Resources Last updated 17-Dec-2024

Examples

Below are example JSON configuration files for several of the default resources.

OAuth2 - DSAPI AM

{
    "configuration": {
        "clientId": "my-client",
        "clientSecret": "f2ddb55e-30b5-4a45-9db5-5e30b52a4574",
        "securityDomain": "my-security",
        "serverURL": "https://DSAPIio_access_management",
        "userClaim": "sub"
    }
}

OAuth2 - Generic Auth Server

{
    "configuration": {
        "introspectionEndpoint": "https://my_authorization_server/oauth/check_token",
        "introspectionEndpointMethod": "POST",
        "clientAuthorizationHeaderName": "Authorization",
        "clientAuthorizationHeaderScheme": "Basic",
        "clientId": "my-client",
        "clientSecret": "f2ddb55e-30b5-4a45-9db5-5e30b52a4574",
        "tokenIsSuppliedByHttpHeader": false,
        "tokenIsSuppliedByQueryParam": true,
        "tokenQueryParamName": "token",
        "useClientAuthorizationHeader": true
    }
}

Overview

Every API Management installation includes several default resources that are commonly used in standard APIM implementations and can be configured during the API design phase. The recommended configuration method employs the Policy Studio.

The following sections summarize resource descriptions, configuration parameters, and configuration examples.

Resource descriptions

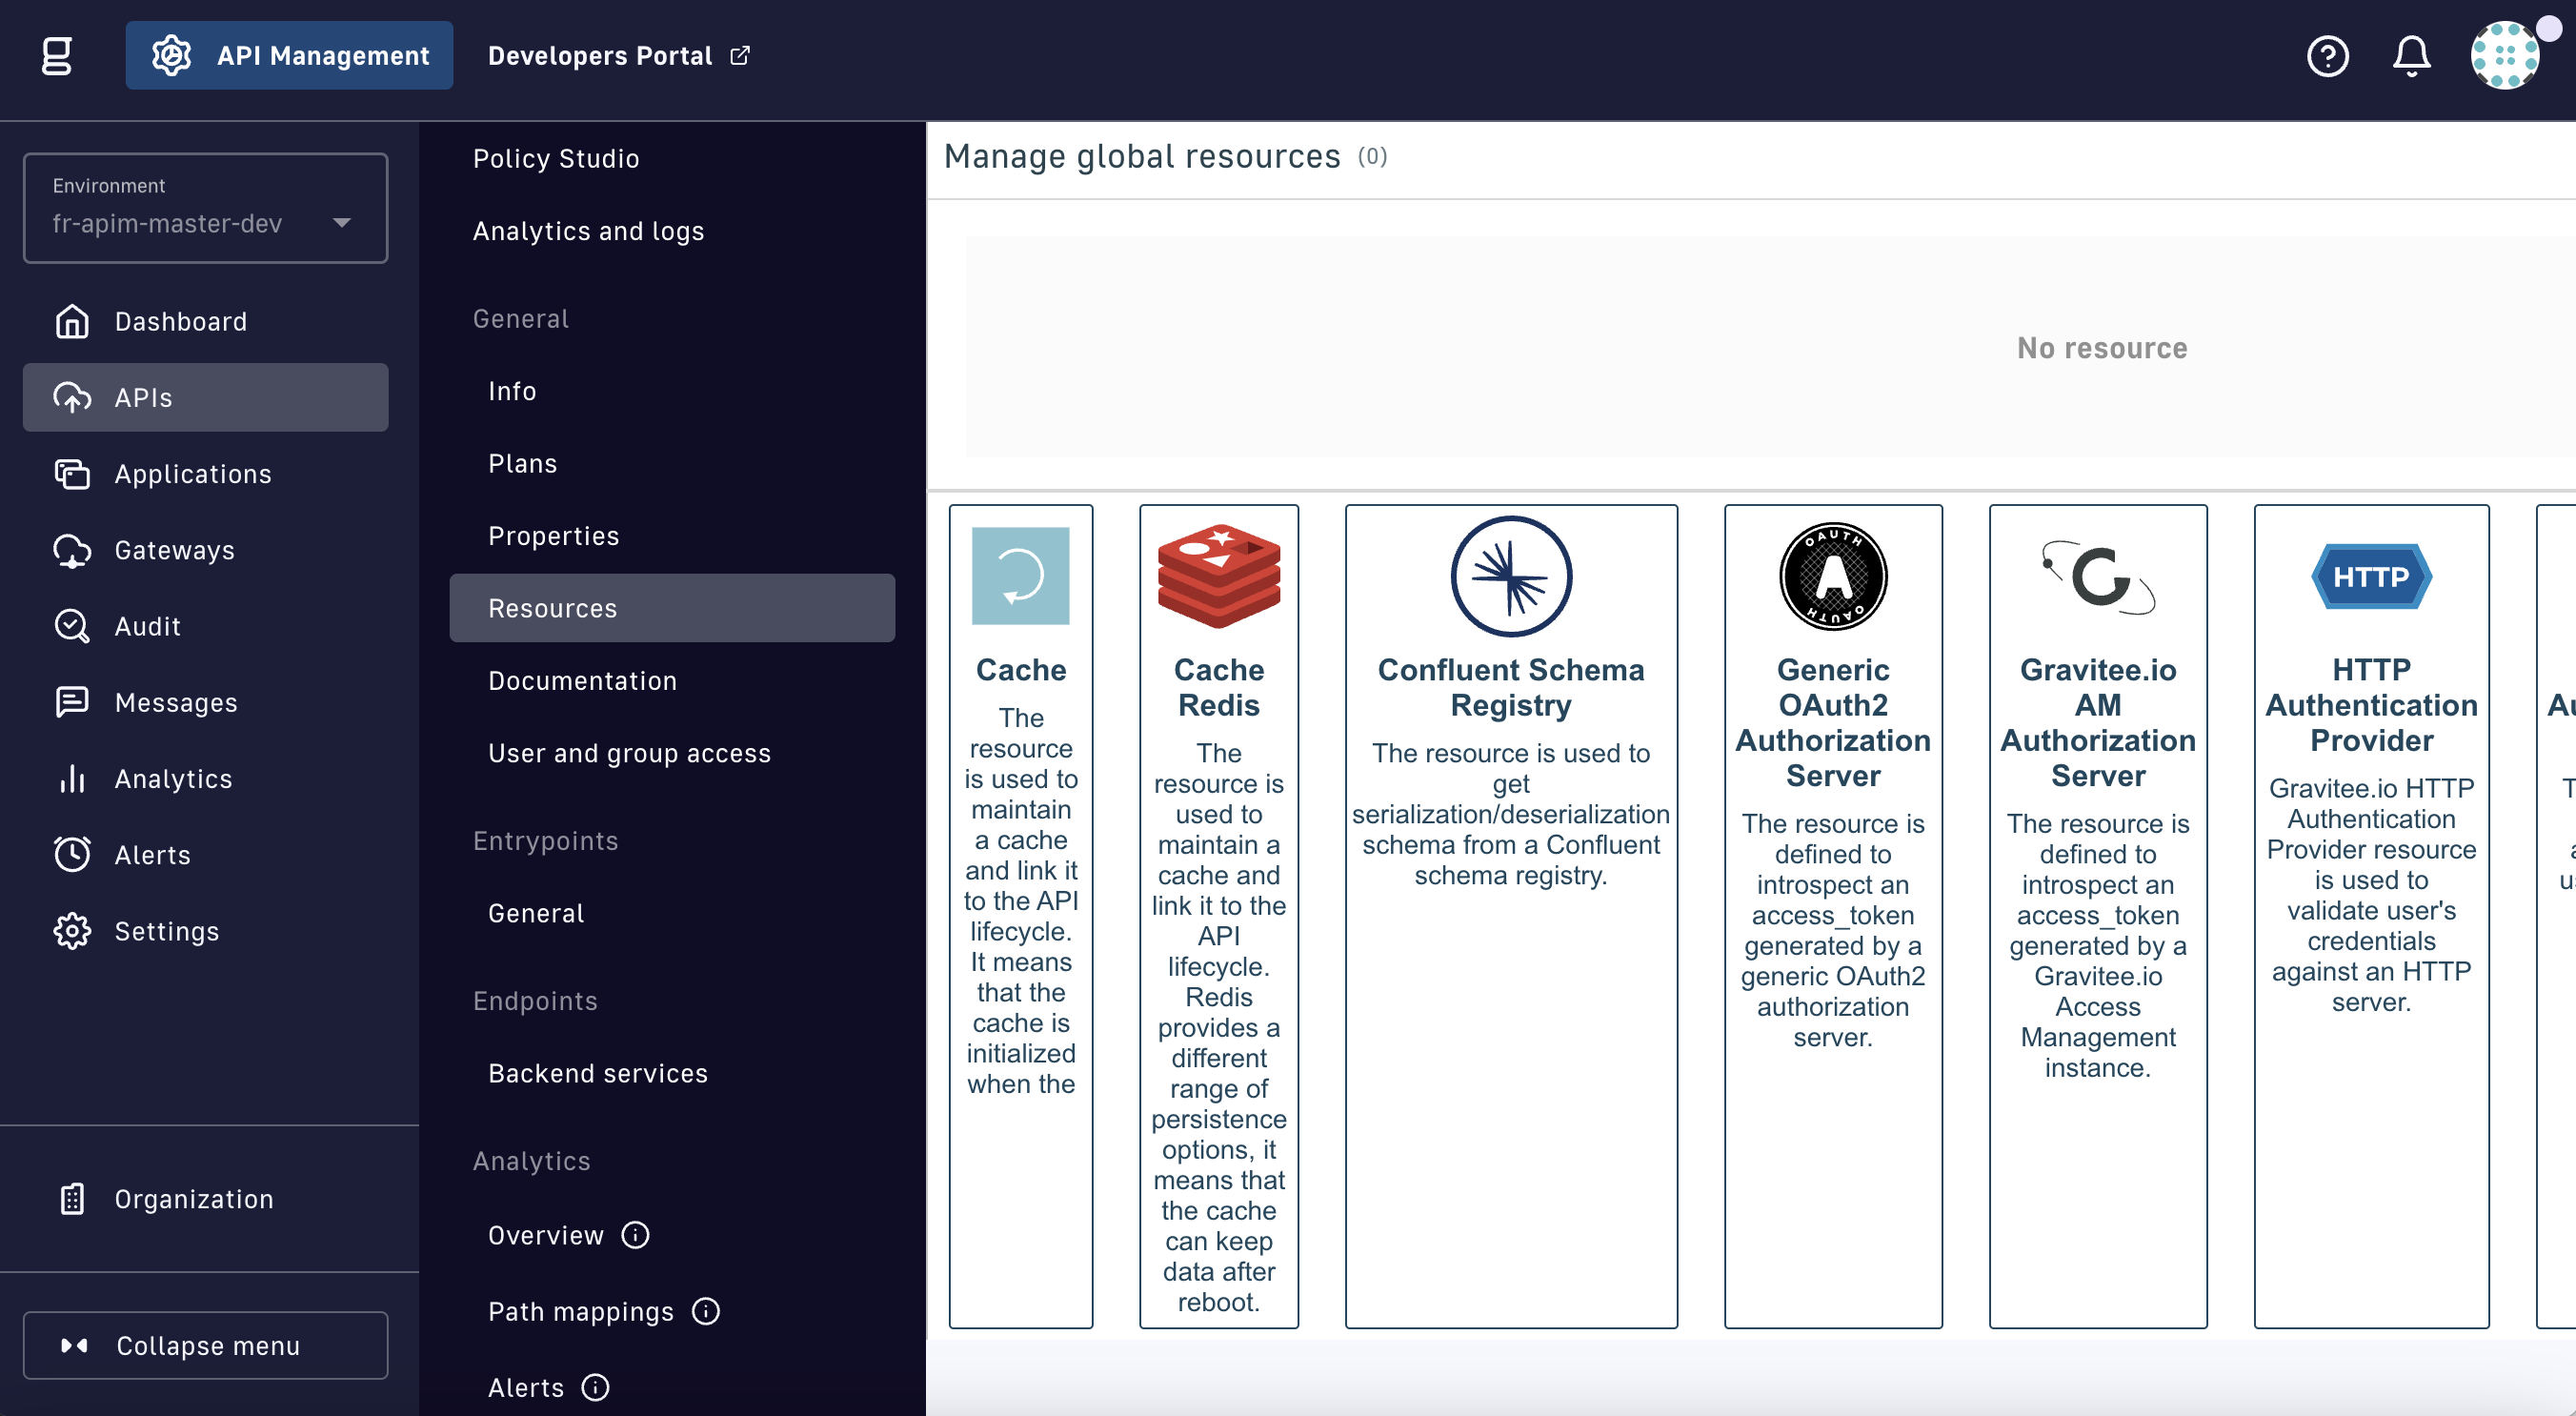
APIM includes several default resources, each of which is described in more detail below.

  • Cache: Maintains a cache linked to the API lifecycle, i.e., the cache is initialized when the API starts and released when the API stops. It is responsible for storing HTTP responses to avoid subsequent calls to the backend.
  • Cache Redis: Same as Cache (above), but the current implementation is based on Redis. The Cache Redis resource can be configured standalone or as part of the Redis Sentinel monitoring solution.
  • OAuth2 - DSAPI AM Authorization Server: Introspects an access_token generated by a DSAPI AM instance.
  • OAuth2 - Generic Authorization Server: Introspects an access_token generated by a generic OAuth2 authorization server. This resource provides a comprehensive configuration for how token introspection is applied in to accommodate common authorization servers.
  • Confluent Schema Registry: Fetches serialization/deserialization data from a Confluent schema registry.
  • HTTP Authentication Provider: Validates user credentials against an HTTP server.
  • Inline Authentication Provider: Authenticates a user in memory.
  • LDAP Authentication Provider: Authenticates a user in LDAP.
  • Keycloak Adapter: Introspects an access token.
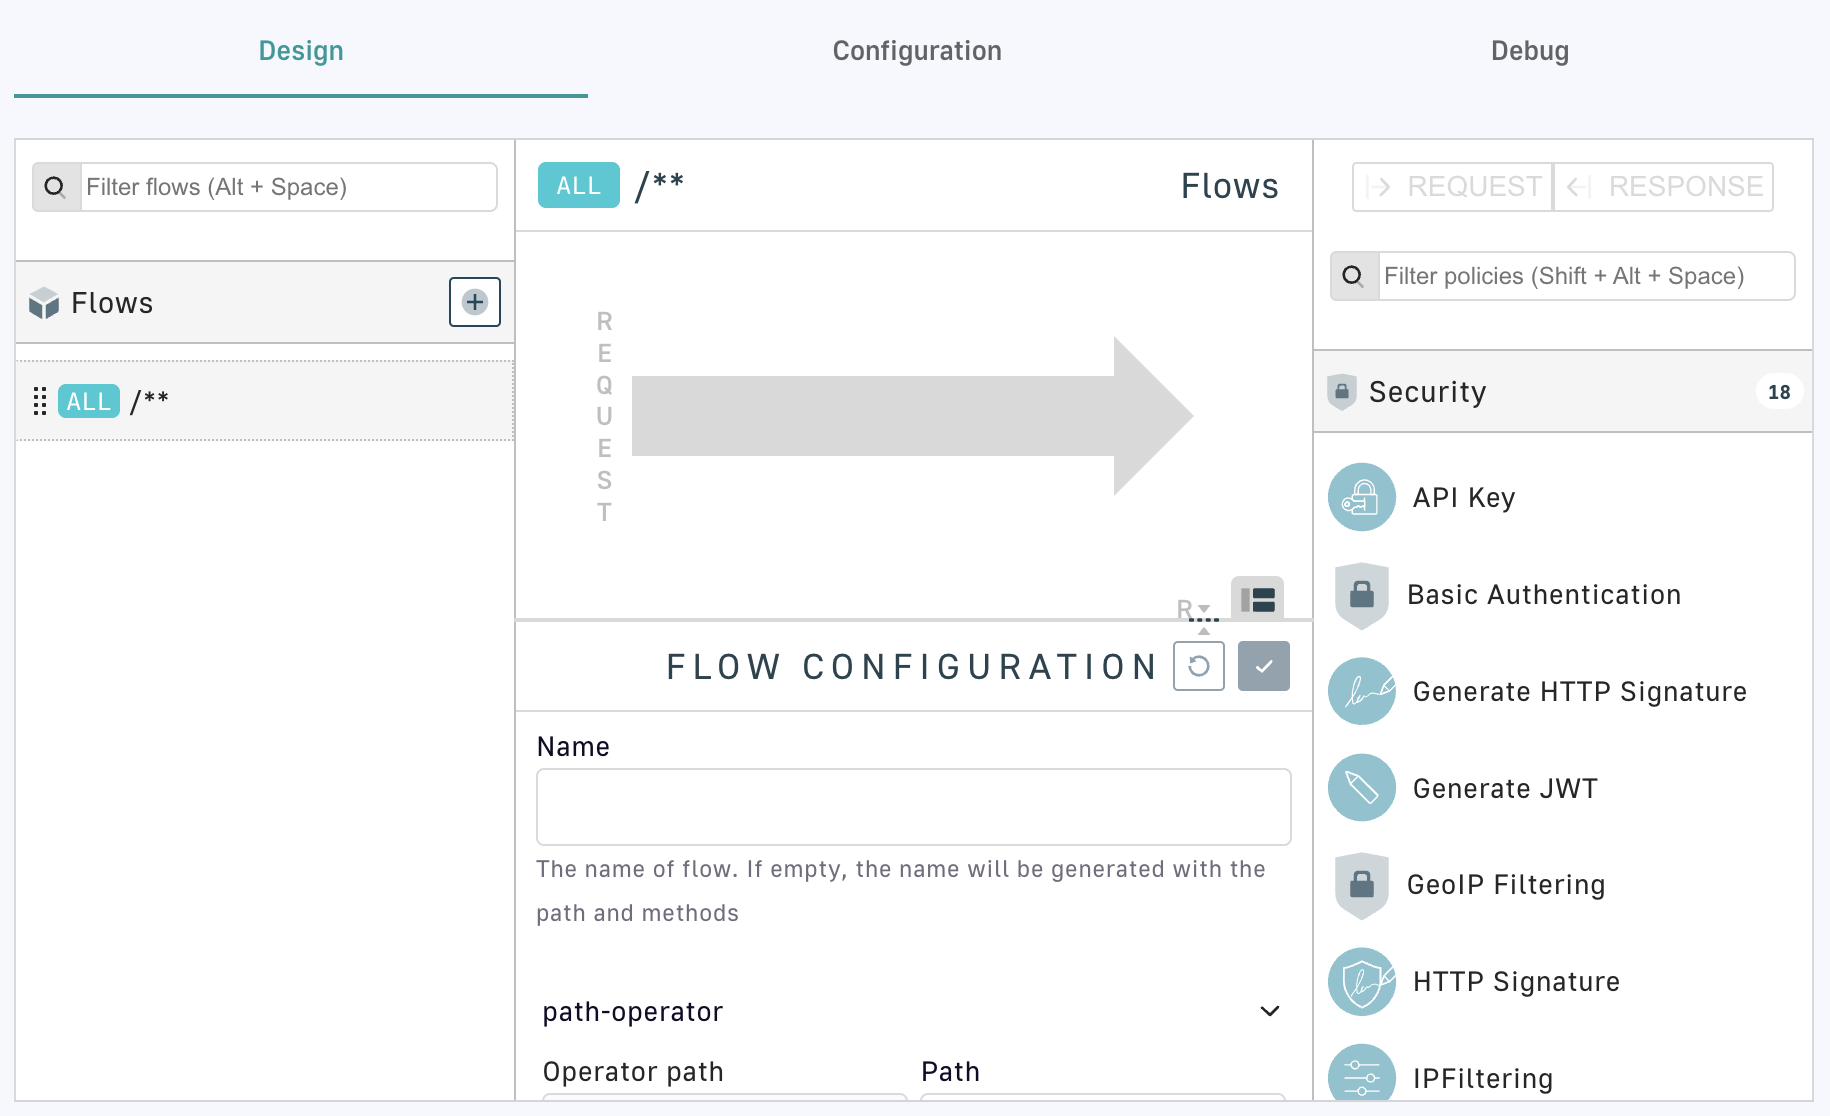
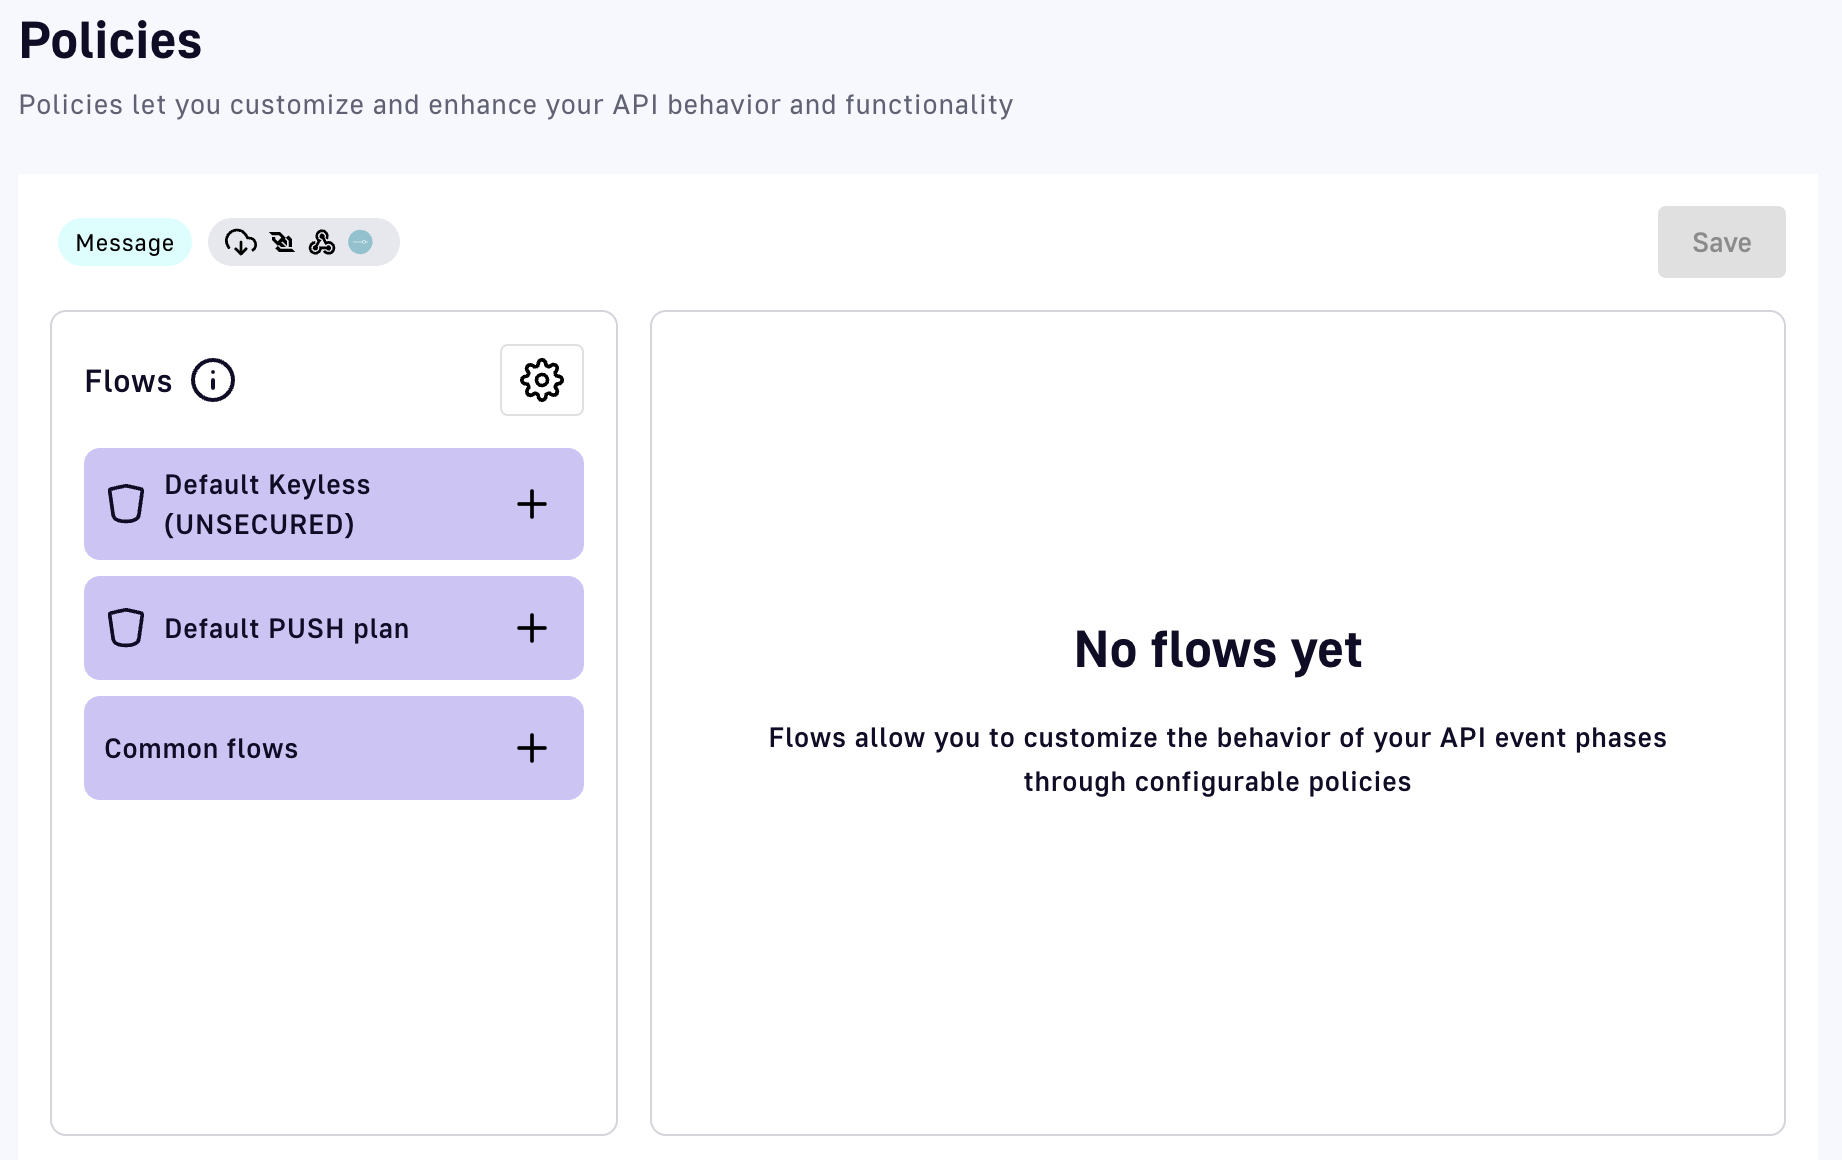
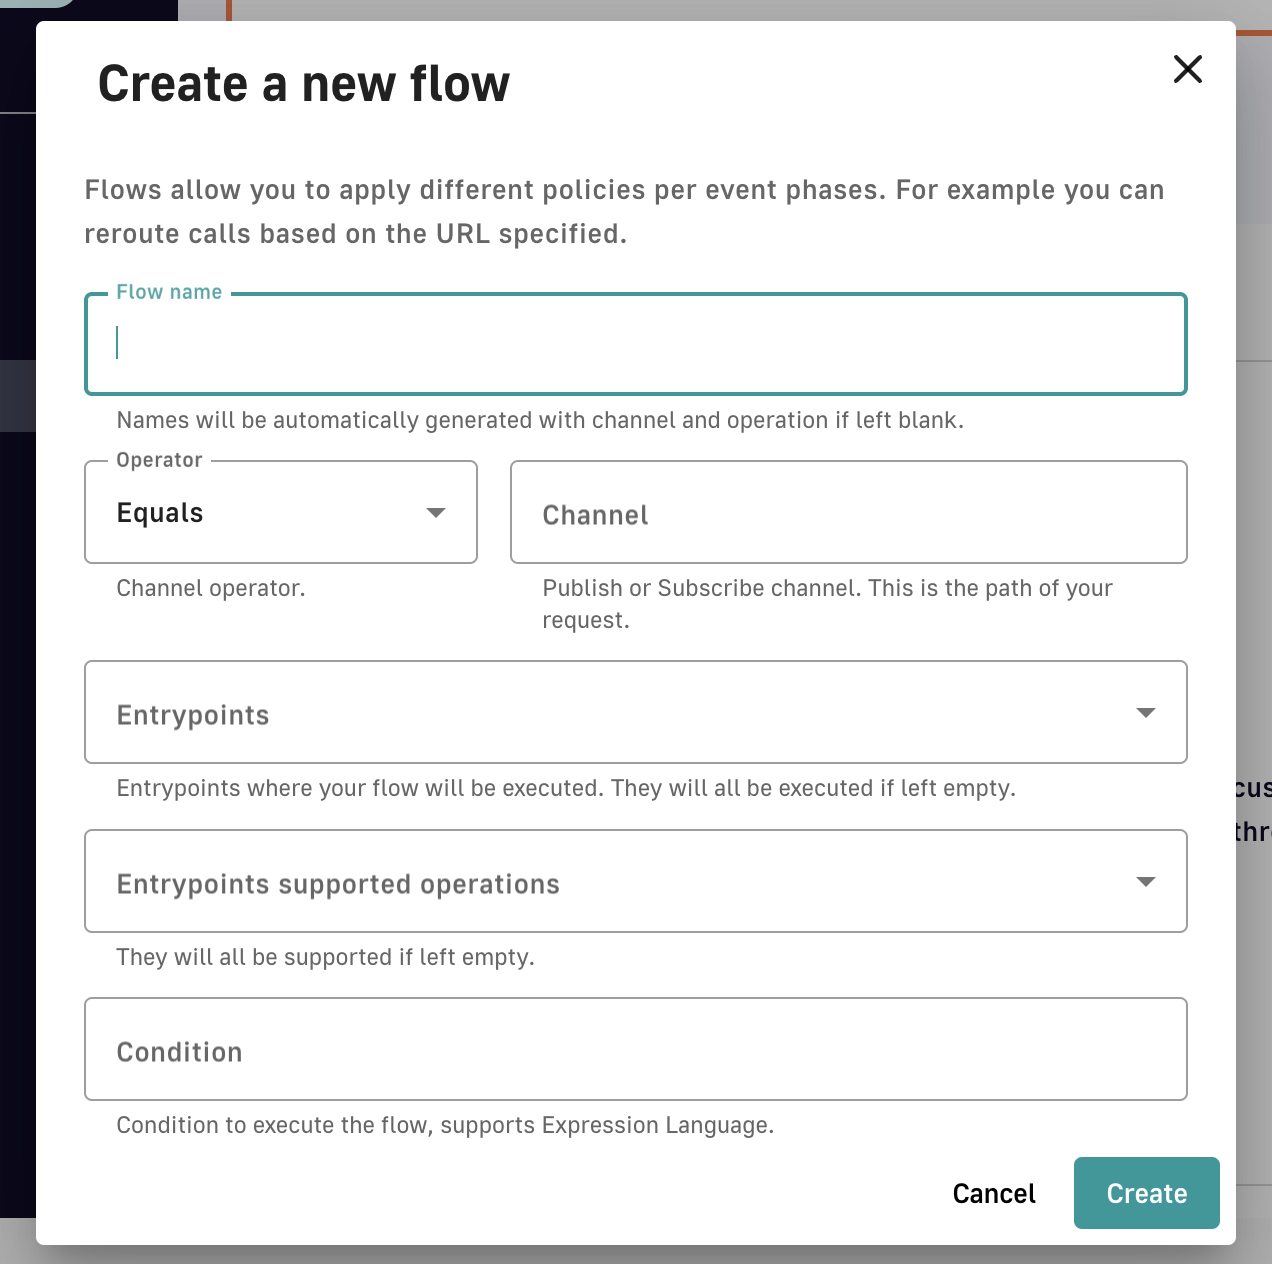
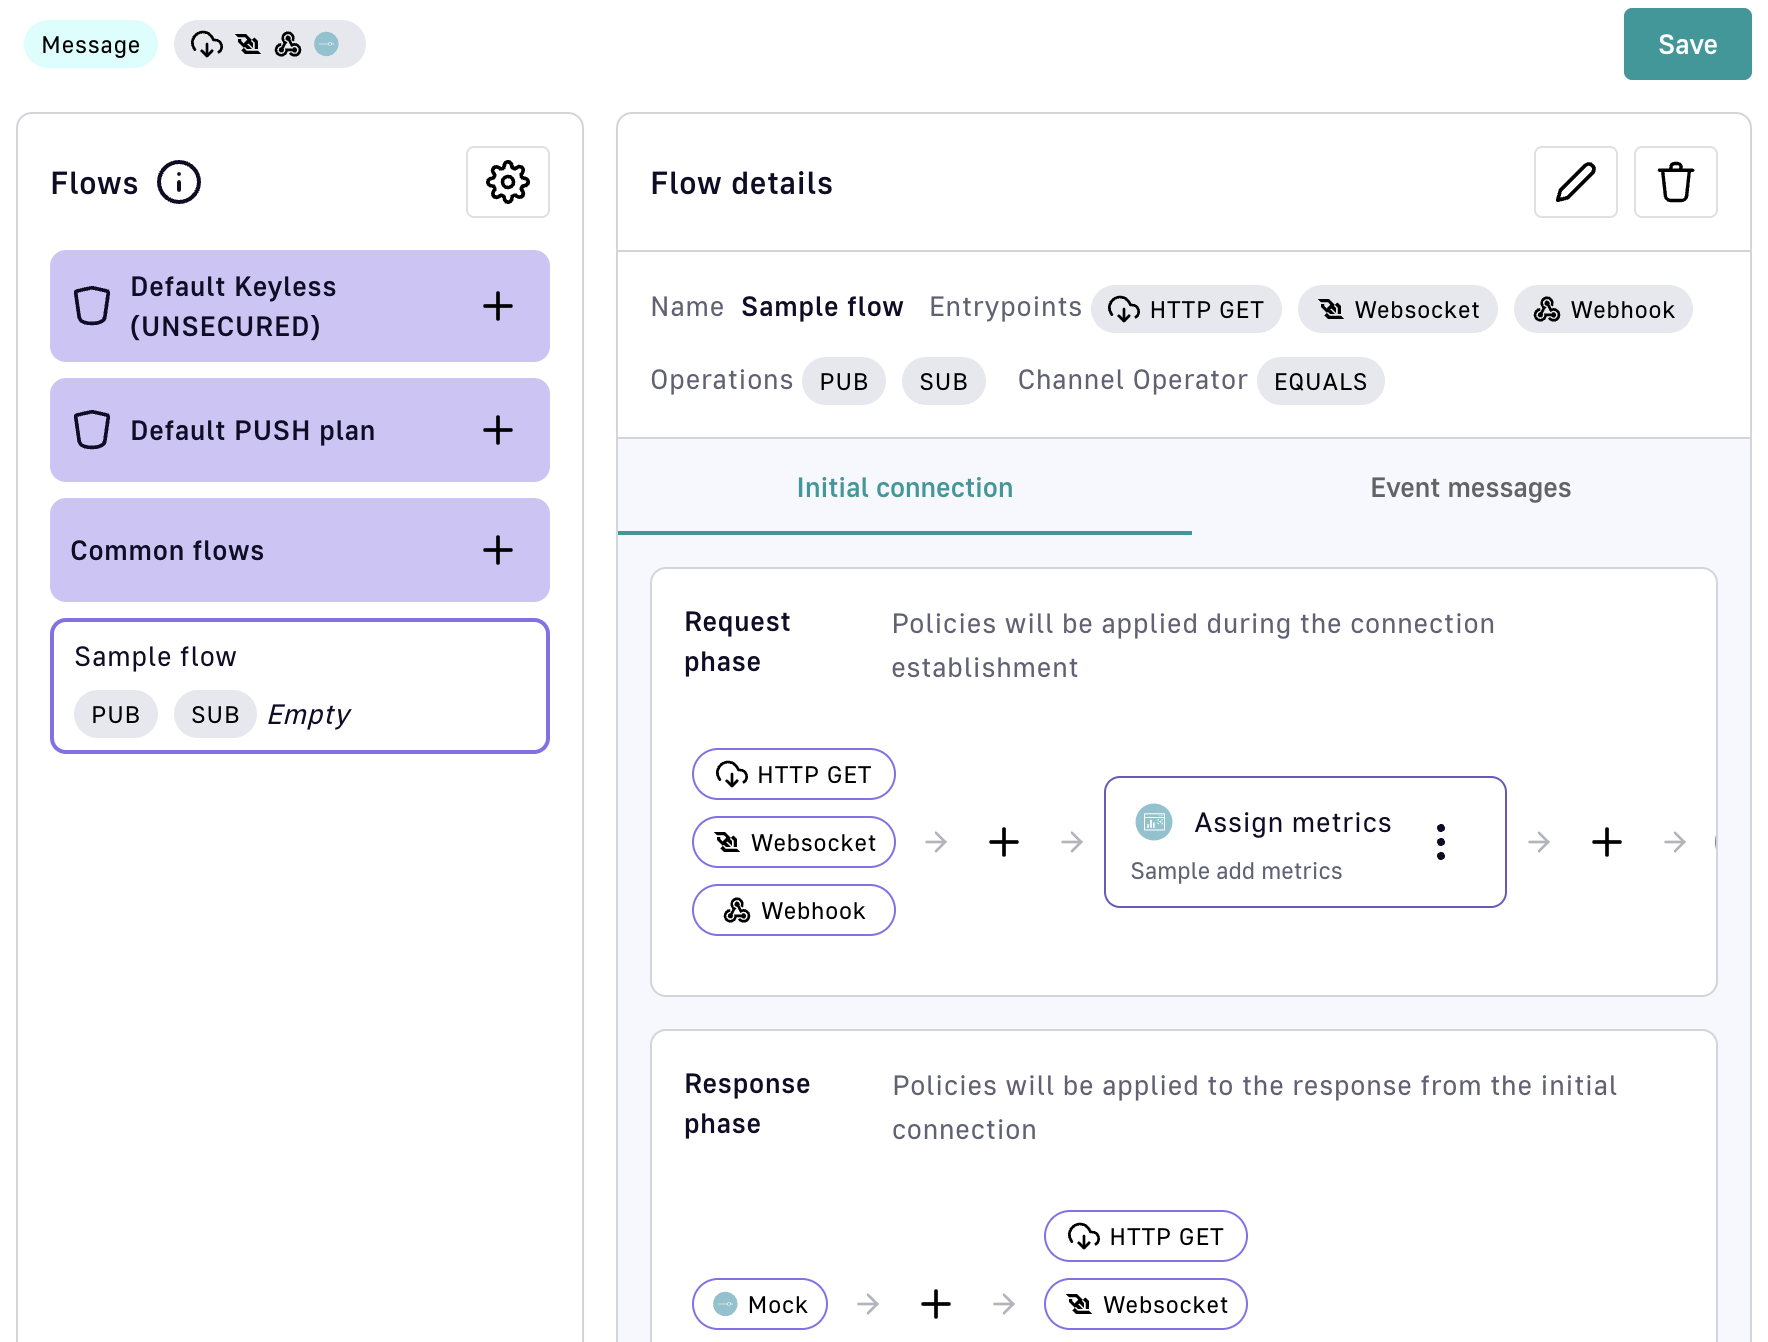
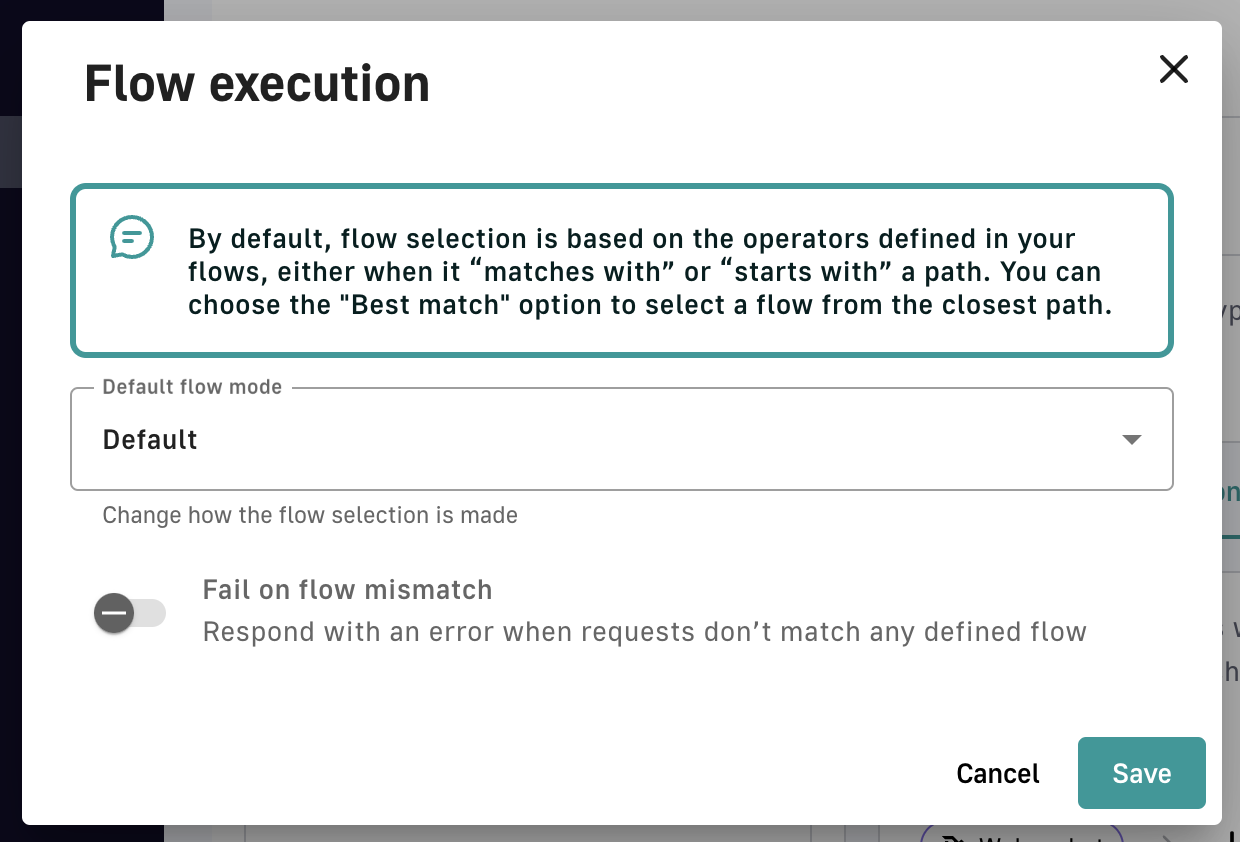
Creating a resource

To create a resource:

  1. Log in to APIM Management Console.

  2. Click APIs in the left sidebar.

  3. Select the API you want to add the resource to.

  4. Click Resources in the inner left sidebar.

  5. Select the resource you want to configure:

    Add a resource

  6. In the CREATE RESOURCE form, configure the resource per the Configuration options section.

Cache

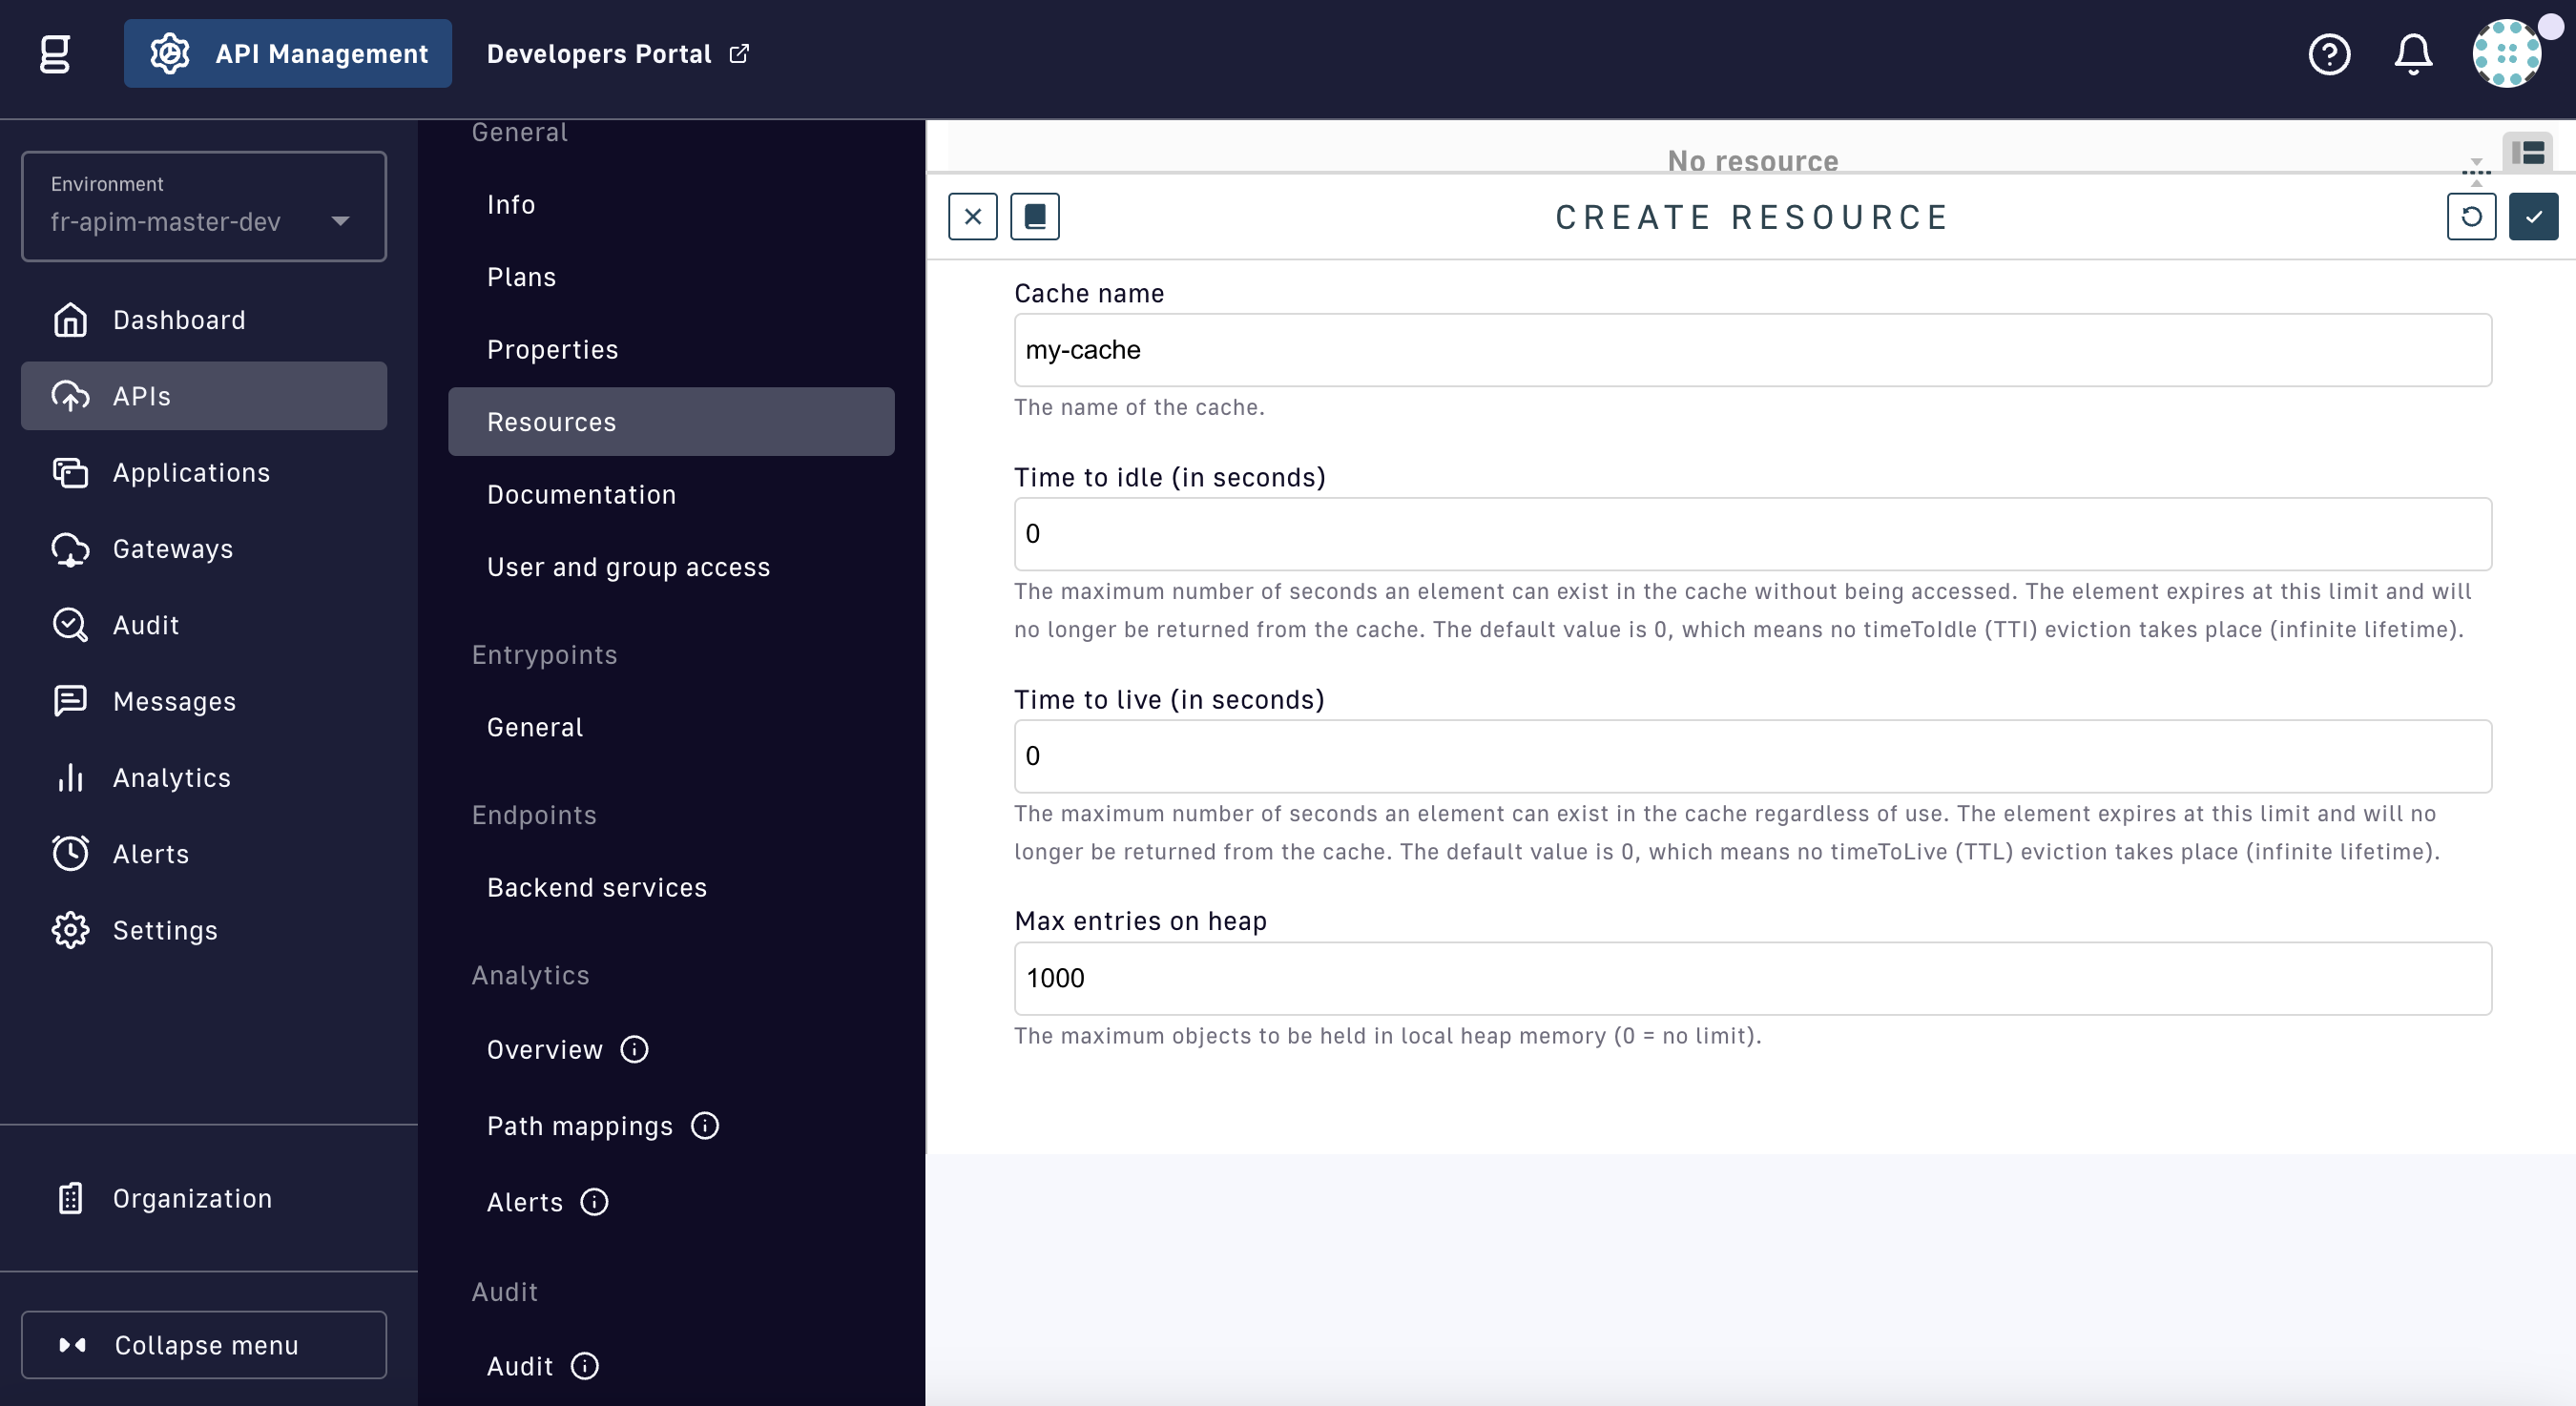
Create a Cache resource

Config paramDescriptionDefault
Cache nameName of the cachemy-cache
Time to idleMaximum number of seconds an element can exist in the cache without being accessed. When this threshold is reached, the element expires and will no longer be returned from the cache. The default value is 0, i.e., no timeToIdle (TTI) eviction takes place (infinite lifetime).0
Time to liveMaximum number of seconds an element can exist in the cache, regardless of usage. When this threshold is reached, the element expires and will no longer be returned from the cache. The default value is 0, i.e., no timeToLive (TTL) eviction takes place (infinite lifetime).0
Max entries on heapMaximum number of objects to be held in local heap memory (0 = no limit)1000

Cache Redis

Create a Cache Redis resource

The Cache Redis resource can operate standalone or with the Redis Sentinel monitoring solution. The majority of Cache Redis configuration options are common to both modes of operation, but several are exclusive to either standalone or Sentinel as indicated with a bold asterisk (*).

Config paramDescriptionDefault
Cache nameName of the cachemy-redis-cache
Release cache

Enabled: The resource will release the cache when the API is stopped

Disabled: The cache must be managed manually on the Redis server

false
Max totalMaximum number of connections supported by the pool8
PasswordThe password for the instance-
Time to liveMaximum number of seconds an element can exist in the cache, regardless of usage. When this threshold is reached, the element expires and will no longer be returned from the cache. The default value is 0, i.e., no timeToLive (TTL) eviction takes place (infinite lifetime).0
TimeoutSpecifies the connection timeout and the read/write timeout2000
Use SSLToggle to use SSL connectionstrue
Use standalone modeToggle to use standalone modetrue
HostThe host of the instance
*Standalone config only
localhost
PortThe port of the instance
*Standalone config only
6379
Use sentinel modeToggle to use sentinel mode. Sentinel provides high availability for Redis (effectively, the Redis deployment persists without human intervention, barring certain kinds of failures)false
MasterSentinel master ID
*Sentinel config only
sentinel-master
Sentinel passwordSentinel password
*Sentinel config only
-
Sentinel nodesArray of sentinel nodes
*Sentinel config only
-

Examples

Cache

{
        "name": "cache",
        "type": "cache",
        "enabled": true,
        "configuration": {
            "name": "my-cache",
            "timeToIdleSeconds":0,
            "timeToLiveSeconds":0,
            "maxEntriesLocalHeap":1000
        }
    }
    

Cache Redis

{
        "name": "my-redis-cache",
        "type": "cache-redis",
        "enabled": true,
        "configuration": {
            "name": "my-redis-cache",
            "releaseCache": false,
            "maxTotal": 8,
            "password": "secret",
            "timeToLiveSeconds": 600,
            "timeout": 2000,
            "useSsl": true,
            "sentinelMode" : false,
            "standalone": {
                "host": "localhost",
                "port": 6379
            }
        }
    }
    Sentinel configuration example:
    {
        "name" : "my-redis-cache",
        "type" : "cache-redis",
        "enabled" : true,
        "configuration" : {
            "name" : "my-redis-cache",
            "releaseCache": false,
            "maxTotal" : 8,
            "password" : "secret",
            "timeToLiveSeconds" : 600,
            "timeout" : 2000,
            "useSsl" : true,
            "sentinelMode" : true,
            "sentinel" : {
                "masterId" : "sentinel-master",
                "password" : "secret",
                "nodes": [
                  {
                    "host" : "localhost",
                    "port" : 26379
                  },
                  {
                    "host" : "localhost",
                    "port" : 26380
                  },
                  {
                    "host" : "localhost",
                    "port" : 26381
                  }
                ]
            }
        }
    }
    

OAuth2

Generic Authorization Server

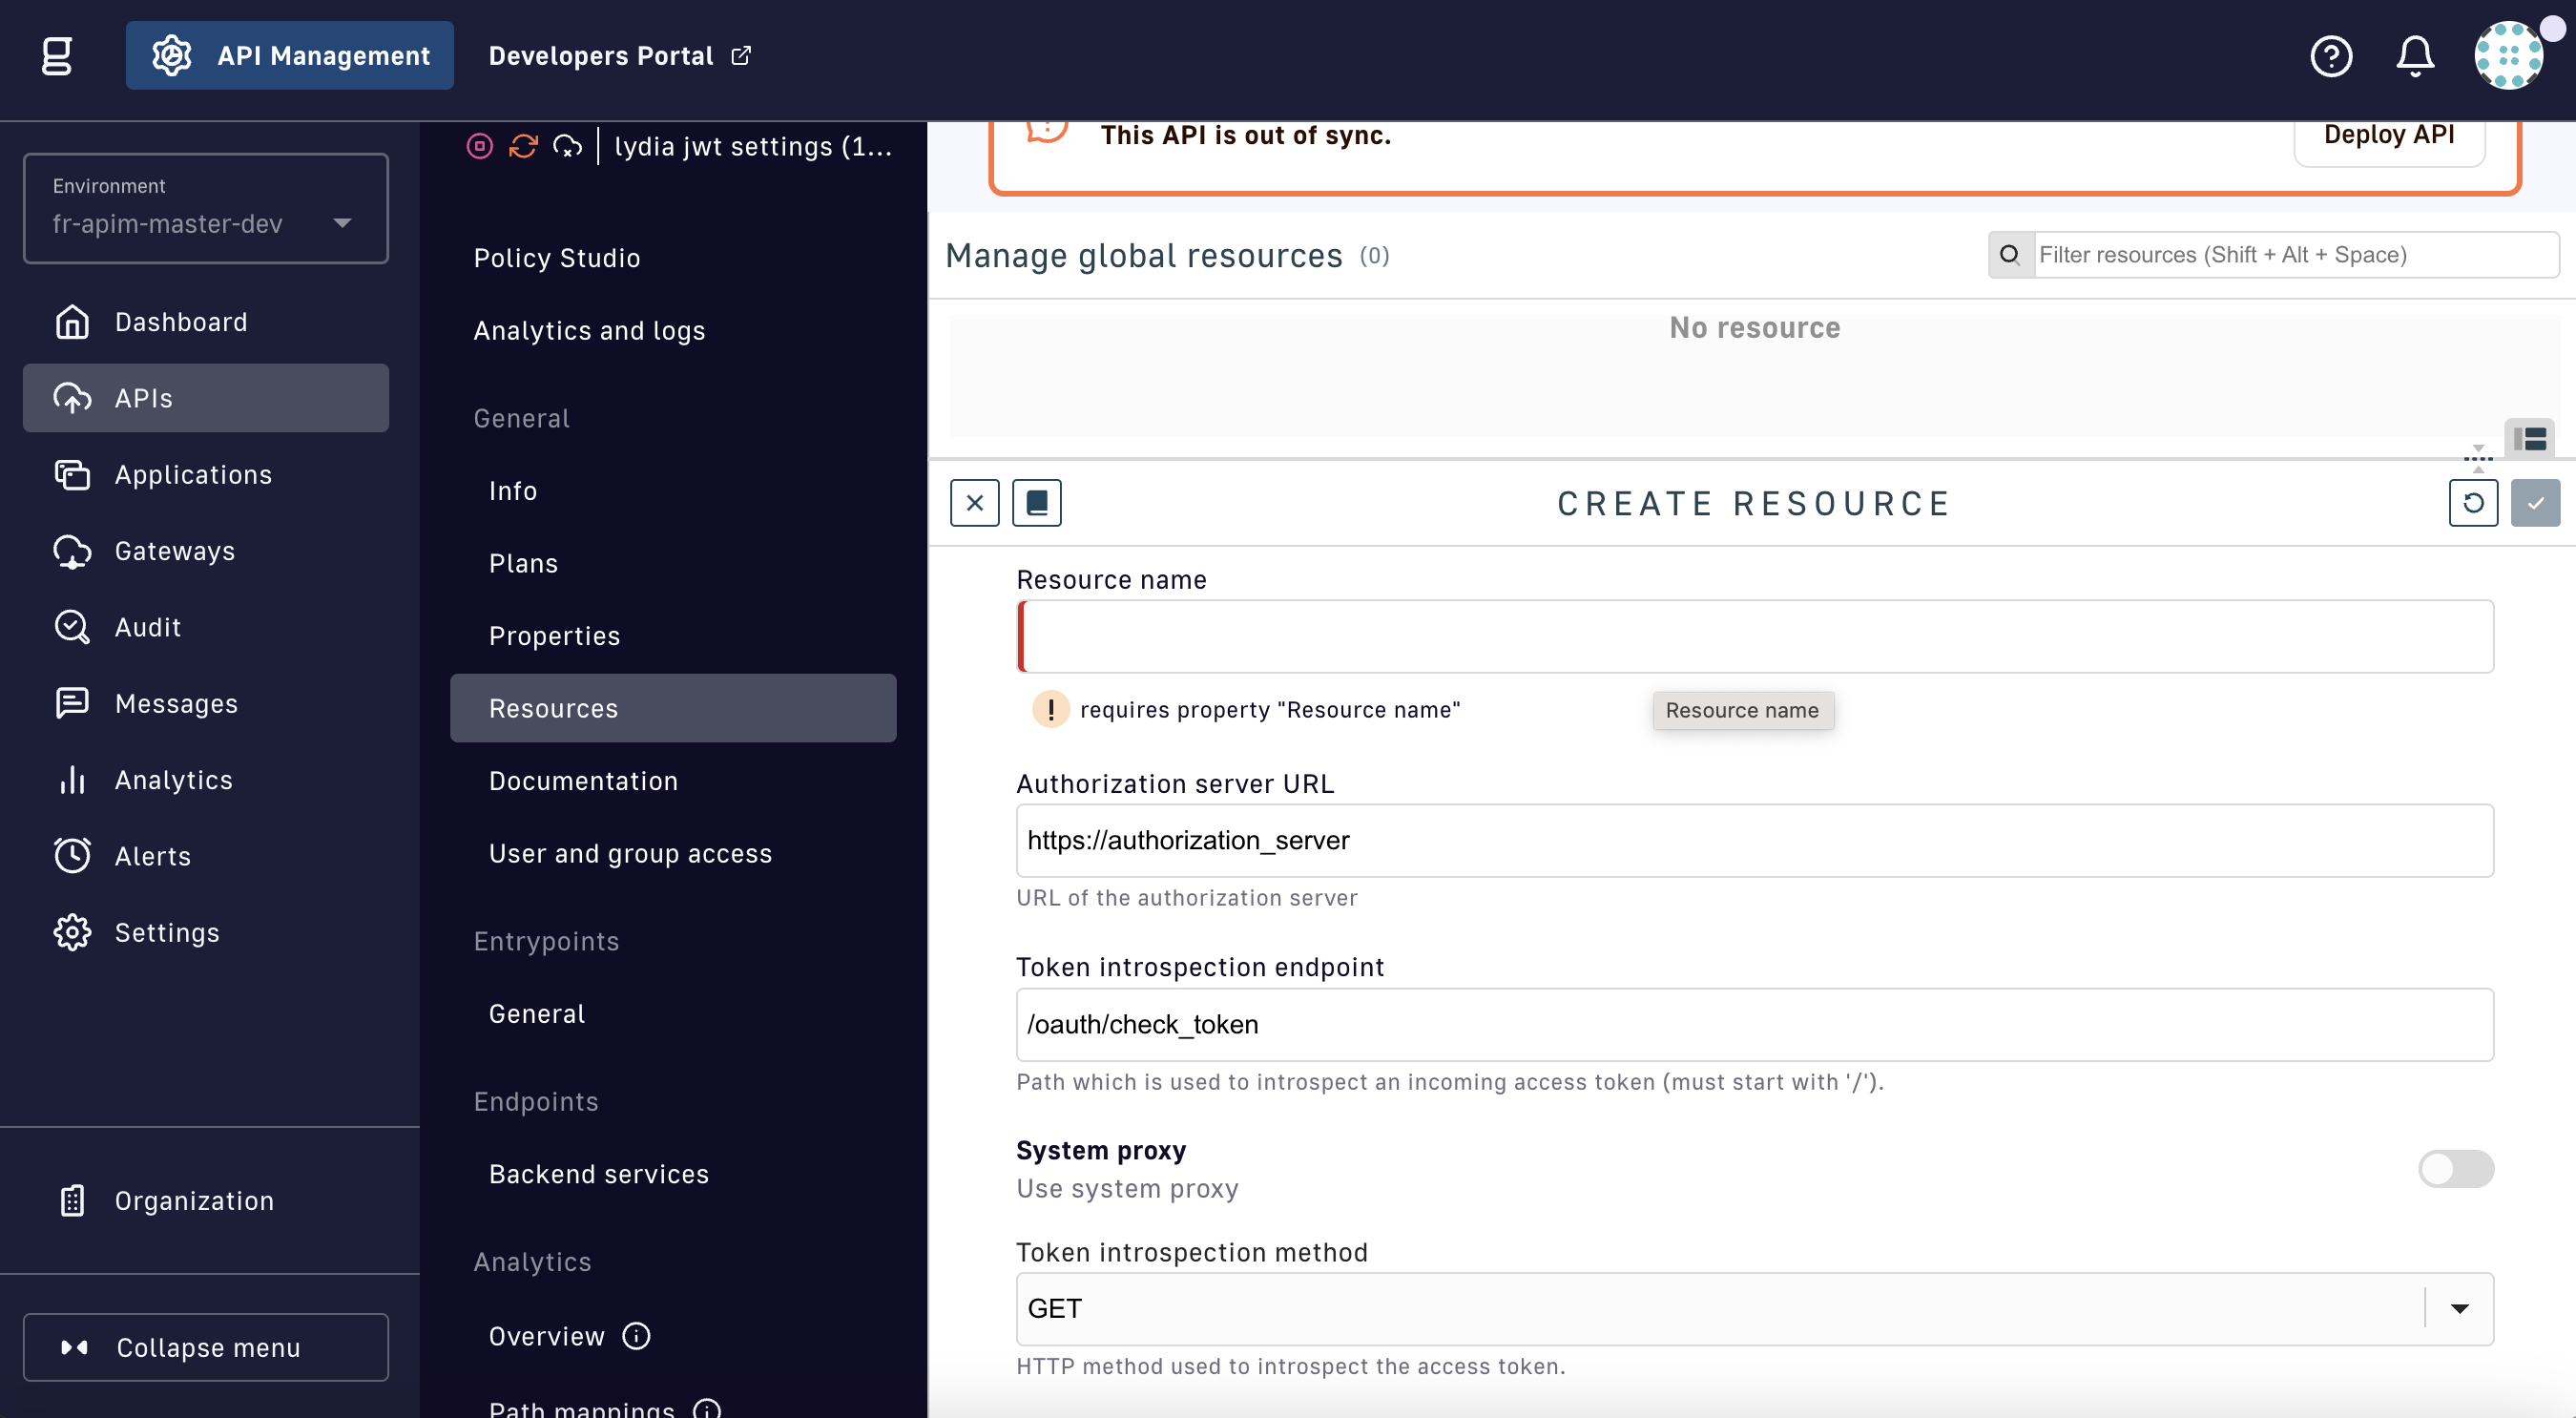
Create an OAuth2 Generic Authorization Server resource

Config paramDescriptionDefault
Resource nameName of the resource-
Authorization server URLURL of the authorization serverhttps://authorization_server
Token introspect endpointURL the resource uses to introspect an incoming access token/oauth/check_token
System proxyToggle to use system proxyfalse
Token introspect methodHTTP method to introspect the access tokenGET
Client IDClient identifier-
Client secretClient secret-
Use HTTP header for client authorizationTo prevent token scanning attacks, the endpoint MUST require access authorization. DSAPI uses an HTTP header for client authentication.true
Authorization headerAuthorization headerAuthorization
Authorization schemeAuthorization schemeBasic
Use a query parameter to supply access tokenAccess token is passed to the introspection endpoint using a query parametertrue
Token query param nameQuery parameter that supplies access tokentoken
Use an HTTP header to supply access tokenAccess token is passed to the introspection endpoint using an HTTP headerfalse
HTTP header nameHTTP header used to supply access token-
Use application/x-www-form-urlencoded form to send access tokenSend access token in application/x-www-form-urlencoded formfalse
Form param nameForm parameter nametoken
User claimUser claim field to store end user in log analyticssub

DSAPI AM Authorization Server

{% tab title="DSAPI AM Authorization Server" %}

Create an OAuth2 DSAPI AM Authorization Server resource

Config paramDescriptionDefault
Resource nameName of the resource-
Server URLURL of the DSAPI Access Management server-
System proxyToggle to use system proxyfalse
VersionVersion of the Access Management serverV3_X
Security domainSecurity domain (realm) from which the token has been generated and must be introspected-
Client IDClient identifier-
Client secretClient secret-
User claimUser claim field to store end user in log analyticssub

Examples

OAuth2 - DSAPI AM

{
        "configuration": {
            "clientId": "my-client",
            "clientSecret": "f2ddb55e-30b5-4a45-9db5-5e30b52a4574",
            "securityDomain": "my-security",
            "serverURL": "https://DSAPIio_access_management",
            "userClaim": "sub"
        }
    }
    

OAuth2 - Generic Auth Server

{
        "configuration": {
            "introspectionEndpoint": "https://my_authorization_server/oauth/check_token",
            "introspectionEndpointMethod": "POST",
            "clientAuthorizationHeaderName": "Authorization",
            "clientAuthorizationHeaderScheme": "Basic",
            "clientId": "my-client",
            "clientSecret": "f2ddb55e-30b5-4a45-9db5-5e30b52a4574",
            "tokenIsSuppliedByHttpHeader": false,
            "tokenIsSuppliedByQueryParam": true,
            "tokenQueryParamName": "token",
            "useClientAuthorizationHeader": true
        }
    }
    

Authentication providers

HTTP

Create an HTTP Authentication Provider resource

Config paramDescriptionDefault
Resource nameThe name of the resource-
HTTP methodHTTP method to invoke the endpointPOST
Use system proxyToggle to use the system proxy configured by your administratorfalse
URLServer URL-
Request bodyThe body of the HTTP request. Supports the DSAPI Expression Language.-
Authentication conditionThe condition to be verified to validate that the authentication is successful. Supports the DSAPI Expression Language.{#authResponse.status == 200}

Inline

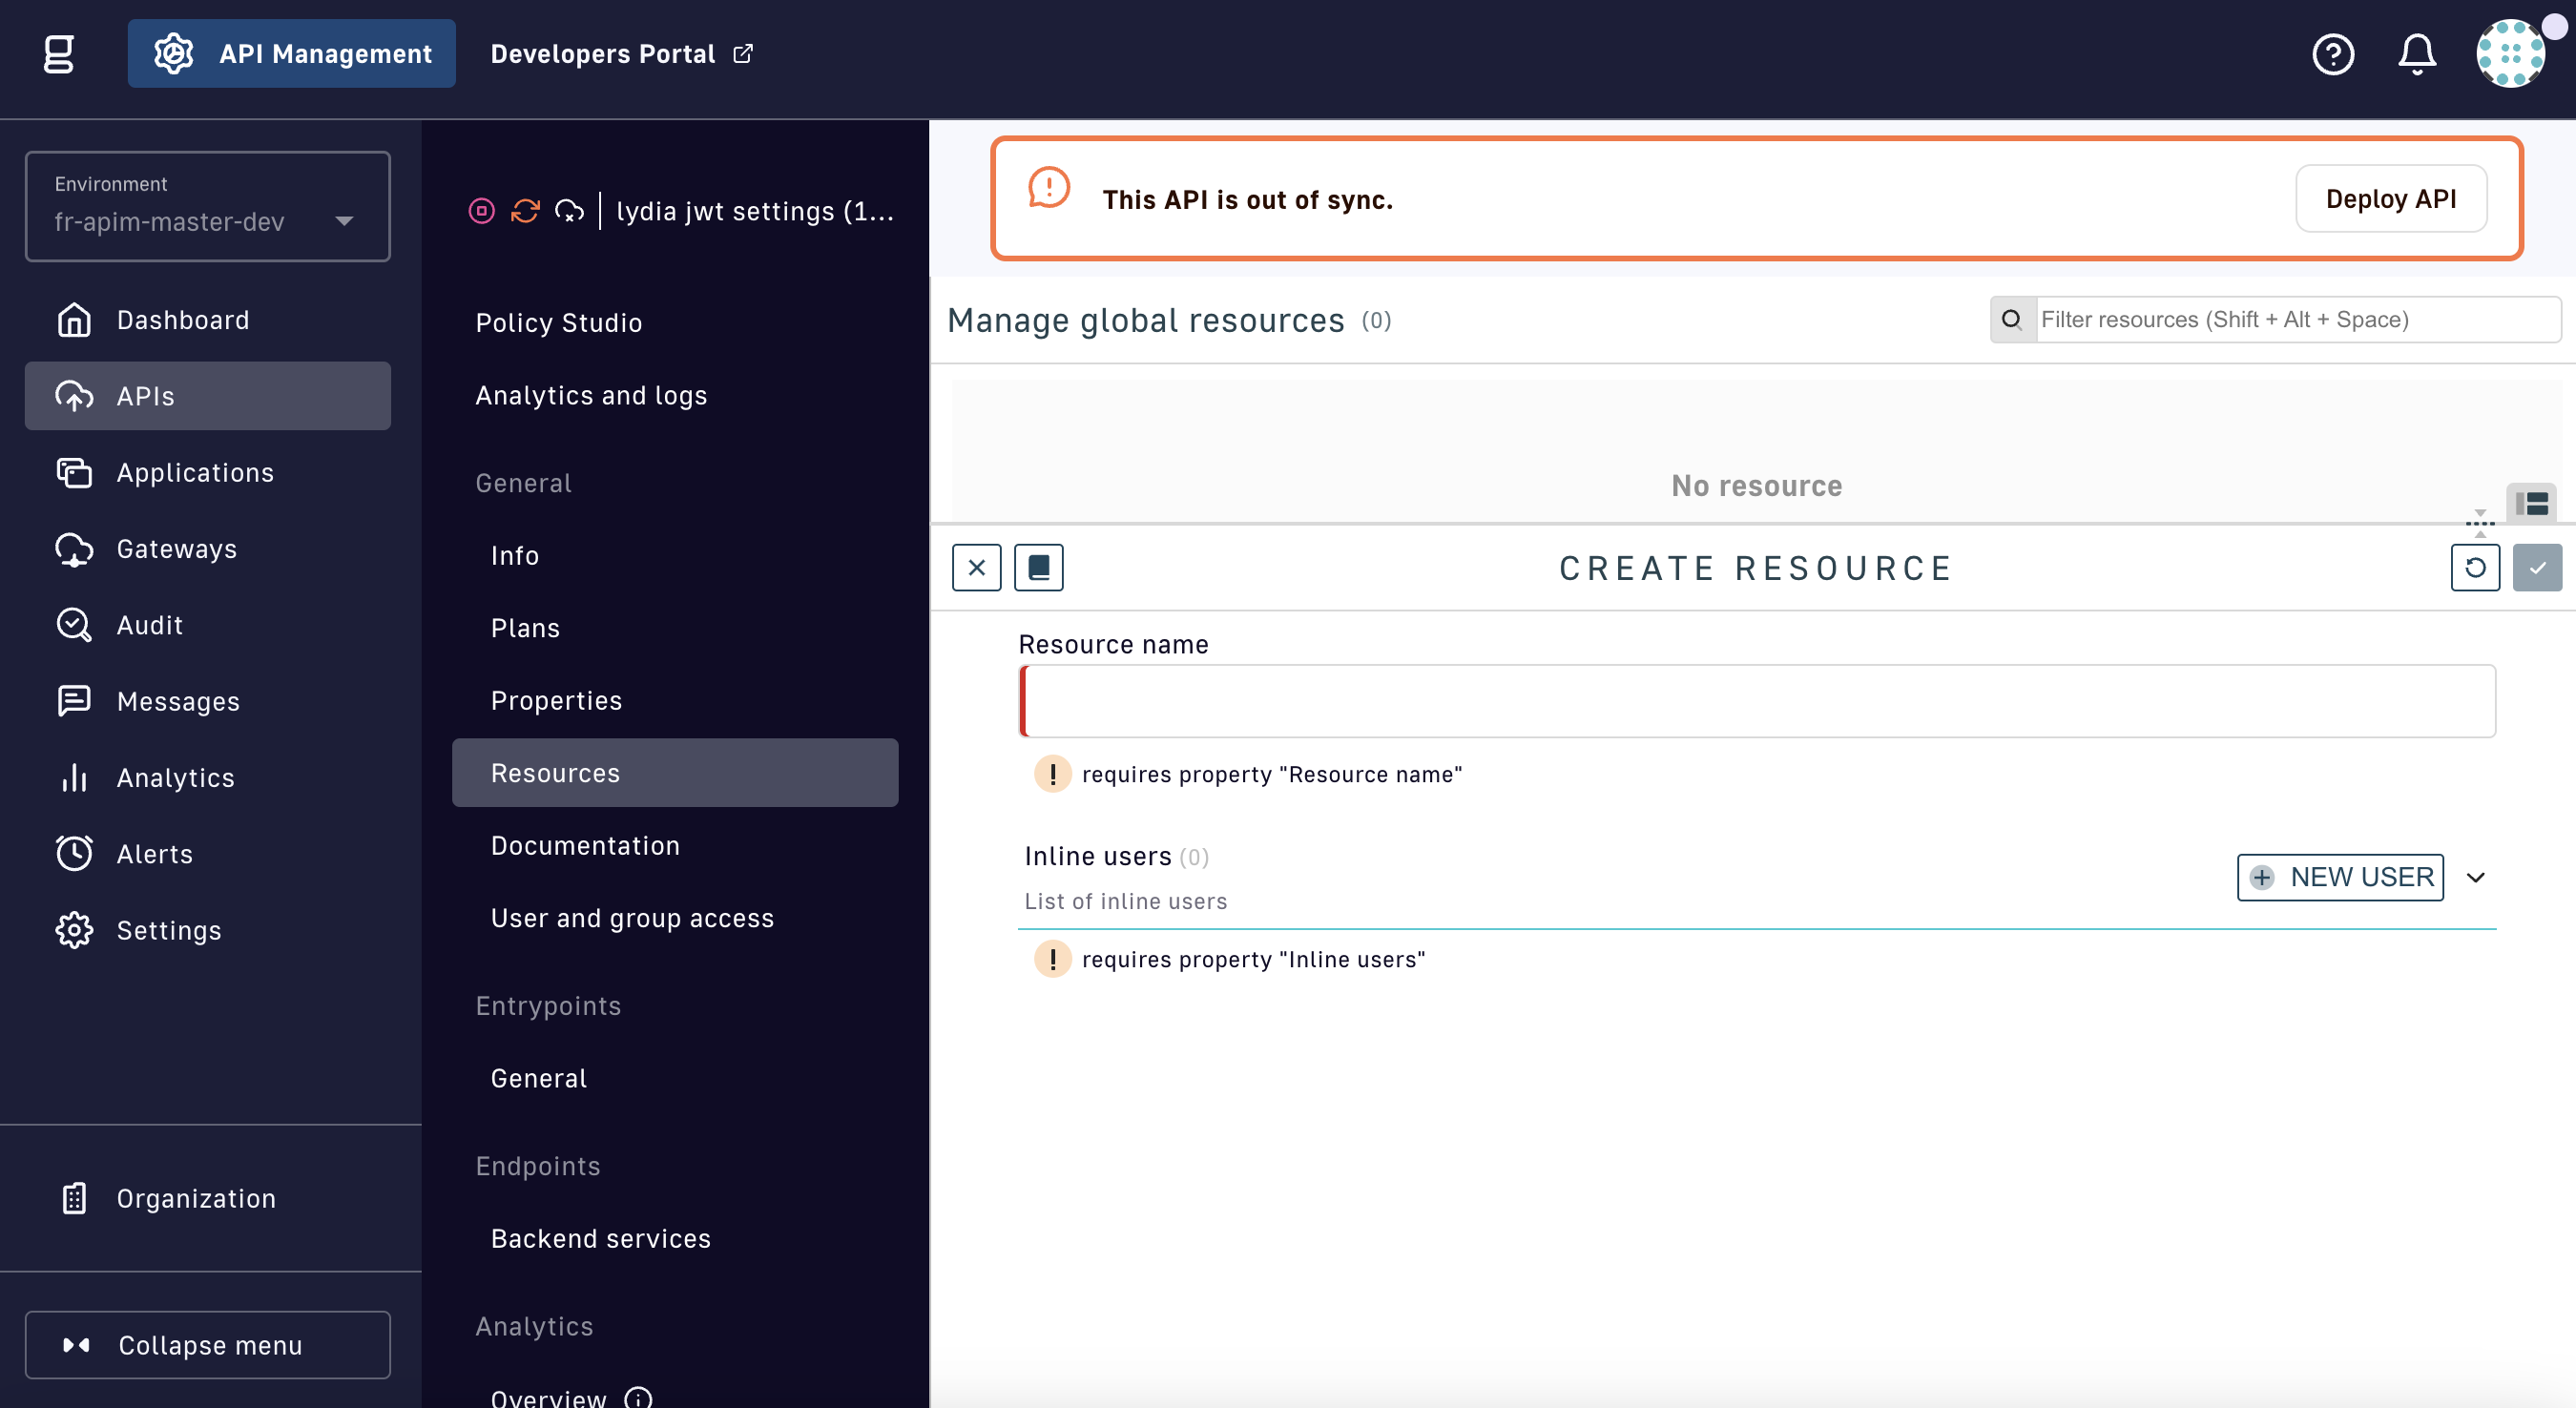
Create an Inline Authentication Provider resource

Config paramDescriptionDefault
Resource nameThe name of the resource-
HTTP methodHTTP method to invoke the endpointPOST
Use system proxyToggle to use the system proxy configured by your administratorfalse
URLServer URL-
Request bodyThe body of the HTTP request. Supports the DSAPI Expression Language.-
Authentication conditionThe condition to be verified to validate that the authentication is successful. Supports the DSAPI Expression Language.{#authResponse.status == 200}

LDAP

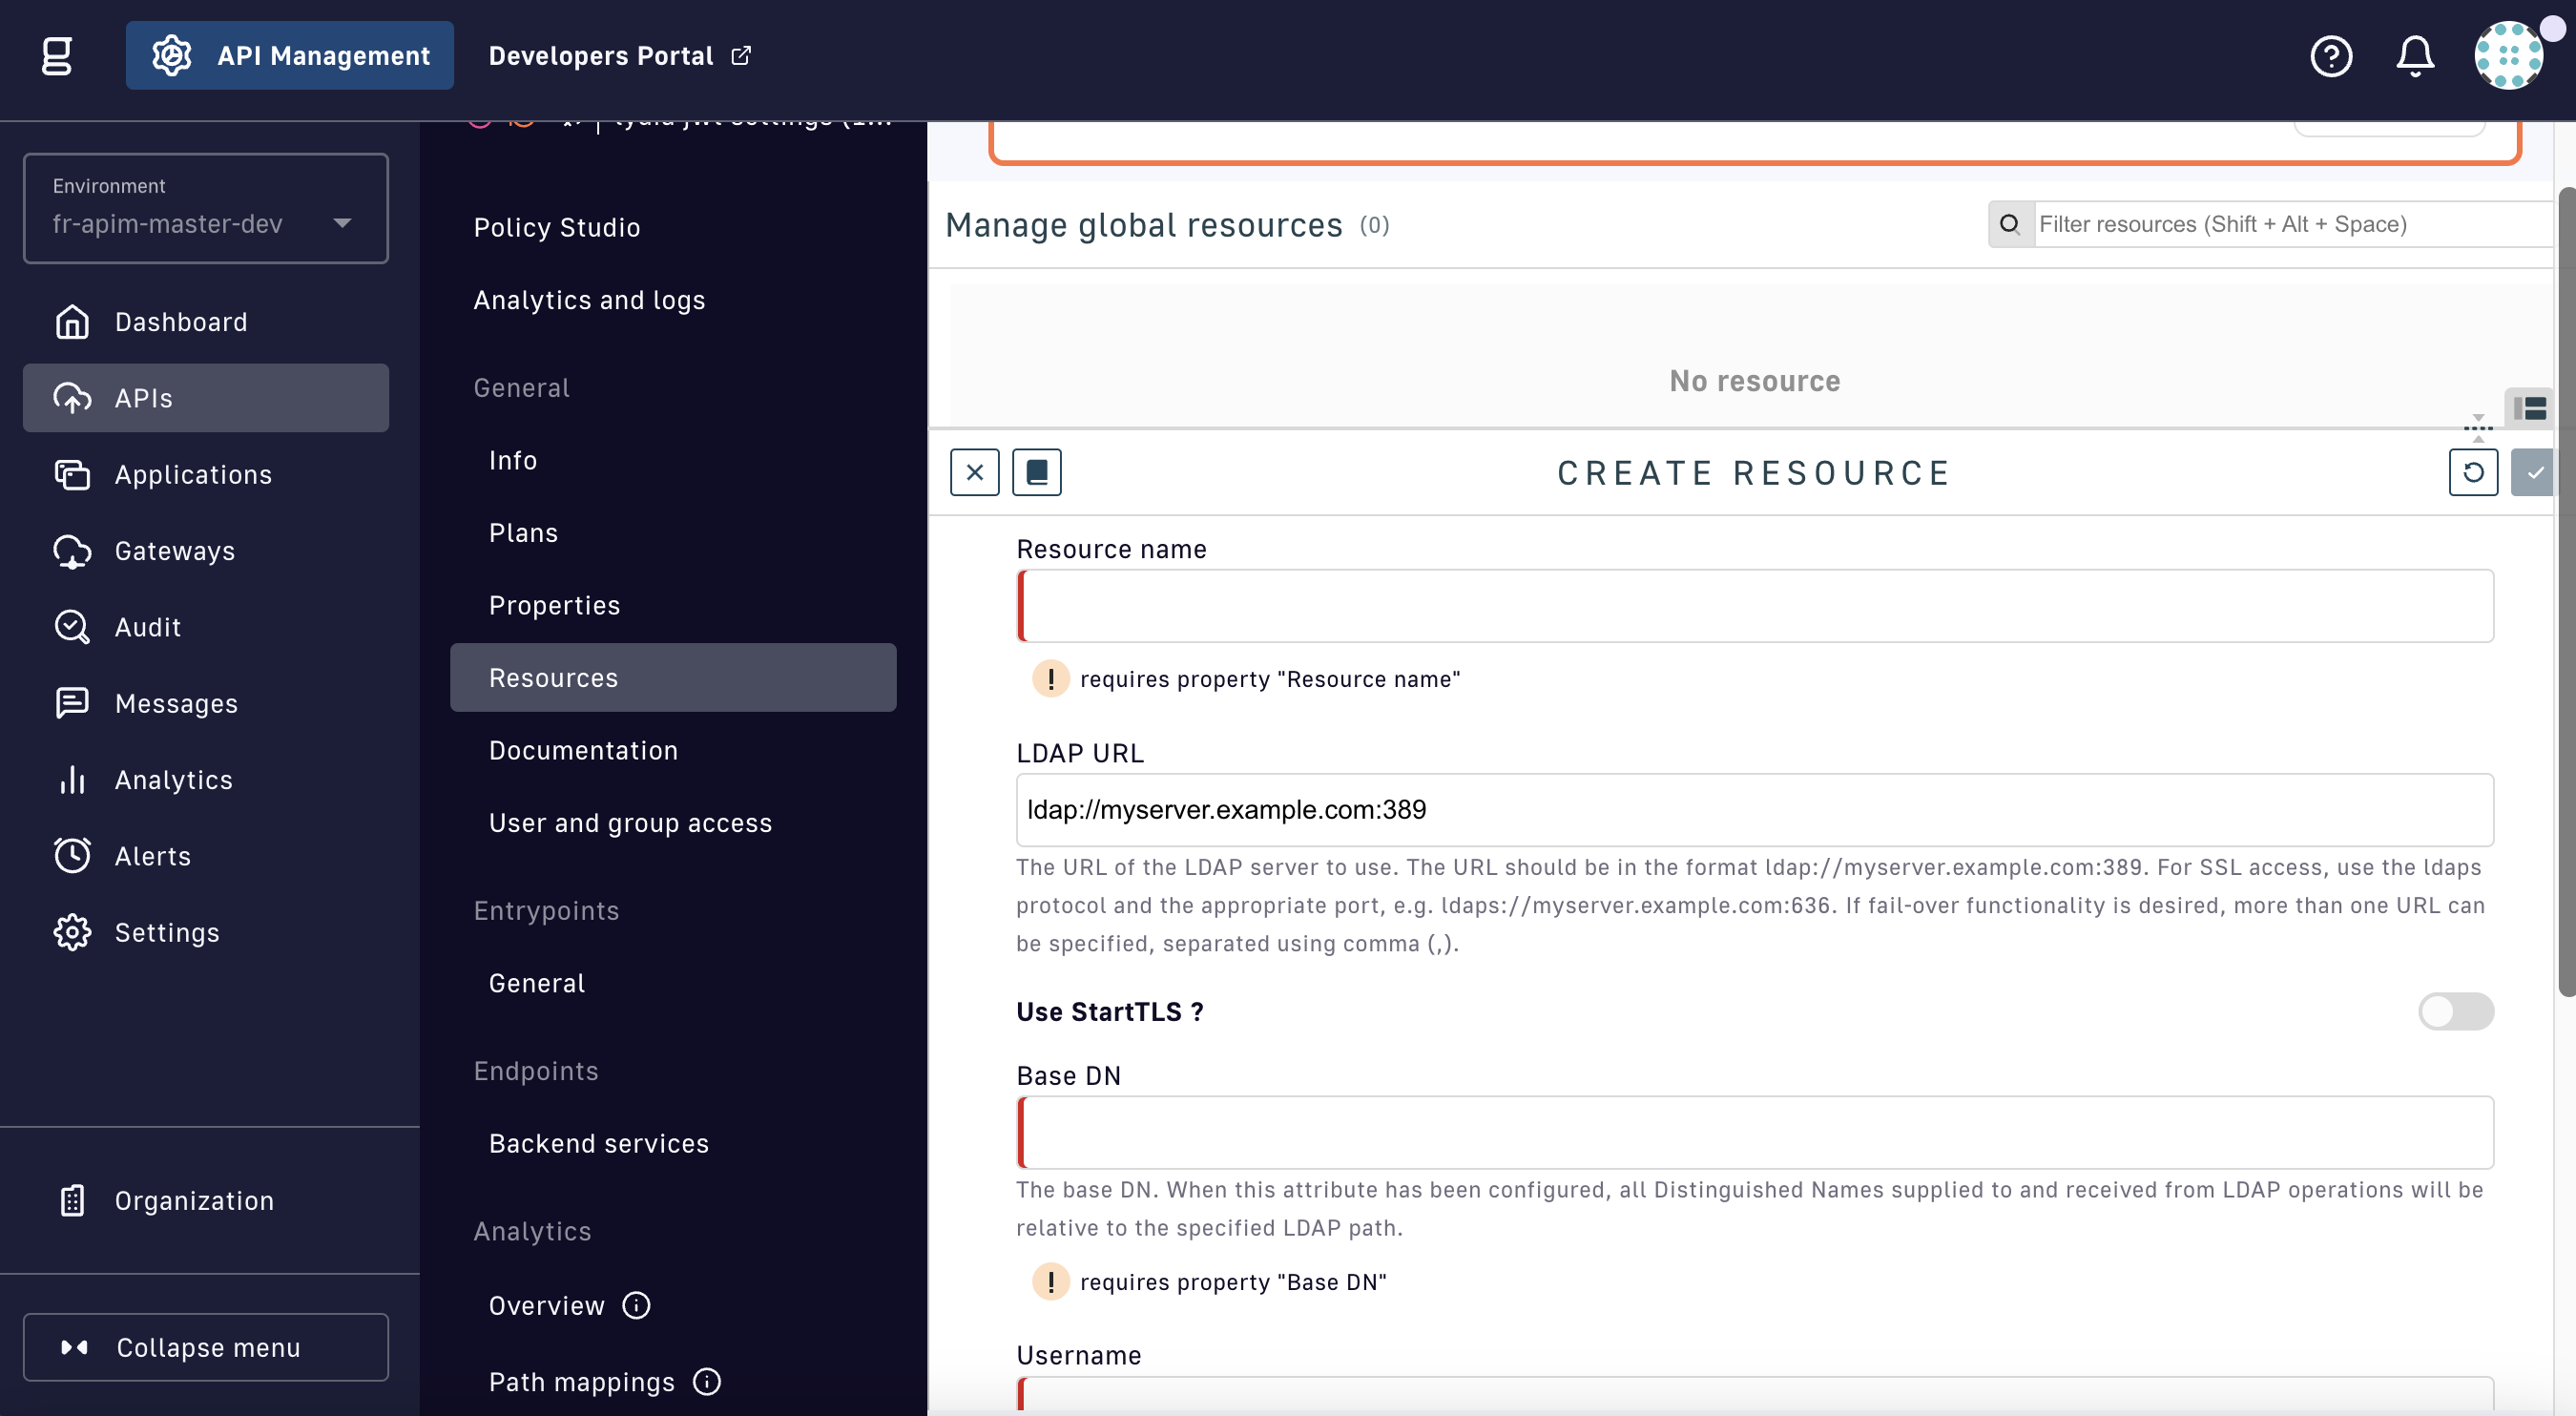
Create an LDAP Authentication Provider resource

Config paramDescriptionDefault
Resource nameThe name of the resource-
HTTP methodHTTP method to invoke the endpointPOST
Use system proxyToggle to use the system proxy configured by your administratorfalse
URLServer URL-
Request bodyThe body of the HTTP request. Supports the DSAPI Expression Language.-
Authentication conditionThe condition to be verified to validate that the authentication is successful. Supports the DSAPI Expression Language.{#authResponse.status == 200}

Applying policies to your APIs

v2 API Policy Studio

Legacy version

The v2 Policy Studio can only be used to design flows for APIs using the v2 API definition and does not support applying policies at the message level or for pub/sub use cases. Instead, please refer to the v4 Policy Studio documentation.

Introduction

The v2 Policy Studio consists of the following sections:

  • Design: Manage all flows associated with your Gateway API
  • Configuration: Modify settings related to flow execution

Design

Flows are created when policies are added to the request and/or response phases and targeted by path, HTTP method(s), or via DSAPI's Expression Language. A single API supports multiple flows, which can be set to target subscribers of an individual plan or all users of the API.

To create a flow and add policies:

  1. Log in to your APIM Console

  2. Selecting APIs from the left nav

  3. Select the API for which to design a flow

  4. Select Policy Studio from the inner left nav

  5. Select the Design tab

  6. In the Flows section, select the + icon, then configure the flow:

    Configure a flow

    • Name: Give your flow a descriptive name. Otherwise, a name will be automatically generated using the path and methods.
    • Operator path: For the provided Path, apply this flow to requests with a path that Equals or Starts with the same path.
    • Path: Define the path to use in conjunction with the Operator path to determine if this flow should be applied.
    • Methods: Define the HTTP methods for which you want the flow to be executed. If you leave this empty, the flow will be executed for every HTTP method, assuming the other conditions are met.
    • Conditions: Define specific conditions that will trigger flow execution using DSAPI's Expression Language (EL).
  7. To add a policy to the flow, drag-and-drop the policy that you want to enforce onto either the request or response phase

  8. To configure the policy, select it and use the menu beneath the flow map

  9. Select the checkmark icon, then click Save in the pop-up window

  10. Redeploy your API to the Gateway for the changes to take effect

  • A policy added to the request phase will be enforced by the Gateway at the time of the request, before a client is given access to the API.
  • If a policy is added to the response phase, the Gateway will enforce the policy after the request is allowed, but before the response is returned to the client.
Example: Add a Rate Limit policy

Limit the number of requests that a client can make using the HTTP GET method to five per second:

  1. Create a new flow via the steps above
  2. Configure the flow to execute only on the HTTP GET method
  3. From the policy menu, drag-and-drop the Rate Limit policy onto the request phase
  4. Give the rate limit a description
  5. Add conditions using the DSAPI EL
  6. Enable or disable non-strict mode and rate limit response headers in the HTTP response
  7. Define a Key that will be used to identify consumers against whom the Rate Limit policy should be enforced. If this is left blank, the rate limit will be applied to any consumer that has subscribed to the API's plan.
  8. Set the max requests (static) to 5, the time duration to 1, and the time unit to SECONDS
  9. Select the checkmark icon and click Save
  10. Redeploy your API

Configure flow mode

DSAPI offers two flow modes: DEFAULT and BEST_MATCH.

DEFAULT

Allows for the execution of multiple flows, where each is determined independently based on the Operator path defined in the flow

BEST_MATCH

The Gateway chooses a single flow with the closest match to the path of the API request. From left to right, each part of the path is compared, where strict equality between parts of the request and flow paths takes precedence over a path parameter.

Example of best match

Consider the flows /test/:id and /test/subtest:

  • If the request is /test/55, the resulting flow will be /test/:id
  • If the request is /test/subtest, the resulting flow will be /test/subtest

To modify the flow mode:

  1. Log in to your APIM Console

  2. Selecting APIs from the left nav

  3. Select the API for which to design a flow

  4. Select Policy Studio from the inner left nav

  5. Select the Configuration tab

  6. Change the Flow Mode to either DEFAULT or BEST_MATCH using the drop-down menu

    Configure Flow Mode

v4 API Policy Studio

Product limitations

The v4 Policy Studio can only be used to design flows for APIs using the v4 API definition and supports applying policies at the message level or for pub/sub use cases. The v4 Policy Studio does not currently support DSAPI Debug mode.

Introduction

DSAPI defines a flow as the method to control where, and under what conditions, policies act on an API transaction. The v4 Policy Studio is a no-code tool used to create and manage flows. The details of its purpose and functionality are described in the following sections:

  • Design: Manage all flows associated with your Gateway API
  • Configuration: Modify settings related to flow execution
  • Properties: Define key-value pairs at the API level
  • Resources: Configure global resources to support your flows

Design

Flows are created when policies are added to the Request, Response, Publish, and/or Subscribe phases of an existing v4 API. A single API supports multiple flows, which can be applied to different phases and target either subscribers of an individual plan or all users of the API.

Policies are added to flows to enforce security, reliability, and proper data transfer. Examples of policies include traffic shaping, authentication/authorization, rate limiting, and dynamic routing.

Phases

Phases are available based on a flow's entrypoint(s). When a policy is applied and how it is enforced by the Gateway depends on the phase:

  • Request: A policy is applied during connection establishment and enforced at the time of the request, before a client is given access to the API.
  • Response: A policy is applied to the response from the initial connection and enforced after the request is allowed, but before the response is returned to the client.
  • Publish: A policy is applied to messages sent to the endpoint and enforced when messages are published, before a client is given access to the API.
  • Subscribe: A policy is applied to messages received by the entrypoint and enforced after messages are subscribed to, but before the response is returned to the client.

To create a flow and add policies:

  1. Log in to your APIM Console

  2. Selecting APIs from the left nav

  3. Select the API for which to design a flow

  4. Select Policies from the inner left nav

  5. Click the + icon for a plan or Common flows to create a flow

    Create a flow

  6. Configure the flow using the Create a new flow module with the options shown below

    Configure a new flow

    • Flow name: Give your flow a descriptive name. Otherwise, a name will be automatically generated using the channel and operation.
    • Operator: Apply this flow to requests with a path that Equals or Starts with the specified Channel.
    • Channel: Define the path to use in conjunction with the Operator to determine if this flow should be applied.
    • Entrypoints: Select the entrypoint(s) for which the flow will be executed. If none are selected, the flow will be executed for all possible entrypoints, assuming required conditions are met.
    • Entrypoints supported operations: Select Publish and/or Subscribe as the operation(s) supported by the entrypoint(s). If none are selected, both will be supported.
    • Condition: Use DSAPI's Expression Language (EL) to define specific conditions that will trigger flow execution.
  7. Click Create in the modal, then Save on the Policies page

  8. To add a policy, click the + icon to the phase where the policy should be enforced

    Add a policy

    • Select the Initial connection tab to add policies to the Request and/or Response phase(s)
    • Select the Event messages tab to add policies to the Publish and/or Subscribe phase(s)
  9. Select from the pre-populated policies that are valid by the entrypoints and endpoints

  10. In the policy configuration modal, enter the information appropriate to and required by the policy

  11. Click Add policy. The policy will appear in the flow diagram of the phase it was added to.

    Policy added to flow

  12. Click Save on the Policies page, then redeploy your API to the Gateway for the changes to take effect

To edit a policy, click on the three vertical dots on its icon in the flow diagram

Configure flow mode

To configure the flow mode, click the gear icon in the Flows panel to open the Flow execution module

Configure flow mode

  • Default flow mode: Use the drop-down menu to select Default or Best Match
  • Fail on flow mismatch: Enable to generate an error when there is no match between the request Channel and any defined flow

API properties

Properties are read-only during the Gateway's execution of an API transaction. They can be accessed from within flows using DSAPI's Expression Language (EL) and the #api.properties statement. To configure properties:

To configure API properties:

  1. Log in to your APIM Console

  2. Selecting APIs from the left nav

  3. Select the API for which to design a flow

  4. Select Configuration from the inner left nav

  5. Select the Properties tab

    Add API properties

  6. To add hardcoded properties, either:

    • Click Add property and enter property definitions one at a time as a key-value pair
    • Click Import and enter property definitions as a list in <key>=<value> format

Encryption

Encrypted values can be used by API policies, but encrypted data should be used with care. APIM Gateway will automatically decrypt these values.

To encrypt a hardcoded API property value:

  1. Reset the default secret key in DSAPI.yml. The secret must be 32 bytes in length.

    # Encrypt API properties using this secret:
    api:
      properties:
        encryption:
             secret: vvLJ4Q8Khvv9tm2tIPdkGEdmgKUruAL6
     to provide the best security available.
    
  2. Enable the Encrypt toggle when adding a property via Add property. Once you click Save, you can no longer edit, modify, or view the value.

Dynamic properties

To configure dynamic properties:

  1. Log in to your APIM Console

  2. Selecting APIs from the left nav

  3. Select the API for which to design a flow

  4. Select Configuration from the inner left nav

  5. Select the Properties tab

  6. Click the Manage dynamically button and define the configuration

    Configure dynamic properties

    • Toggle Enabled to ON
    • Schedule: A cron expression to schedule the health check
    • HTTP Method: The HTTP method that invokes the endpoint
    • URL: The target from which to fetch dynamic properties
    • Request Headers: The HTTP headers to add to the request fetching properties
    • Request body: The HTTP body content to add to the request fetching properties
    • (Optional) Transformation (JOLT specification): If the HTTP service doesn’t return the expected output, edit the JOLT transformation accordingly
    • Toggle Use system proxy ON to use the system proxy configured in APIM installation
  7. Click Save

After the first call, the resultant property is added to the list of global properties, where its value is continuously updated according to the cron schedule specified.

Key-value pairs can also be maintained using a dictionary, e.g., if this information is stored independently of the API creation process or applies to multiple APIs.

Resources

Some policies support the addition of resources, which can be used for actions such as authentication and schema registry validation. After you create resources, you will be able to reference them when designing policies. Policies that support resources include:

Basic AuthenticationSpecify an LDAP Authentication Provider resource and/or an Inline Authentication Provider resource to authenticate users in memory
CacheSpecify a cache resource via the Cache or Cache Redis resources
HTTP Signature
Generate HTTP Signature
Specify your HTTP Authentication Provider resource
OAuth2Specify a Generic OAuth2 Authorization Server resource or a DSAPI AM Authorization Server resource
OpenID Connect UserinfoSpecify a Keycloak Adapter resource to use Keycloack as your OpenID Connect resource
AVRO to JSON
AVRO to Protobuf
Protobuf to JSON
Specify your Confluent Schema Registry to retrieve serialization and deserialization schemas from a Confluent Schema registry
Global resources are available to all flows associated with the Gateway API, but are not available to other Gateway APIs.

Examples

Example 1: Dynamic routing

Configure a v4 proxy API to query the stock levels of shop databases, then dynamically reroute any API call containing a shop ID to its associated URL:

  1. Define a list of properties for the shops, where <key> is the unique shop ID and <value> is the shop URL
  2. Configure a dynamic routing policy that builds new URLs dynamically through property matching via the #api.properties statement:

If the ID in the request header matches the key of one of the properties, it is replaced with the URL. The dynamic routing policy then reroutes the API call to the URL.

Example 2: Monetization via latency

To monetize data delivery, consider a v4 message API that sends an alert whenever inventory is added to an online store. Tier 1 customers pay for item availability alerts in true real-time, while Tier 2 customers are notified for free, but in less than real-time.

  1. Add a keyless flow to the Default Keyless Plan
  2. Apply a latency policy to the Default Keyless Plan
  3. Select Consumers from the inner left nav
  4. Under the Plans tab, click + Add new plan
  5. Select API Key from the drop-down menu and configure an API Key plan

Tier 2 customers can use our API for free, but new merchandise alerts are delayed by 30 minutes. Tier 1 customers who purchase the API Key plan are given unlimited access to real-time data.

Policy support and versioning

Overview

DSAPI policies fall into the following functional categories:

  • Security
  • Transformation
  • Restrcitions
  • Performance
  • Routing
  • Monitoring and testing

Although the implementation details of each policy are unique, they share a common installation and deployment, and they are compatible with subsets of phases.

Policies cannot currently be applied to v4 TCP proxy APIs

v2 APIs and v4 APIs policies support

v2 and v4 APIs support difference policies. The following table shows the differences in support for the following API types:

  • v2 proxy APIs
  • v4 proxy APIs
  • v4 message APIs

v2 APIs and v4 APIs support comparison for policies

Policyv2 proxy APIsv4 proxy APisv4 message APIs
API Key
Assign Attributes
Assign Content
Assign Metrics
AVRO to JSON
AVRO to Protobuf
AWS Lambda
Basic Authentication
Cache
Circuit Breaker
Cloud Events
Custom Query Parameters Parser
Data Logging Masking
Dynamic Routing
Generate HTTP Signature
Generate JWT
GeoIP Filtering
GraphQL Rate Limit
Groovy
HTML to JSON

Configuration

Policies can be added to flows that are assigned to an API or to a plan. DSAPI supports configuring policies through the Policy Studio in the Management Console or interacting directly with the Management API.

Phases

Policies can be applied to the request or the response of a Gateway API transaction, which are broken up into phases that depend on the API definition version. Each policy is compatible with a subset of the available phases.

v4 API definition

v4 APIs have the following phases:
  • onRequest: This phase is executed before invoking the backend services for both proxy and message APIs. Policies can act on the headers and the content for proxy APIs.
  • onMessageRequest: This phase occurs after the onRequest phase and allows policies to act on each incoming message before being sent to the backend service. This only applies to message APIs.
  • onResponse: This phase is executed after invoking the backend services for both proxy and message APIs. Policies can act on the headers and the content for proxy APIs.
  • onMessageResponse: This phase after the onResponse phase and allows policies to act on each outgoing message before being sent to the client application. This only applies to message APIs.

v2 API definition

v2 APIs have the following phases:
  • onRequest: This phase only allows policies to work on request headers. It never accesses the request body.
  • onRequestContent: This phase always occurs after the onRequest phase. It allows policies to work at the content level and access the request body.
  • onResponse: This phase only allows policies to work on response headers. It never accesses the response body.
  • onResponseContent: This phase always occurs after the onResponse phase. It allows policies to work at the content level and access the response body.