Using the DSAPI API Management components
DSAPI API Management (APIM) consists of the following four components:
- Management Console
- Management Gateway
- Management API
- Developer Portal
For more information about these four components and how to use them in your environment, see the following articles:
Gateway
Introduction
This guide will walk through how to configure your general DSAPI API Management (APIM) Gateway settings using the DSAPI.yaml file. As detailed in the Configuring APIM Components, you can override these settings by using system properties or environment variables.
The DSAPI.yaml file, found in DSAPI_HOME/config/, is the default way to configure APIM.
YAML (yml) format is sensitive to indentation. Ensure you include the correct number of spaces and use spaces instead of tabs.
With the DSAPI.yaml file, you can configure the following:
- HTTP Server
- Plugins repository
- Management repository
- Rate Limit repository
- Reporters
- Services
- Sharding tags
- Organizations and environments
- Transaction ID and request ID headers
Configure your HTTP Server
You configure the HTTP Server configuration in the following section of the DSAPI.yaml file:
http:
    port: 8082
    host: 0.0.0.0
    idleTimeout: 0
    tcpKeepAlive: true
    compressionSupported: false
    maxHeaderSize: 8192
    maxChunkSize: 8192
    instances: 0
    requestTimeout: 30000
    secured: false
    alpn: false
    ssl:
      clientAuth: none # Supports none, request, required
      keystore:
        path: ${DSAPI.home}/security/keystore.jks
        password: secret
      truststore:
        path: ${DSAPI.home}/security/truststore.jks
        password: secret
This section discusses how to enable support for:
Enable HTTPS support
You can use the DSAPI.yaml file to configure HTTPS support. However, you first need to enable secure mode in DSAPI.yml and provide a keystore. You can generate a keystore if you don't have one, or use the file path or Kubernetes location.
keytool -genkey \
    -alias test \
    -keyalg RSA \
    -keystore server-keystore.jks \
    -keysize 2048 \
    -validity 360 \
    -dname CN=localhost \
    -keypass secret \
    -storepass secret
Provide a path pointing to the keystore containing the certificate and the associated private key:
http:
    # ... skipped for simplicity
    secured: true
    ssl:
      clientAuth: none # Supports none, request, required
      keystore:
        path: /path/to/keystore.jks
        password: adminadmin
      truststore:
        path:
        password:
As of DSAPI APIM v3.13.0, the keystore file is automatically watched for any modifications and reloaded without having to restart the Gateway server.
It is possible to load the keystore directly from the Kubernetes secret or configmap by specifying the appropriate Kubernetes location in the DSAPI.yaml file:
http:
    # ... skipped for simplicity
    secured: true
    ssl:
      clientAuth: none # Supports none, request, required
      keystore:
        type: pkcs12
        kubernetes: /my-namespace/secrets/my-secret/keystore
        password: adminadmin
The expected http.ssl.keystore.kubernetes is structured as follows: /{namespace}/{type}/{name}/{key} with:
namespace: the name of the targeted Kubernetes namespacetype: can be eithersecretsorconfigmaps, depending on the type of Kubernetes resources being retrievedname: the name of the secret or configmap to retrievekey: the name of the key holding the value to retrieve. Thekeyis optional when using a standardkubernetes.io/tlssecret (note: it only supports PEM cert & key). Thekeyis mandatory for anyOpaquesecret or configmap (note: they only support JKS & PKC12 keystore type).
The keystore (or PEM cert & key) stored in the Kubernetes secret or configmap is automatically watched for any modifications and reloaded without having to restart the Gateway server.
Enable HTTP/2 support
First, enable HTTPS support as described in the section above.
You then need to enable alpn in DSAPI.yaml:
http:
    alpn: true
    ...
You can now consume your API with both HTTP/1 and HTTP/2 protocols:
curl -k -v --http2 https://localhost:8082/my_api
Enable WebSocket support
To enable WebSocket support, update the DSAPI.yaml file:
http:
    websocket:
      enabled: true
You can now consume your API via both WS and WSS protocols:
curl ws://localhost:8082/my_websocket
Enable certificate-based client authentication
http:
    ssl:
      clientAuth: none # Supports none, request, required
      truststore:
        path: /path/to/truststore.jks
        password: adminadmin
Available modes for clientAuth are:
- None: Client authentication is disabled (replacement of the
falsevalue) - Request: Client authentication is not required but can be if using SSL enforcement policy
- Requires: Client authentication is required (replacement of
truevalue)
Multi-server support
The DSAPI APIM Gateway currently supports a multi-server architecture which allows one Gateway to support multiple protocols. For example, the Gateway can now proxy both HTTP and HTTPS requests by running two servers on different ports simultaneously.
To enable this feature, you must use an alternate configuration in the DSAPI.yaml file:
- The root-level
httpconfiguration property should be replaced with the root-levelserversproperty. Theserversproperty allows for an array of servers in the configuration file. - An
idproperty has been added to identify and compare servers. - The
typeproperty is now mandatory and at the moment, only supports a value ofhttp.
http as the root-level property.
The rest of the configuration schema remains unchanged. Here is an example of a configuration that allows one Gateway to support HTTP and HTTPS:
# Gateway servers
  servers:
    - id: "http"
      type: http
      port: 8092
    - id: "http_secured"
      type: http
      port: 8443
      secured: true
      alpn: true
      ssl:
        keystore:
          type: jks
          path: ${DSAPI.home}/security/keystore.jks
        sni: true
        openssl: true
Configure the plugins directory
The plugins directory can be configured via either local installation or Helm.
You can configure the APIM Gateway plugins directory with plugins.path configuration property:
plugins:
    path: ${DSAPI.home}/plugins
Users can add plugins not included in APIM's default distribution to this directory. This includes different versions of DSAPI plugins or their own custom plugins.
If you do not wish to modify the default directory, DSAPI also lets you specify additional folders in an array:
plugins:
    path:
    - ${DSAPI.home}/plugins
    - ${DSAPI.home}/plugins-ext
In this example, bundled plugins remain in the default directory. This configuration adds an additional plugins-ext directory for the user to add plugins not included in APIM's default distribution.
DSAPI's Helm Chart protects the bundled plugins directory by default. This is a sample configuration of how to add additional plugins:
{% code title="value.yaml" %}
gateway:
    additionalPlugins:
    - http://host:port/path/to/my-plugin.zip
    - http://host:port/path/to/my-gateway-plugin.zip
  api:
    additionalPlugins:
    - http://host:port/path/to/my-plugin.zip
The property removePlugins has been removed from the Helm chart as it is no longer necessary. See plugin discovery and loading for more information.
Configure the Management repository
The Management repository is used to store global configurations such as APIs, applications and API keys. The default configuration uses MongoDB (single server). You can configure the Management repository using the DSAPI.yaml file:
management:
    type: mongodb
    mongodb:
      dbname: ${ds.mongodb.dbname}
      host: ${ds.mongodb.host}
      port: ${ds.mongodb.port}
  #    username:
  #    password:
  #    connectionsPerHost: 0
  #    connectTimeout: 500
  #    maxWaitTime: 120000
  #    socketTimeout: 500
  #    socketKeepAlive: false
  #    maxConnectionLifeTime: 0
  #    maxConnectionIdleTime: 0
  #    serverSelectionTimeout: 0
  #    description: DSAPI.io
  #    heartbeatFrequency: 10000
  #    minHeartbeatFrequency: 500
  #    heartbeatConnectTimeout: 1000
  #    heartbeatSocketTimeout: 20000
  #    localThreshold: 15
  #    minConnectionsPerHost: 0
  #    threadsAllowedToBlockForConnectionMultiplier: 5
  #    cursorFinalizerEnabled: true
  ## SSL settings (Available in APIM 3.10.14+, 3.15.8+, 3.16.4+, 3.17.2+, 3.18+)
  #    sslEnabled:
  #    keystore:
  #      path:
  #      type:
  #      password:
  #      keyPassword:
  #    truststore:
  #      path:
  #      type:
  #      password:
  ## Deprecated SSL settings that will be removed in 3.19.0
  #    sslEnabled:
  #    keystore:
  #    keystorePassword:
  #    keyPassword:

  # Management repository: single MongoDB using URI
  # For more information about MongoDB configuration using URI, please have a look to:
  # - http://api.mongodb.org/java/current/com/mongodb/MongoClientURI.html
  #management:
  #  type: mongodb
  #  mongodb:
  #    uri: mongodb://[username:password@]host1[:port1][,host2[:port2],...[,hostN[:portN]]][/[database][?options]]

  # Management repository: clustered MongoDB
  #management:
  #  type: mongodb
  #  mongodb:
  #    servers:
  #      - host: mongo1
  #        port: 27017
  #      - host: mongo2
  #        port: 27017
  #    dbname: ${ds.mongodb.dbname}
  #    connectTimeout: 500
  #    socketTimeout: 250
Configure the Rate Limit repository
When defining the Rate Limiting policy, the DSAPI APIM Gateway needs to store data to share with other APIM Gateway instances.
For Management repositories, you can define a custom prefix for the Rate Limit table or collection name.
Counters can be stored in MongoDB, JDBC, or Redis Standalone.
ratelimit:
    type: mongodb
    mongodb:
      uri: mongodb://${ds.mongodb.host}/${ds.mongodb.dbname}
      prefix: # collection prefix
If you want to use a custom prefix, you need to follow the following instructions.
To store counters in JDBC:
ratelimit:
    type: jdbc
    jdbc:
      url: jdbc:postgresql://host:port/dbname
      password: # password
      username: # username
      prefix:   # collection prefix
If you want to use a custom prefix, you need to follow the following instructions.
To store counters in Redis Standalone:
ratelimit:
    type: redis
    redis:
      host: 'redis.mycompany'
      port: 6379
      password: 'mysecretpassword'
Redis Sentinel and Redis SSL configuration options are presented here.
Configure reporters
You can configure various aspects of reporters, such as reporting monitoring data, request metrics, and health checks. All reporters are enabled by default. To stop a reporter, you need to add the property enabled: false:
reporters:
    elasticsearch:
      endpoints:
        - http://localhost:9200
  #    index: DSAPI
  #    bulk:
  #       actions: 500           # Number of requests action before flush
  #       flush_interval: 1      # Flush interval in seconds
  #    security:
  #       username:
  #       password:
Configure services
You can update the default APIM Gateway default values. All services are enabled by default. To stop a service, you need to add the property 'enabled: false' (you can see an example in the 'local' service).
services:
    # Synchronization daemon used to keep the Gateway state in sync with the configuration from the management repository
    # Be aware that, by disabling it, the Gateway will not be sync with the configuration done through Management API and Management Console
    sync:
      # Synchronization is done each 5 seconds
      cron: '*/5 * * * * *'

    # Service used to store and cache api-keys from the management repository to avoid direct repository communication
    # while serving requests.
    apikeyscache:
      delay: 10000
      unit: MILLISECONDS
      threads: 3 # Threads core size used to retrieve api-keys from repository.

    # Local registry service.
    # This registry is used to load API Definition with json format from the file system. By doing so, you do not need
    # to configure your API using the web console or the rest API (but you need to know and understand the json descriptor
    # format to make it work....)
    local:
      enabled: false
      path: ${DSAPI.home}/apis # The path to API descriptors

    # Gateway monitoring service.
    # This service retrieves metrics like os / process / jvm metrics and send them to an underlying reporting service.
    monitoring:
      delay: 5000
      unit: MILLISECONDS

    # Endpoint healthcheck service.
    healthcheck:
      threads: 3 # Threads core size used to check endpoint availability
Configure sharding tags
You can apply sharding on APIM Gateway instances either at the system property level or with DSAPI.yml.
In this example, we are configuring deployment only for APIs tagged as product or store and of those, we are excluding APIs tagged as international.
tags: 'product,store,!international'
For more in-depth information on how to configure sharding tags, please refer to the Sharding Tags documentation.
Configure organizations and environments
You can configure organizations and environments using their hrids on APIM Gateway instances either at the system property level or with DSAPI.yml.
Only APIs and dictionaries belonging to the configured organizations and environments will be loaded.
If only the organizations configuration is set, then all environments belonging to these organizations are used. If only the environments configuration is set, then all environments matching the setting will be used, regardless of their organization. If both organizations and environments are set, all environments matching the setting and belonging to these organizations will be used. If none of these fields is set, then all organizations and environments are used.
In this example, we are configuring deployment only for dev and integration environments for mycompany organization.
organizations: mycompany
  environments: dev,integration
Configure transaction ID and request ID headers
By default, the APIM Gateway will generate an id for each request and set it in the following headers:
X-DSAPI-Transaction-Id: This header represents the identifier for the entire transaction, which typically encompasses multiple calls or requests. It allows the tracking of a series of related requests and responses that are part of a larger transaction.X-DSAPI-Request-Id: This header represents the identifier for a single call or request within the transaction. Every individual request receives a unique identifier, which allows each request to be tracked separately.
Both of these headers can be customized. You can provide your own header names:
handlers:
    request:
      transaction:
        header: X-Custom-Transaction-Id
      request:
        header: X-Custom-Request-Id
Also, you can configure the APIM Gateway behavior when the backend itself sets the same headers. To do so you need to set the overrideMode attribute. The following values are available:
override: The header set by the APIM Gateway will override the one provided by the backendmerge: Both headers set by the APIM Gateway and the backend will be kept (as headers can be multivalued)keep: The header set by the backend will be kept and the one provided by the APIM Gateway discarded
Both transaction and request headers can be configured independently:
handlers:
    request:
      transaction:
        header: X-Custom-Transaction-Id
        overrideMode: merge
      request:
        header: X-Custom-Request-Id
        overrideMode: keep
Dictionaries
Introduction
While API publishers can create properties for their own APIs, dictionaries provide a way to manage properties independent of individual APIs, making it possible to apply them across APIs and maintain them globally with a different user profile, such as an administrator.
Dictionary properties are based on key-value pairs. You can create two types of dictionaries: manual and dynamic.
Dictionaries need to be deployed to the API Gateway before you can use them. You can see the date and time the dictionary was last deployed in the dictionary list:
.png)
You can use dictionaries anywhere in APIM where DSAPI Expression Language is supported, such as when defining policies for API flows. You can access dictionary properties with the Expression Language statement #dictionaries.
Create a new dictionary
To create a new dictionary, select Settings in the left hand nav, then select Dictionaries.
.gif)
Access dictionary settings
Select the  icon. You'll be brought to the Create a new dictionary page. Here, you'll need to define the Name, Description, and Type. You'll have two options for Dictionary type:
- Manual: These dictionaries are made up of static properties defined manually at dictionary creation time
- Dynamic: These dictionaries are made up of properties that are updated continuously, based on a schedule and source URL defined at dictionary creation time
Create a manual dictionary
To create a manual dictionary, choose Manual as the Type, then click Create. You'll be brought to a page where you can define the static properties for your dictionary. To create a property, select the  icon and give your property a name and value.
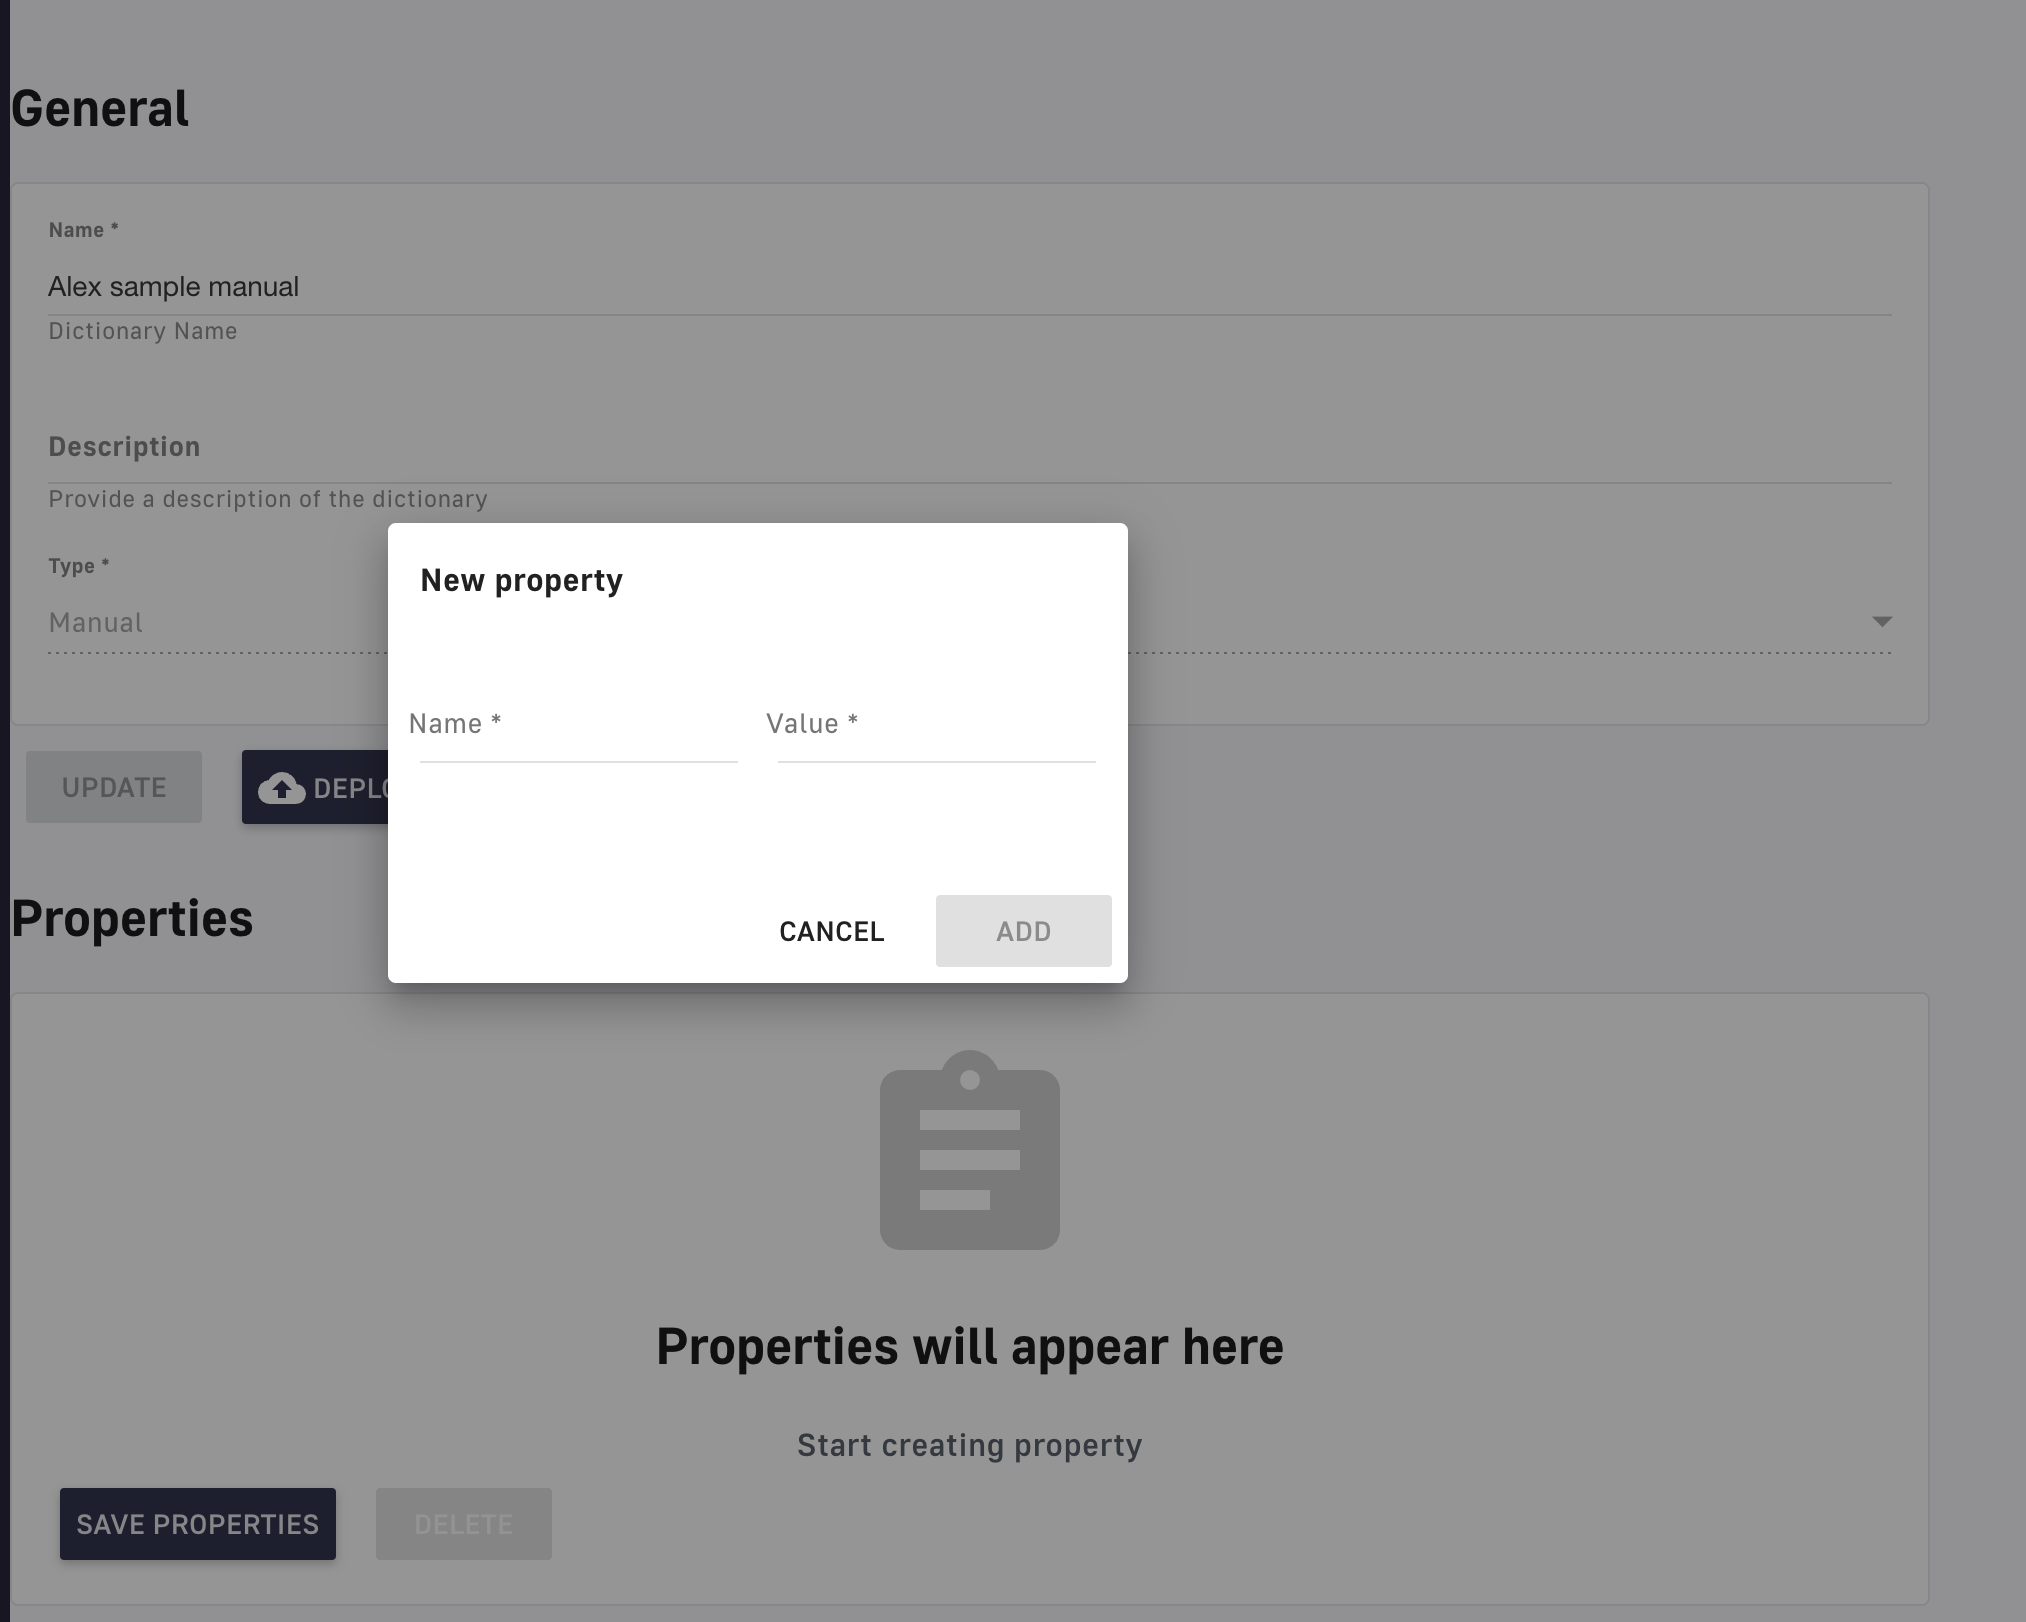
Add properties to your dictionary
Select Add, and then Save Properties when you are done defining your key-value pairs. To start and deploy your dictionary, select Deploy.
Create a dynamic dictionary
To create a manual dictionary, choose Dynamic as the Type. Trigger and Provider sections will then appear.
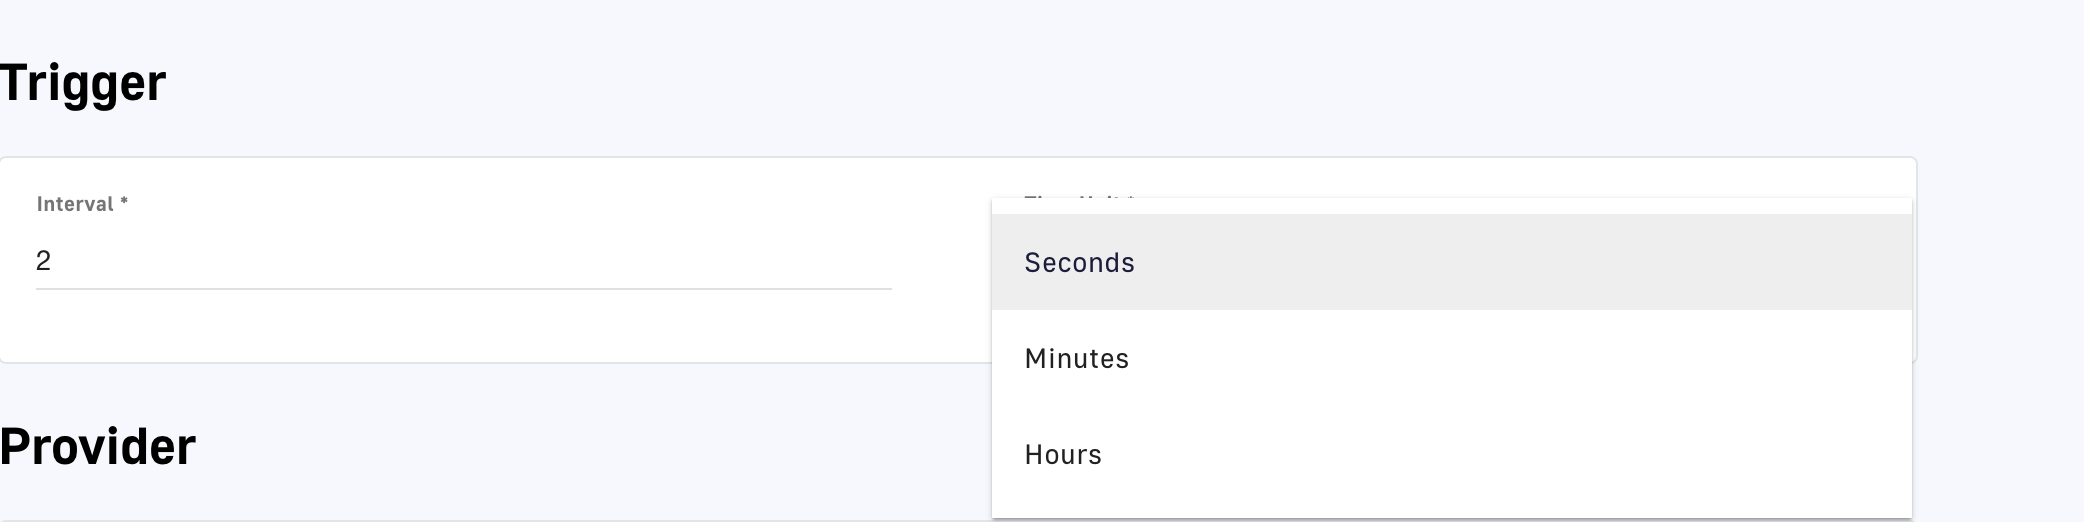
Define your trigger
In the Provider section, specify the details of the source of the properties:
- A Type of Custom (HTTP).
- HTTP Service URL: the URL and method of the API providing the properties
- Enable or disable Use system proxy
- The HTTP Methods
- The request body
- One or more HTTP headers
- The transformation to apply to the response, in JOLT format
When you're done, click Create, then Start. DSAPI APIM will begin to retrieve the properties at the defined intervals and list them in the Properties section.
You can select any properties you want to delete and/or select Deploy to deploy your Dictionary to your DSAPI API Gateway.
Example
The following example creates a list of properties based on extracting the names and versions from the JSON at the defined URL and assigning them to the property keys and values:

When you select Start, the properties are added to the list according to the defined schedule:

Internal API
Introduction
The DSAPI APIM Gateway component includes its own internal API for monitoring and retrieving technical information about the component.
Configuration
Enable the API as a service in the DSAPI.yaml file and update any other required configuration:
services:
    core:
      http:
        enabled: true
        port: 18082
        host: localhost
        authentication:
          type: basic
          users:
            admin: adminadmin
The above values are defined as follows:
enabled: Whether the service is enabled (defaulttrue).port: The port the service listens on (default18082). Ensure you use a port not already in use by another APIM component.host: The host (defaultlocalhost).authentication.type: The authentication type for requests. This value isnone, if no authentication is required, orbasic(defaultbasic).authentication.users: A list ofuser: passwordcombinations. Only required if authentication type isbasic.
Endpoints
| Operation | Description | Example |
|---|---|---|
| Gets generic node information. | |
| Gets the health status of the component. Probes can be filtered using the optional This endpoint can be used by a load balancer, e.g., to determine if a component instance is not in the pool. The following probes are not displayed by default and you must explicitly use the query param to retrieve them: - cpu - memory - api-sync These probes are considered healthy if they are under a configurable threshold (default is 80%). To configure the default, add it to your [source, yml] ---- services: health: threshold: cpu: 80 memory: 80 ---- | |
| Gets the node configuration from the DSAPI.yml file and/or environment variables. | |
| Gets monitoring information from the JVM and the server. | |
Component-specific endpoints
In addition to the main endpoints listed above, the internal API includes dedicated endpoints to get more information about the APIs deployed on the APIM Gateway instance.
| Operation | Description | Example |
|---|---|---|
| Gets the APIs deployed on this APIM Gateway instance. | |
| Gets the API configuration for this APIM Gateway instance. | |
Logging
Overview
This article describes logging at both the Gateway and API level and how to expose metrics to Prometheus.
Gateway-level logging
This section describes the Gateway logging capabilities that are applied to all v4 Gateway APIs by default.
Configure logging
To configure runtime logging for your v4 Gateway APIs:
- Open your API Management Console
- Go to Settings in the left sidebar
- Click on API logging in the inner left sidebar
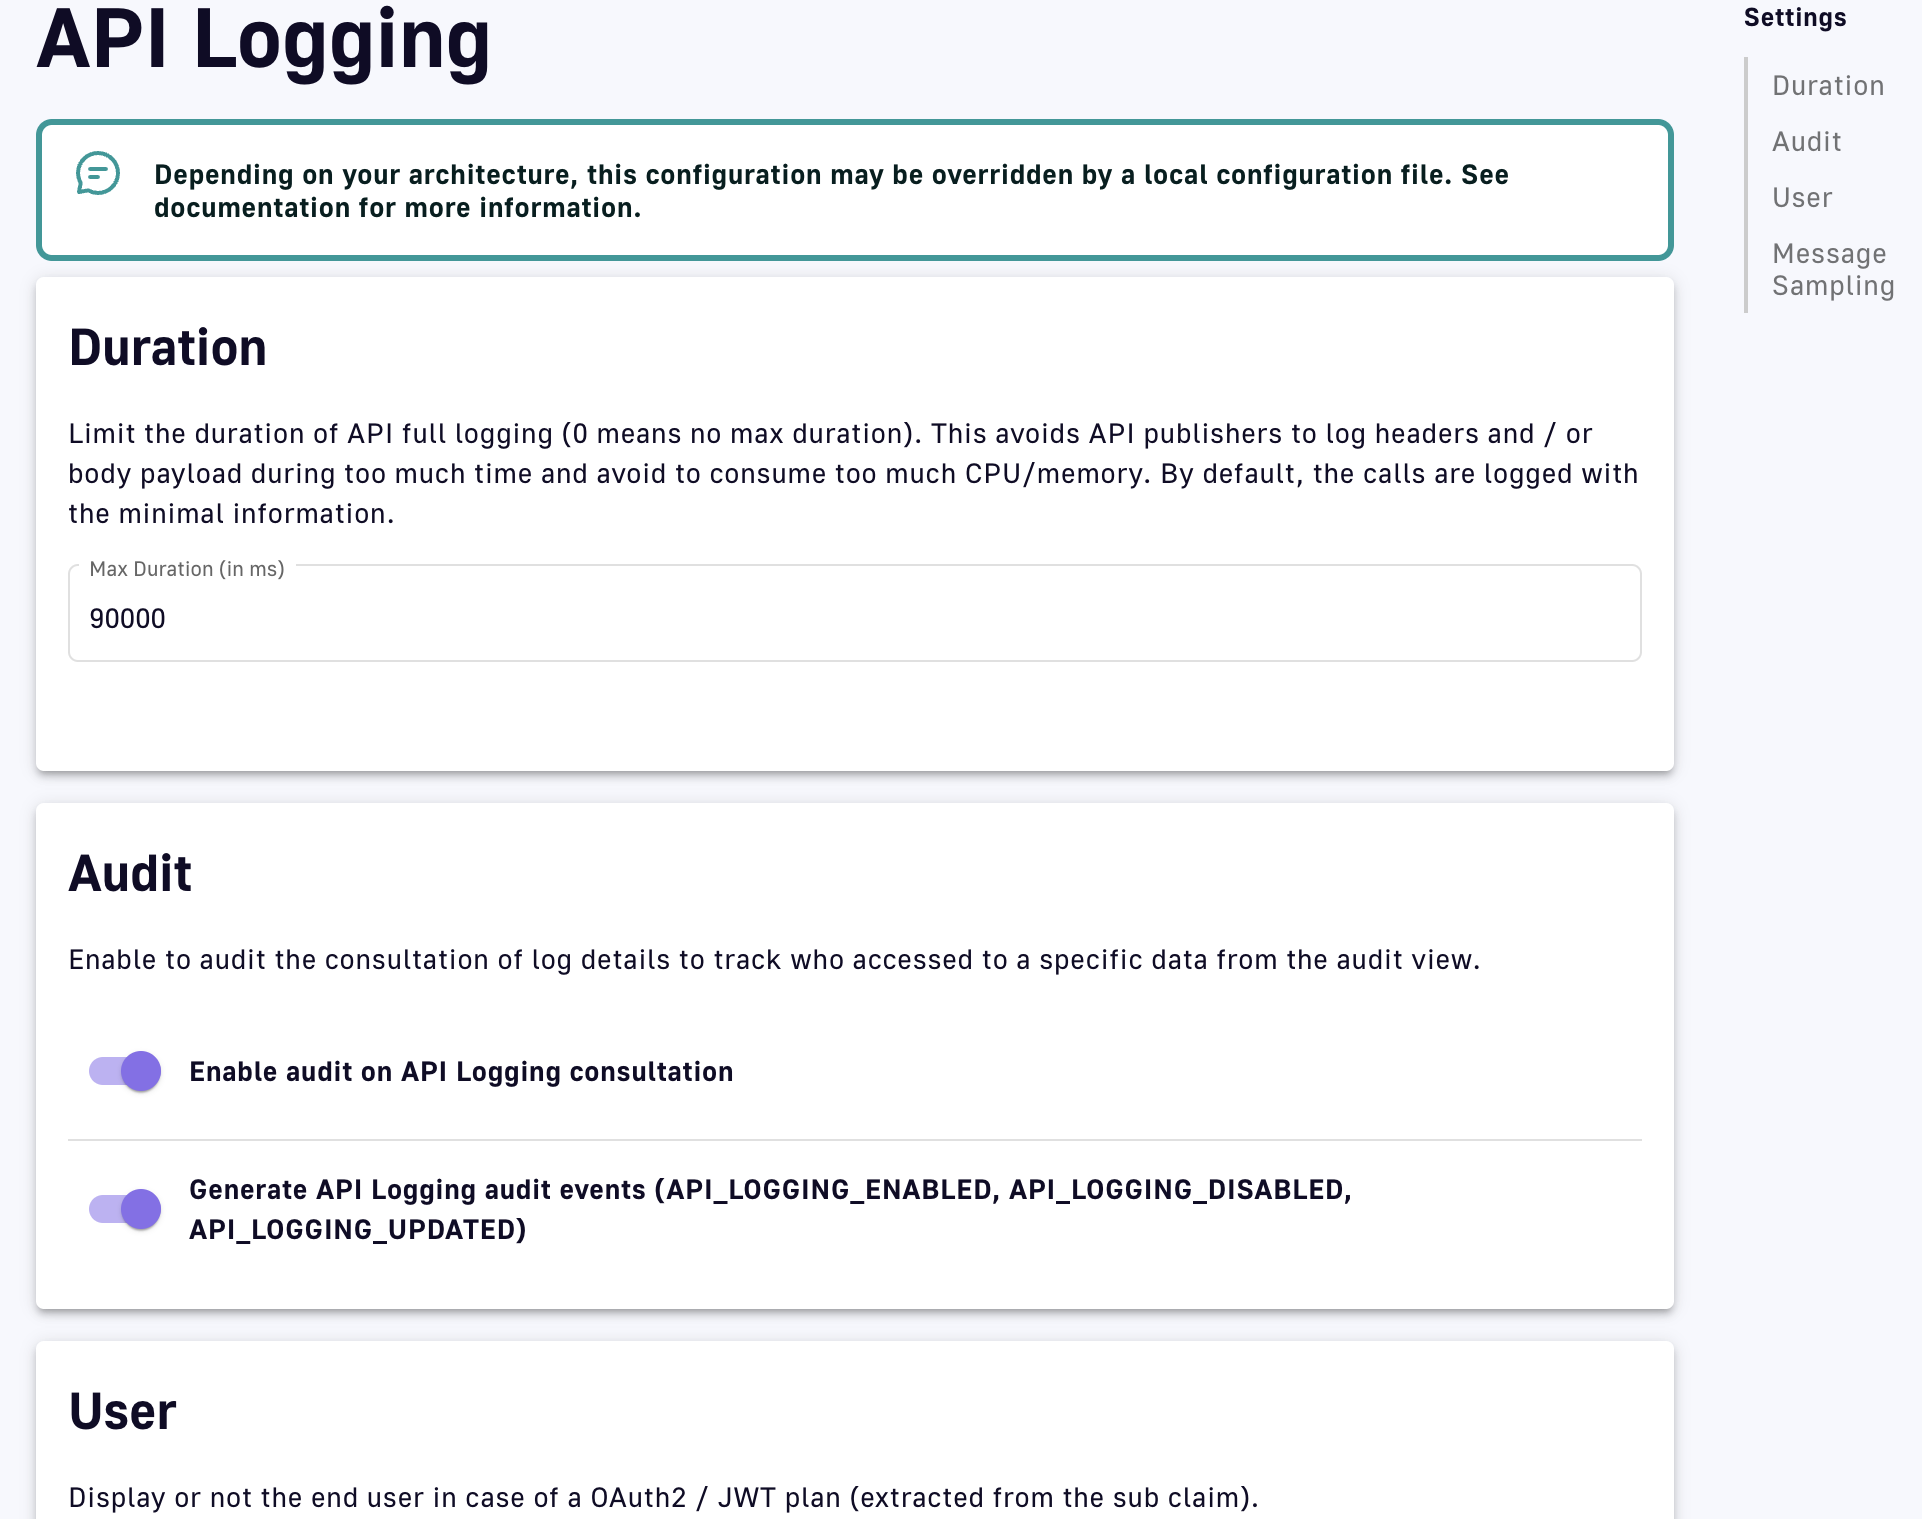
Configurable settings are grouped in the following categories:
The default value (90000 ms) logs minimal call information. A value of 0 is interpreted as no maximum duration.
When enabled, the following options track who accessed specific data from the audit view:
- Enable audit on API Logging consultation
- Generate API Logging audit events (API_LOGGING_ENABLED, API_LOGGING_DISABLED, API_LOGGING_UPDATED)
Toggle Display end user on API Logging (in case of OAuth2/JWT plan) to include information about the the end user in the API logging. This is useful when using an OAuth2 or JWT plan.
Set the defaults and limits of the possible sampling configurations.
- Probabilistic: Messages are sampled based on a specified probability value between 0.01 and 0.5.
- Count: One message is sampled for every number specified, where the specified value must be greater than 1.
- Temporal: Messages are sampled based on a specified time duration value that conforms to ISO-8601 format. }
API-level logging
The following sections describe the logging capabilities for v4 APIs.
View record of logs
Comprehensive connection logs allow you to analyze the usage of your v4 message APIs or v4 proxy APIs. To view the runtime logs associated with calls to your API:
- Open your API Management Console
- Go to APIs in the left sidebar
- Select your API
- Click on API Traffic in the inner left sidebar
Logs are displayed under the Runtime Logs tab in reverse chronological order:
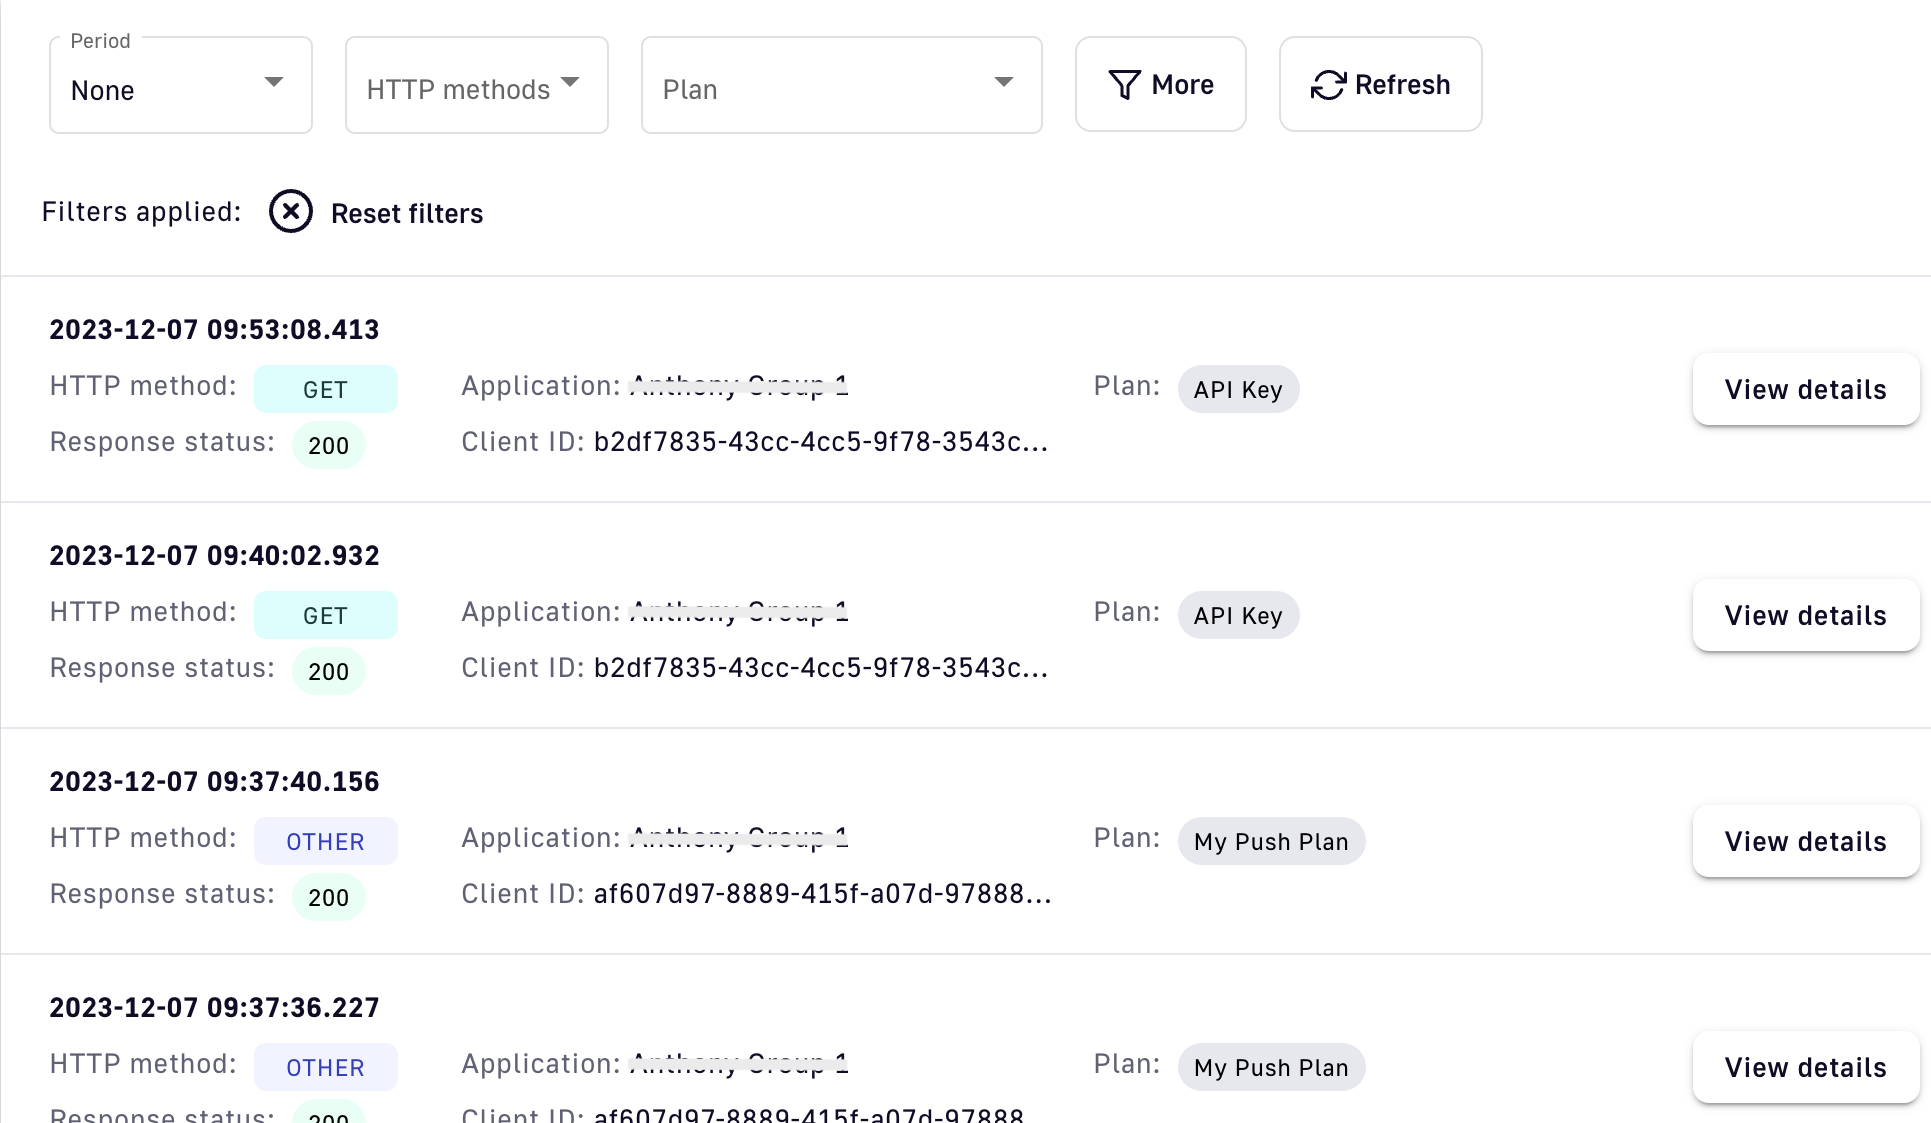
Sample v4 message API runtime log entries
The filters above the list of logs allow you to filter records by timeframe, HTTP method, or plan. The More button offers additional filtering options.
If logging is disabled, existing logs are still displayed, but a banner indicates that the record is not current.
Modify logging information
Logging information can be modified by configuring the options under the Settings tab. To view and modify the logging options:
- Open your API Management Console
- Go to APIs in the left sidebar
- Select your API
- Click on API Traffic in the inner left sidebar
- Click on the Settings tab
To configure which information is recorded, select from the following options:
- Logging mode: Select from Entrypoint and Endpoint to customize which modes are logged.
- Logging phase: Select from Request and Response to customize which phases are logged.
- Content data: Select from Message content, Message headers, Message metadata and Headers to customize which data is logged.
- Message sampling: Select an option to customize the sampling configuration.
- Probabilistic: Messages are sampled based on a specified probability value between 0.01 and 0.5.
- Count: One message is sampled for every number specified, where the specified value must be greater than 1.
- Temporal: Messages are sampled based on a specified time duration value that conforms to ISO-8601 format.
- Display conditions: You have the ability to filter the message data based on Request phase condition and Message condition. Each of these fields supports the use of DSAPI Expression Language.
Runtime logs settings
Configure sampling methods with DSAPI.yml
DSAPI.yml, the corresponding field is disabled in the Management Console.
Sampling methods for v4 message APIs can also be configured in the DSAPI.yml file. The messageSampling configuration option determines, for each sampling method, whether it can be used, its default value, and its max value:
- Probabilistic: Must be a
doublerepresenting a percentage (min value 0.01, max value 0.5) - Count: Must be an
integer(min value 1) - Temporal: Must be a
stringin ISO 8601 format
```
  logging:
    messageSampling:
      probabilistic:
        default: 0.01
        limit: 0.5
      count:
        default: 100
        limit: 10000
      temporal:
        default: PT1S
        limit: PT1S
  ```
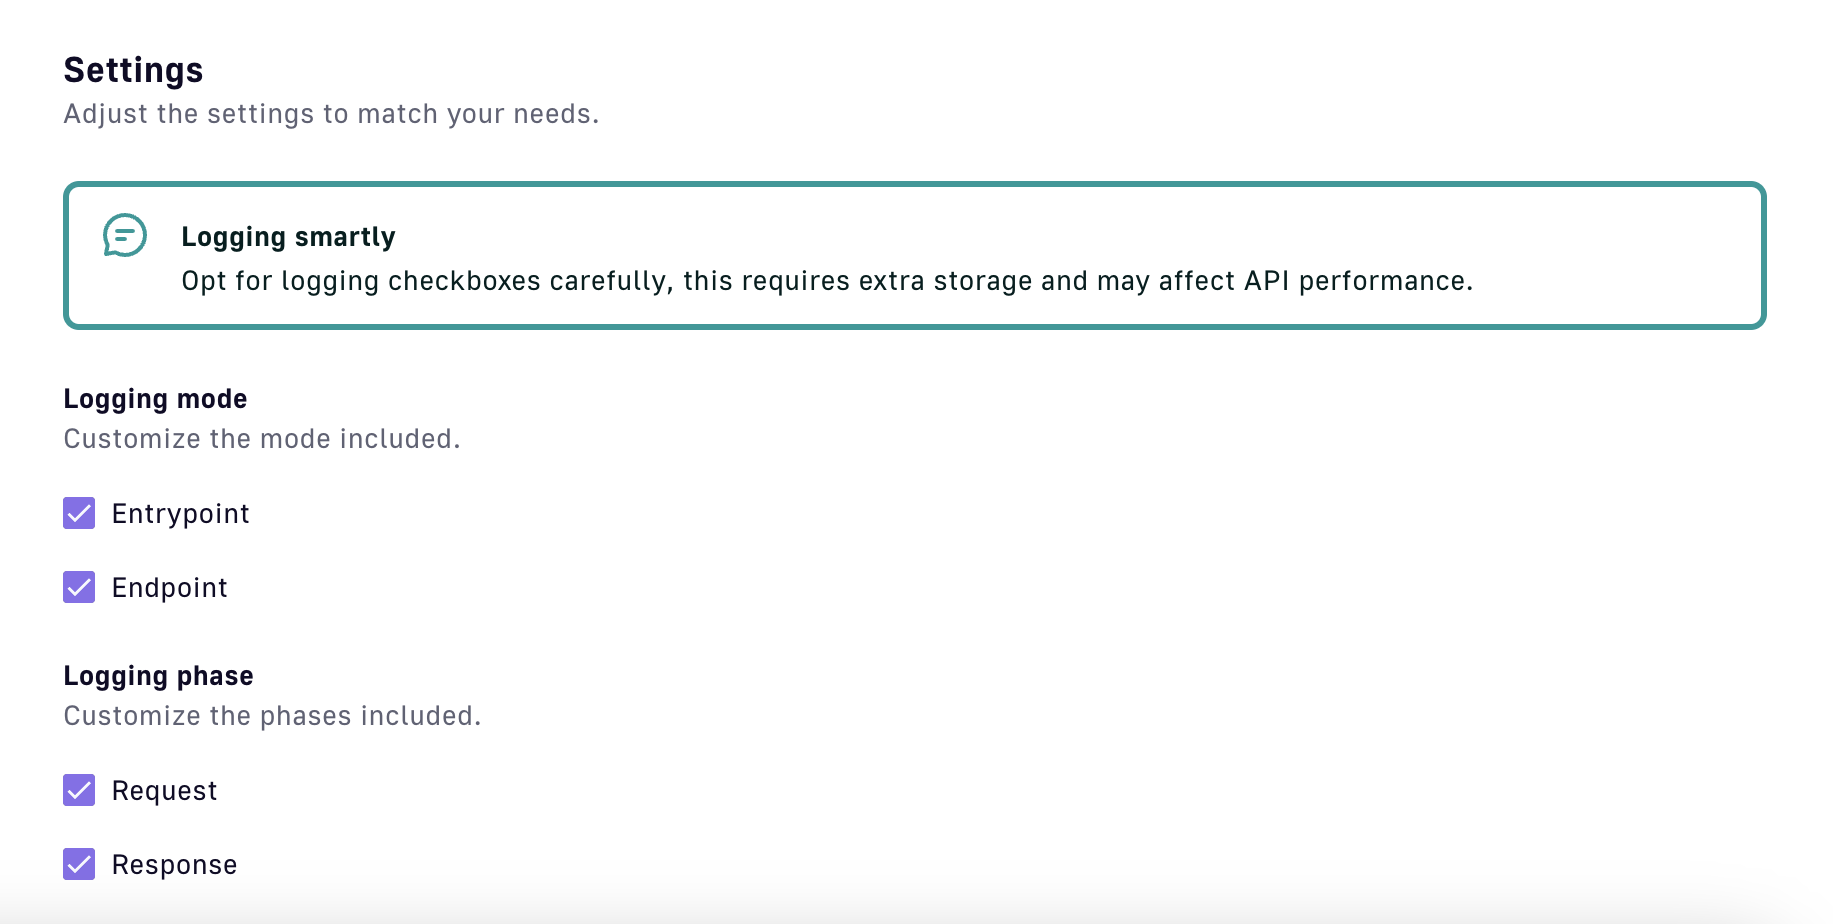
To configure which information is recorded, select from the following options:
- Logging mode: Select from Entrypoint and Endpoint to customize which modes are logged.
- Logging phase: Select from Request and Response to customize which phases are logged.
- Content data: Select from Headers and Payload to customize which data is logged.
- Display conditions: You have the ability to filter data based on Request phase condition. This field supports the use of DSAPI Expression Language.
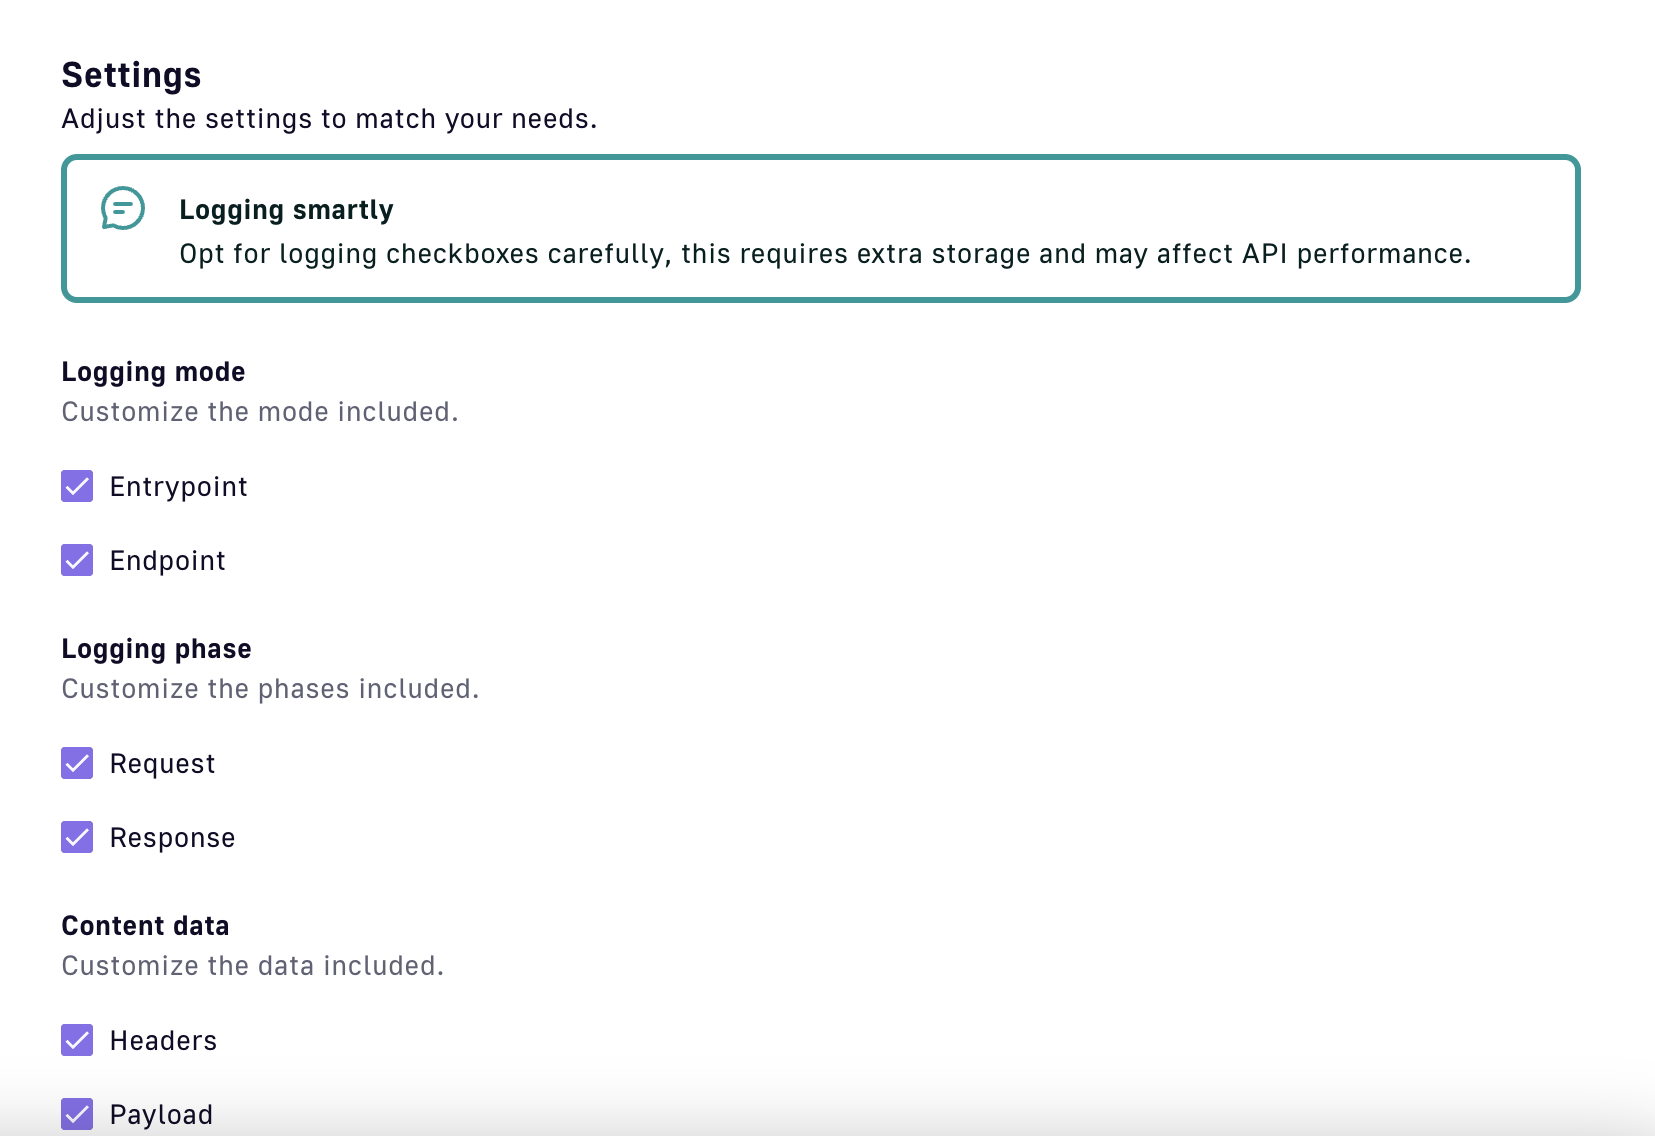
Runtime logs settings
View messages
To view the details of any entry in the list of runtime logs:
- Open your API Management Console
- Go to APIs in the left sidebar
- Select your API
- Click on API Traffic in the inner left sidebar
- Click on the Runtime Logs tab
- Click on View details for a particular entry
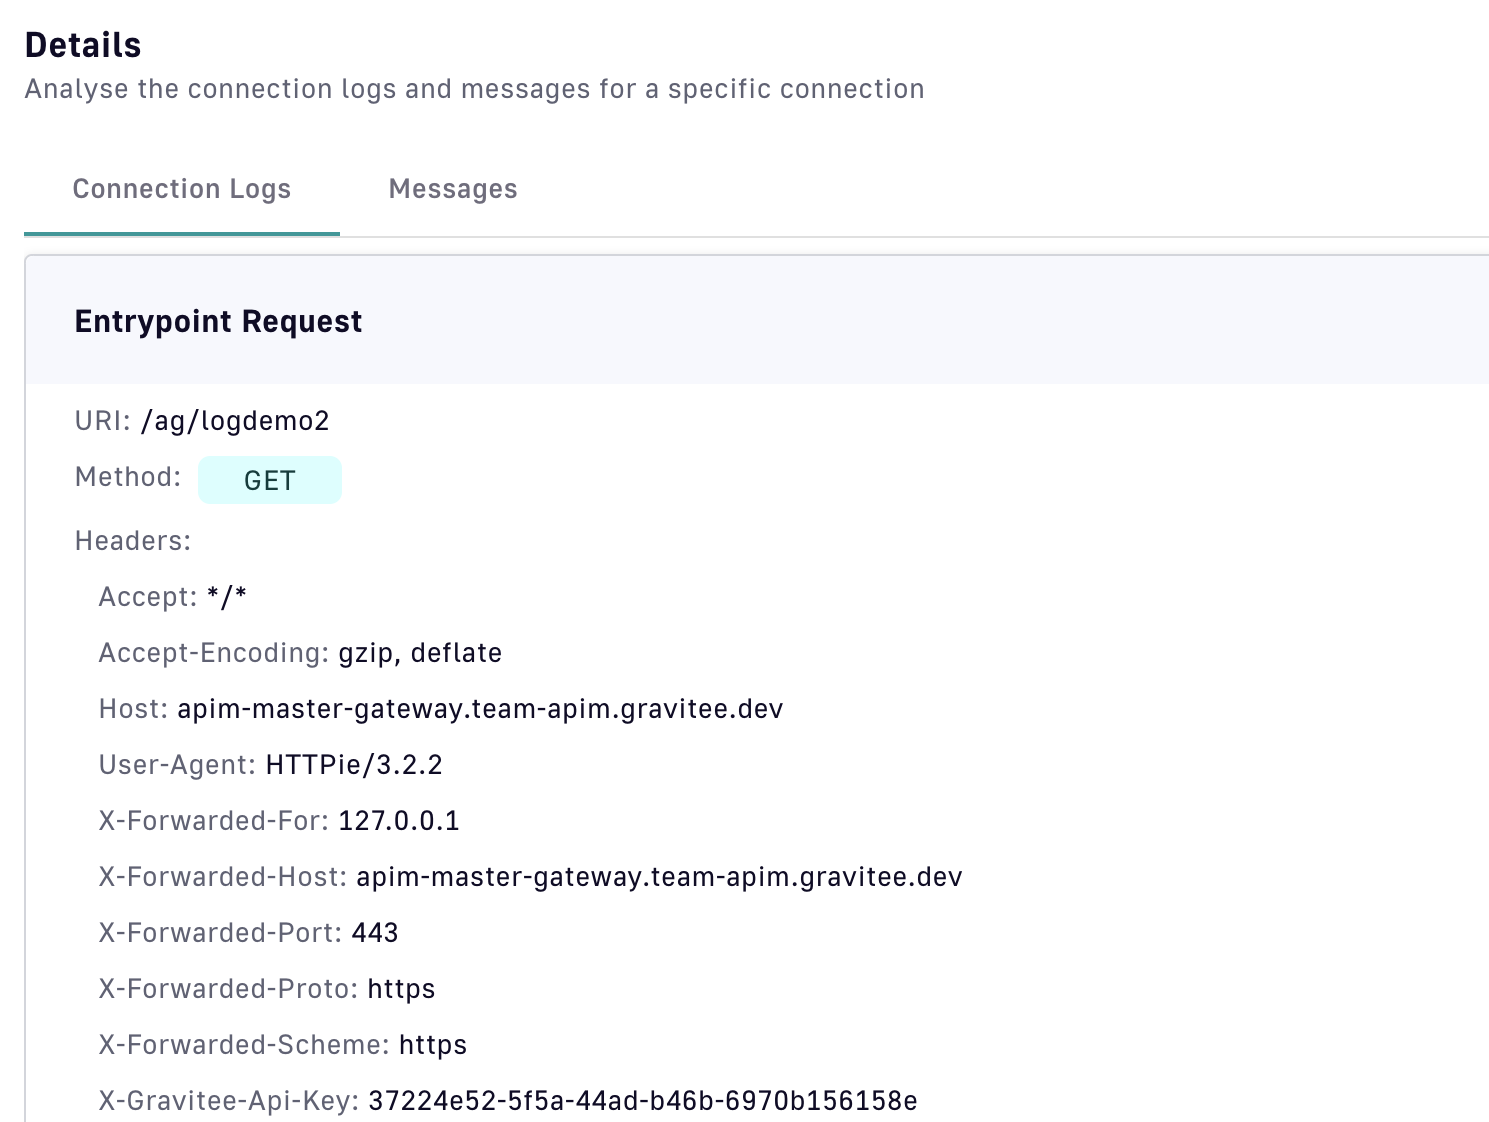
View log details
Under the Messages header, entrypoint and endpoint message details are grouped by date code:
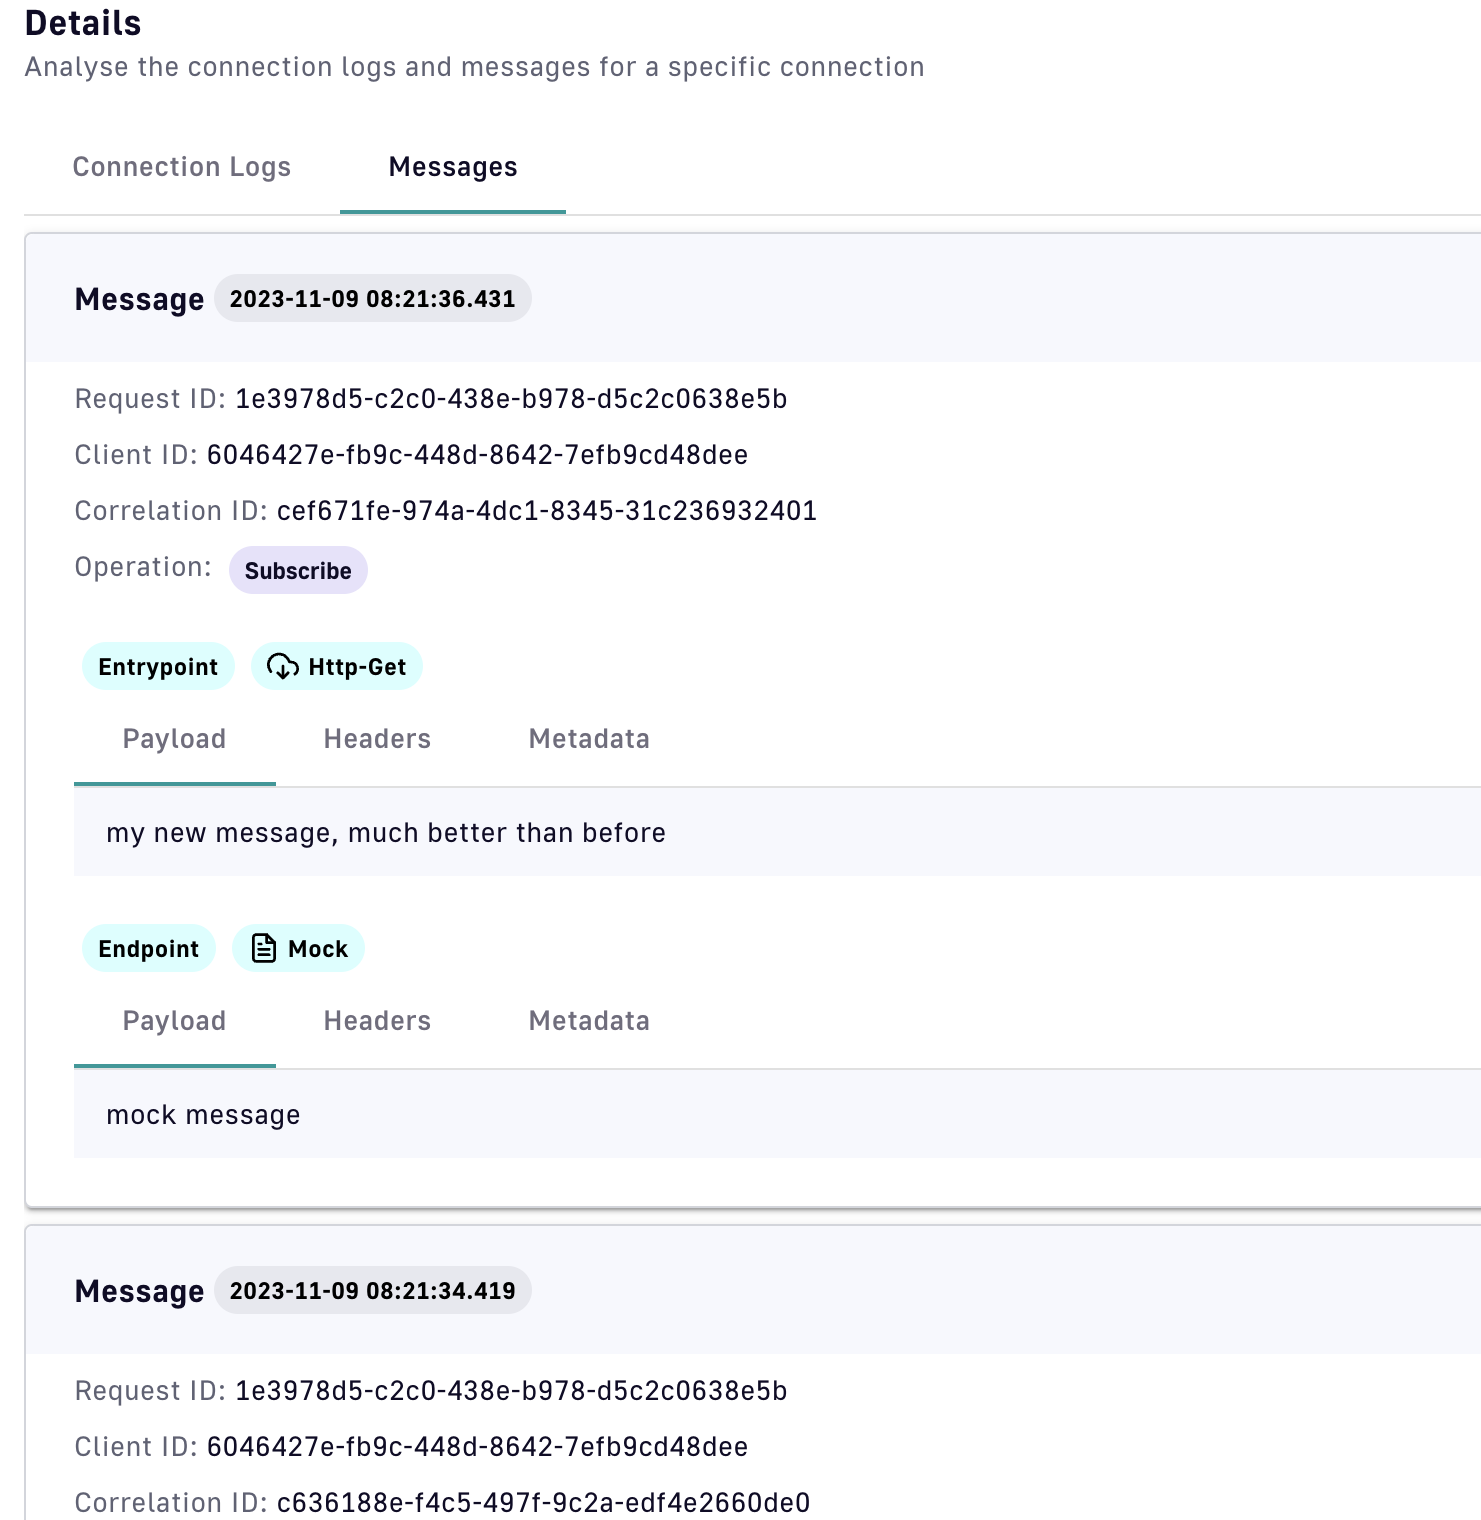
Each message record includes placeholder tabs for raw content, headers, and metadata. If the corresponding data was recorded, it will appear under the tab. If no data was recorded, the field will be empty.
Under Details, logs for the entry are grouped by Entrypoint Request, Endpoint Request, Entrypoint Response, and Endpoint Response, with Headers and Payload as the content:
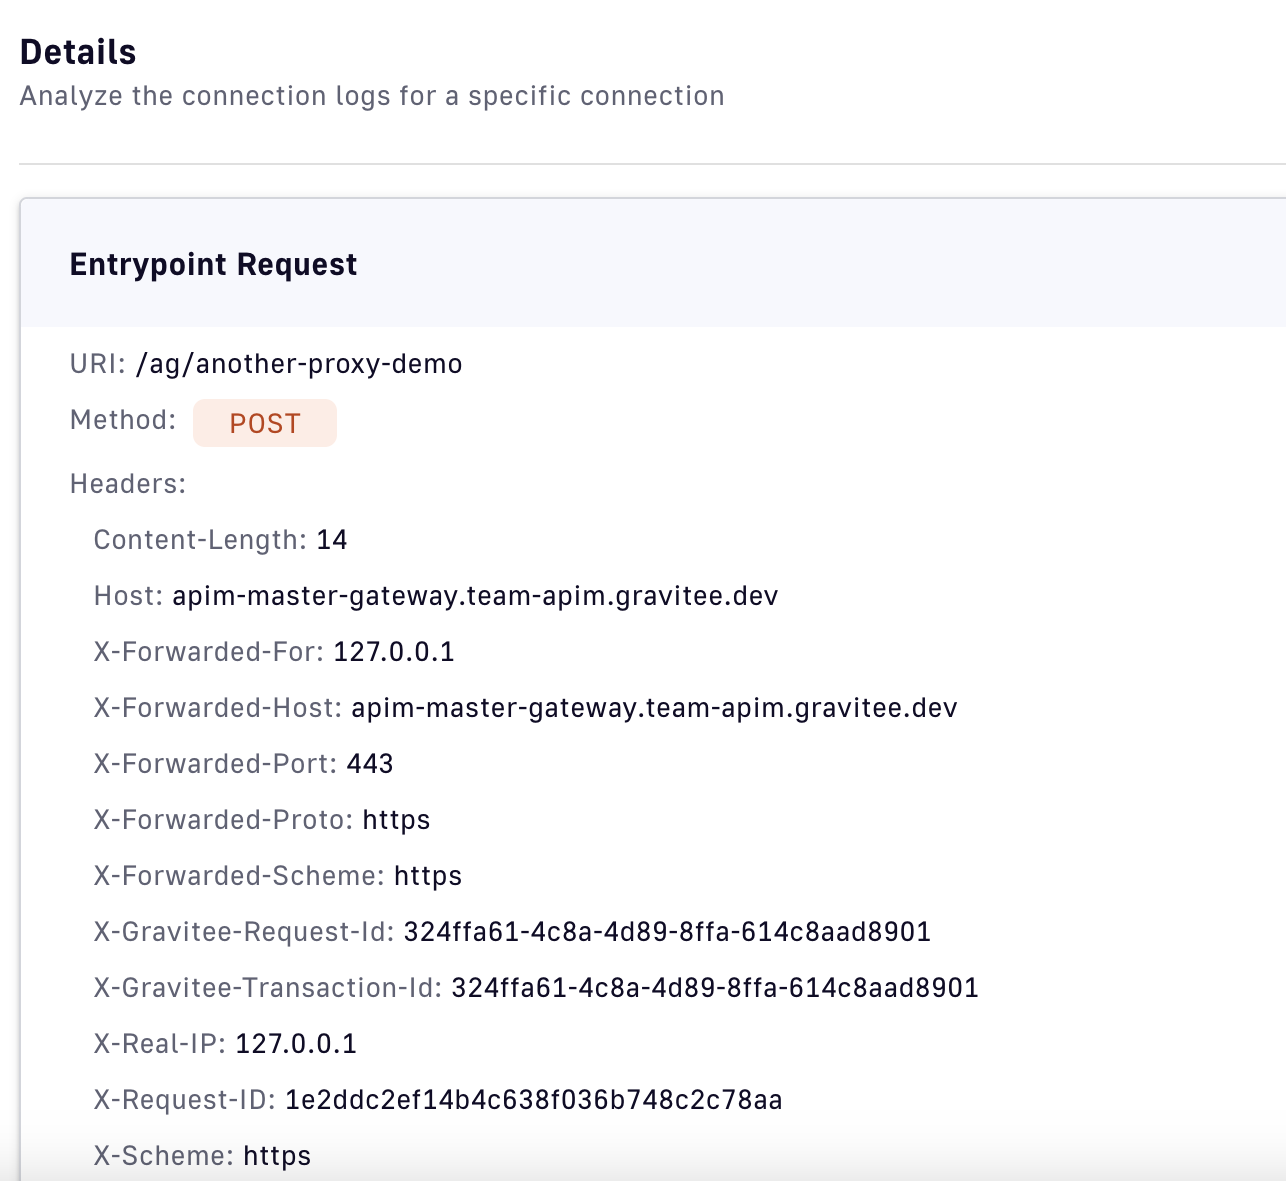
View log details
Expose metrics to Prometheus
The following sections detail the configurations necessary to expose metrics to Prometheus.
Enable the metrics service
Prometheus support is activated and exposed using the component’s internal API. The metrics service can be enabled in the DSAPI.yml configuration file:
services:
    metrics:
      enabled: true
      prometheus:
        enabled: true
localhost only and must not be invoked outside localhost. To widely expose the API, you may need to set the services.core.http.host property to the correct network interface. If you are running the application in a Docker container, set the IP to the IP address of the container. Each change requires a restart.
Configure labels
Labels are used to provide dimensionality to a metric. For example, metrics related to a HTTP request have an http_path label that allows them to query timeseries for a specific path, or any other operation.
You can specify which labels to use in the configuration file:
services:
    metrics:
      enabled: true
      labels:
        - local
        - remote
        - http_method
        - http_code
        - http_path
      prometheus:
        enabled: true
The list of available labels can be found here.
Default values are local, http_method and http_code.
Vert.x 4 is used by default. We have introduced a new field in the Prometheus configuration to enable the use of Vert.x 3 label names. To use old labels, set version to 3.10:
services:
    metrics:
      prometheus:
        naming:
          version: 3.10
Prometheus configuration
The following example requests Prometheus to scrape the formatted metrics available in the Gateway internal API:
scrape_configs:
    - job_name: 'gio-gw'
      basic_auth:
        username: admin
        password: adminadmin
      metrics_path: /_node/metrics/prometheus
      static_configs:
        - targets: ['localhost:18082']
http://localhost:9090/graph by default.
Reporters
Overview
Reporters are designed to record a variety of events occurring in the DSAPI API Management (APIM) Gateway and output them to a new source in their order of occurrence. This enables you to manage your data using a solution of your choice.
The following sections detail:
Event types
The following event types are supported:
| Type | Description |
|---|---|
request | This event type provides common request and response metrics, such as response time, application, request ID, and more. |
log | This event type provides more detailed request and response metrics. It is reported when logging has been enabled at the API level. |
health-check | This event type allows for health-check events to be reported when a health-check endpoint has been configured and enabled on an API. |
node | This event type provides some system and JVM metrics for the node DSAPI is running on. |
Available reporters
The following reporters are currently compatible with APIM:
| Type | Bundled in Distribution | Default | Enterprise only |
|---|---|---|---|
| Elasticsearch | true | true | false |
| File | true | false | false |
| TCP | true | false | true |
| Datadog | false | false | true |
Configuring reporters
Elasticsearch is the default reporter, but this section will show you how to configure different reporters. If you wish to use a reporter not included in the default distribution, you must first add the reporter as a plugin. Refer to the Plugins guide to learn more.
File reporter
The file reporter has the following configuration parameters:
| Parameter name | Description | Default value |
|---|---|---|
enabled | This setting determines whether the file reporter should be started or not. The default value is false. | false |
fileName | The path events should be written to. Use the %s-yyyy_mm_dd pattern to create one file per event type on a daily basis. | #{systemProperties['DSAPI.home']}/metrics/%s-yyyy_mm_dd} |
output | Output file type - json, message_pack, elasticsearch, csv. | json |
flushInterval | File flush interval (in ms). | 1000 |
retainDays | The number of days to retain files before deleting one. | 0 (to retain forever) |
<EVENT_TYPE>.exclude | Fields to exclude from the output. Available for json and message_pack outputs only. | none |
<EVENT_TYPE>.include | Fields to include in the output. Available for json and message_pack outputs and only if excludes have been defined. | none |
<EVENT_TYPE>.rename | Fields to rename when writing the output. Available for json and message_pack outputs only. | none |
The configuration example below excludes all fields from the request JSON file except the api and application fields, renames the application field to app, and excludes log, node, and health-check events from being reported:
reporters:
   file:
     enabled: true
     fileName: ${DSAPI.home}/metrics/%s-yyyy_mm_dd
     output: json
     request:
       exclude:
         - "*"
       include:
         - api
         - application
       rename:
         application: app
     log:
       exclude:
         - "*"
     node:
       exclude:
         - "*"
     health-check:
       exclude:
         - "*"
request, log, node or health-check. Fields referenced as exclude, include and rename items all support jsonPath for accessing nested elements.
TCP reporter
The file reporter has the following configuration parameters:
| Parameter name | Description | Default value |
|---|---|---|
enabled |
This setting determines whether the TCP reporter should be started or not. The default value is false. |
false |
output |
Format of the data written to the TCP socket - json, message_pack, elasticsearch, csv. | json |
host |
The TCP host where the event should be published. This can be a valid host name or an IP address. | localhost |
port |
The TCP port used to connect to the host. | 8123 |
connectTimeout |
Maximum time allowed to establish the TCP connection in milliseconds. | 10000 |
reconnectAttempts |
This setting determines how many times the socket should try to establish a connection in case of failure. | 10 |
reconnectInterval |
Time (in milliseconds) between socket connection attempts. | 500 |
retryTimeout |
If the max reconnect attempts have been reached, this setting determines how long (in milliseconds) the reporter should wait before trying to connect again. | 5000 |
tls.enabled |
Enable TLS | false |
tls.verifyClient |
If true, client certificate will be sent for mutual TLS negotiation. When enabling this, providing a key-store is required so that mutual TLS negotiation can happen. | false |
tls.keystore.type |
The type of key-store to use (either PEM, JKS or PFX) | null |
tls.keystore.password |
The password to use for the key-store (only for JKS and PFX types) | null |
tls.keystore.certs |
The list of certificates used, when type is PEM | null |
tls.keystore.keys |
The list of keys used, when type is PEM | null |
tls.truststore.type |
The type of trust-store to use (either PEM, JKS or PFX) | null |
tls.truststore.password |
The password to use for the trust-store (only for JKS and PFX types) | null |
tls.keystore.certs |
The list of certificates to trust, when type is PEM | null |
reporters:
   tcp:
     enabled: true
     host: localhost
     port: 9001
     output: json
     request:
       exclude:
         - "*"
       include:
         - api
         - application
       rename:
         application: app
     log:
       exclude:
         - "*"
     node:
       exclude:
         - "*"
     health-check:
       exclude:
         - "*"
     tls:
       enabled: true
       verifyClient: true
       keystore:
         type: pem
         keys:
         - client.key
         certs:
         - client.crt
       truststore:
         type: pem
         certs:
         - logstash.crt
Datadog reporter
This reporter allows you to send APIM Gateway events to Datadog listening server.
In the following table, you can see how different data from DSAPI has been transformed into the Datadog format.
| DSAPI | Datadog |
|---|---|
Monitor |
Metrics |
EndpointStatus |
Events |
Metrics |
Metrics |
Log |
Log |
The Datadog reporter has the following configuration parameters:
| Parameter name | Description | Default value |
|---|---|---|
enabled | This setting determines whether the Datadog reporter should be started or not. The default value is false. | false |
site | If you don’t use the default website of Datadog, for example if the data center is in the EU, then you need to set this variable. | null |
authentication | In order to send data to Datadog, you need to provide your Authentication details and all supported Datadog Authentication mechanisms can be used in here as well. You need to choose only one Authentication type and remove the rest. | N/A |
The configuration is loaded from the common APIM Gateway configuration file, DSAPI.yml. This will send the data to your Datadog account:
reporters:
   datadog:
     enabled: true
     site: "datadoghq.eu"
     authentication:
       #apiKeyPrefix: ""
       apiKey: "YOUR_API_KEY"
       #appKey: "YOUR_APP_KEY"
       #tokenScheme: ""
       #token: "YOUR_TOKEN"
       #username: "YOUR_USERNAME"
       #password: "YOUR_PASSWORD"
     #http:
     #  proxy:
     #    type: HTTP #HTTP, SOCK4, SOCK5
     #    https:
     #      host: localhost
     #      port: 3128
     #      username: user
     #      password: secret
     #customTags: >
     #  s1.company.com:9092,
     #  s2.company.com:9092,
     #  s3.company.com:9092
     #log: # (Following mapping section is also available for other types: node, health-check, log)
     #  exclude: # Can be a wildcard (ie '*') to exclude all fields (supports json path)
     #    - clientRequest
     #    - clientResponse
     #    - proxyRequest
     #request: # (Following mapping section is also available for other types: node, health-check, log)
     #  exclude:
     #    - apiResponseTimeMs
Shared policy groups
With shared policy groups, you can define a collection of policies in a central location and use them across multiple APIs. For more information about Shared policy groups, see the following articles:
Shared policy groups overview
With shared policy groups, you can define a collection of policies in a central location and use them across multiple APIs. Also, you can complete the following actions:
- Define a standard set of policies to shape traffic
- Enforce security standards
- Transform messages.
The deployment of a shared policy group to the gateway is independent of the deployment lifecycle of the APIs the shared policy group is used in. If you make a change to the shared policy group, and then deploy it to the gateway, all APIs will pick up the changes when the next connection begins, without requiring the APIs to be restarted. When using this feature at scale, inform your team of any changes you make, and test your changes before deploying to a higher environment.
- Shared policy groups only work on the DSAPI v4 API definition.
Creating shared policy groups
- Navigate to the shared policy groups by completing the following sub-steps:
a. Navigate to Settings, and then click Gateway.
b. Click Shared Policy Group.
- Click Add Shared Policy Group.
- Depending on the chain that you want execute on, select either proxy APIs or message APIs.
- Select the phase of API execution you want the chain to execute on.
- In the Add Shred Policy Group for API window, provide the following information for your API:
- Name
- Description
- Prerequisite message. When the group is used in an API, the prerequisite message is a text warning that is shown in the policy studio. This message indicates to users that the shared policy group requires additional configuration in the API to function. For example, context attributes.
- Click Save.
Adding a policy chain
- Navigate to the light version of the DSAPI policy studio,
- In the policy chain, click the plus symbol. You see a list of policies filtered to those are compatible with the phase the shared policy group executes on.
- Add the policies to the chain, and then configure the policies.
- To persist the changes, click Save.
- To deploy the shared policy group to the gateway, click Deploy.
You can now use the shared policy group in an API flow.
Adding a shared policy group
Before you begin
- Create an API flow
Procedure
- To add a policy flow, click the plus button. You see the that are applicable to the phase.
- (Optional) To filter the result for Shared policy groups, click Shared Policy Group.

Policies for Request phase screen with the Shared Policy group filter appiled
- Click Select for the shared policy group that you want to add to the chain.
- (Optional) In the Policies for Request phase, add a description and trigger condition. If you added a prerequisite message for your policy chain, it is shown here.

Policies for Request phase screen with a shared policy group selected
- Click Add policy.
Editing a shared group policy
You can edit the shared policy group, complete the following steps:
- Navigate to the policy chain.
- On the shared policy group tile, click the three vertical dots.
- From here, you can complete the following actions:
- Edit the policy group's name and condition.
- Review the prerequisite message.
- Edit the group.
- Disable the group.
- Delete the group.
- Save, and then deploy your API within the regular flow of the API.
Viewing version history of the shared policy group
- To view the version history of a shared policy group, click Version History.
You see a list of the version in reverse choronological order.

Version of Transform Headers Demo screen
Comparing versions
- To compare two versions, select two versions to compare.
You can compare the versions using any of the following methods:
- To compare the versions using the raw JSON file, click Raw.
- To compare the versions side by side, click Diff Side by Side.
- To compare the versions line by line, click Diff LIne by Line.

Restoring a previous version
To restore a previous version, complete the following steps:
- In the version details window, click Restore version. This action creates a pending version that you must deploy.
Default AI flows overview
By default, DSAPI APIM 4.5 has three shared policy groups that empowers AI use cases. These policy groups can be chained together to support LLM proxy use cases. For example, prompt templating, prompt security, and LLM rate limiting.
Here are the default shared policy groups:
- Rate Limit & Request token limit: This policy limits the number of requests and number of tokens sent in a request. To use this policy, set context attributes prompt, maxTokens, and maxRequests.
- Prompt Templating Example: Uses the Assign Content policy to create and enhance a prompt from external data.
- In this example, the shared policy group takes an input field of ip in the request body and adds it as an attribute.
- It runs an HTTP Callout policy to find the IP address set in the context attribute and return its country and city as context attributes.
- From the context attributes, it crafts a prompt in the Assign Attributes policy.
- Redirect to HuggingFace: This policy group crafts the body of a request to HuggingFace, which includes model parameters and options, and then it sends that request to a Dynamic Routing policy that redirects to HuggingFace.
You can use these shared policy groups together to build an LLM proxy for prompt templating and rate limiting. Also, you can edit these shared policy groups to match your needs.
You can delete these shared policy groups if you do not wish to have them. If you delete them, they will not return in that environment.
Limitations
Shared policy groups have the following limitations:
- You cannot export a shared policy group. As a workaround, if you have a valid personal access token and the APIM_HOST environment variable set, you can download the definition through the management API using the following command (editing environment variables and environment ID as needed):
curl --request GET \
  --url https://${MAPI_URL}/management/v2/environments/DEFAULT/shared-policy-groups/${GROUP_ID} \
  --header 'Accept: application/json' \
  --header 'Authorization: Basic ${PERSONAL_ACCESS_TOKEN}'
- You cannot import a shared policy group. As a workaround, if you have a valid personal access token and the APIM_HOST environment variable set, you can create a shared policy group through the management API using the following command, with the
datafield containing the group definition:
curl --request POST \
  --url https://${MAPI_URL}/management/v2/environments/DEFAULT/shared-policy-groups \
  --header 'Accept: application/json' \
  --header 'Authorization: Basic ${PERSONAL_ACCESS_TOKEN}' \
  --header 'Content-Type: application/json' \
  --data '{
  "crossId": "5e2b3b3b-3b3b-3b3b-3b3b-3b3b3b3b3b3b",
  "name": "My Shared Policy Group",
  "description": "This is a shared policy group",
  "prerequisiteMessage": "The resource cache \"my-cache\" is required",
  "apiType": "MESSAGE",
  "phase": "REQUEST",
  "steps": [
    {
      "name": "string",
      "description": "string",
      "enabled": true,
      "policy": "string",
      "configuration": {},
      "condition": "string",
      "messageCondition": "string"
    }
  ]
}'
- If you import an API with a shared policy group reference that does not exist in the higher environment, the API executes with no issues. Future versions of DSAPI will allow the platform administrator to configure whether to allow APIs to run or be imported with missing shared policy groups.
Notifications
Introduction
DSAPI allows you to set up alerts and notifications based on events recognized by the Gateway. You can set up notifications that appear in the DSAPI API Management Console or that are sent to DSAPI users via email. You can also create custom alerts based on user-defined rules and conditions.
Configure notifications for your APIs
APIM includes 3 categories of notifications and 3 types of notifiers. Their purpose and configuration are described below, along with customization via templates.
Notifications
Portal notifications relate to the platform and include the following:
| Name | What triggers it? |
|---|---|
| First Login | User logs in for the first time |
| Group invitation | User is invited in a group |
| Message | Custom message is sent to an Environment Role via notification |
| New Support Ticket | New support ticket is created |
| Password Reset | Password is reset |
| User Created | New user is created |
| User Registered | User is registered |
| User Registration Request | New user is created and automatic validation is disabled |
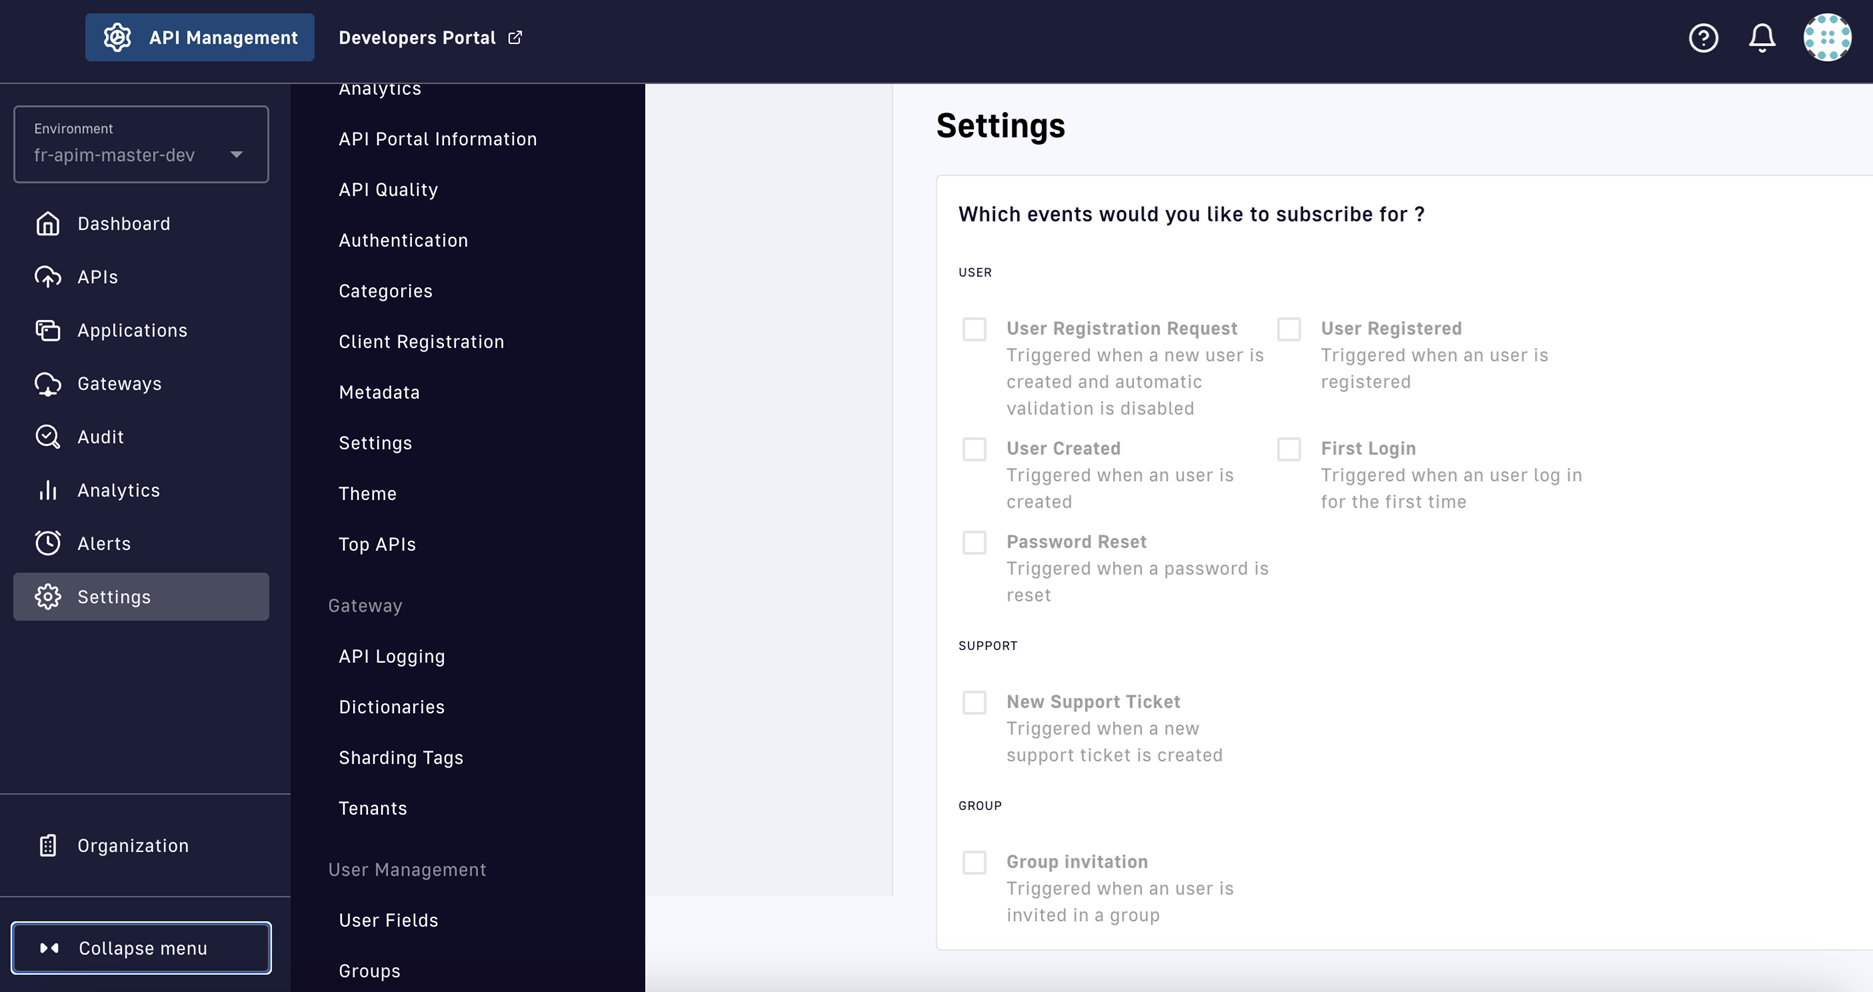
To subscribe to Portal notifications, go to APIM Console > Settings > Notifications:
API notifications relate to a specific API and include the following:
| Name | What triggers it? |
|---|---|
| Accept API review | API review is accepted |
| API Deprecated | API is deprecated |
| API key Expired | API key is expired |
| API key Renewed | API key is renewed |
| API key Revoked | API key is revoked |
| API Started | API is started |
| API Stopped | API is stopped |
| Ask for API review | API is ready for review |
| Message | Custom message is sent to an Application Role via notification |
| New Rating | New rating is submitted |
| New Rating Answer | New answer is submitted |
| New Subscription | Subscription is created |
| New Support Ticket | New support ticket is created |
| Reject API review | API review is rejected |
| Subscription Accepted | Subscription is accepted |
| Subscription Closed | Subscription is closed |
| Subscription Paused | Subscription is paused |
| Subscription Rejected | Subscription is rejected |
| Subscription Resumed | Subscription is resumed |
| Subscription Transferred | Subscription is transferred |
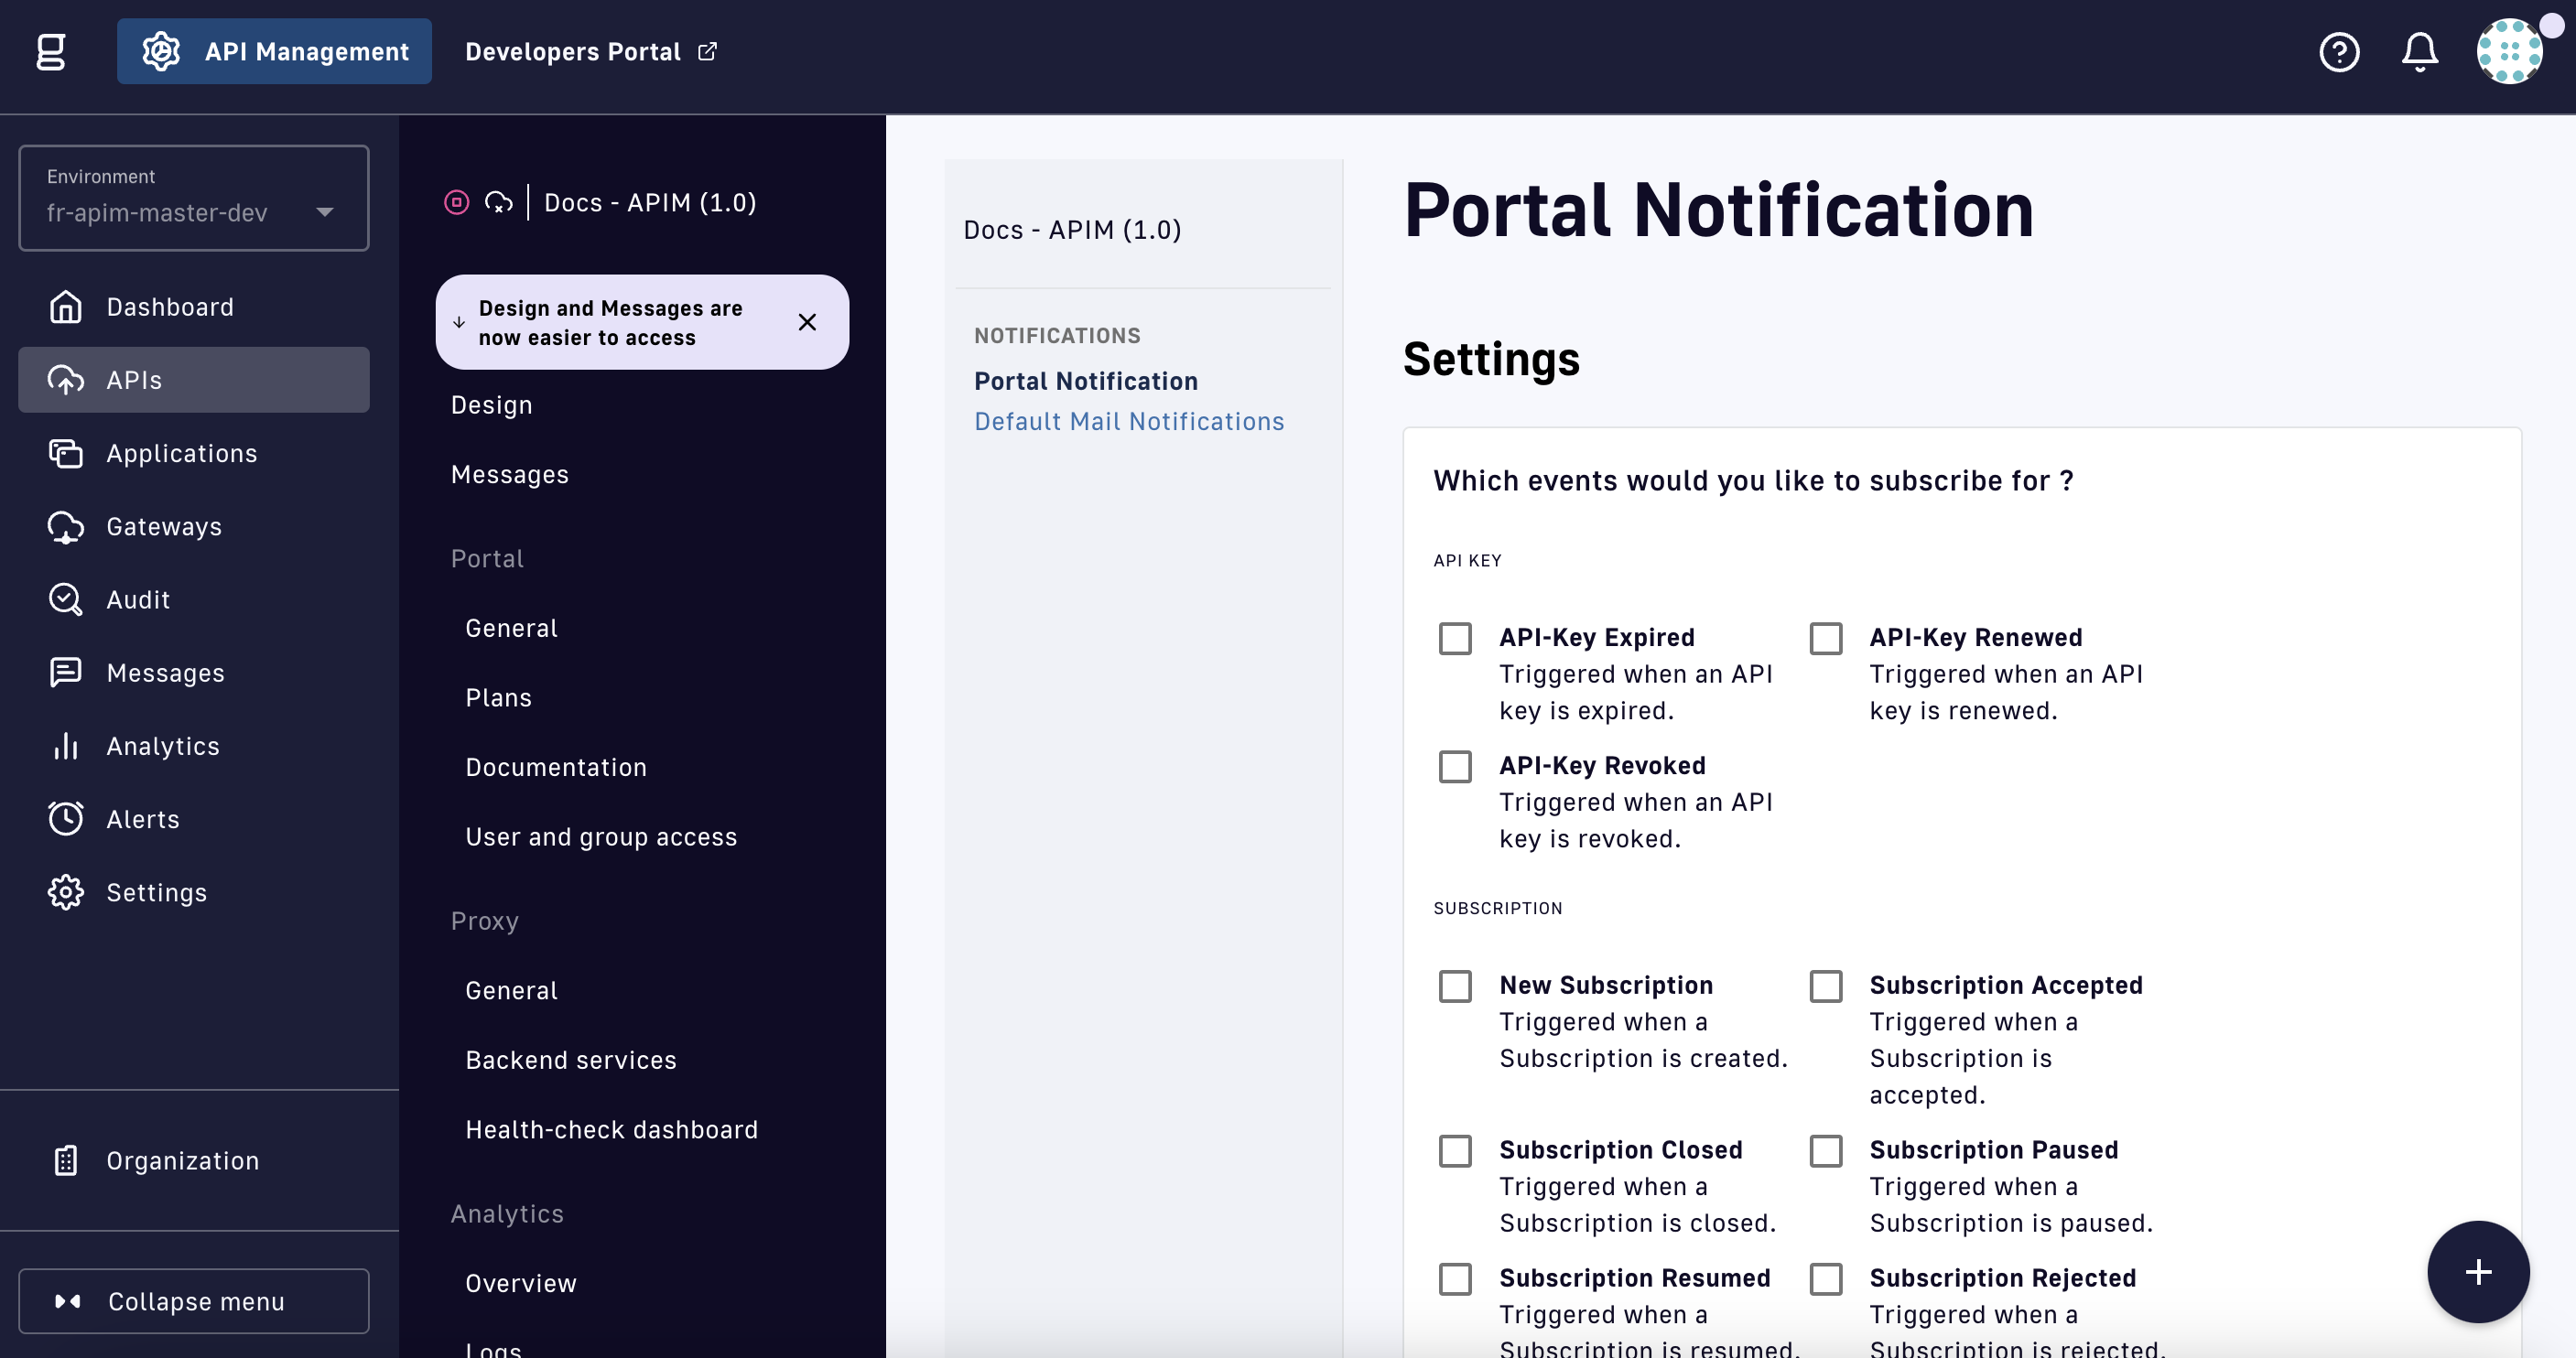
To subscribe to notifications related to a specific API, go to APIM Console > APIs, select the API, and click Notifications:
Application notifications relate to a specific application and include the following:
| Name | What triggers it? |
|---|---|
| New Subscription | Subscription is created |
| New Support Ticket | New support ticket is created |
| Subscription Accepted | Subscription is accepted |
| Subscription Closed | Subscription is closed |
| Subscription Paused | Subscription is paused |
| Subscription Rejected | Subscription is rejected |
| Subscription Resumed | Subscription is resumed |
| Subscription Transferred | Subscription is transferred |
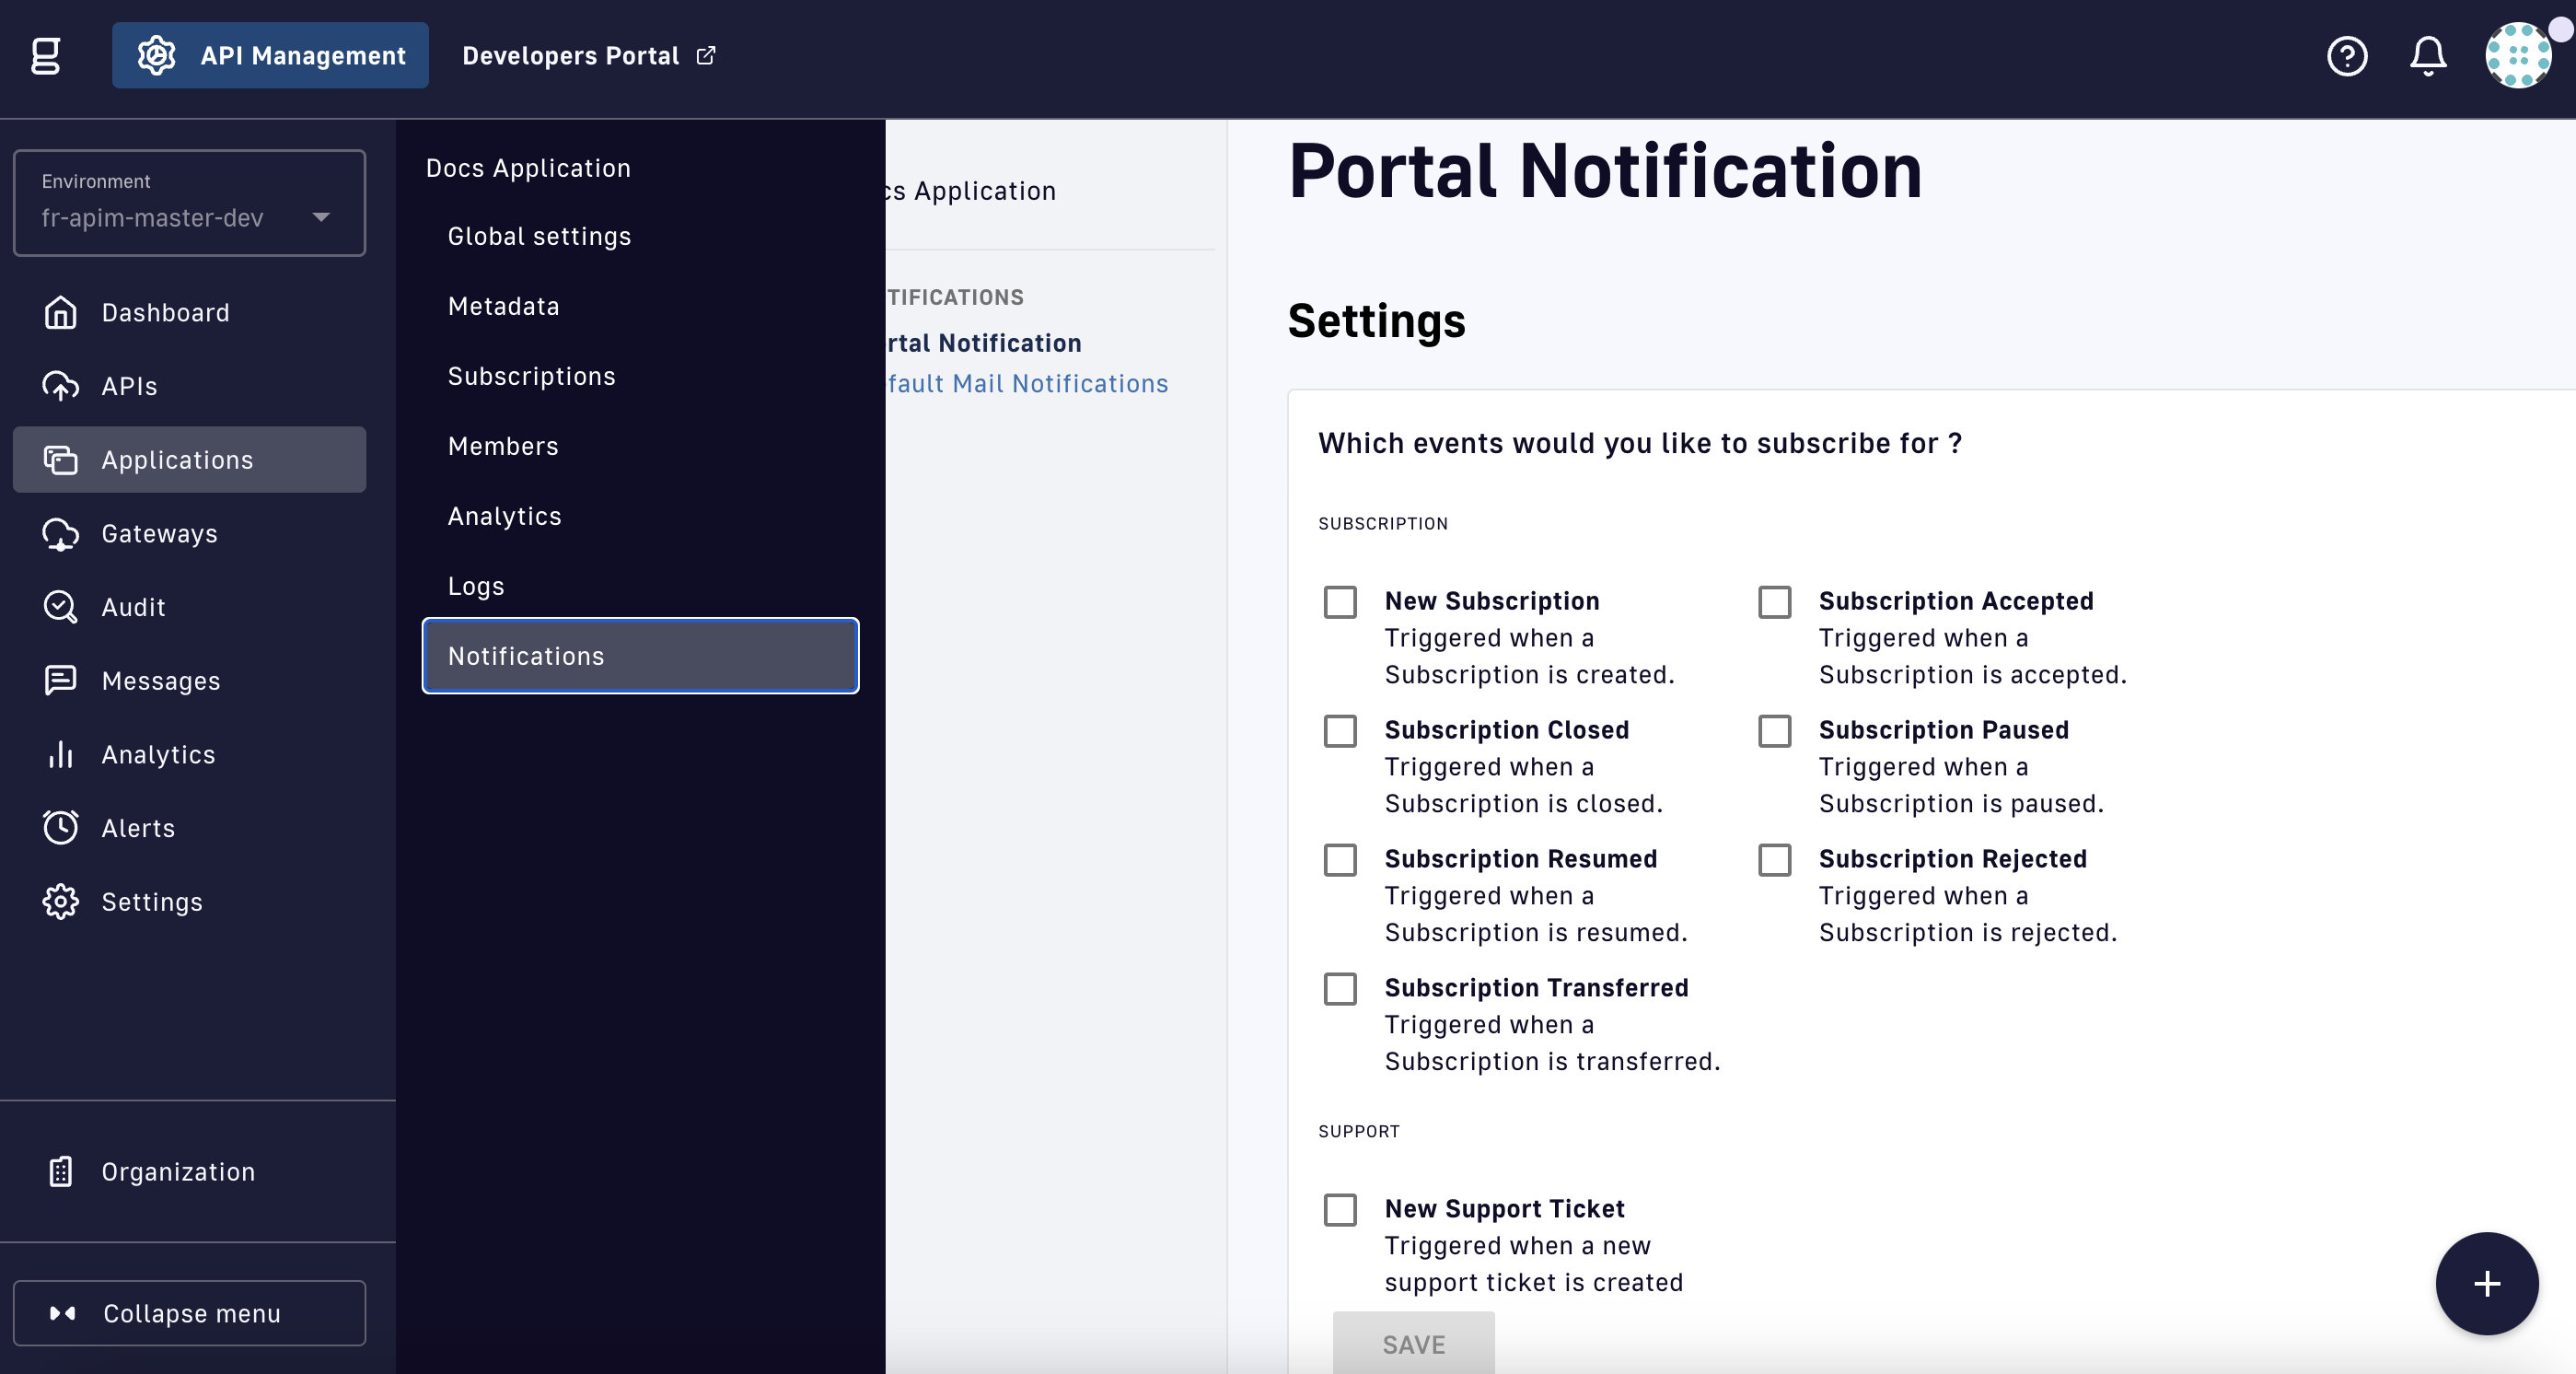
To subscribe to notifications related to a specific application, go to APIM Console > Applications, select the application, and click Notifications:
Notifiers
The Portal notifier is the default notifier and sends messages to users logged in to the Developer Portal. Notifications appear in the Portal or Management Console.
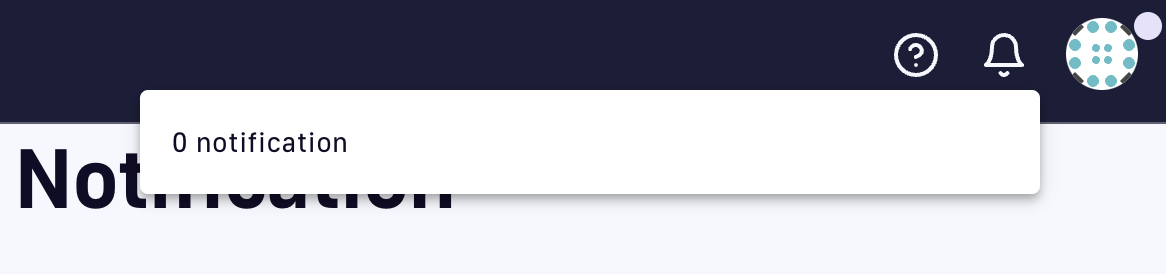
They can be displayed by clicking the bell icon in the header menu of APIM Console:
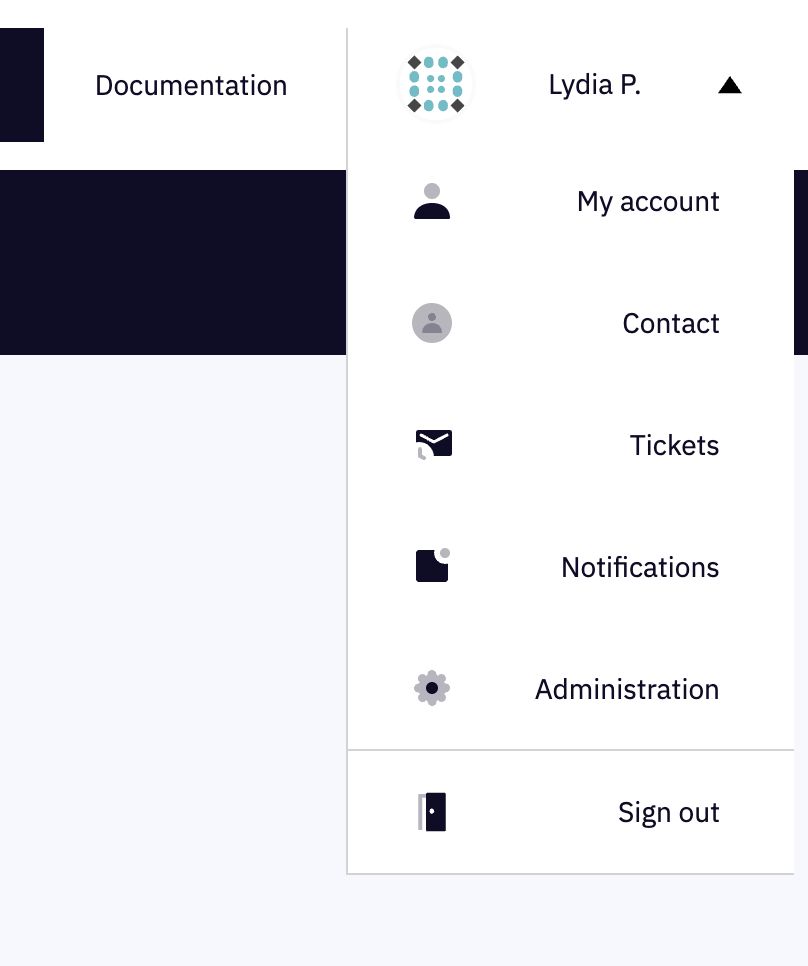
In the Developer Portal, notifications are displayed in a page accessible from the user menu:
The templates of Portal notifications can be customized in Settings.
Email notifiers send an email to a specific list of email addresses. To create a new email notifier:
- Define the email notifier (who the email notification will come from).
- Define the email list (who the email notification will be sent to). Multiple emails can be added as long as they are separated by a
,or a;. - Subscribe to the desired notifications.
The templates of email notifications can be customized in Settings.
Webhook notifiers send an HTTP POST request to a configured URL. The request contains two headers and a JSON body representing the message. The headers are:
X-DSAPI-Event: Contains the event ID (e.g.,API_KEY_REVOKED)X-DSAPI-Event-Scope: Contains the type of notification (e.g.,API)
The JSON body is similar to the following (depending on the notification type, some fields may not be present in the body):
{
    "event": "",
    "scope": "",
    "api": {
      "id": "",
      "name": "",
      "version": ""
    },
    "application": {
      "id": "",
      "name": ""
    },
    "owner": {
      "id": "",
      "username": "",
      "owner": ""
    },
    "plan": {
      "id": "",
      "name": "",
      "security": "",
      "plan": ""
    },
    "subscription": {
      "id": "",
      "status": "",
      "subscription": ""
    }
  }
To create a Webhook notifier:
- Click the plus icon
 .
. - Choose the Default Webhook Notifier type and give the notifier a name.
- Add the URL which APIM will call to send notifications.
- Subscribe to the desired notifications.
Templates
Email and Portal notification templates are based on HTML and YML files, located here:
templates:
    path: ${DSAPI.home}/templates
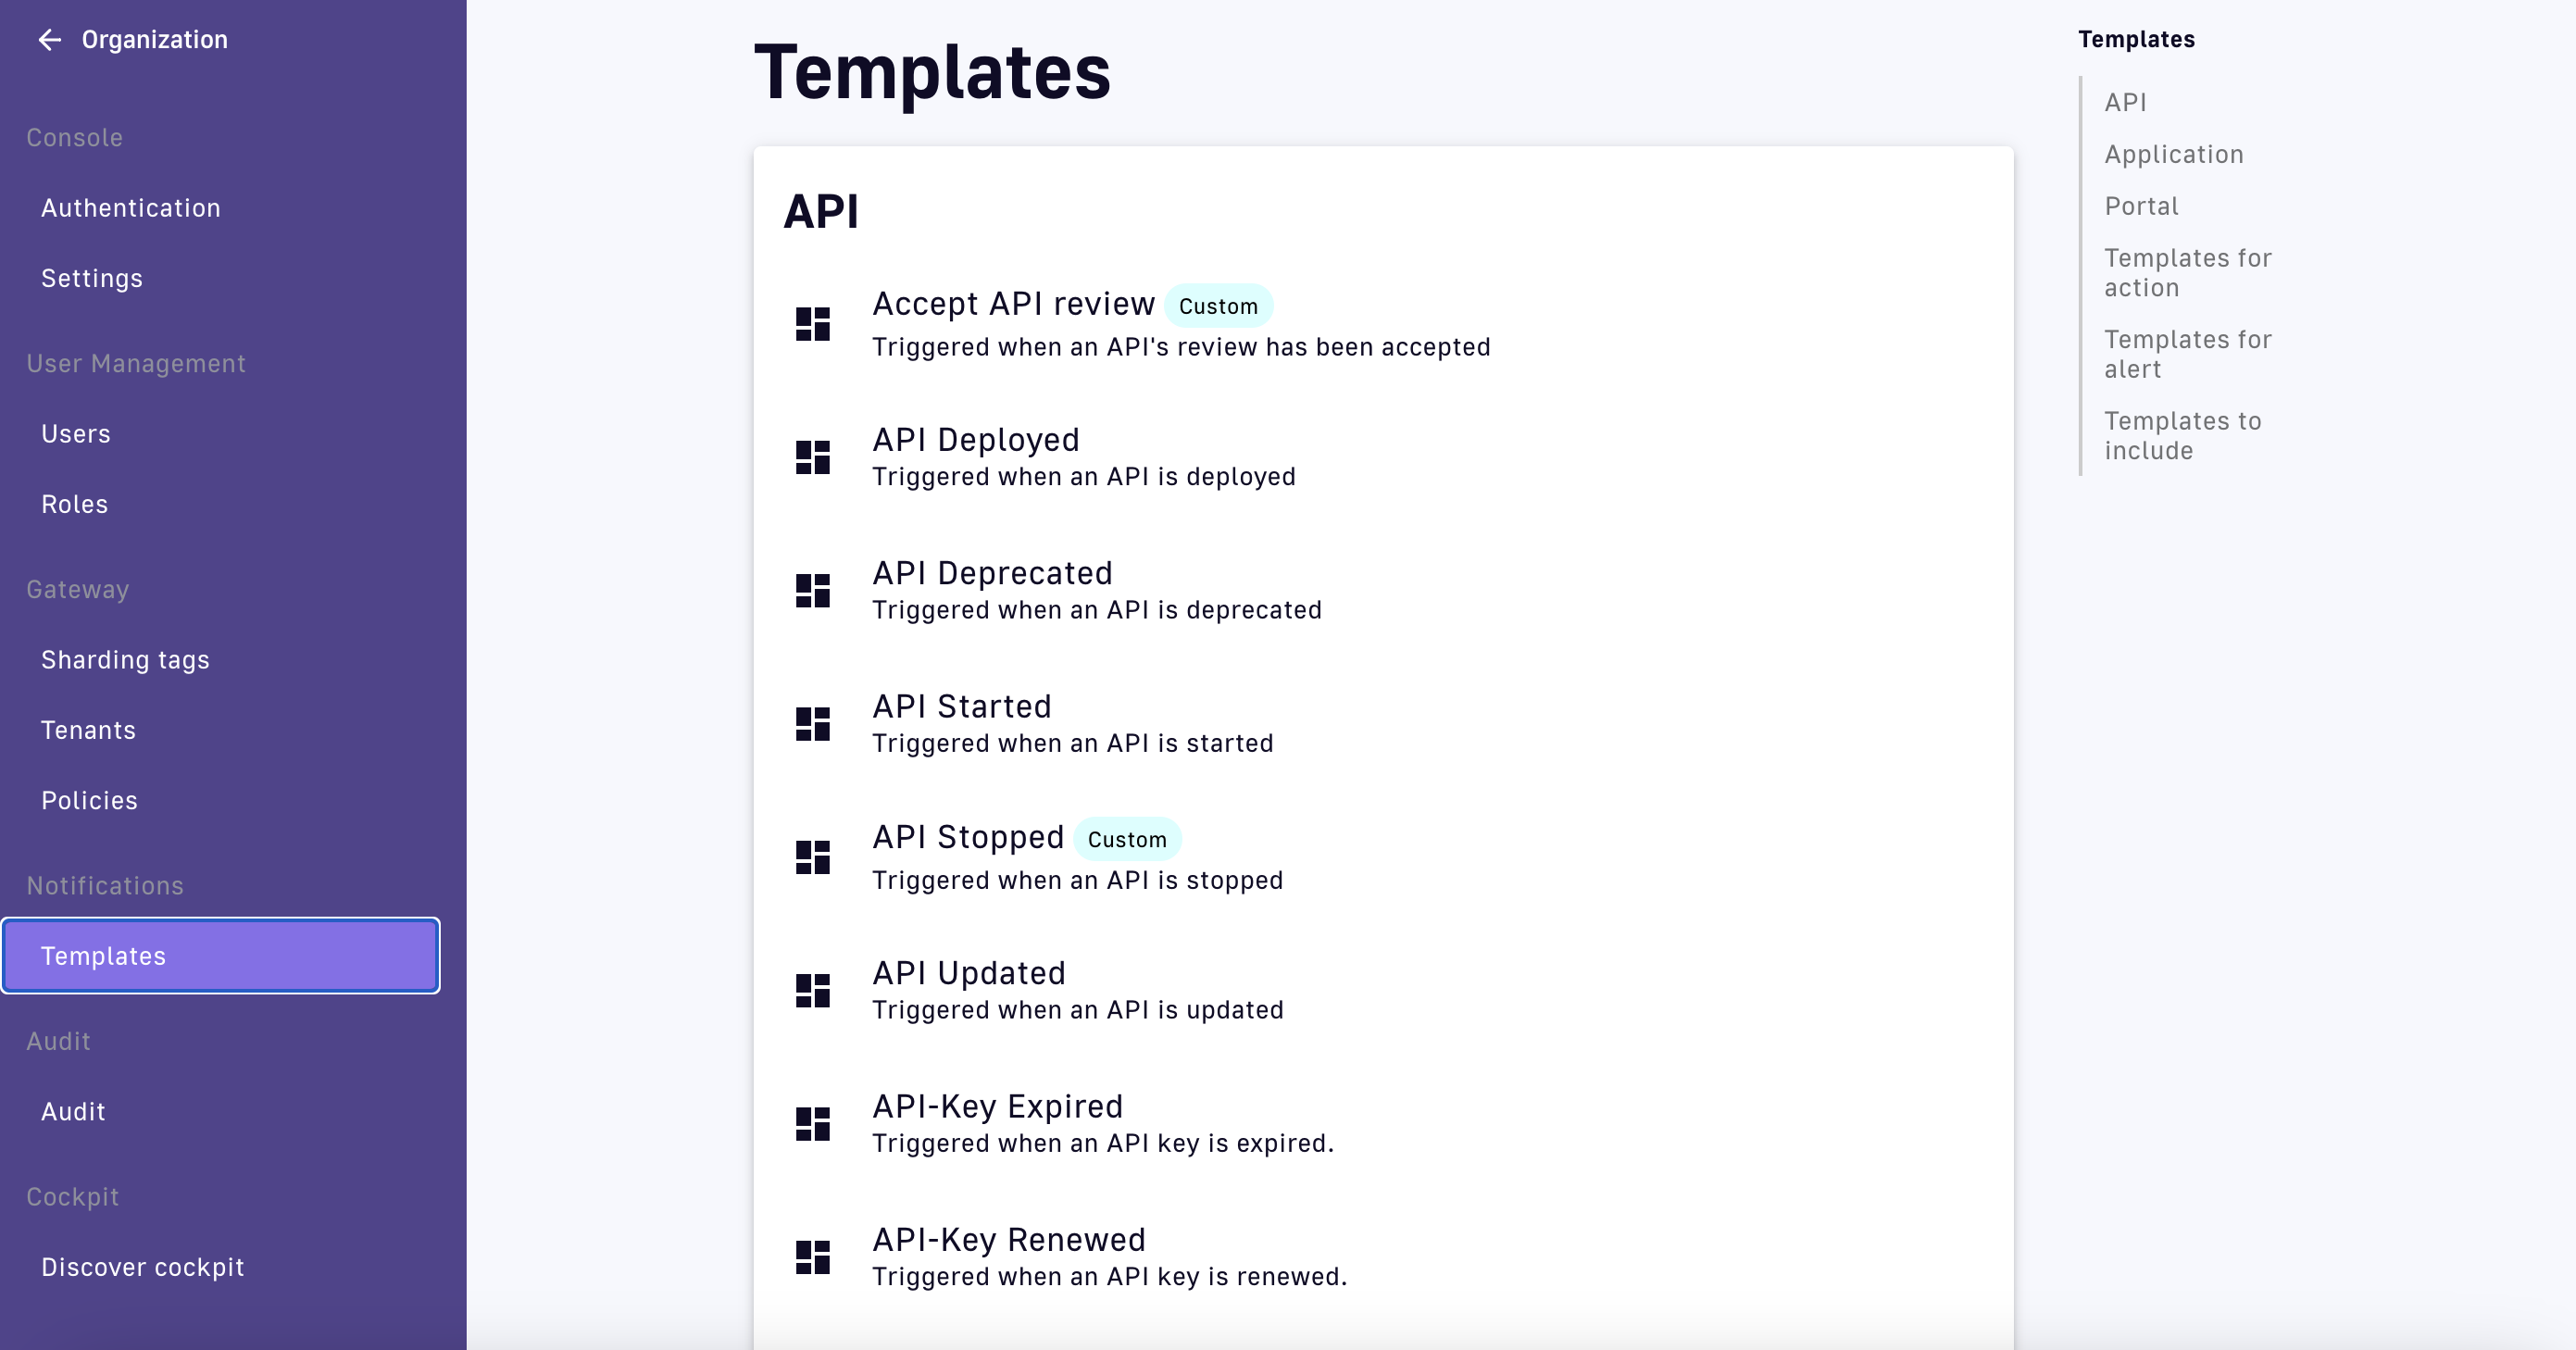
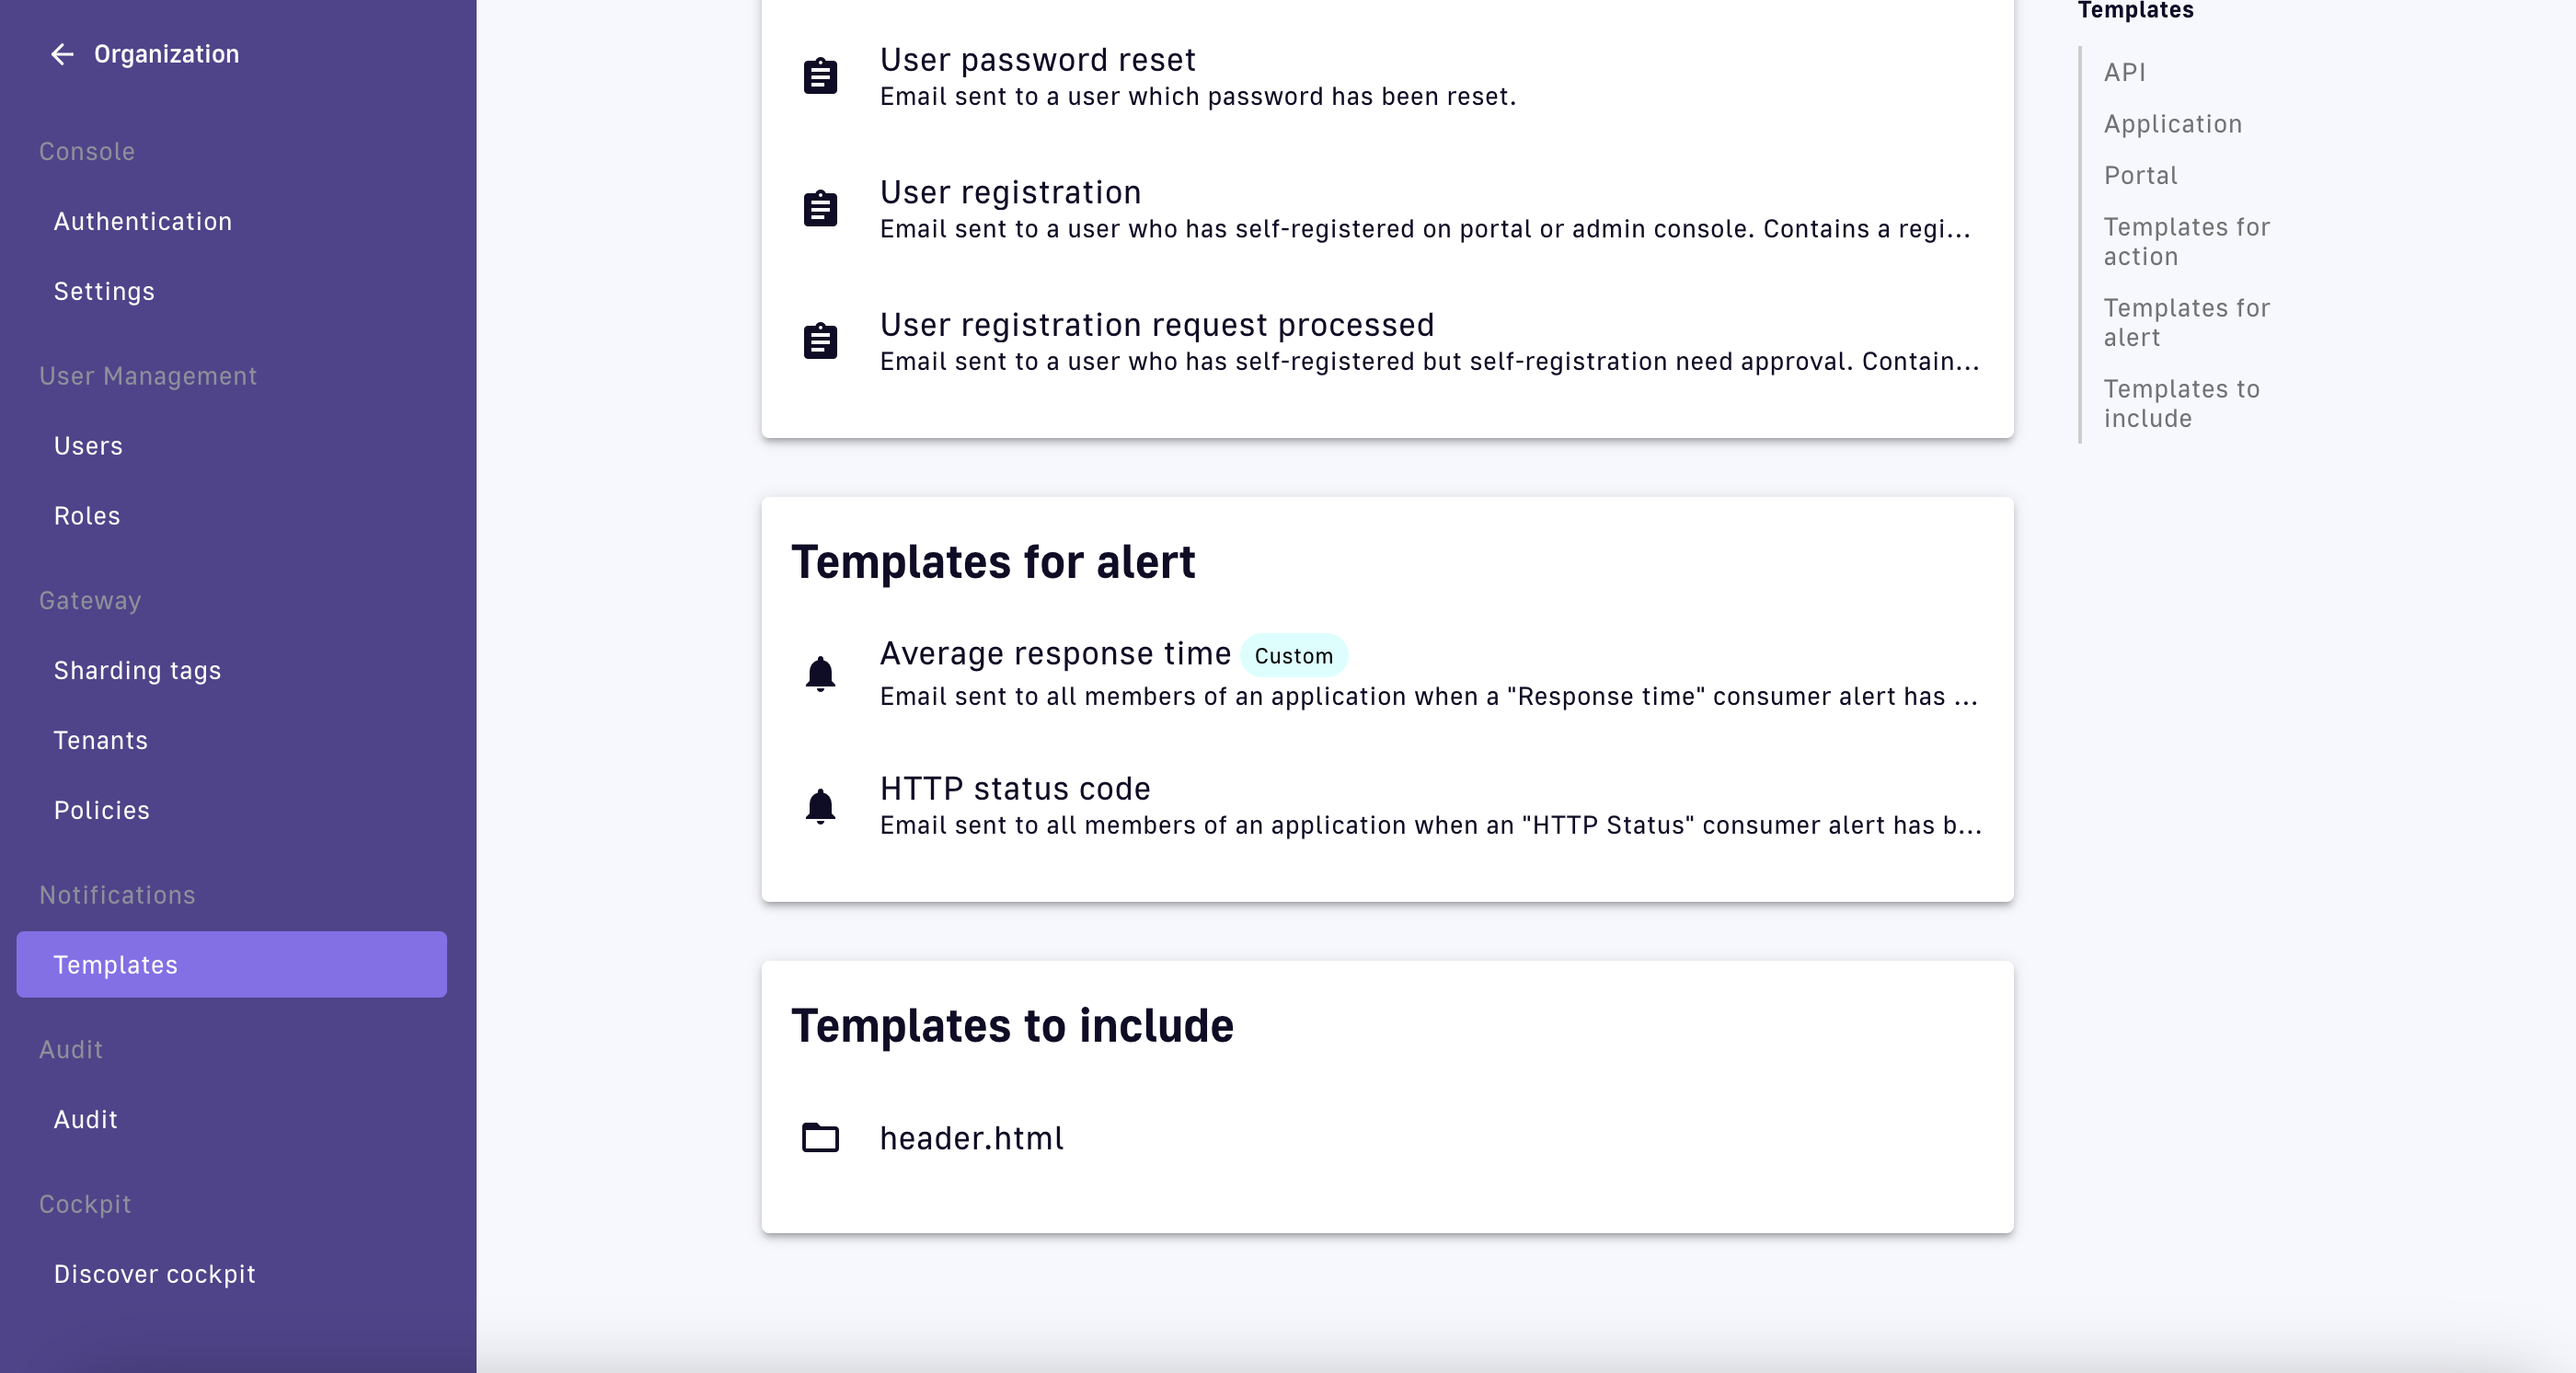
These templates can be overridden in APIM Console > Organization > Notifications > Templates:
Email templates that are sent for specific actions and not related to a notification can be customized. Typically, these emails are intended for specific users.
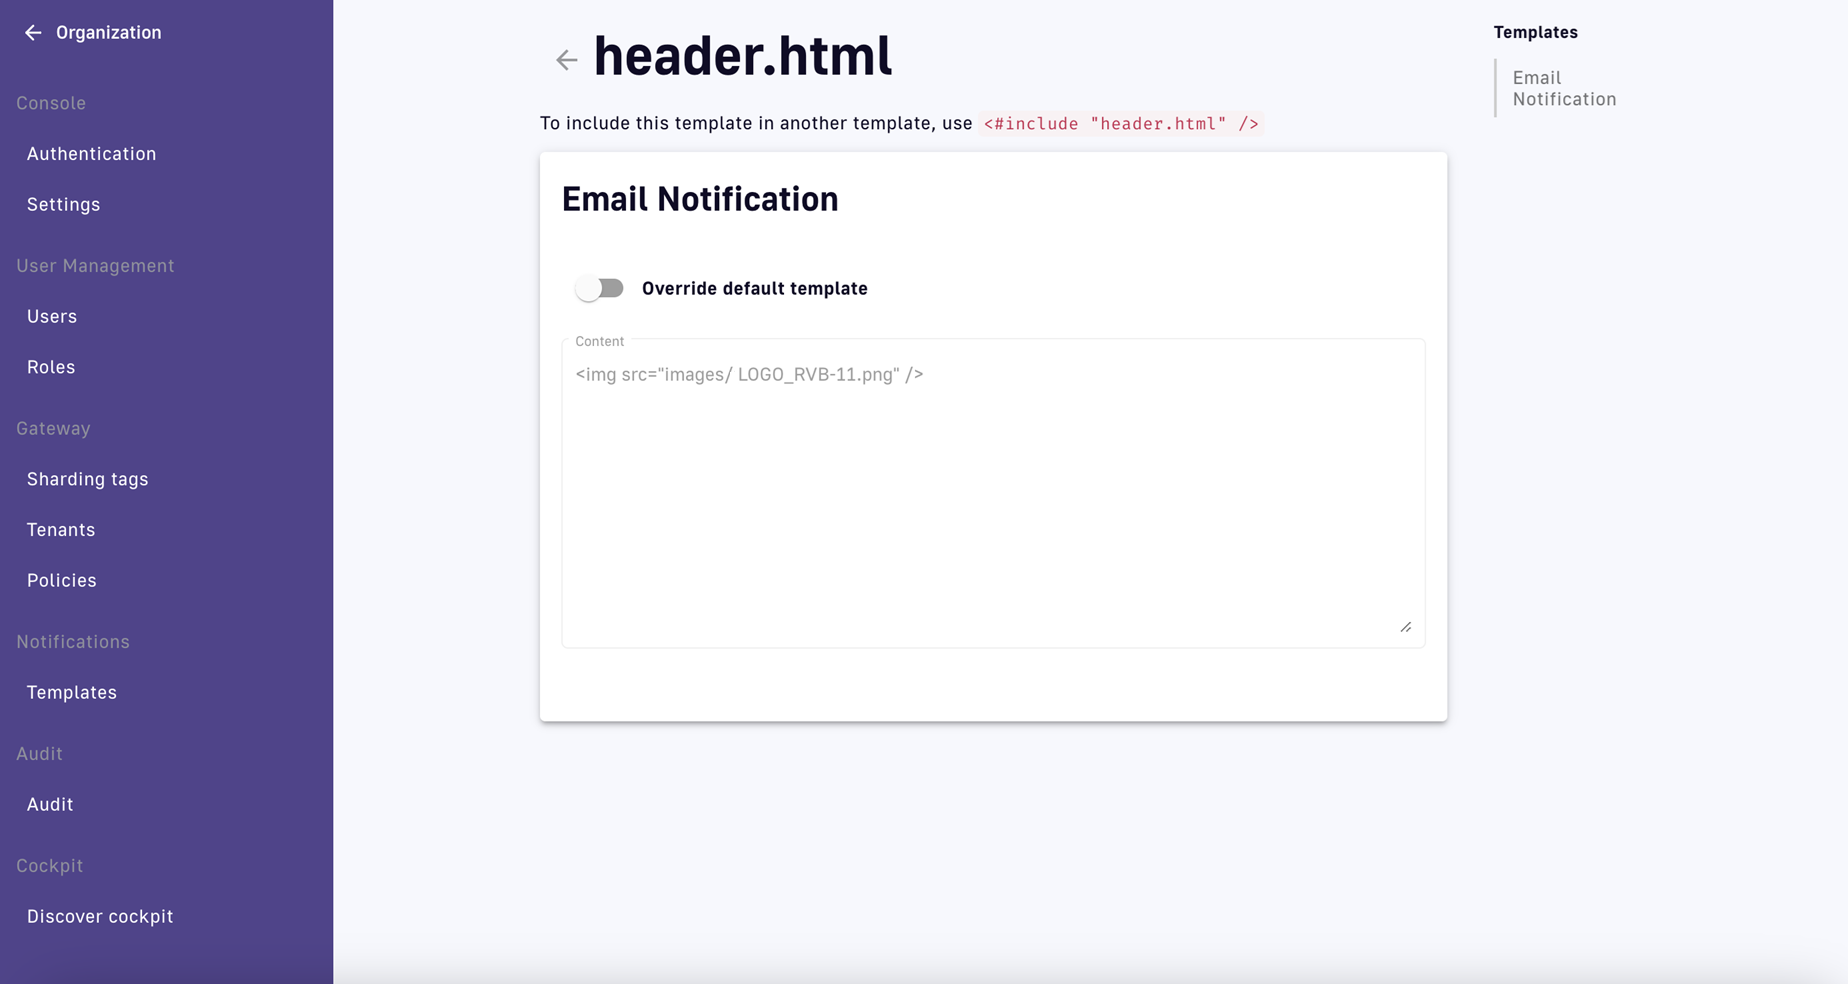
The header.html file that is included by default in all email templates can also be customized.
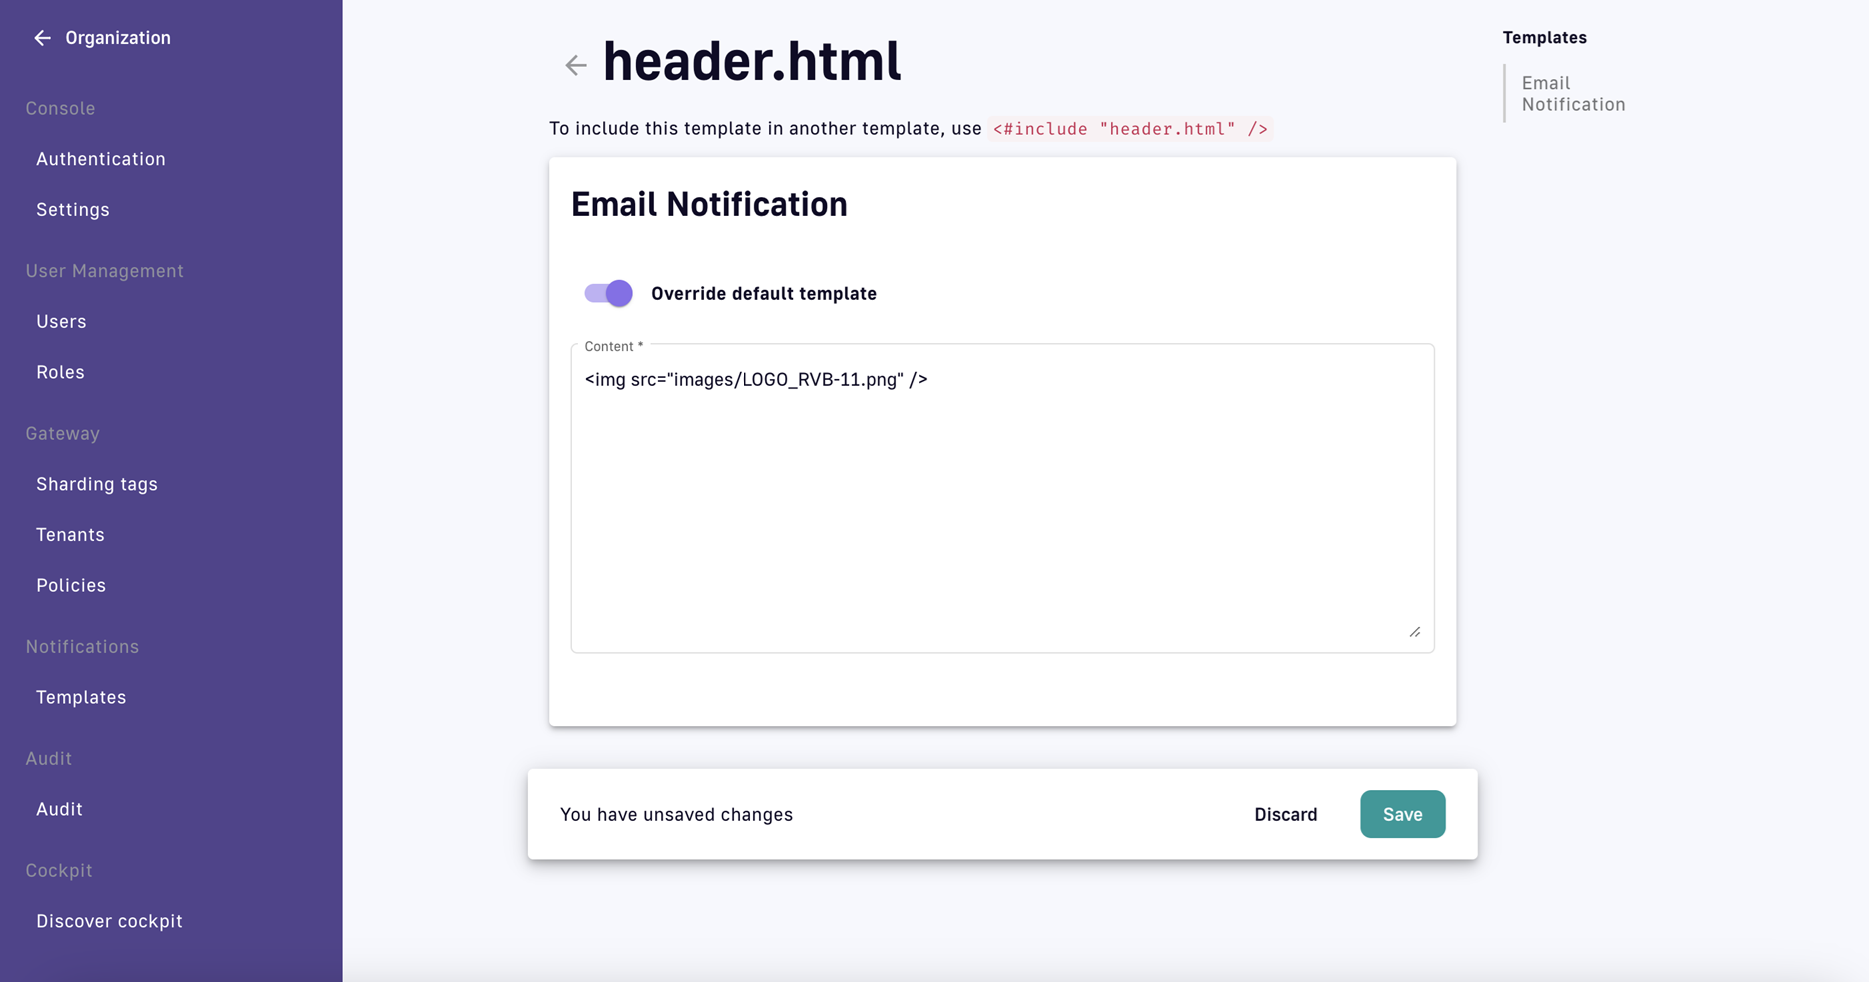
Customize a template
Portal and email notifiers can be configured for most notifications. To customize a template, toggle the switch Override default template and update the title and/or content.
The available attributes are summarized below. Use the Apache Freemarker template engine to add specific information to templates, e.g., {api.metadata['foo-bar']}.
| API | Application | Group | Plan | Owner/User | Subscription |
|---|---|---|---|---|---|
| name | name | name | name | username | status |
| description | description | - | description | firstname | request |
| version | type | - | order | lastname | reason |
| role | status | - | publishedAt (Date) | displayName | processedAt |
| metadata (Map) | role | - | closedAt (Date) | startingAt | |
| deployedAt (Date) | - | - | - | - | endingAt |
| createdAt (Date) | createdAt (Date) | createdAt (Date) | createdAt (Date) | - | closedAt |
| updatedAt (Date) | updatedAt (Date) | updatedAt (Date) | updatedAt (Date) | - | subscribedAt |
Example template
<html>
    <body style="text-align: center;">
      <header>
        <#include "header.html" />
      </header>
      <div style="margin-top: 50px; color: #424e5a;">
        <h3>Hi ${owner.username},</h3>
        <p>The API Key <code>${apiKey}</code> has been expired.
      </p>
    </body>
  </html>
OpenTracing
Introduction
DSAPI's OpenTracing solution with Jaeger allows you to trace every request that comes through the API Management (APIM) Gateway. This provides enhanced monitoring capabilities, such as in-depth visibility into API policies and requests across multiple services, and simplifies debugging.
This page describes how to:
Enable OpenTracing using DSAPI.yaml
To enable OpenTracing on APIM Gateway, add the following to the DSAPI.yaml file:
tracing:
      enabled: true
      type: jaeger
      jaeger:
      host: localhost
      port: 14250
Test OpenTracing in Docker
To test OpenTracing in Docker:
-
Use the Docker run command for installing Jaeger with no customizations:
docker run -d --name jaeger \
    -p 5775:5775/udp \
    -p 6831:6831/udp \
    -p 6832:6832/udp \
    -p 5778:5778 \
    -p 16686:16686 \
    -p 14268:14268 \
    -p 14250:14250 \
    -p 9411:9411 \
    jaegertracing/all-in-one:1.24
Running this Docker command will also provide access to the JaegerUI, which can be reached on its default port:http://localhost:16686 -
Confirm Jaeger has been enabled and is running by checking Docker
-
Install the .ZIP file for the Jaeger tracer plugin:
- Since the Jaeger tracer is not bundled by default, click here to download it
- Add the plugin for the DSAPI Jaeger tracer .ZIP file to the configuration of your APIM Gateway instance
-
Run your API Gateway and APIM.
-
Open DSAPI APIM and choose an API with a policy assigned to it
-
Call your API
-
To see your calls:
-
Open JaegerUI by visiting
http://localhost:16686(note that JaegerUI was automatically installed earlier in the process) -
Select Search and find the API you called
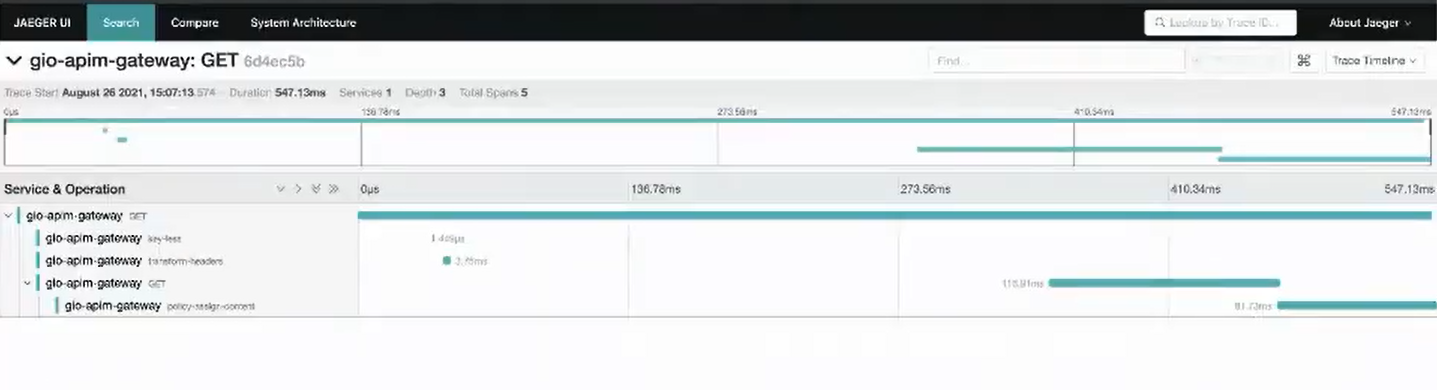
See API calls using JaegerUI
Each policy traversed is listed on a different line to provide greater visibility and assist with debugging. Timestamp info is included in the detailed view.
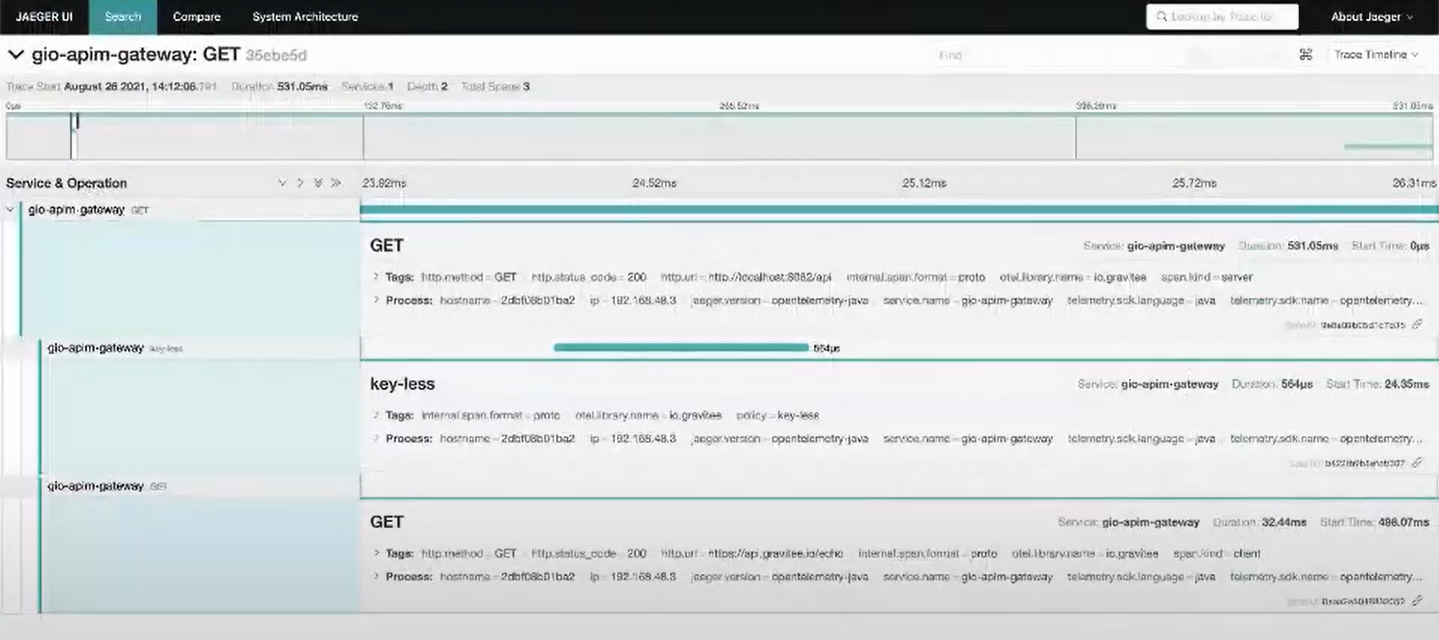
Timestamp information in the detailed view
-
Configure Environment Variables
Configure environment variables as needed in the Jaeger Gateway. For example:
DSAPI_service_tracing_enabled: true
  DSAPI_services_tracing_jaegar_host: localhost
  DSAPI_services_tracing_jaeger_port: 14250
Plans and policies
You can enhance the security of your APIs, you can add plans and policies. For more information about plans and policies, see the following articles:
Plans and Policies overview
Overview
The next two core DSAPI API Management (APIM) concepts we will focus on are plans and policies:
- Plan: Provides a service and access layer on top of your API that specifies access limits, subscription validation modes, and other configurations to tailor your API to a specific subset of API consumers. An API consumer always accesses an API by subscribing to one of the available plans.
- Policies: Customizable rules or logic the Gateway executes during an API transaction. Policies generally fall into the categories of security, transformation, restrictions, performance, routing, or monitoring & testing.
Plans and policies are managed by the API publisher to add different layers of security and functionality to the backend resources they own.
.svg)
Plans
There are many possible API access scenarios, any of which can be difficult to encode into your backend services. Plans are a powerful way to decouple the business logic from the access control of your backend services.
In APIM, all APIs require at least one plan before they can be deployed on the Gateway. The most important part of plan configuration is selecting the security type. APIM supports the following five security types:
- Keyless (public)
- Push
- API Key
- OAuth 2.0
- JWT
APIM intelligently routes API consumers to plans based on specific criteria in the API request. APIM then uses an application-based subscription model to decide whether to accept or deny an incoming API request.
Applications and subscriptions
Plans are an access layer around APIs. An application allows an API consumer to register and agree to this plan. If the registration is approved by the API publisher, the result is a successful contract, or subscription.
To access your APIs, consumers must register an application and submit a subscription request to a published API plan. Applications act on behalf of the user to request tokens, provide user identity information, and retrieve protected resources from remote services and APIs.
API publishers can modify a subscription at any time, which includes transferring API consumers to a different plan, pausing the subscription, setting an expiration date, or permanently closing a subscription.
Keyless plan subscriptions
Because keyless plans do not require authorization, APIs with keyless plans do not require the API consumer to create an application or submit a subscription request. Deployed APIs with a keyless plan will be publicly available on the Gateway's network.
Policies
A policy modifies the behavior of the request or response handled by APIM Gateway. Policies can be considered a proxy controller, guaranteeing that a given business rule is fulfilled during request/response processing.
The request and response of an API transaction are broken up into phases. Policies can be applied to these phases in policy chains of arbitrary length.
Phases
Gateway APIs have the following phases:
- Request: For both traditional and message proxy APIs, this phase is executed before invoking the backend service. Policies can act on the headers and content of traditional proxy APIs.
- Publish: This phase occurs after the request phase and allows policies to act on each incoming message before it is sent to the backend service. This phase only applies to message proxy APIs.
- Response: For both traditional proxy and message proxy APIs, this phase is executed after invoking the backend service. Policies can act on the headers and content of traditional proxy APIs.
- Subscribe: This phase is executed after the response phase and allows policies to act on each outgoing message before it is sent to the client application. This phase only applies to message proxy APIs.
Policies are scoped to different API consumers through flows. Flows are a method to control where, and under what conditions, a group of policies act on an API transaction.
Example
Let's say you have a backend API server architected around flight data. This data is not sensitive and you want to allow anyone to easily access it. However, because the data is supplied by verified airlines, you want to limit data modifications to specific API consumers who are explicitly granted permission.
This is easily achieved with APIM and does not require any changes to the backend API server.
First, you could create two plans in APIM: A keyless plan and a JWT plan. The keyless plan does not require API consumers to create an application or submit a subscription request and allows API consumers on the Gateway's network to immediately begin sending requests through the available entrypoints.
However, you would also configure the keyless plan with a flow containing a resource filtering policy applied to the request phase. This policy would be configured to grant read access only to the backend API. All other types of API requests (e.g., POST, PUT, DELETE, etc.) would be denied.
The flow with the resource filtering policy does not apply to the JWT plan and API consumers subscribed to it could modify data associated with their airline. However, to be granted access to the JWT plan, users need to first create an application and submit a subscription request that must be approved by you, the API publisher.
Adding a policy
Access API
First, we need to open the API in the APIM Console. You may already have it open from the previous part of the Quickstart Guide. If not, simply head back over to the APIs homescreen and select the API you created.

APIs homescreen
- Select APIs in the sidebar
- Select the API you created in Gateway APIs 101
Policy Studio
Once you're back to your API's General Info page, go to the Policy Studio.
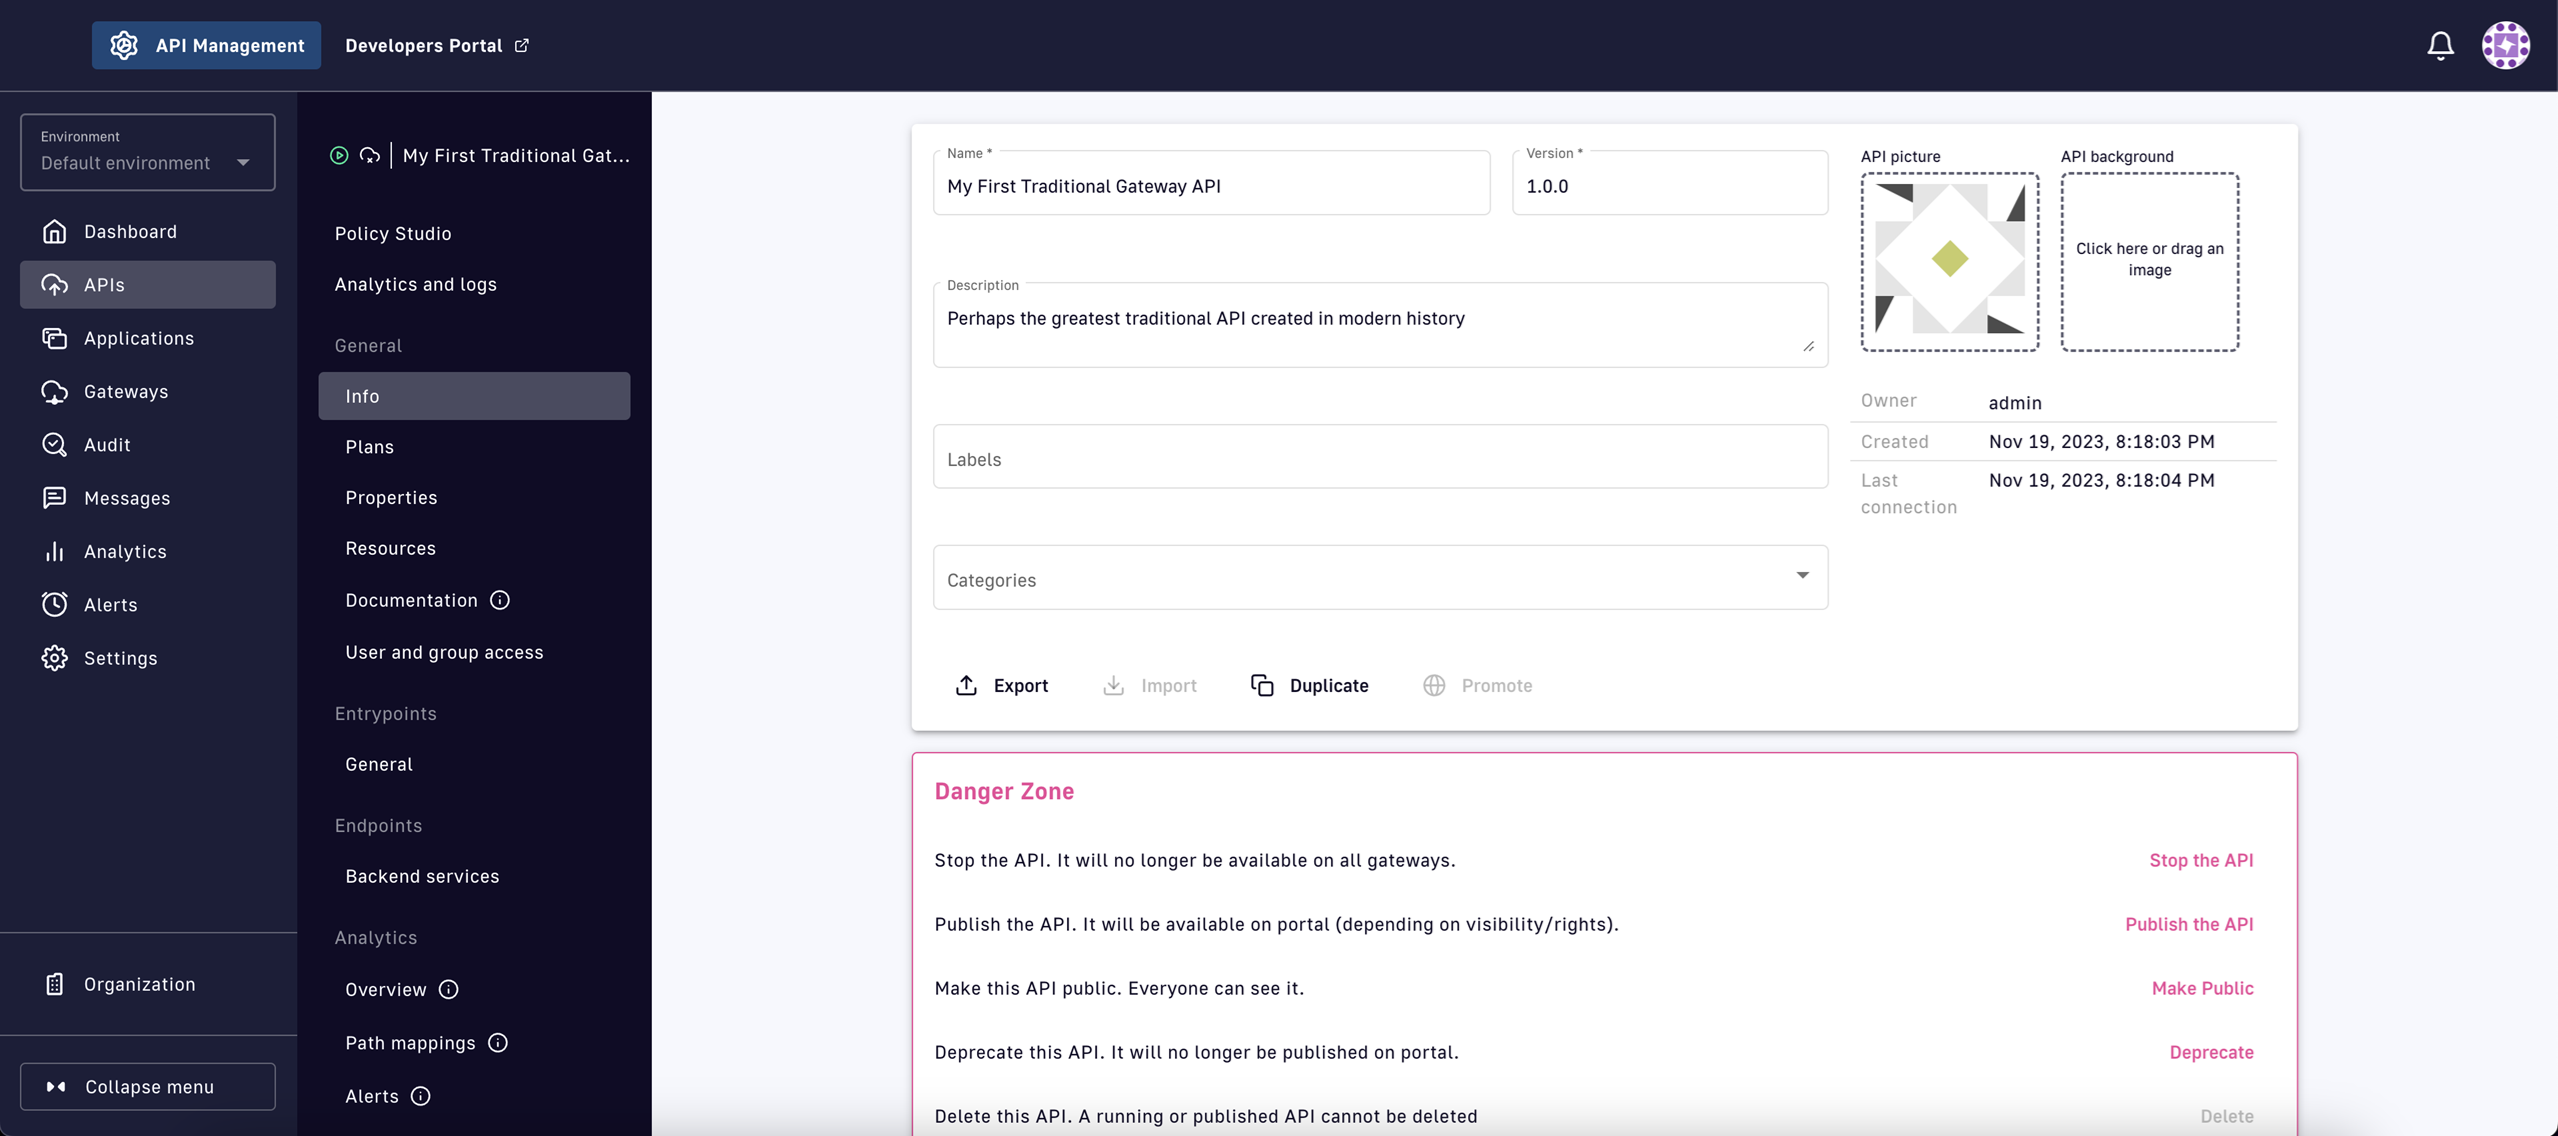
API General Info page
- Select Policy Studio from the inner sidebar
Creating a flow
The Policy Studio is a powerful interface for visually designing flows and applying policies to APIs. Remember, flows are a way to group policies and set conditions that determine which API requests trigger the flow.
One way to condition a flow is by plan. Every plan that is added to an API can have its own set of flows.
You should see your Default Keyless (UNSECURED) plan on the left side of the Policy Studio. Additionally, you should see Common flows. Let's add a flow to Common flows to ensure our policy applies to all consumers of our API, regardless of the plan they are subscribed to.

Adding a flow under Common flows
- Select the + icon to the right of Common flows
- Provide a name for the flow and select Create
Flow conditions
We are purposefully keeping this flow very simple. However, the conditions that trigger a flow can be fine-tuned beyond assigning the flow to a plan:
- Operator and path: Use this to trigger a flow based on the path of the API request. The condition is evaluated for every request and the flow is only triggered if it evaluates to
true. - Methods: Select the HTTP methods this flow applies to.
- Expression Language Condition: Use DSAPI's Expression Language (EL) to provide a custom condition. The condition is evaluated for every request and the flow is only triggered if it evaluates to
true.
Adding a policy
Creating a flow opens up the flow editor. This screen will look different based on whether you are working with a traditional or message proxy API. Follow the instructions that match your API's proxy type:
Traditional proxy
The only phases available to traditional proxy APIs are request and response. We will be adding a policy to the response phase.
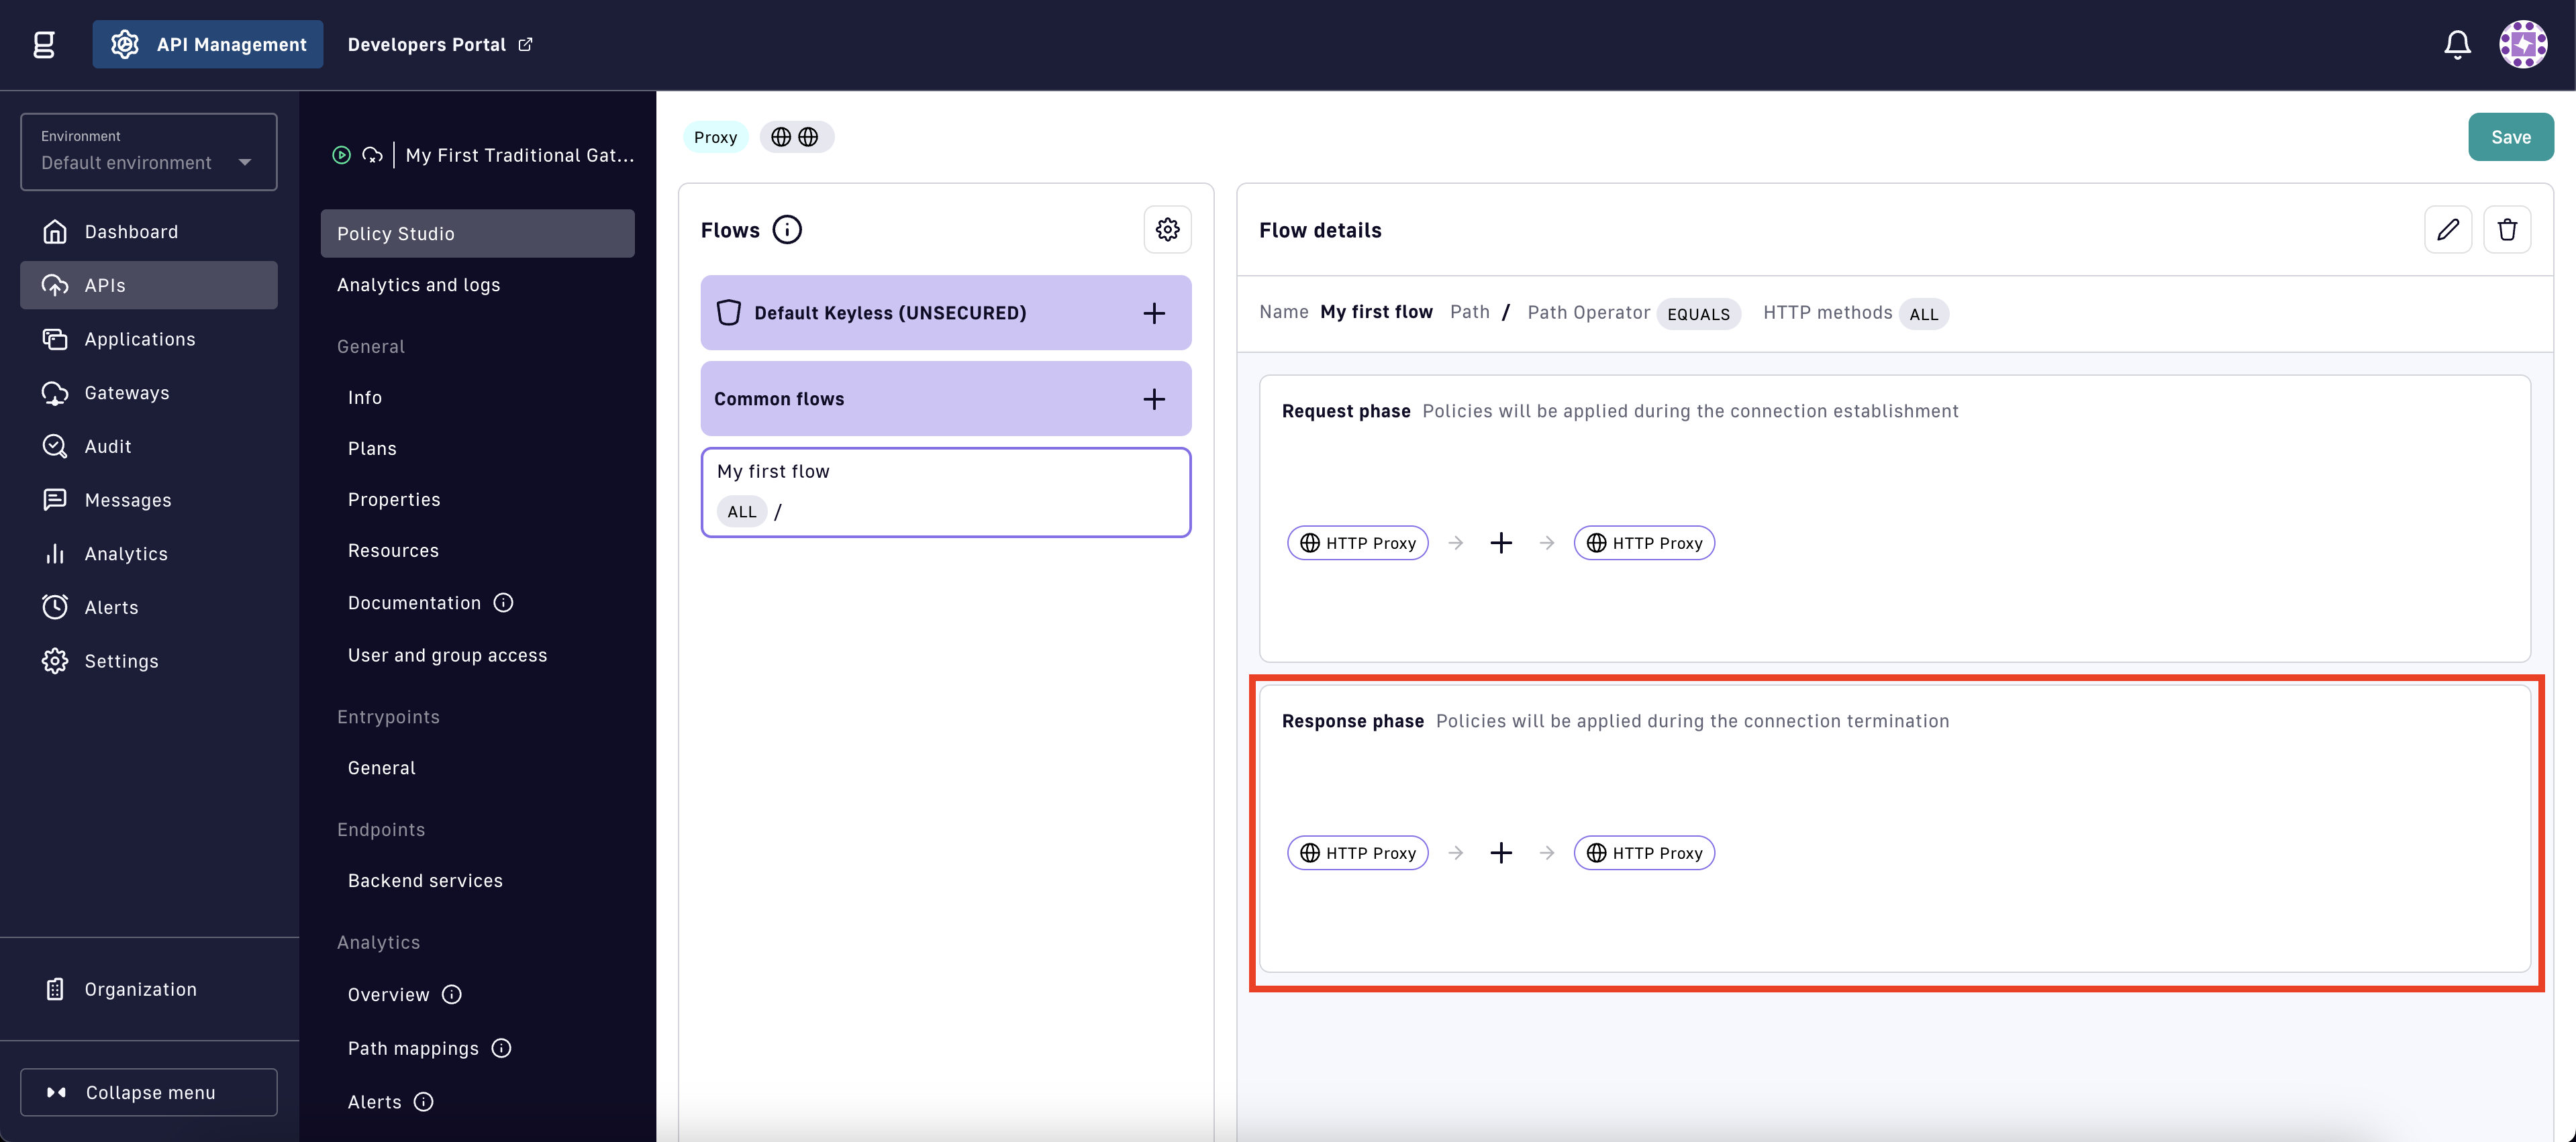
- Select the + icon in the Response phase
Message Proxy
The phases available to message proxy APIs are request, response, publish, and subscribe. The publish and subscribe phases allow the policy to be applied at the message level. We will be adding the policy to the subscribe phase.
.png)
- Select the Event messages tab in the flow editor
- Select the + icon in the Subscribe phase
The previous actions will open up the policy selector. We are going to add an Assign Content policy that allows us to modify the content of the payload before it reaches the API consumer.
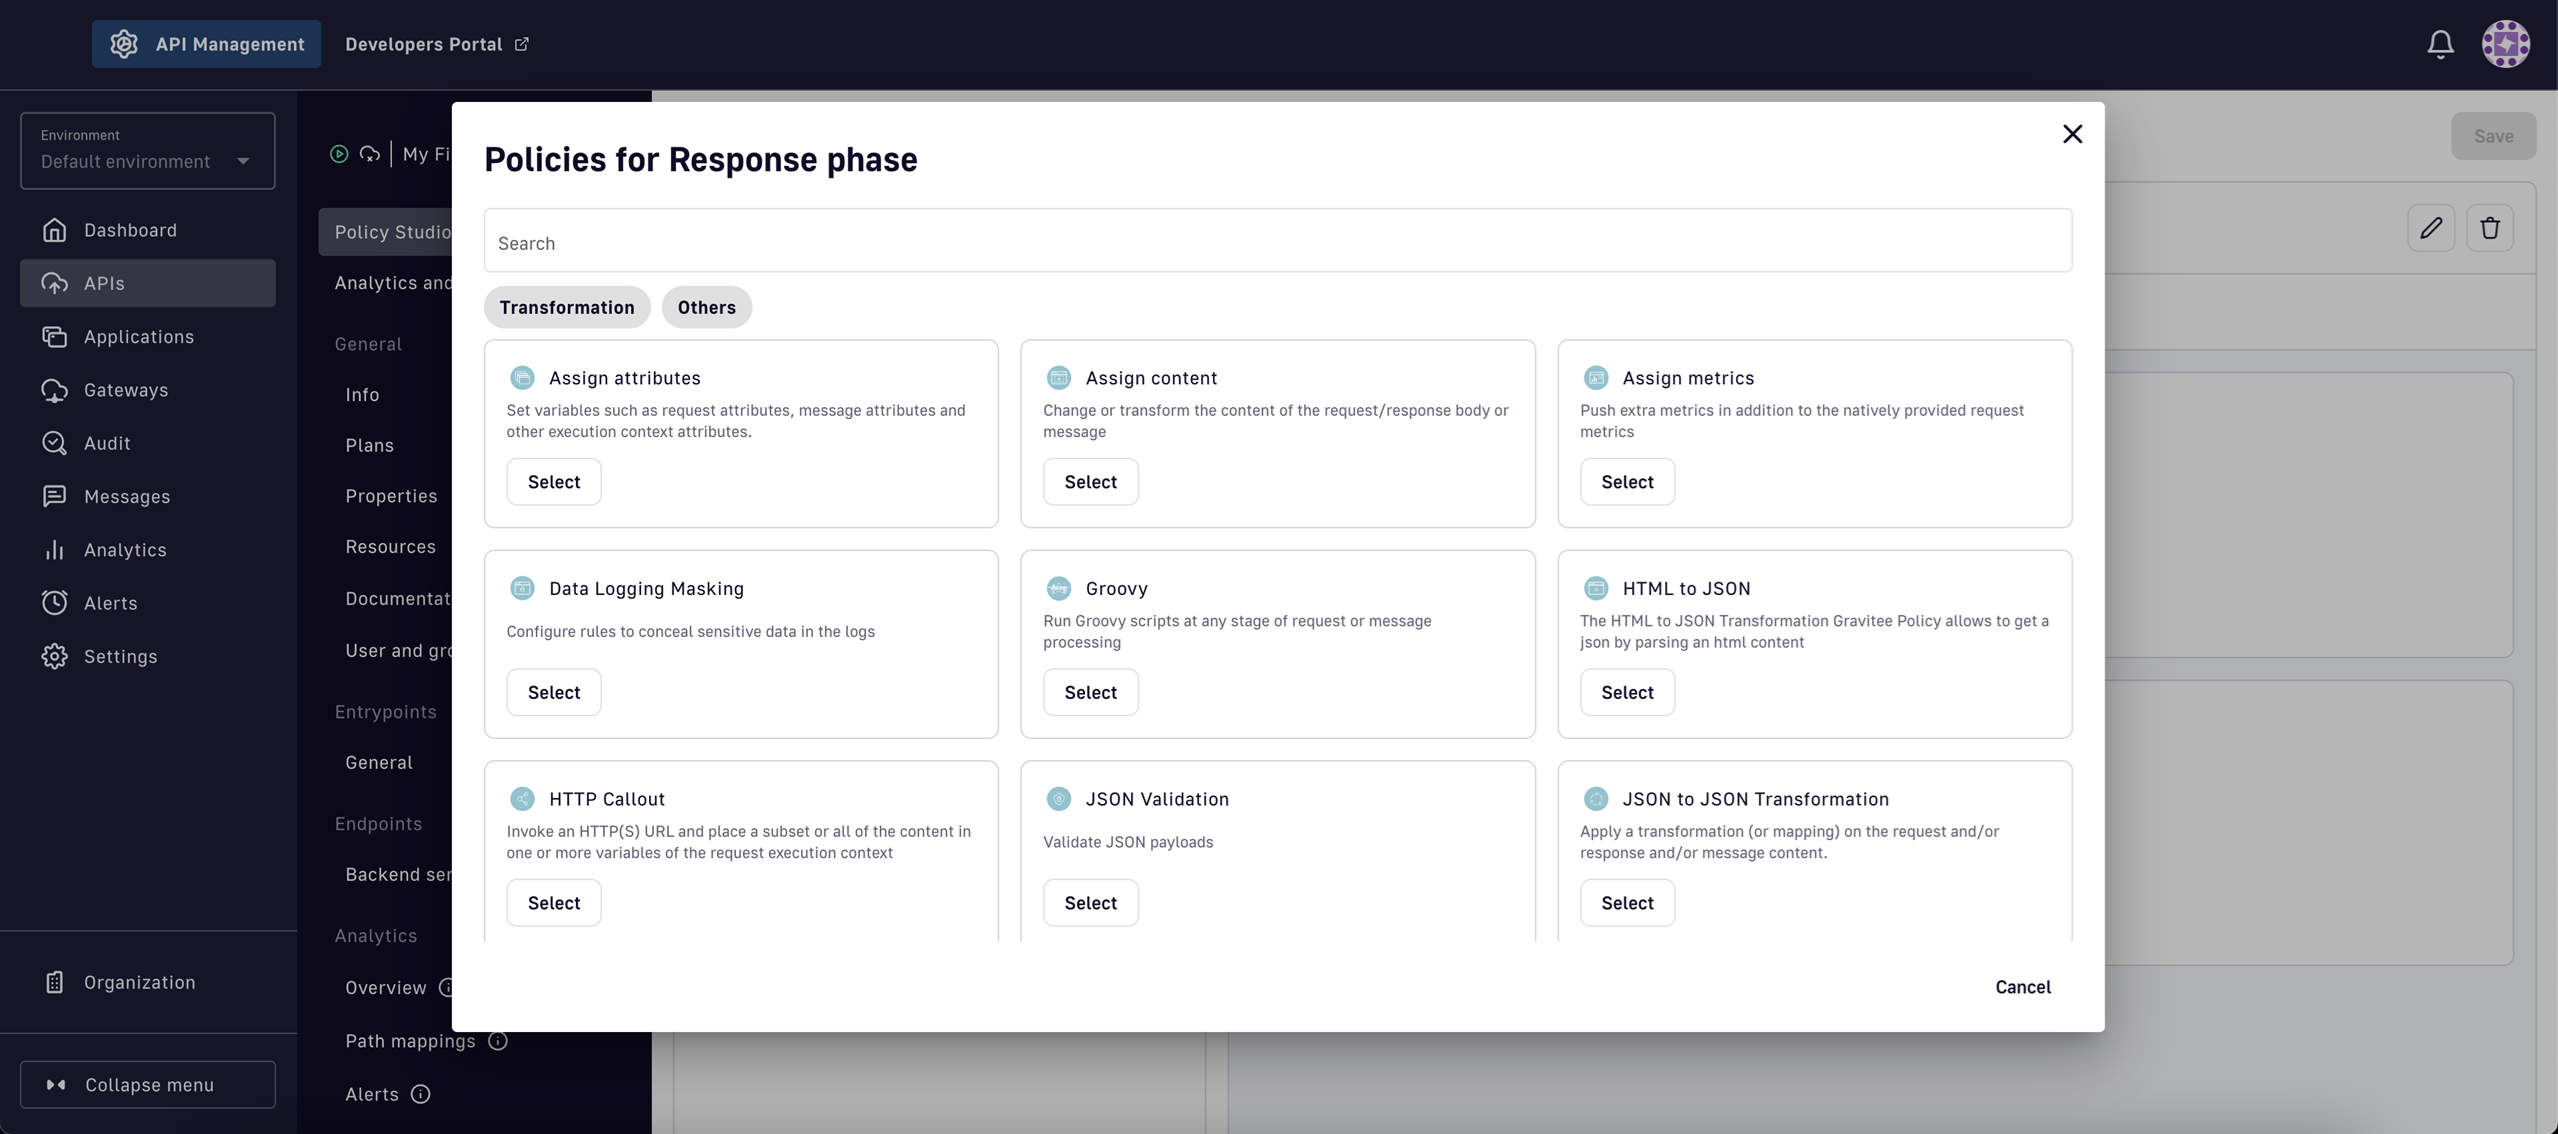
Add an Assign Content policy
- Click Select under the Assign content policy
Every policy allows you to provide a Description and a Trigger condition. Trigger conditions for policies are just like trigger conditions for flows, except these allow you to set independent conditions for each policy.
Additionally, every policy has configuration settings specific to it. For the Assign Content policy, we can override the payload of the response or individual message by supplying a string in the Body content input box.
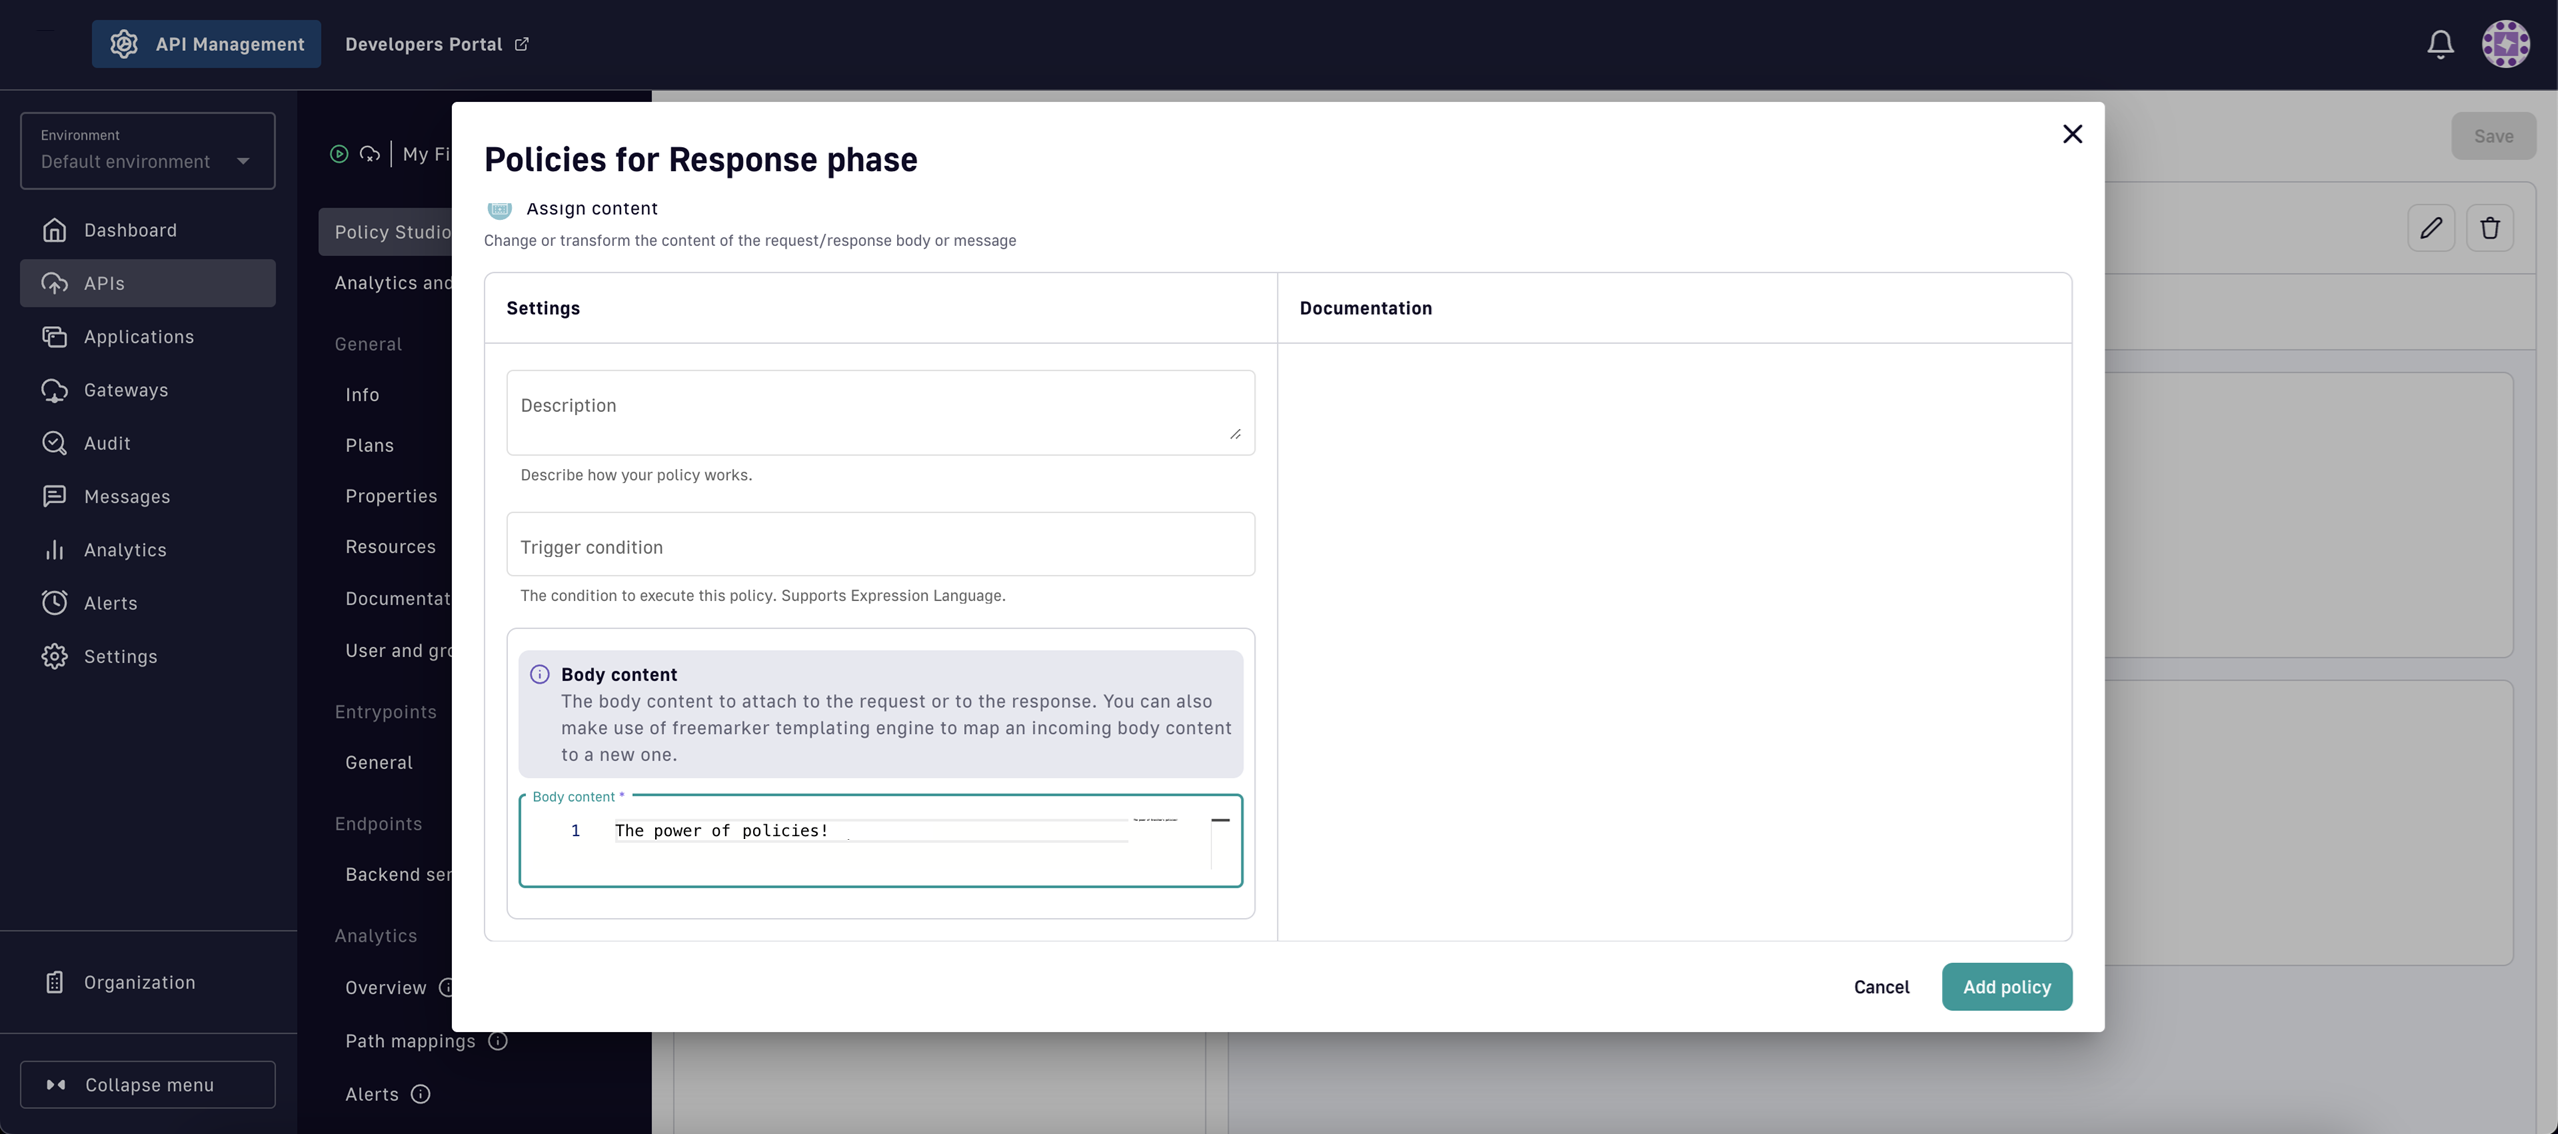
Configure the Assign Content policy
- Type a string in the Body content input box
- Select Add policy to add it the flow
- Select Save in the top right of the flow editor
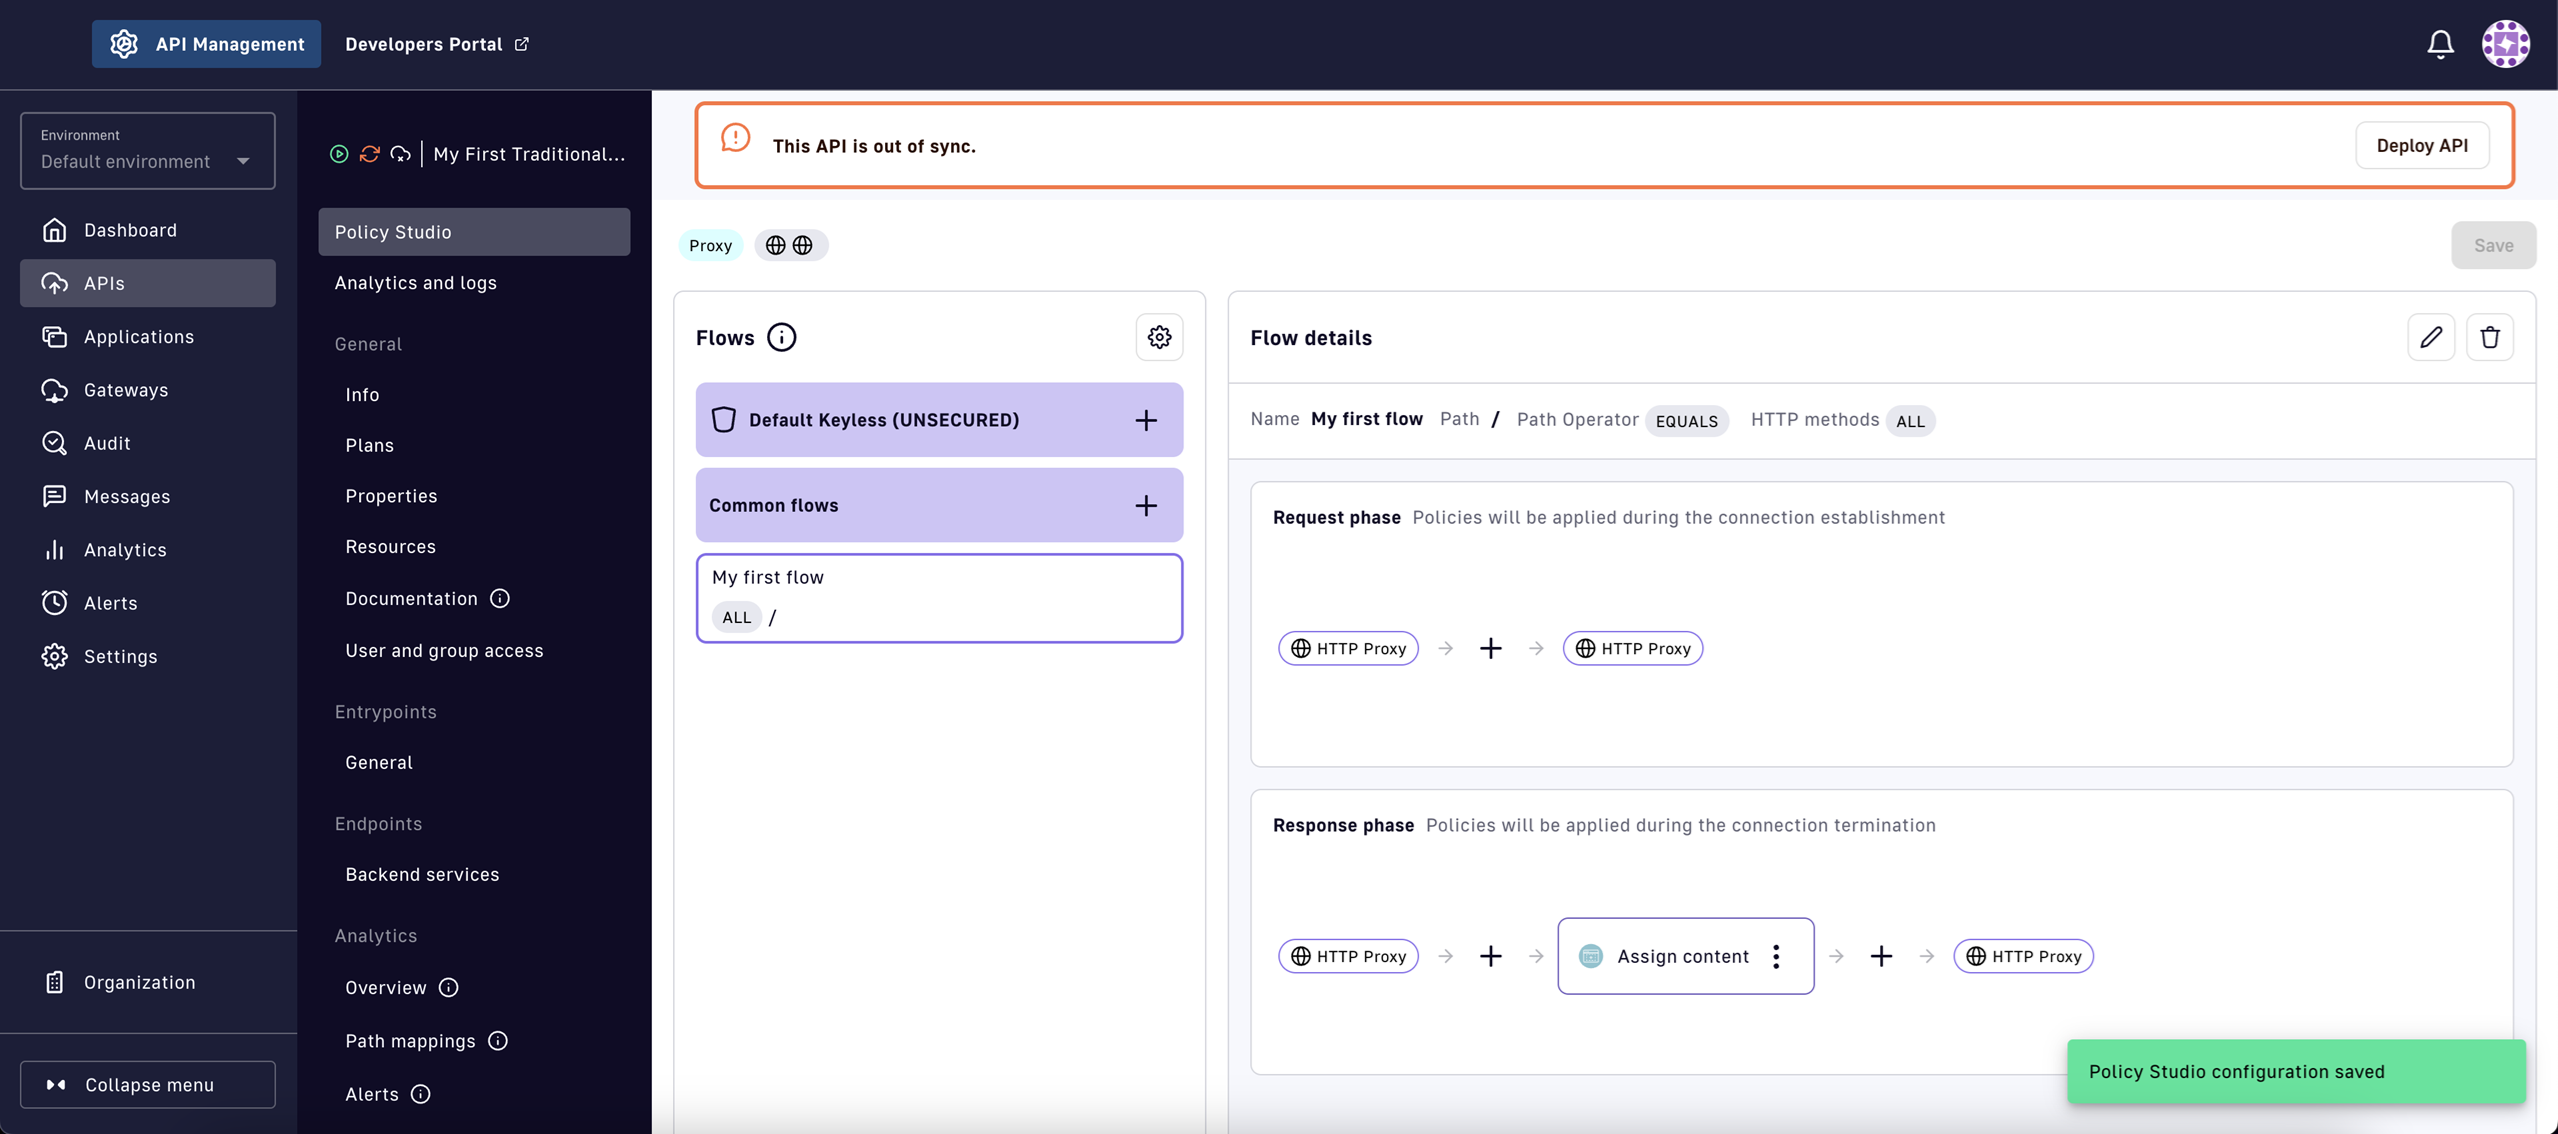
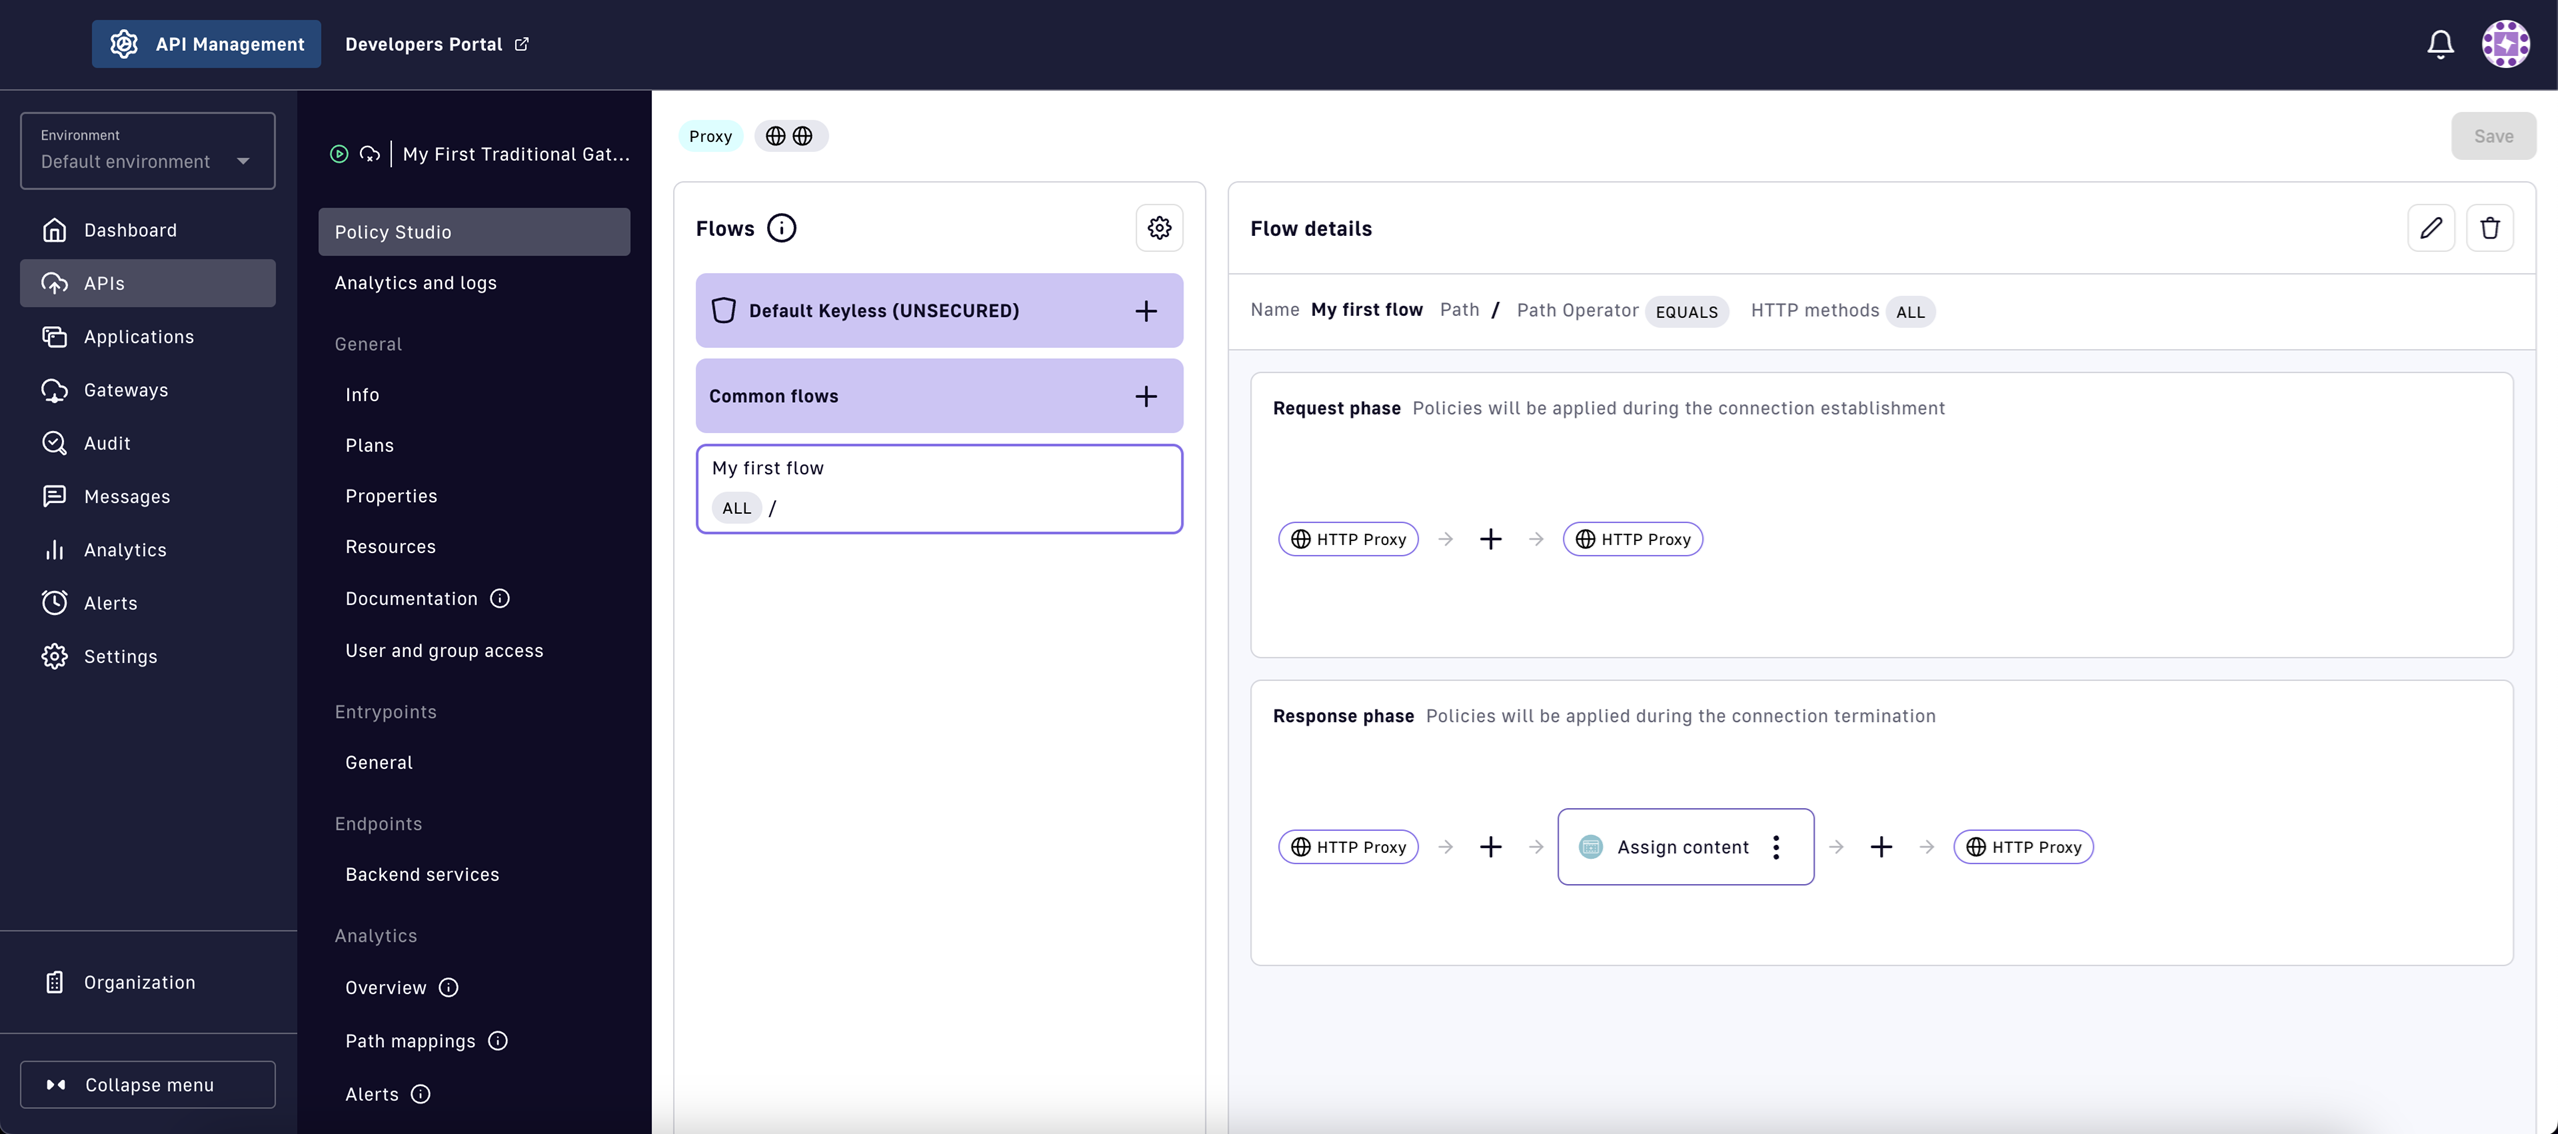
You should now see the Assign Content policy added to the correct phase of the flow.
Redeploy an API
After saving, you'll notice a banner appears at the top of the Console that says This API is out of sync. This means the changes you made in the Console are saved but have not yet been propagated to the Gateway.
To ensure these changes are synced to the Gateway, the API must be redeployed.
Redeploy an API
- Select Deploy API in the top right
- Select Deploy in the modal that pops up on the screen
This is an essential concept to understand. API deployment is a syncing mechanism between the Console and Gateway. Changes in the Console must be synced to the Gateway for them to have any impact on the API consumers who send requests to the Gateway.
Test your policy
Try sending the same request from the first part of the Quickstart Guide.
curl -X GET -i "https://<your-gateway-server>/<your-context-path>"
Adding a plan
From the Policy Studio, go to the Plans page.
Policy Studio
- Select Plans from the inner sidebar
From here, we can manage all the plans and subscriptions for this API. Currently, the only plan you should see is the Default Keyless (UNSECURED) plan that was added by default when creating the API.
This plan is currently in the published state. Plans can be in one of four states: staging, published, deprecated, or closed.
.png)
Four stages of a plan
Plan stages explained
Staging: This is the first stage of a plan, when the plan is in draft mode. You can configure your plan, but it won’t be accessible to users.
Published: Once your plan is ready, you can publish it to let API consumers view and subscribe to it on the APIM Portal, then consume the API through it. A published plan can still be edited.
Deprecated (optional state): You can deprecate a plan so it won’t be available on the APIM Portal and API consumers won’t be able to subscribe to it. Existing subscriptions remain, so deprecation doesn’t impact your existing API consumers.
Closed: Once a plan is closed, all associated subscriptions are closed. This cannot be undone. API consumers subscribed to the plan won’t be able to use your API.
Let's go ahead and add API security with an API key plan:
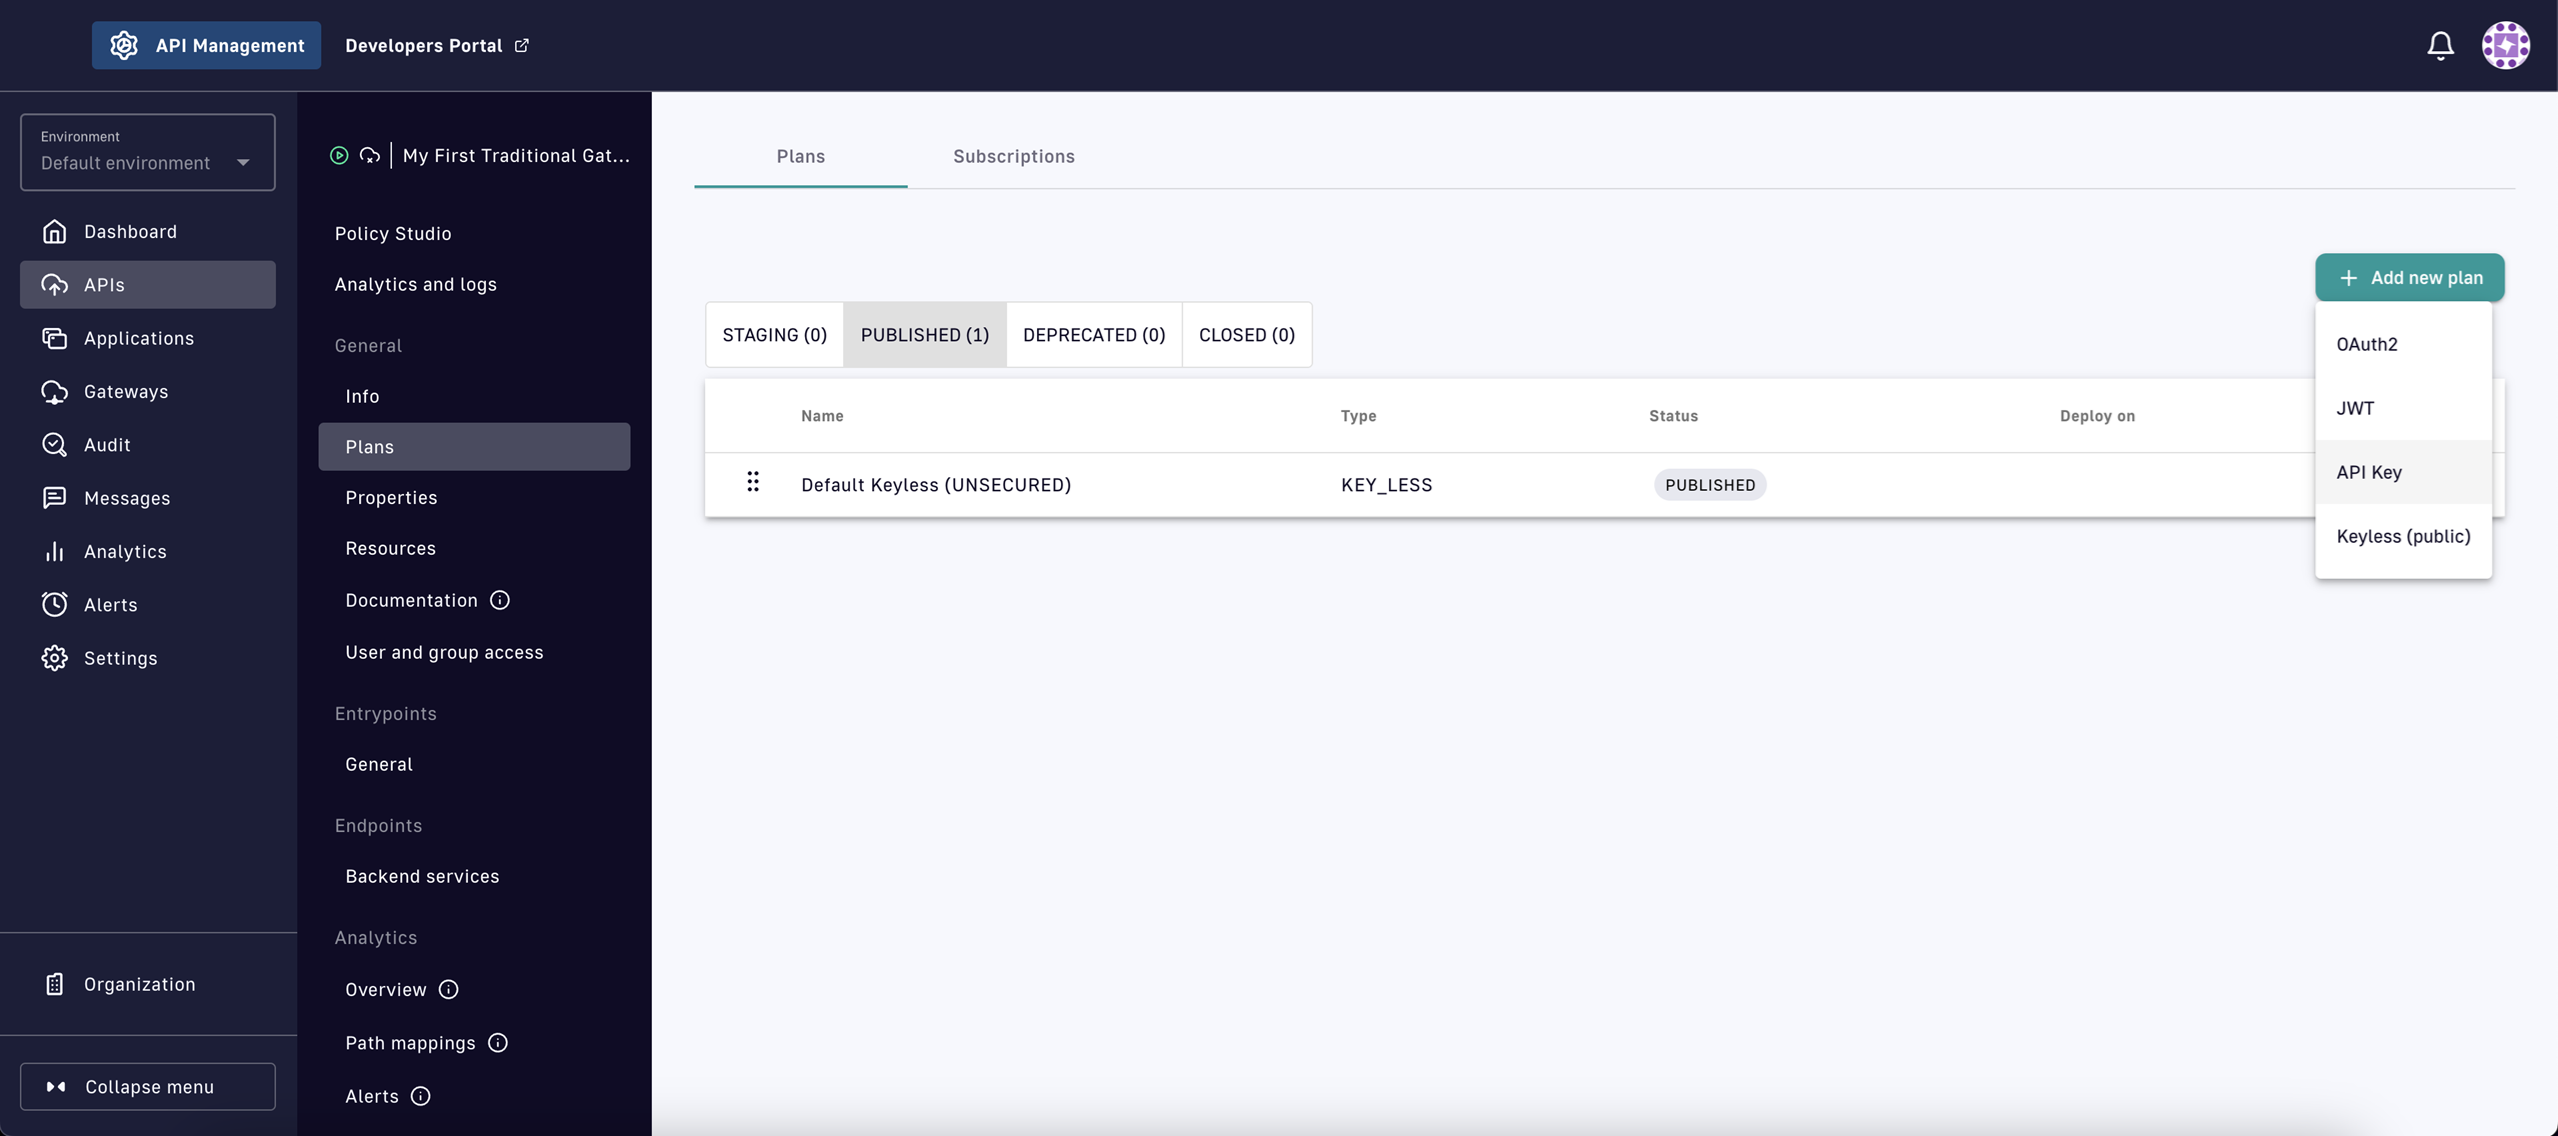
API Plans page
- Select + Add new plan in the top right
- Select API Key from the drop-down menu
This opens the General page of the plan creation wizard. The only required configuration is to provide the plan with a name.
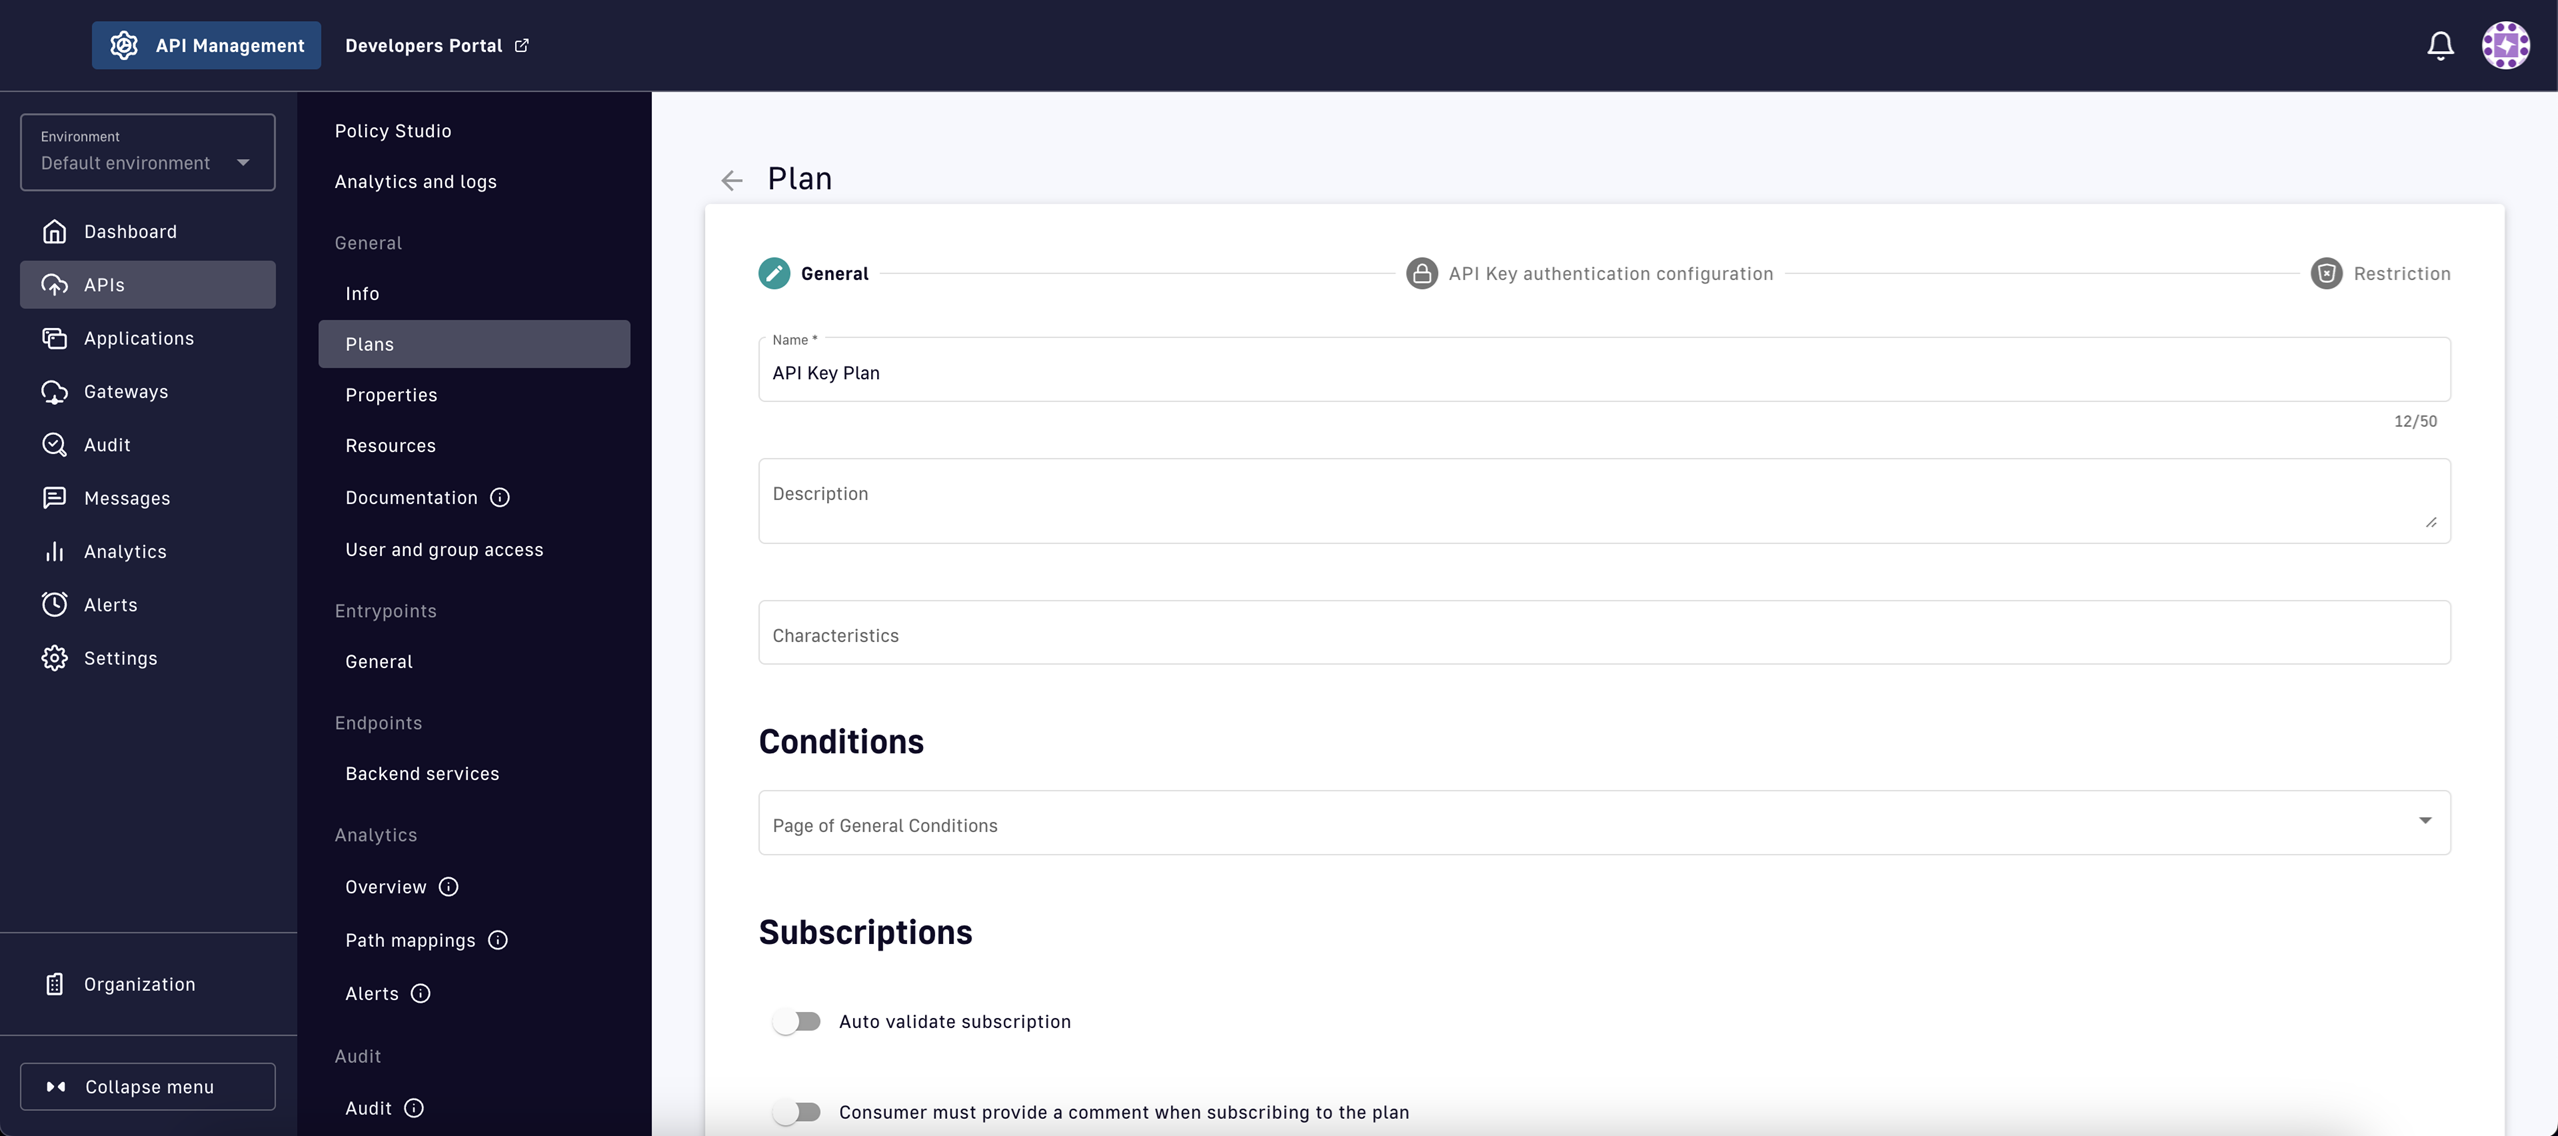
General page of plan creation wizard
- Provide a Name for the plan
- Scroll down to the bottom of the page and click Next
The next step is to configure the security settings specific to the plan type you selected. For our API key plan, we will just keep the defaults.
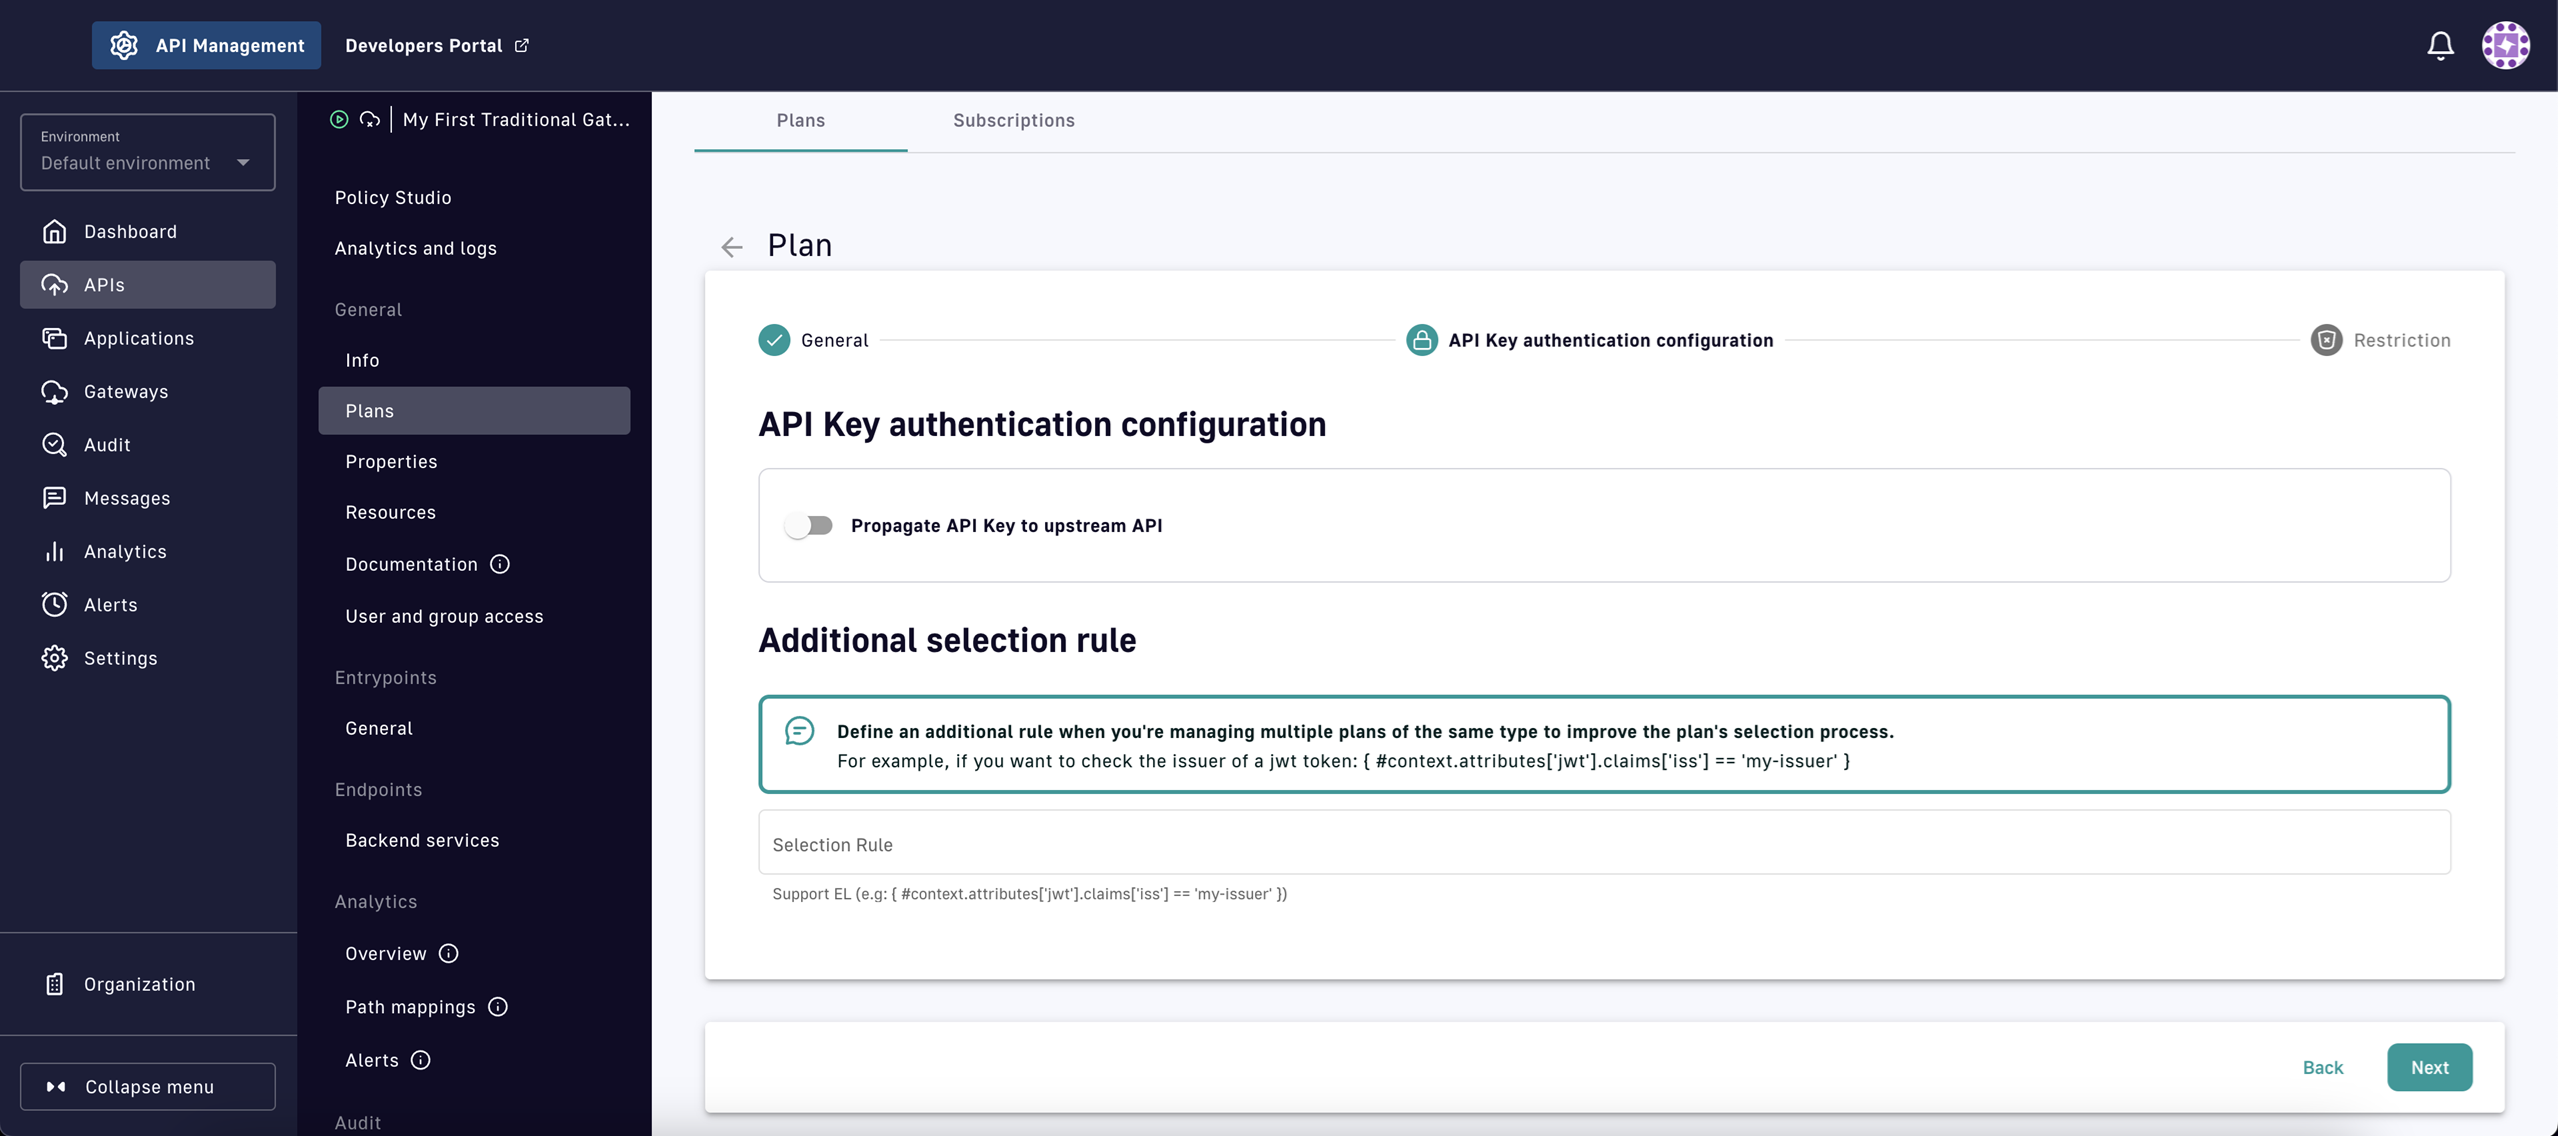
Security configuration page of plan creation wizard
- Leave the defaults and click Next
Finally, you have the option to add restriction policies directly to the plan as part of the creation process.
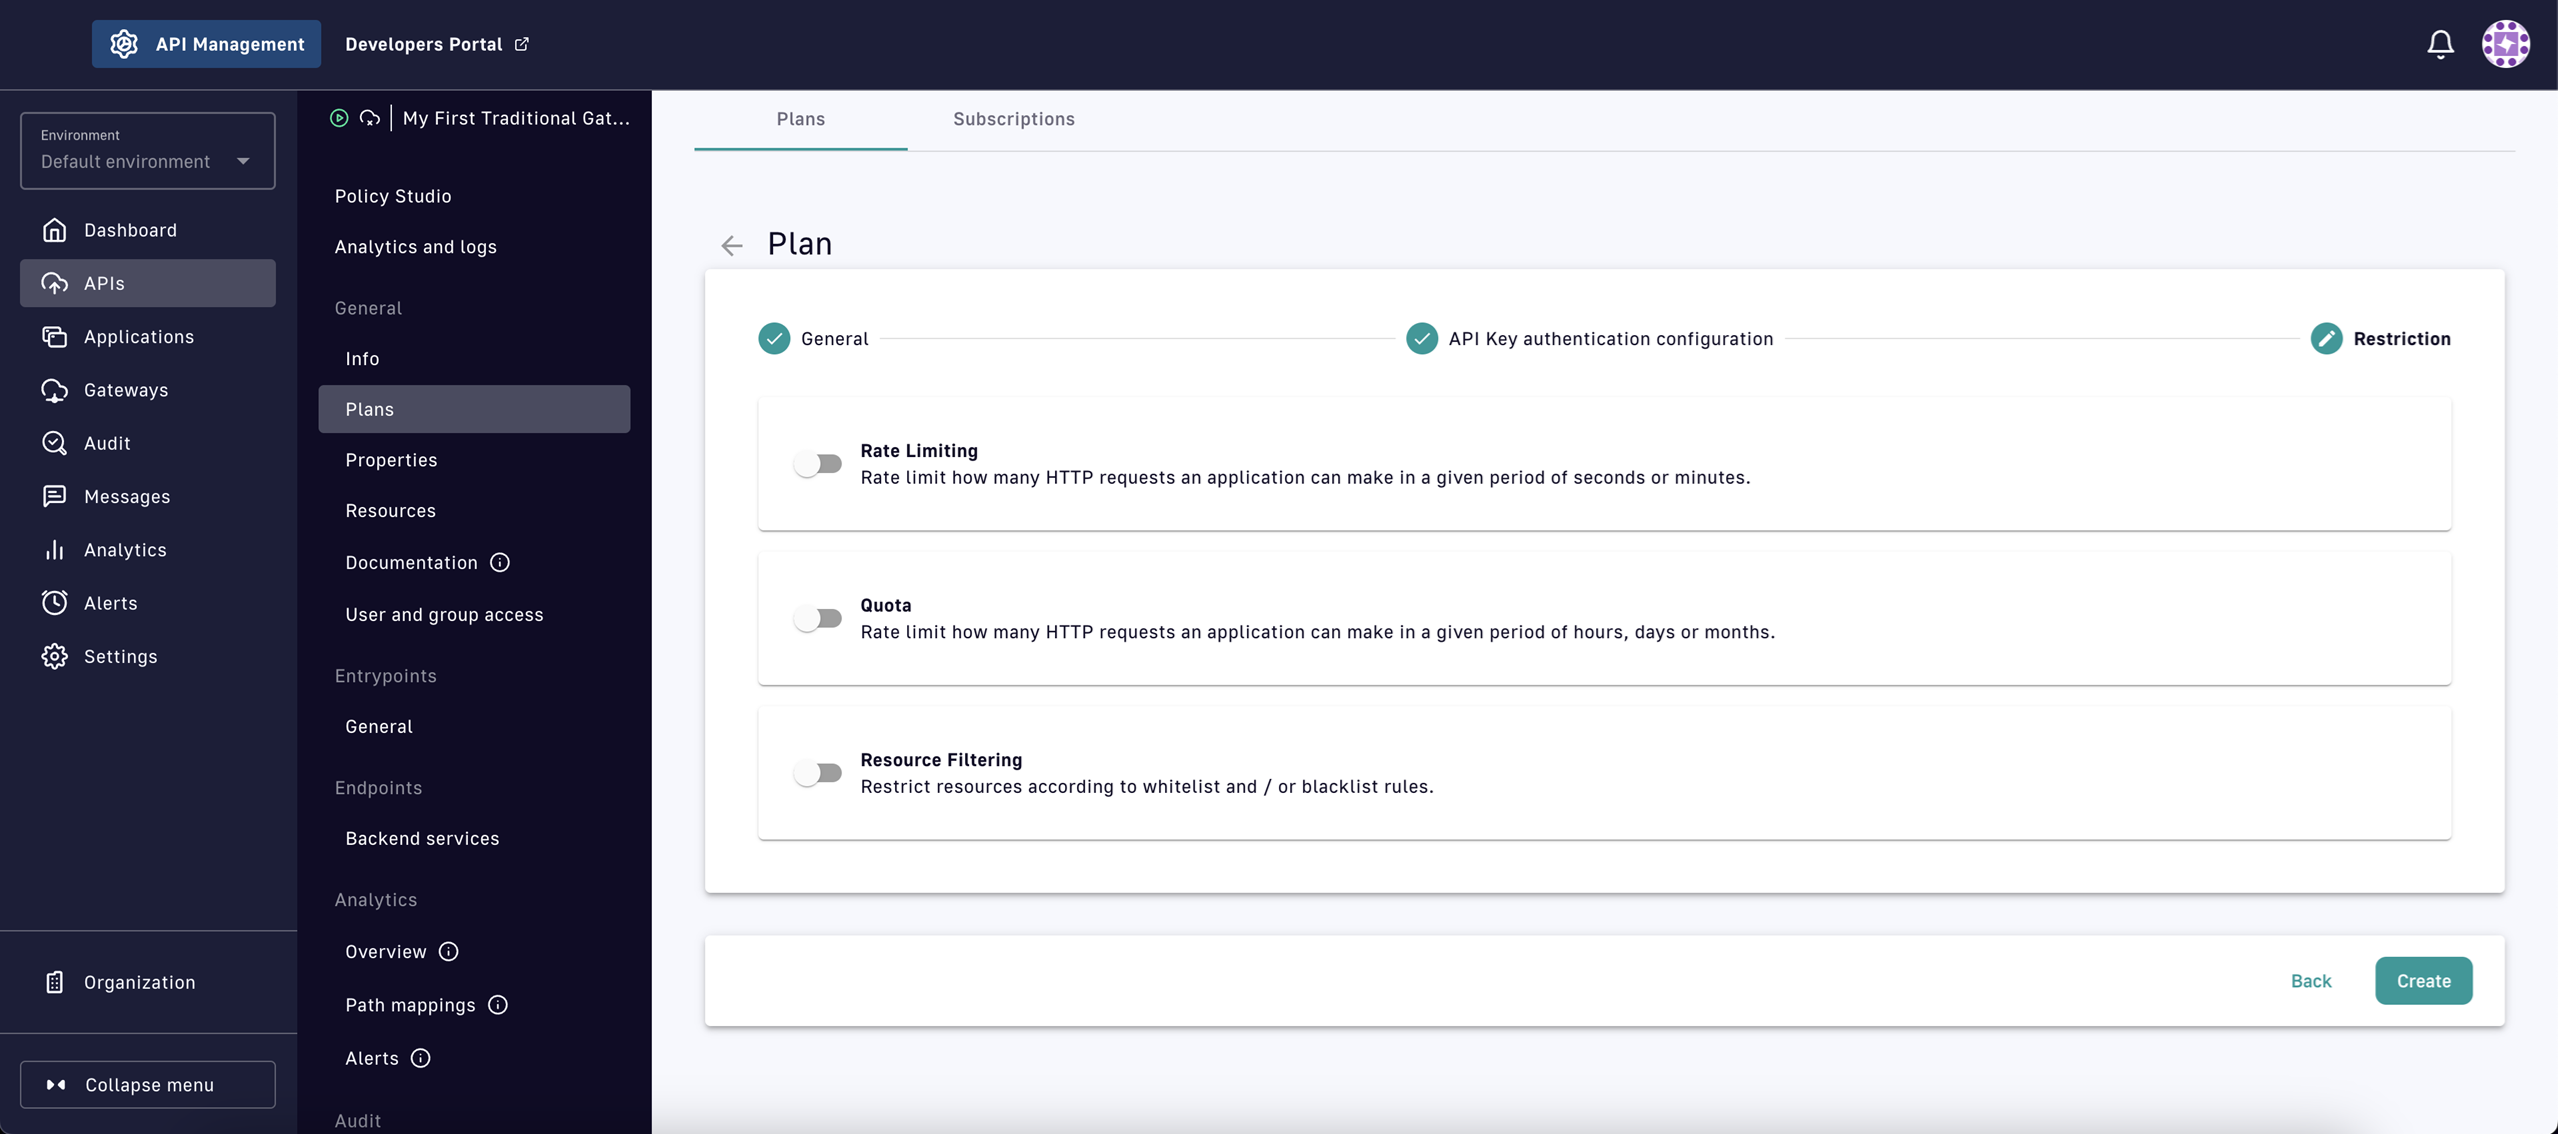
Restrictions page of the plan creation wizard
- Leave the defaults and click Create
This will create the plan in the Staging state. To make it available to API consumers, we need to publish it.
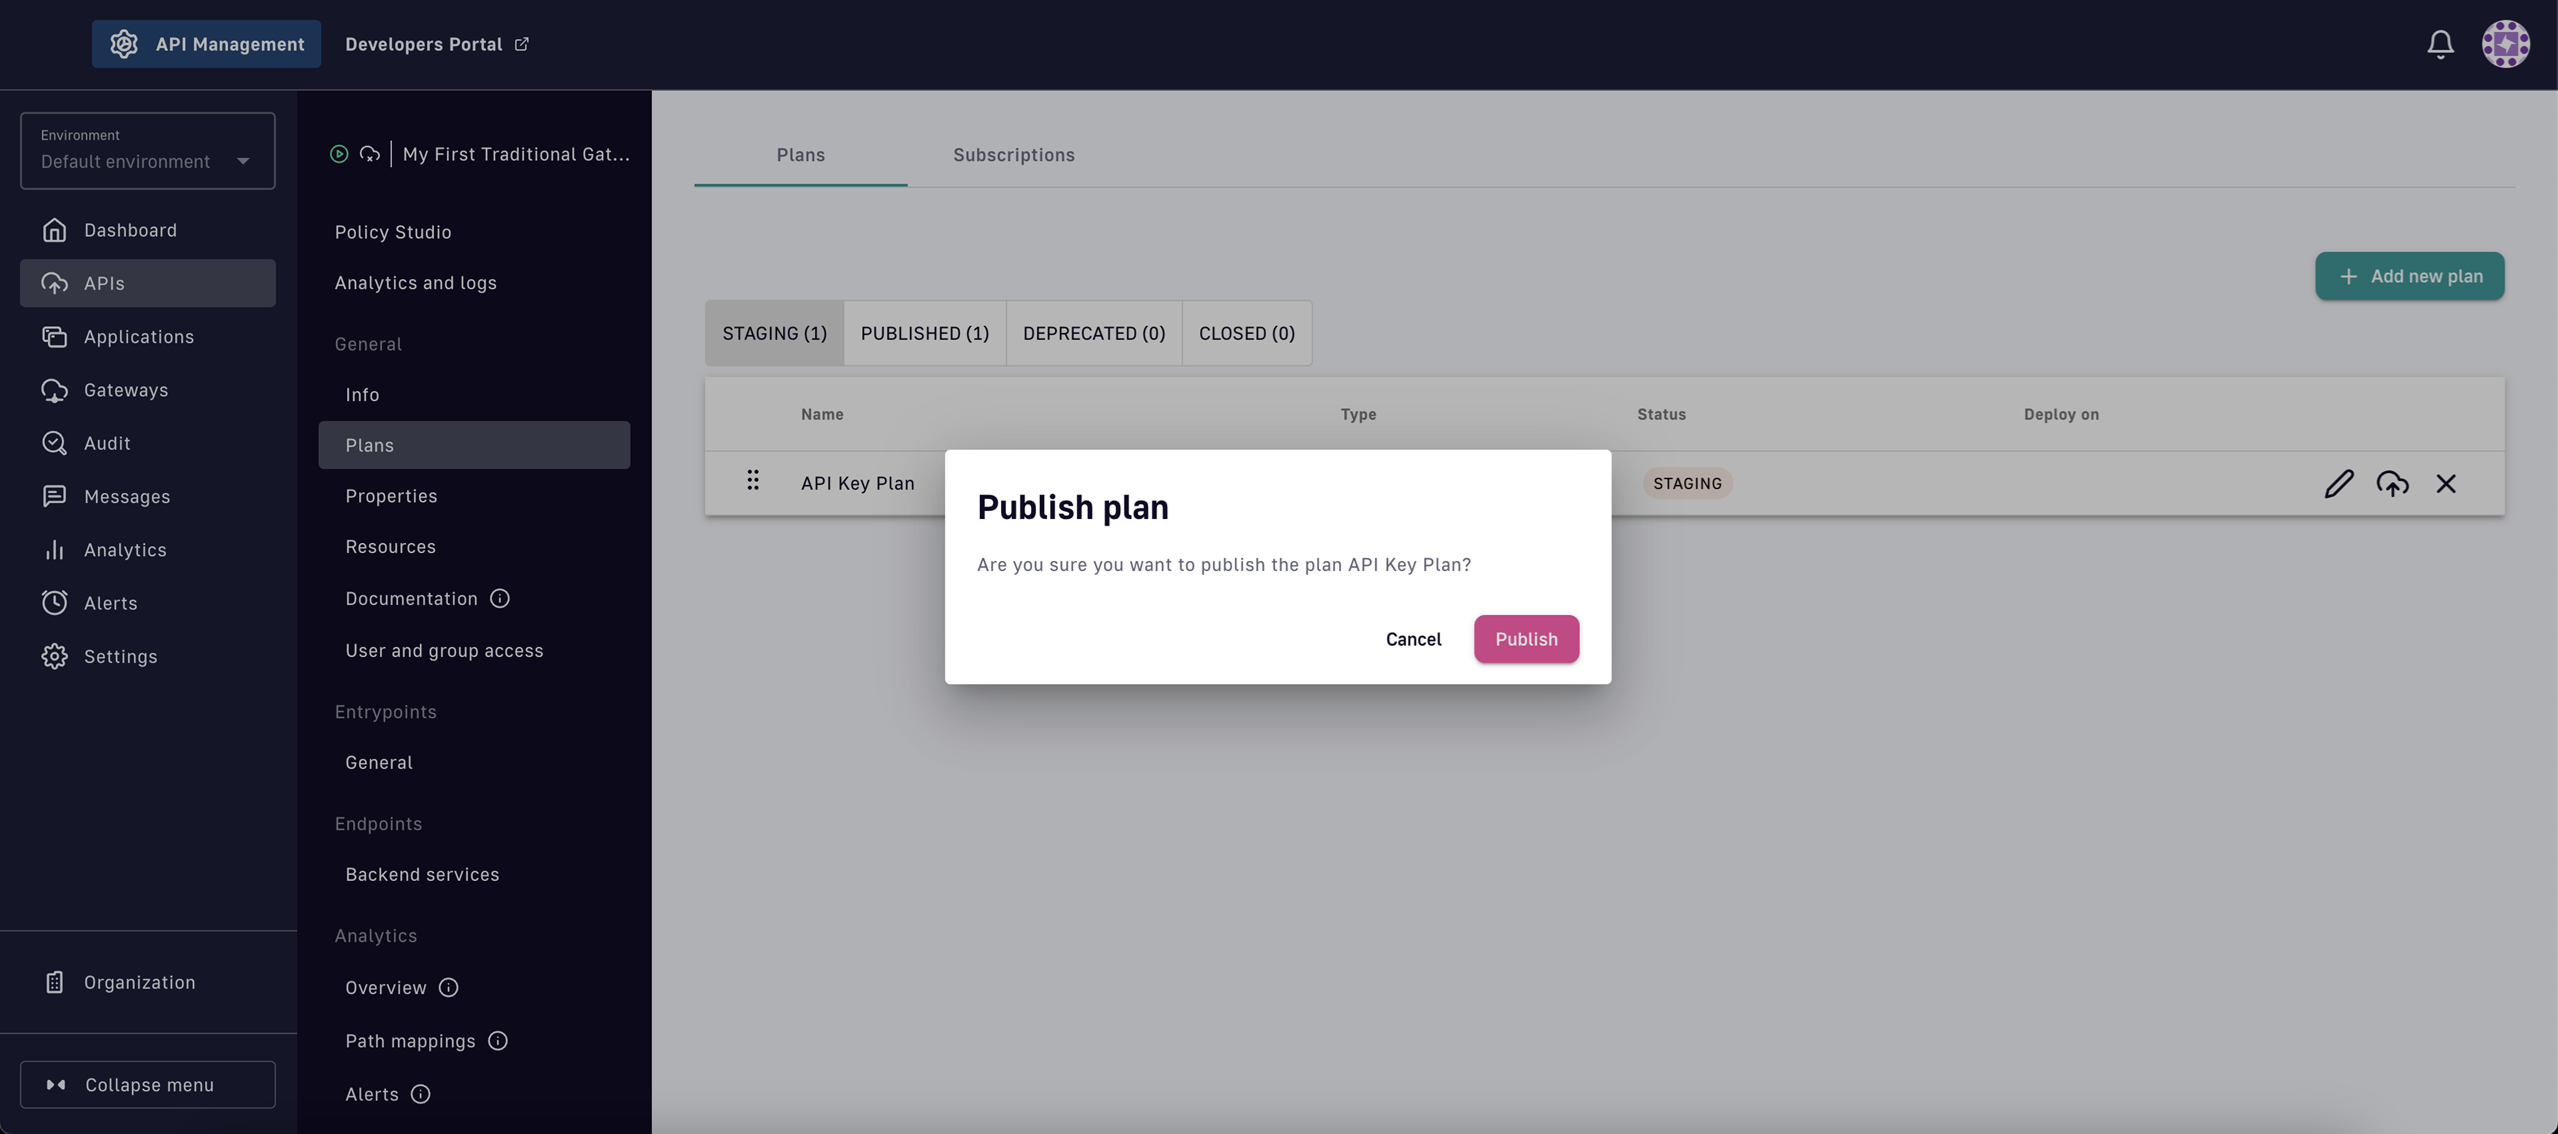
Publish the API key plan
- Select the publish icon to the far right of the plan
- Select Publish in the modal that pops up on the screen
This will change the API key plan's state from staging to published.
To ensure our new API key plan can't be bypassed, we need to close the keyless plan and then sync all the changes we've made to the Gateway.
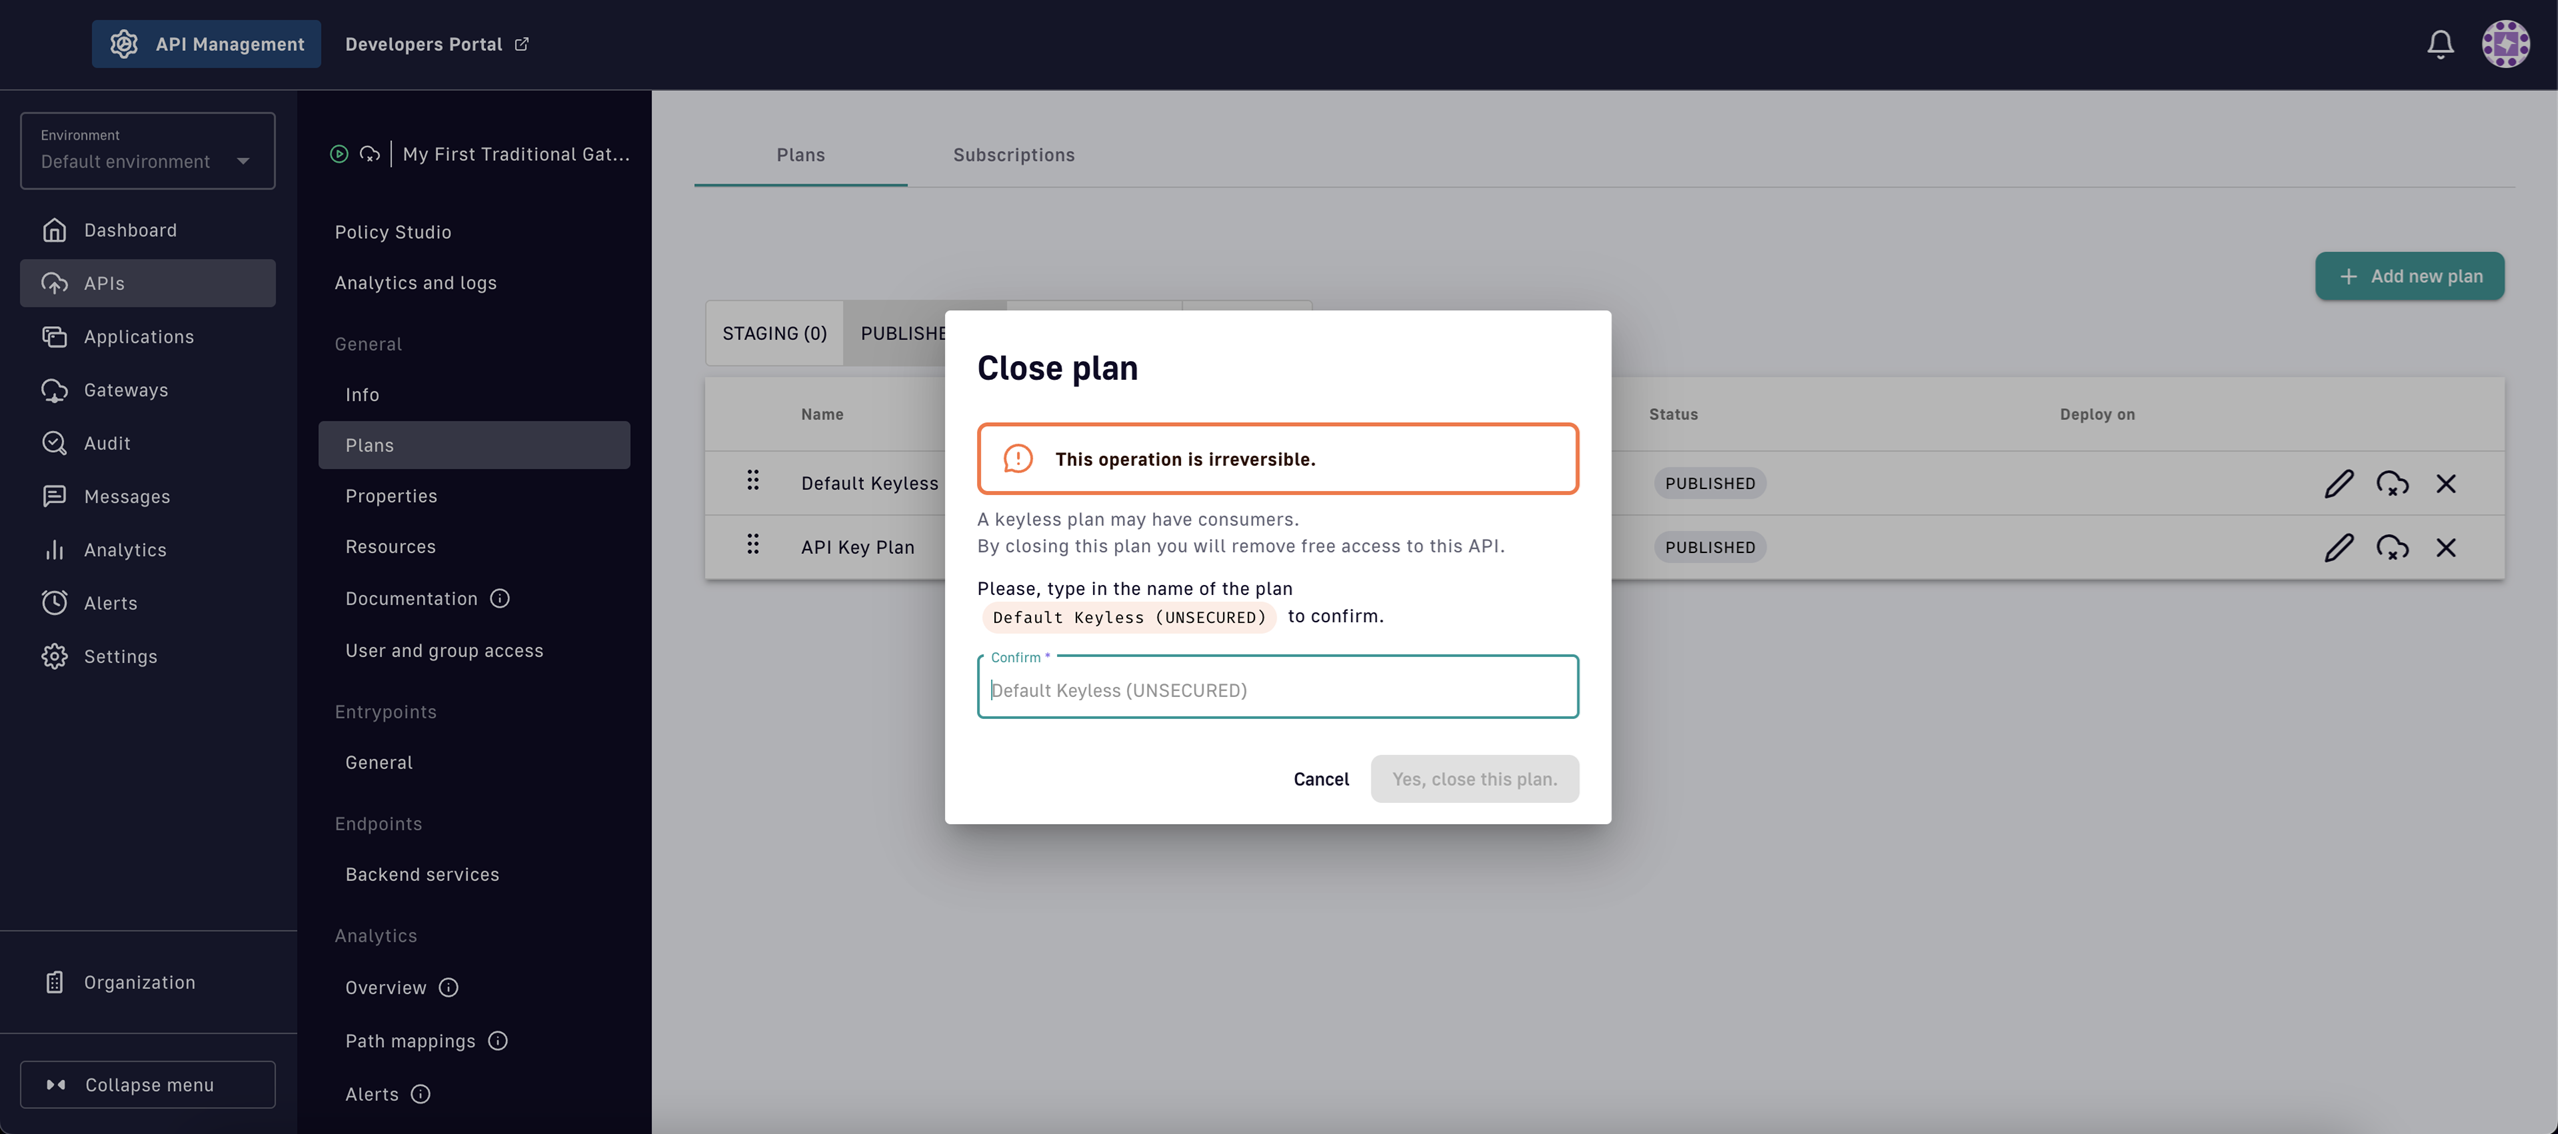
Closing the keyless plan
- Select the delete icon to the far right of the keyless plan
- Confirm the delete by typing in the name of the plan and then clicking Yes, close this plan
- Sync these changes to the Gateway by clicking Deploy API in the banner
Test the plan
One more time, try sending the same request from the first part of the Quickstart Guide.
curl -X GET -i "https://<your-gateway-server>/<your-context-path>"
401 Unauthorized error response status code.
The error response confirms the keyless plan was removed and all requests are now routed to the API key plan. We will need to subscribe to the API key plan and pass the proper authorization token with each request to continue to use the API.
Next steps
You should now be starting to grasp the power, versatility, and scope of the DSAPI APIM platform.
For the final part of the Quickstart Guide, we will be diving into the Developer Portal to show how API publishers can expose and catalog their APIs, and how API consumers can create applications and subscribe to APIs in a catalog.
Custom Policies
Overview
Policies are rules or logic that can be executed by the API Gateway. A policy acts as a proxy controller by guaranteeing that a given business rule is fulfilled during the processing of an API transaction.
Policy skeleton generation
To demonstrate how to develop a policy, the following example creates the FooHeaderCheck policy to validate if requests contain the X-Foo header.
DSAPI-policy-maven-archetype automatically adds "Policy" to the policy name you specify
The skeleton for this policy can be generated with the following code:
mvn archetype:generate\
    -DarchetypeGroupId=io.DSAPI.maven.archetypes\
    -DarchetypeArtifactId=DSAPI-policy-maven-archetype\
    -DarchetypeVersion=1.10.1\
    -DartifactId=foo-header-check-policy\
    -DgroupId=my.DSAPI.extension.policy\
    -Dversion=1.0.0-SNAPSHOT\
    -DpolicyName=FooHeaderCheck
This generates the foo-header-check-policy directory with the following structure:
.
├── pom.xml
├── README.md
└── src
    ├── assembly
    │   └── policy-assembly.xml
    ├── main
    │   ├── java
    │   │   └── my
    │   │       └── DSAPI
    │   │           └── extension
    │   │               └── policy
    │   │                   ├── FooHeaderCheckPolicyConfiguration.java
    │   │                   └── FooHeaderCheckPolicy.java
    │   └── resources
    │       └── plugin.properties
    └── test
        └── java
            └── my
                └── DSAPI
                    └── extension
                        └── policy
                            └── FooHeaderCheckPolicyTest.java
The following files are generated:
| File | Description |
|---|---|
pom.xml |
The main Maven POM file |
README.md |
The main entry point for the policy documentation |
policy-assembly.xml |
The common Maven assembly descriptor for any policies |
FooHeaderCheckPolicyConfiguration.java |
The policy configuration class |
plugin.properties |
The policy descriptor file |
FooHeaderCheckPolicyTest.java |
The JUnit unit test class for this policy |
FooHeaderCheckPolicy.java |
The main policy class that contains business code to implement the policy |
DSAPI projects are Maven-managed. A policy project is described via the Maven Project Object Model file.
Each policy should by documented by a dedicated README.md file that contains comprehensive information related to the use of your policy.
This is the policy configuration. It is described by one or several Java Bean class(es) where each attribute is a configuration parameter. During packaging, the configuration is compiled into JSON schemas using DSAPI's json-schema-generator-maven-plugin. These are read by the Gateway and used to parse API definitions. Policy configuration is injected into the policy class instance at runtime and can be used during implementation.
Each policy plugin is described by the plugin.properties descriptor, which declares the following parameters:
| Parameter | Description | Default value |
|---|---|---|
id | The policy identifier | policy artifact id |
name | The policy name | N/A (mandatory parameter) |
version | The policy version | N/A (mandatory parameter) |
description | The policy description | "Description of the Policy name DSAPI Policy" |
class | The main policy class | Path to the generated class file |
type | The type of DSAPI plugin | policy |
category | The policy category | |
icon | The policy icon | |
proxy | The policy's proxy manifest data | N/A (options include REQUEST, RESPONSE) |
message | The policy's message manifest data | N/A (options include REQUEST, RESPONSE, MESSAGE_REQUEST, MESSAGE_RESPONSE) |
A policy is enabled when declared in the API definition. Ensure the policy identifier is defined correctly. It may be hard to rename if many API definitions link to it.
Policy Application
A policy can be applied to the Request phase of the proxy chain, the Response phase, or both.
A policy can be applied to the proxy Request phase by implementing a method that handles the io.DSAPI.gateway.api.policy.annotations.OnRequest annotation. For example:
@OnRequest
public void onRequest(Request request, Response response, PolicyChain policyChain) {
    // Add a dummy header
    request.headers().set("X-DummyHeader", configuration.getDummyHeaderValue());

    // Finally continue chaining
    policyChain.doNext(request, response);
}
The PolicyChain must always be called with PolicyChain#doNext() or PolicyChain#failWith() to properly terminate onRequest processing
A policy can be applied to the proxy Response phase by implementing a method that handles the io.DSAPI.gateway.api.policy.annotations.OnResponse annotation. For example:
@OnResponse
public void onResponse(Request request, Response response, PolicyChain policyChain) {
    if (isASuccessfulResponse(response)) {
        policyChain.doNext(request, response);
    } else {
        policyChain.failWith(new PolicyResult() {
            @Override
            public boolean isFailure() {
                return true;
            }

            @Override
            public int httpStatusCode() {
                return HttpStatusCode.INTERNAL_SERVER_ERROR_500;
            }

            @Override
            public String message() {
                return "Not a successful response :-(";
            }
        });
    }
}

private static boolean isASuccessfulResponse(Response response) {
    switch (response.status() / 100) {
        case 1:
        case 2:
        case 3:
            return true;
        default:
            return false;
    }
}
PolicyChain must always be called with PolicyChain#doNext() or PolicyChain#failWith() to properly terminate onResponse processing
A policy is not restricted to only one Gateway proxy phase. It can be applied during both the Request and Response phases by using both annotations in the same class.
Provided parameters
Annotated methods can declare parameters which are automatically provided by the Gateway at runtime. Available parameters are:
| Parameter class | Mandatory | Description |
|---|---|---|
io.DSAPI.gateway.api.Request | No | Wrapper to the Request object containing all information about the processed request (URI, parameters, headers, input stream, …) |
io.DSAPI.gateway.api.Response | No | Wrapper to the Response object containing all information about the processed response (status, headers, output stream, …) |
io.DSAPI.gateway.api.policy.PolicyChain | Yes | The current policy chain that gives control to the policy to continue (doNext) or reject (failWith) the chain |
io.DSAPI.gateway.api.policy.PolicyContext | No | The policy context that can be used to get contextualized objects (API store, …) |
Secret Providers
Introduction
DSAPI offers a set of secret-provider plugins that, when deployed, enable secret managers to obscure database passwords and certificates in DSAPI Gateway, API Management, and Access Management configuration files.
Secret managers provide a secure and convenient way to encrypt, store, manage, and retrieve secrets and other sensitive data such as tokens, API keys, passwords, certificates, etc. Using secret managers, it's possible to enforce consistent security policies, ensure resources and digital credentials can only be accessed by authenticated and authorized users, and instantly connect systems to accomplish automated tasks.
While a secret manager refers to any third party software that is able to store and manage secrets securely, secret providers refer to a category of DSAPI plugin. Secret provider plugins can gain access to secret managers via credentials and a secured connection to provide secrets to DSAPI configurations.
kubernetes://... remains available, but is discouraged and will be deprecated over future releases. Instead, secret providers retrieve sensitive information (passwords, x509 pairs, etc.) from secret managers (Kubernetes, HC Vault...) to ensure this information does not appear in clear text.
The sections below focus on the details of secret-provider plugins, how to configure access to secret managers, and how to resolve secrets.
Secret provider plugins
Secret providers are generic, configurable, and autonomous clients that manage connections, retries, and credentials renewal when connecting to secret managers. The following secret-provider plugins are available for DSAPI Gateway, Management API, and Access Management:
kubernetes: A Community Edition plugin that fetches secret and TLS pairs from Kubernetes.iovault: An Enterprise Edition plugin that uses the Key/Value engine of HashiCorp Vault
The following table shows which features have been implemented for each of these plugins:
| Feature | kubernetes | vault |
|---|---|---|
| Resolve a secret | Yes | Yes |
| Watch a secret | Yes | Yes (via polling) |
| Secret format | All K8s types (TLS, generic, etc.) | Key/Value engine v1 or v2 (no mixing) |
| TLS | Yes | Yes, but not with PKI engine |
| Client | in-house | Lean and community- based, but flawed. To be replace by in-house. |
| Zip size | 11KB | 161KB |
Configuring access to secret managers
To configure access to secret managers, you can use DSAPI.yml, environment variables, or JVM properties.
The following shows a DSAPI.yml configuration, where plugins can run in parallel when enabled:
secrets:
    loadFirst: kubernetes # to allow others SM credentials to be resolved from k8s
    kubernetes:
      enabled: true
    vault:
      enabled: true
Alternatively, a secret-provider plugin can be enabled and configured by setting environment variables, e.g., DSAPI_SECRETS_KUBERNETES_ENABLED=true.
Configuration details are discussed below:
- No default assumptions are made regarding the location of
kubeConfigFile. The absence of this file assumes that DSAPI is deployed in Kubernetes and the configuration is in-cluster. - Namespace can be overridden in URLs via
?namespace=<name>. If no namespace is provided, the namespace is assumed to be that of the cluster in which the platform is deployed. To fetch from the default namespace, it must be set explicitly, unless DSAPI is deployed in that namespace.
secrets:
    kubernetes:
      enabled: true
      kubeConfigFile: /opt/DSAPI/config/kube-config.json
      timeoutMs: 3000
      namespace: default
Explanations inline:
secrets:
    vault:
      enabled: true
      host: 127.0.0.1
      port: 8200
  # optional
      namespace: myapphcvns      # default: "default"
      kvEngine: V2               # defaults to v2 can be "v1", no mixing supported
      readTimeoutSec: 2
      connectTimeoutSec: 3
  # required although can be disabled
      ssl:
        enabled: false                        # not for production
        # format: "pemfile"                   # one of "pem", "pemfile", "truststore"
        # pem:                                # (only for "pem")
                                              # value is base64 with headers
        # file: /opt/DSAPI/vault.pem       # for pemfile truststore files
      auth:
        method: token # one of "token", "github", "userpass", "approle", "cert" (mTLS)
      ### github config
        config:
          token: hvc.KksuhsLShi8d8s7/sLius==
      ### github config
          # token:
          # path: <non standard github path>
      ### userpass config
          # username:
          # password:
          # path: <non standard github path>
      ### approle
          # roleId:
          # secretId:
      ### cert
          # format: pemfile                    # one of "pem","pemfile","keystore"
          ## for 'pem' and 'pemfile' format
          # cert:                              # file path or inline cert
          # key:                               # file path or inline private key
          ## for 'keystore' format
          # keyStore:      # file path
          # password:      # keystore password
      # RECOMMENDED but works without
      # for both watch and read
      retry:
        attempts: 2          # set '0' to disable
        intervalMs: 1000
      # if disabled an error will be displayed at load time if http.ssl.keystore.secret is used with watch enabled
      watch:
        enabled: true
        pollIntervalSec: 30
Resolving secrets in configuration files
Secret providers extend the operable range of secret managers to both resolve secrets on startup and watch secrets.
This section covers the syntax for resolving secrets, how secrets are resolved for TLS, and how secret-provider plugins are used to configure secret managers.
Syntax
A consistent URL-like syntax can be used to specify the location of the secret (single value or pairs):
secret://<plugin id>/<secret path or name>[:<data key>][?option=value1&option=value2]
This is a custom syntax that doesn't follow RFC for query parameters but adheres to the following:
&splits the string into key/value pairs=(first occurrence) splits key and value. If absent, the default value istrue- The
data keyis used for single values - A key can be repeated for options with multiple values
- No other characters are interpreted
The examples below show variations of this syntax as it applies to each of the plugins.
ds:
    mongodb:
      password: secret://kubernetes/DSAPI-mongo:password?namespace=DSAPI
DSAPI-mongo: The secret holding key/value pairspassword: The desired key (optional)?namespace: Overrides the configuration namespace (secrets.kubernetes.namespace)
ds:
    mongodb:
      password: secret://vault/secret/DSAPI/mongo:password?namespace=DSAPI
secret: The mount point for Vault's Key-Value engine (required)
DSAPI/mongo: The secret holding key/value pairs (required)
password: The desired key (optional)
?namespace: Overrides the configuration namespace (secrets.vault.namespace)
Resolving secrets for TLS
The following shows the TLS configuration in DSAPI.yml, which replaces the ssl.keystore.kubernetes parameter:
http:
    secured: true
    ssl:
      keystore:
        type: pem
        watch: true
        secret: secret://kubernetes/DSAPI-tls
When the secret is fetched, both the certificate and private_key must be read. DSAPI points to the whole secret instead of specifying a data key because the names of the keys are unknown.
The default mapping of the kubernetes plugin matches the "tls" secret type:
certificate→tls.crtprivate_key→tls.key
By default, the data keys for other secret managers are assumed to be "certificate" and "private_key." However, users may want to follow other naming conventions or store several cert/key pairs in a single secret. For example, in Kubernetes, users may store TLS secrets in "generic" secrets.
To extract the certificate and private key and create a keystore to secure DSAPI in a way that works with any secret manager, we use the query parameter keymap. For example:
secret://kubernetes/giotls?
    keymap=certificate:frontend-tls-cert&keymap=private_key:frontend-tls-priv-key
We expect the secret named giotls to contain two keys, frontend-tls-cert and frontend-tls-key, which are mapped to certifcate and private_key, respectively.
Instead of using PEM, you can use a base64 encoded Java KeyStore with the following configuration:
http:
    secured: true
    ssl:
      keystore:
        type: PKCS12  # JKS format supported despite not recommended for production
        watch: true
        secret: secret://kubernetes/DSAPI-jks/content
        password: secret://kubernetes/DSAPI-jks/password
Note that the keystore content (key content of garavitee-jks) and password are sought separately. In addition, DSAPI does not perform any mapping because naming is Java-specific.
Using secret providers to configure Secret Managers
The example below uses the kubernetes plugin to configure the Vault KV engine. The Vault credentials are only visible to the user with higher privileges who set up the Secrets in Kubernetes.
secrets:
    loadFirst: kubernetes  # this is mandatory to enable this feature
    kubernetes:
      enabled: true
      namespace: my-app
    vault:
      enabled: true
      # other mandatory configuration parameters
      auth:
        method: token
        config:
          token: secret://kubernetes/vault-creds:config_token
Known limitations
Current limitations are summarized below:
- Only the
http.ssl.keystore.secretx.509 pairs (whether format is PEM ot KeyStore) can be watched and therefore hot-reloaded. - Only system environment variables and
DSAPI.ymlproperties can be resolved into secrets. A secret URL cannot be set via JVM properties, e.g.,-Dsystem.proxy.password=secret://kubernetes/giosecrets:proxypasscannot be used. The parameters are passed directly to the platform without parsing and will not be detected by asecret providerplugin. - The
vaultplugin watches via polling because Vault events is an unstable feature.
Sharding tags
Introduction
Sharding tags allow you to “tag” Gateways with a keyword and deploy an API to a Gateway with a certain tag. Gateways can be tagged with one or more sharding tags. Additionally, the ! symbol can be placed before the tag name to specify exclusion rules.
To learn more about how to deploy APIs to specific Gateways based on sharding tags, refer to Configure Deployments.
The sections below discuss:
- Tagged Gateway/API behavior
- Configuring sharding tags for DSAPI API Gateways
- Defining sharding tags for an organization
- Adding sharding tags to an API
- Mapping entrypoints to sharding tags
Tagged Gateway/API behavior
API deployment is impacted by how tags are applied to APIs and Gateways.
Rules
- Tagged Gateway instances will never deploy tagless APIs.
- Tagless Gateway instances will deploy every API, regardless of how the APIs are tagged.
- An API defined with a specific tag will only be deployed on a Gateway that has been assigned that tag.
Examples
- A tagless API will not be deployed on a Gateway tagged with
x. - An API tagged with
xwill be deployed on a tagless Gateway. - A tagless API will be deployed on a tagless Gateway.
- An API defined with tag
xwill be deployed on a Gateway that has been assigned tagx. - An API defined with tag
xwill be deployed on a Gateway that has been assigned tag!y. The tag!ymeans that the Gateway has been assigned every tag buty.
Configure sharding tags for your DSAPI API Gateways
Our discussion of sharding tag configuration assumes an architecture that includes both DMZ Gateways and internal, corporate Gateways. We want to tag these Gateways as external-only and internal-only, respectively, per the diagram below:
.png)
Before sharding tags can be defined in the DSAPI API Management Console, the API Gateway DSAPI.yaml file must be modified to assign a DSAPI API Gateway to a specific sharding tag:
DMZ Gateways:
  tags: ‘external’
Internal Network Gateways:
  tags: ‘internal’
For example, if Gateways can be tagged as “external” and “partner," the below sharding tag definition configures a Gateway to host external APIs that are not dedicated to partners:
tags: ‘product,store,!partner’
Once Gateways have been tagged, these sharding tags must be defined within API Manager.
Define sharding tags for an organization
Follow the steps below to add sharding tags to your organization.
-
Log in to your API Management Console:
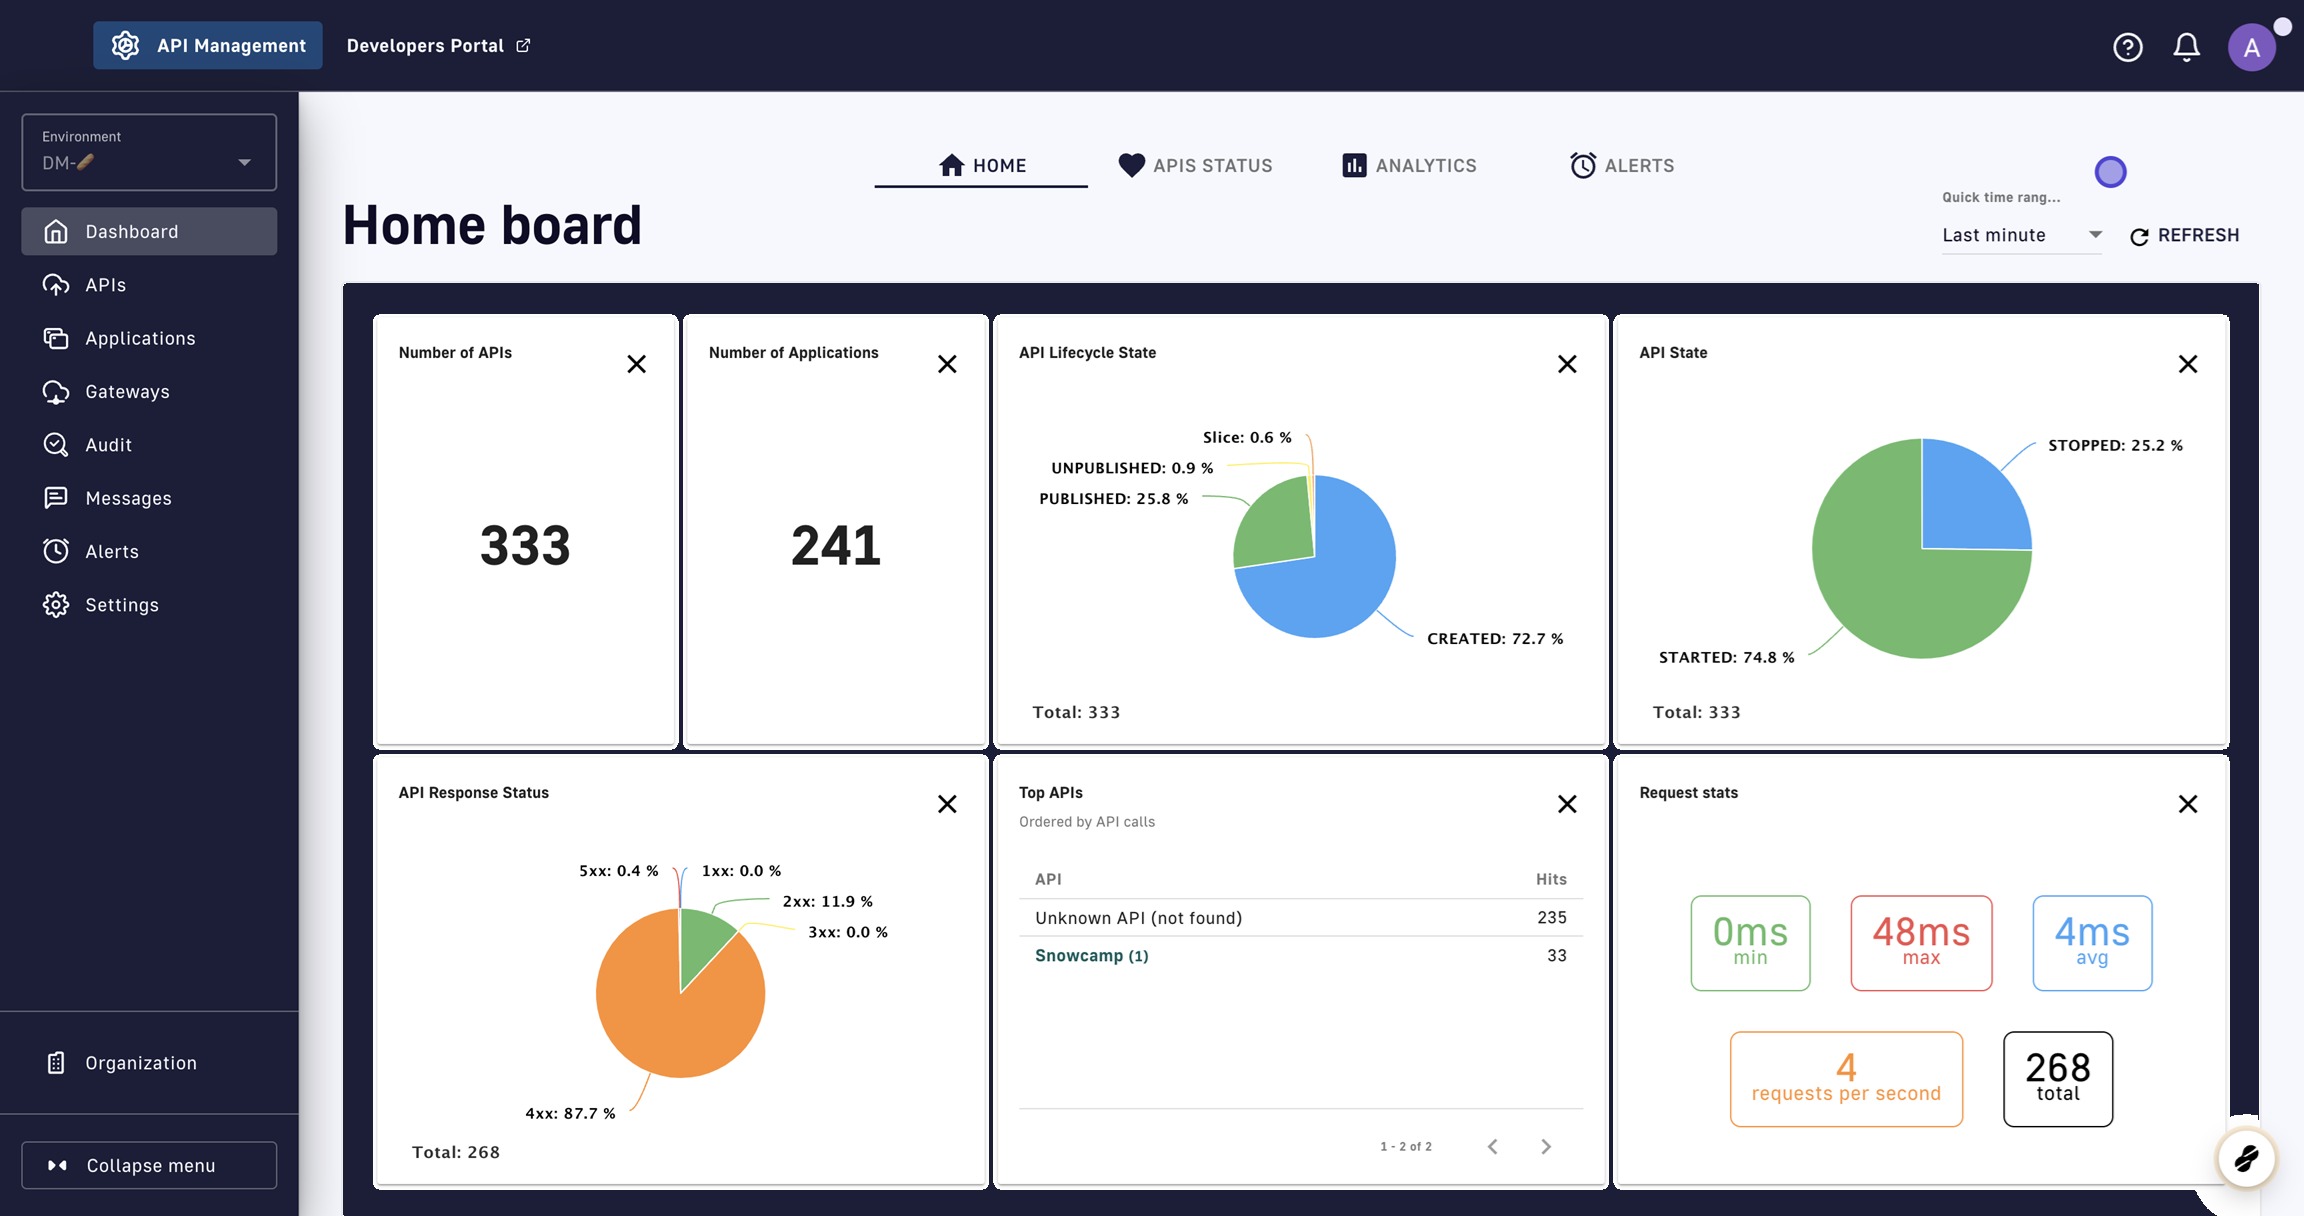
-
In the left-hand nav, select Organization:
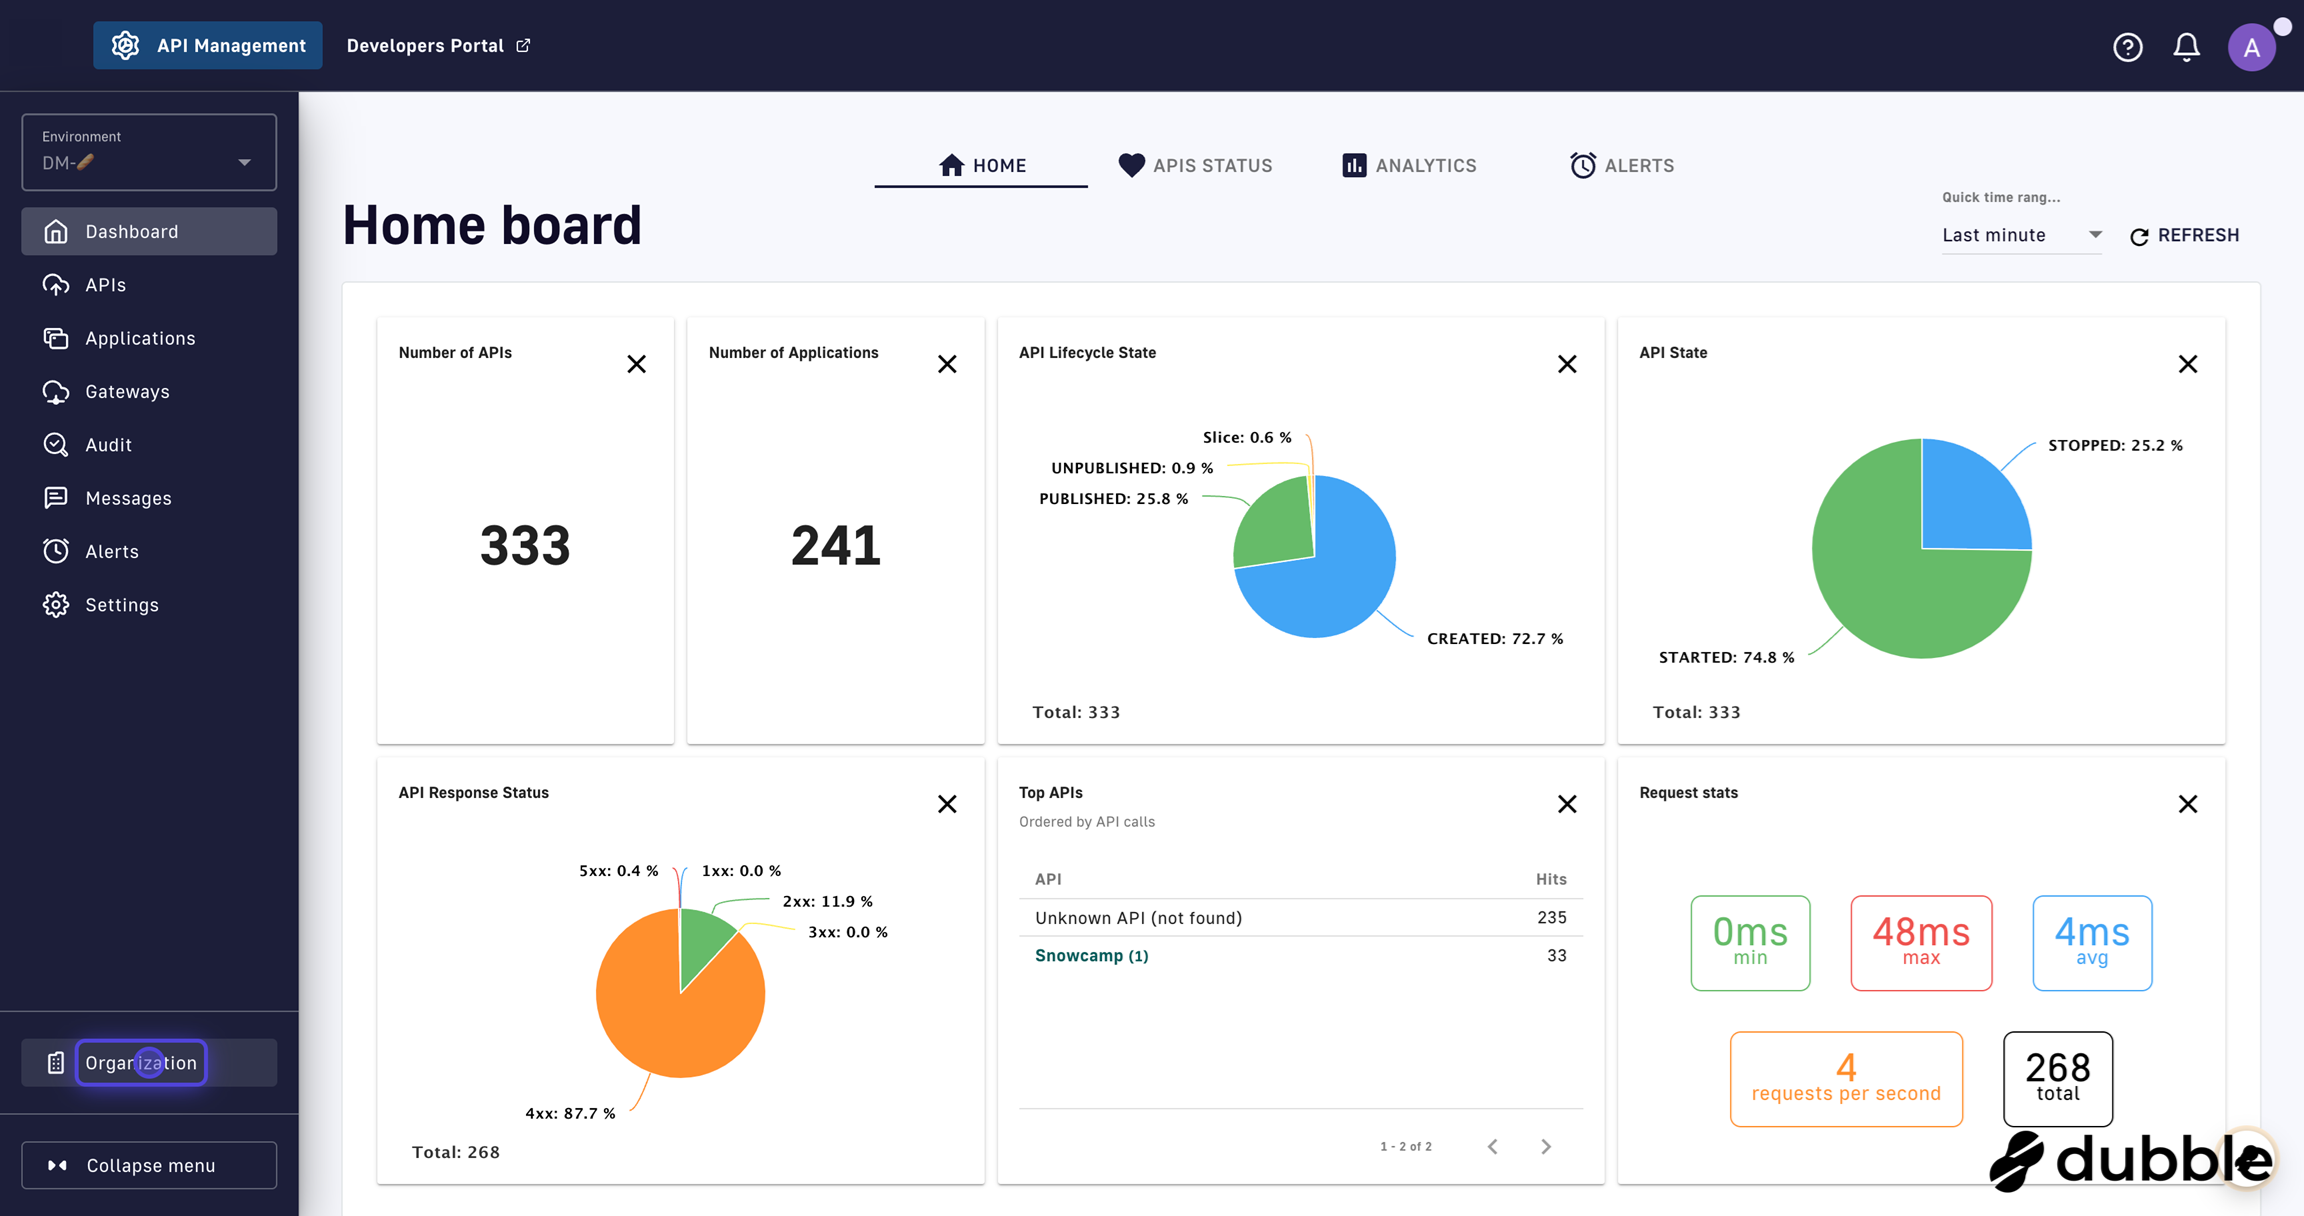
-
On the Organization page, select Sharding tags:
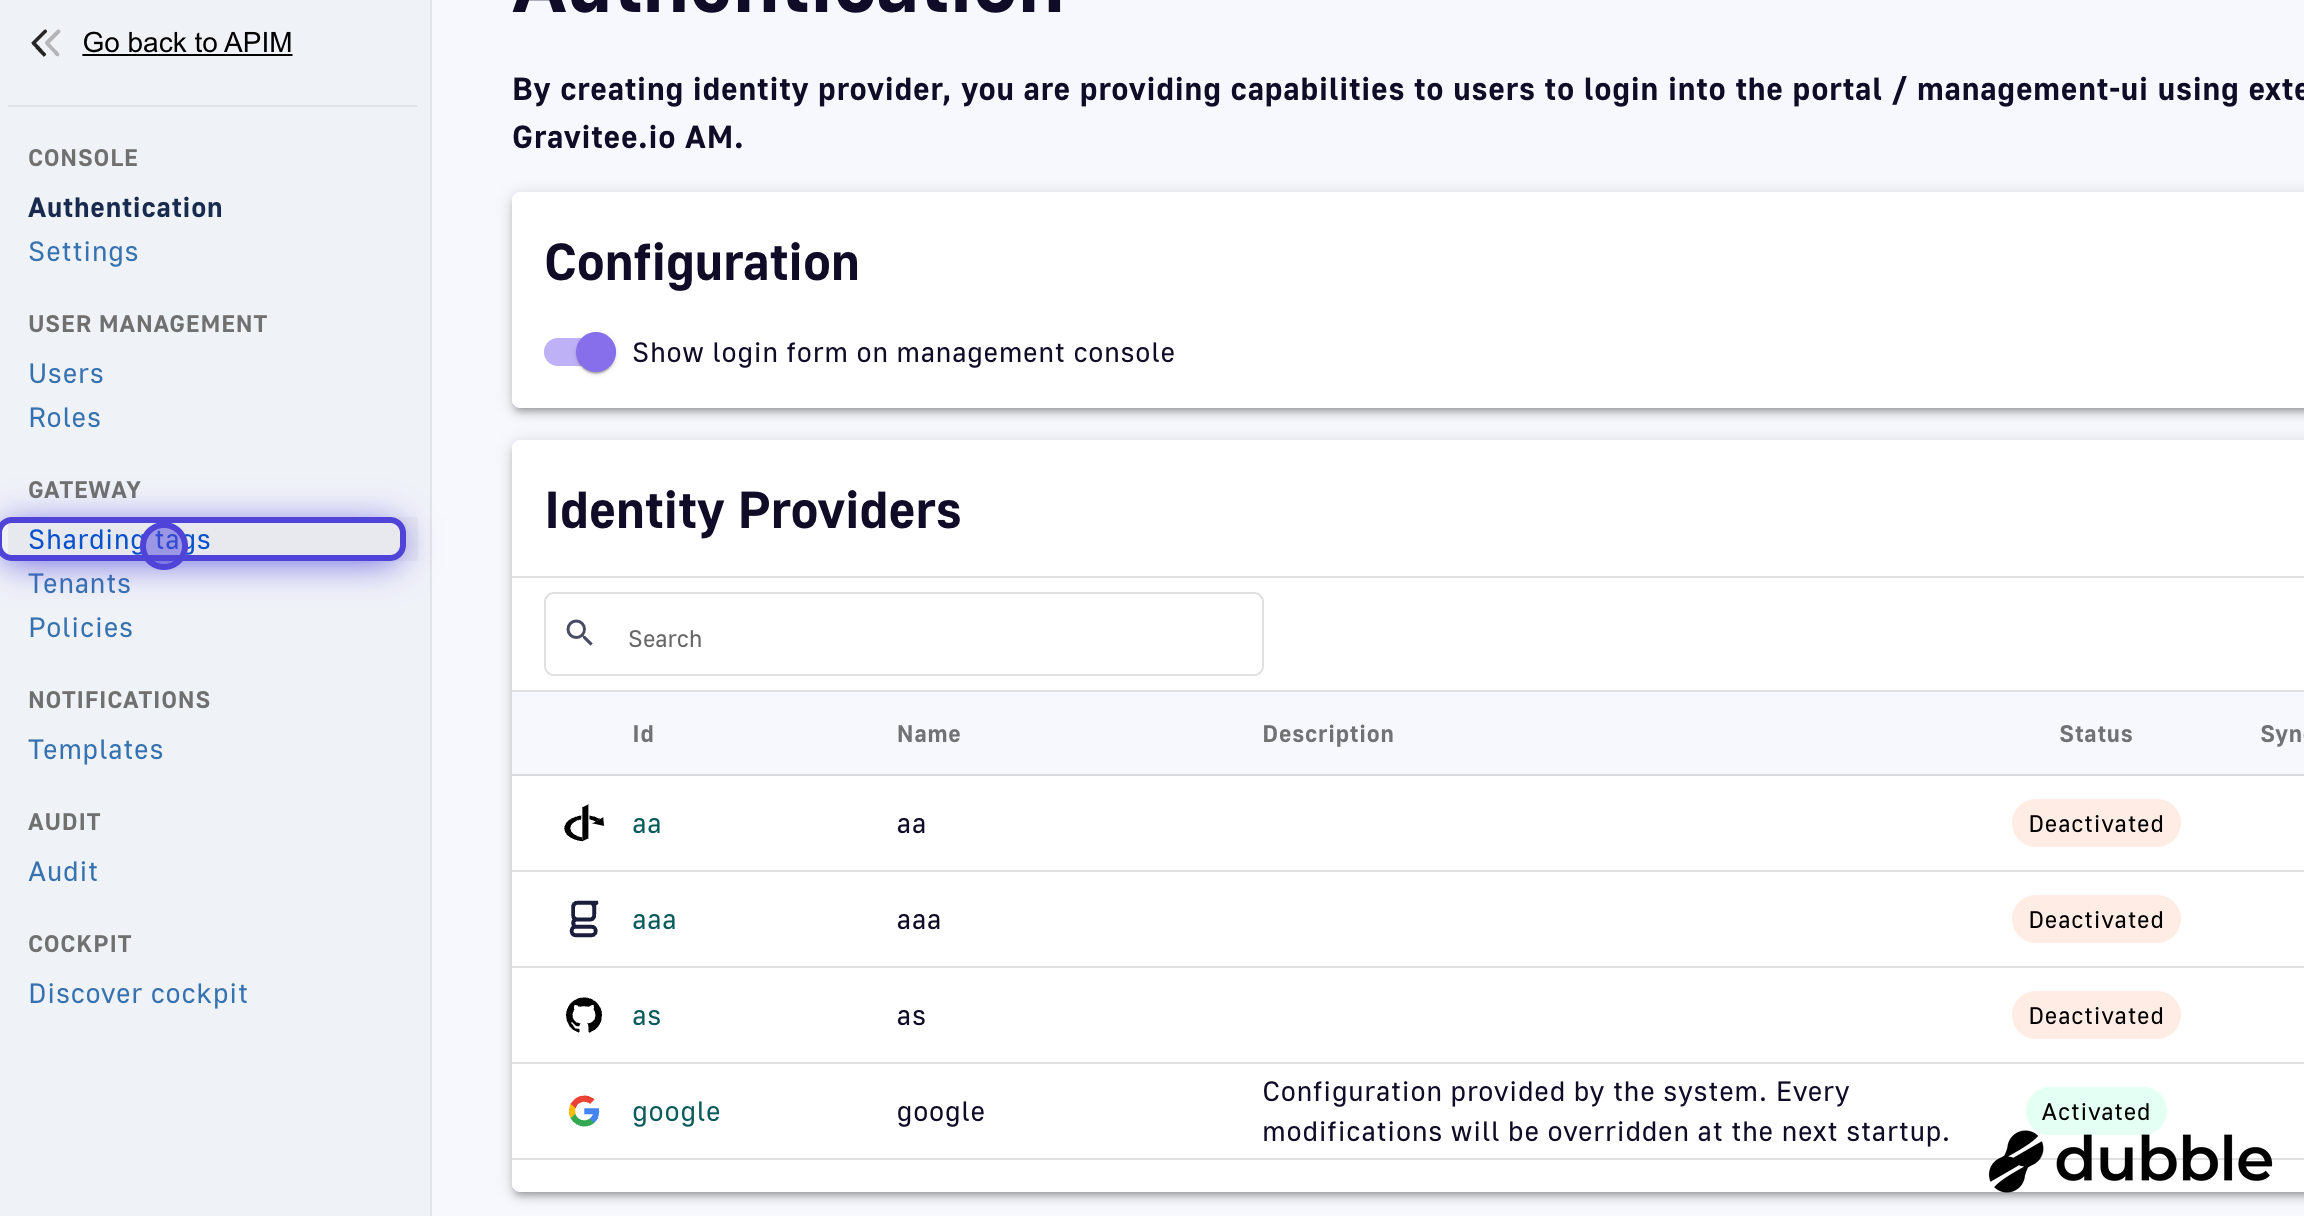
-
Click + Add a tag:
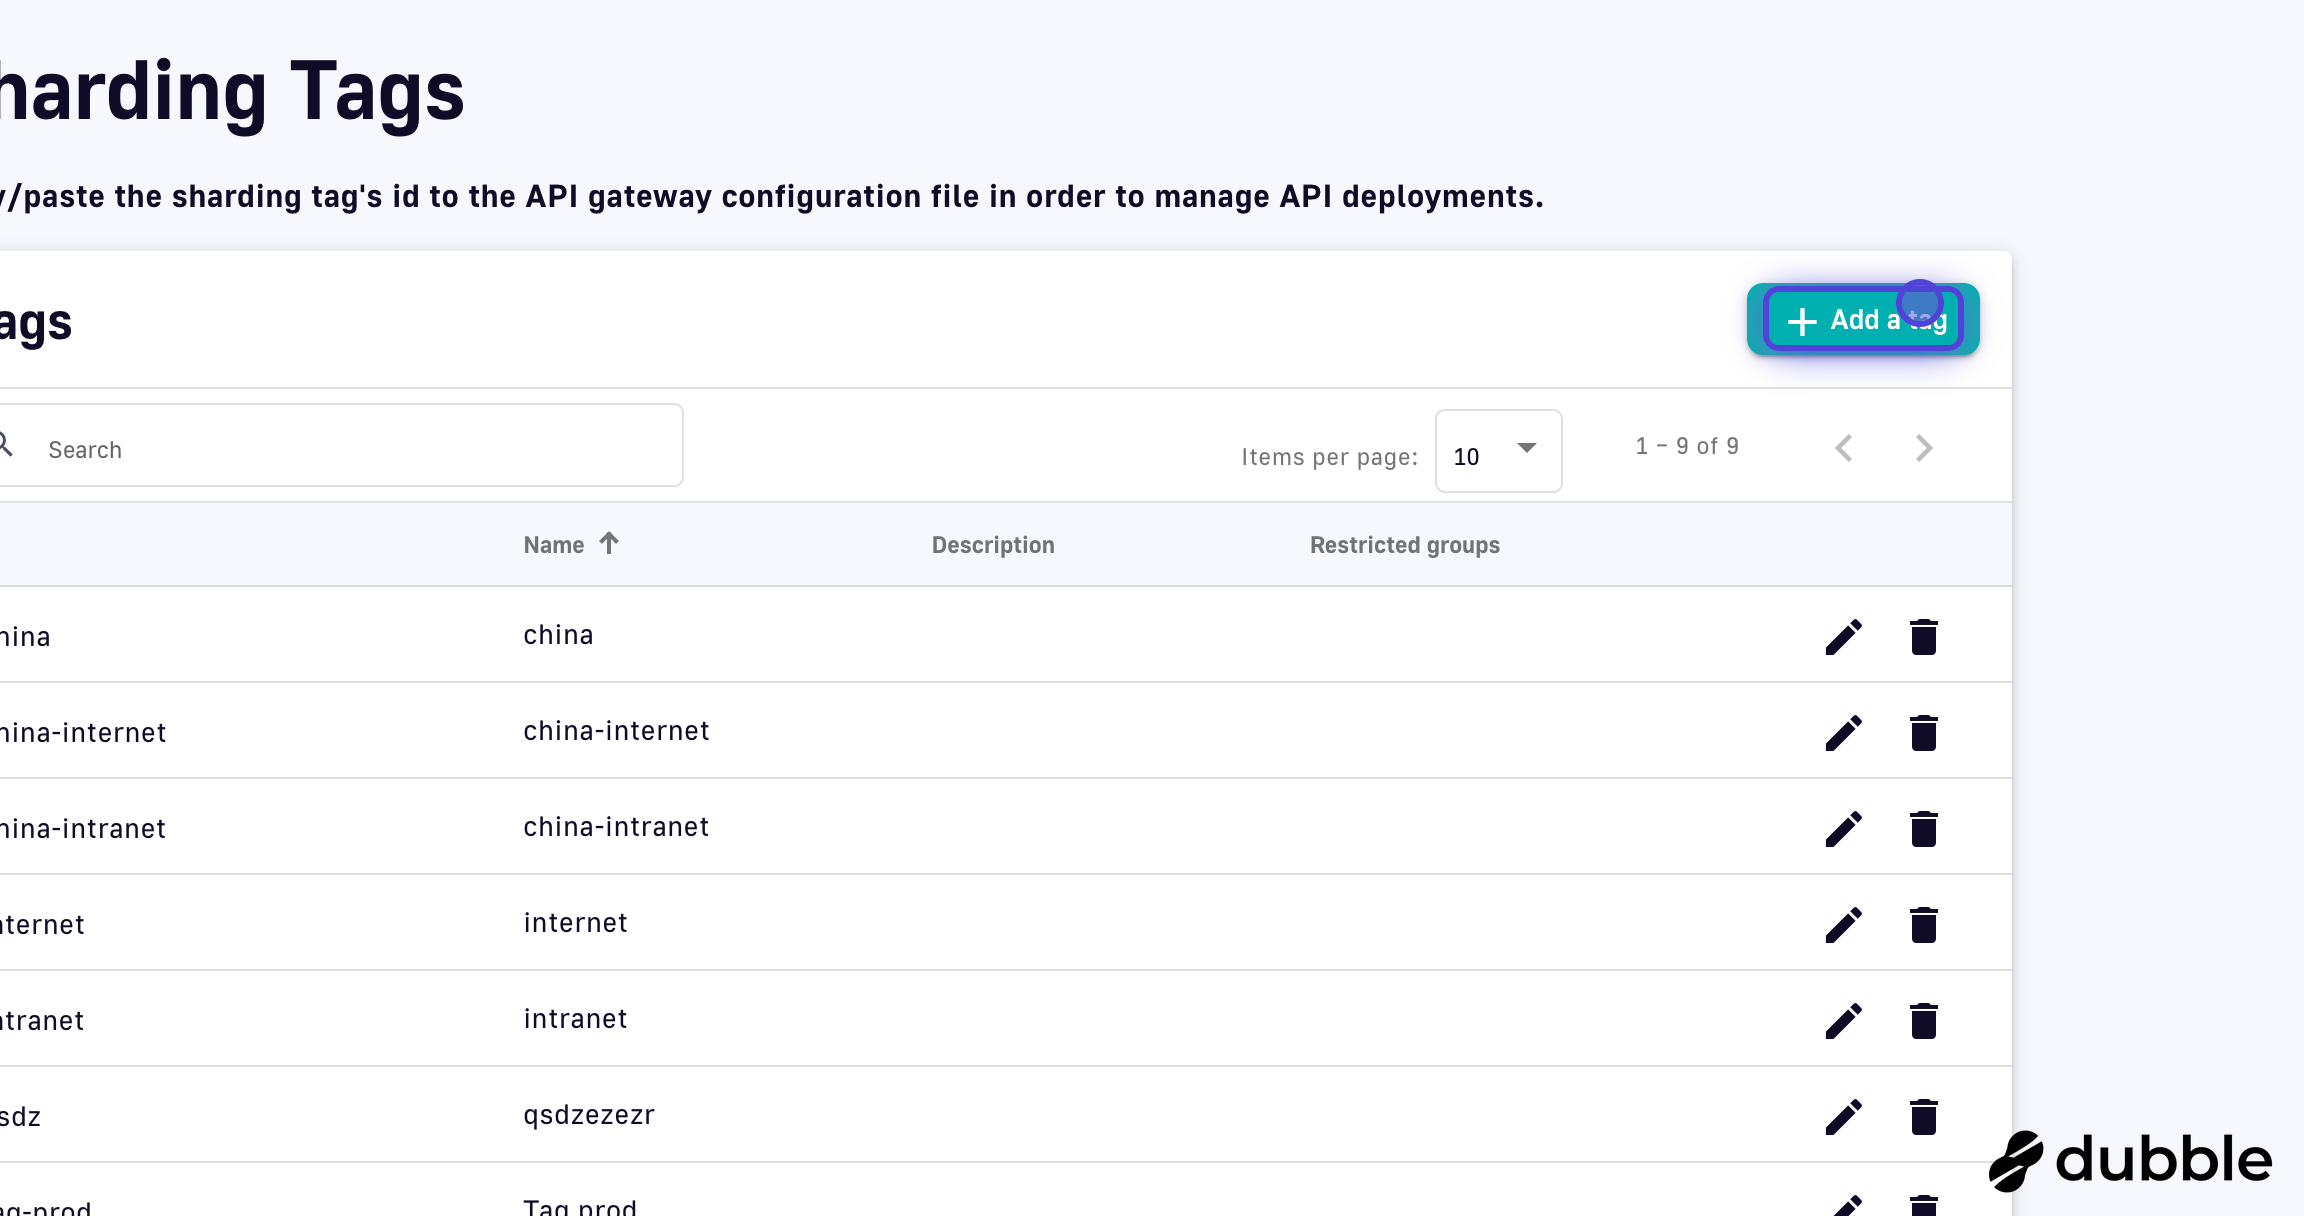
-
Create the same tags that you created in the
DSAPI.yamlfile, ensuring the names are an exact match. For this example, let's first create the "internal" tag using the Name field: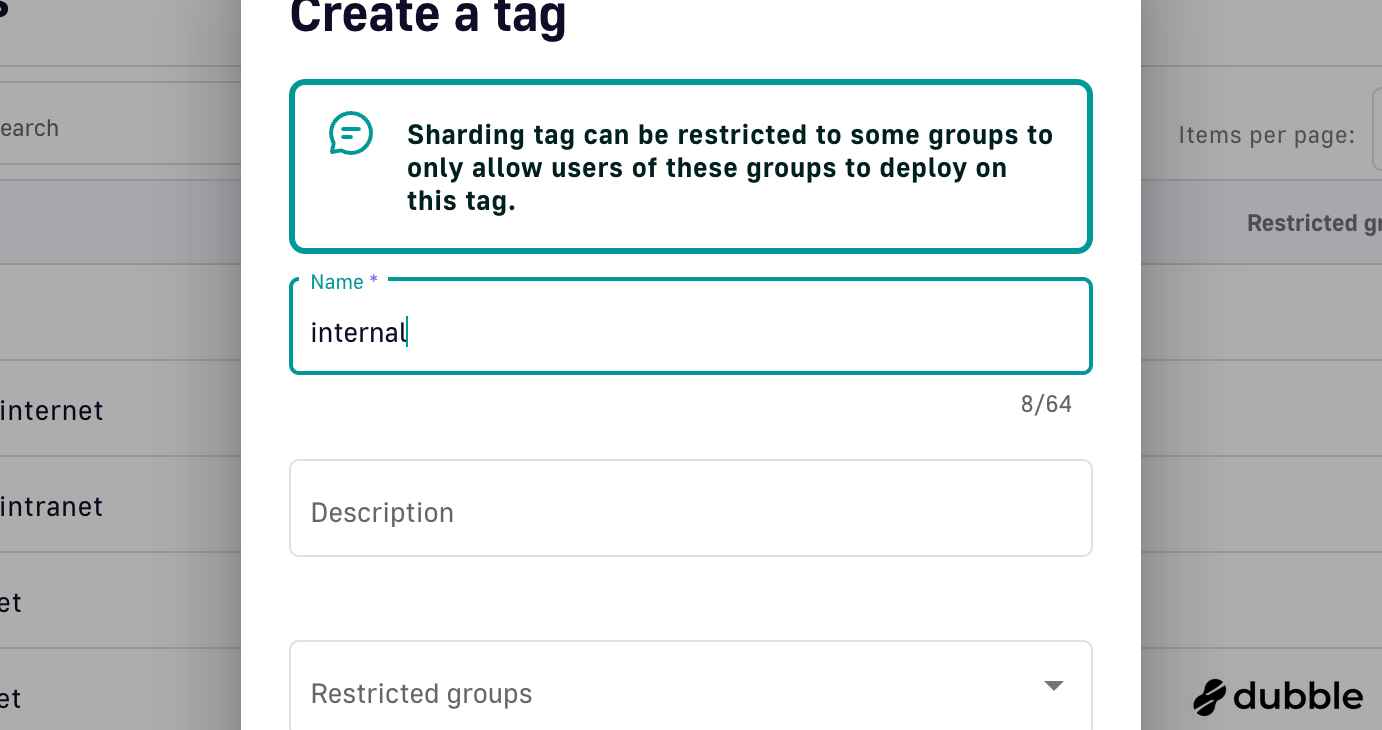
-
(Optional) You can choose to restrict the usage of the tag to certain groups, as defined in DSAPI user administration. We'll skip this.
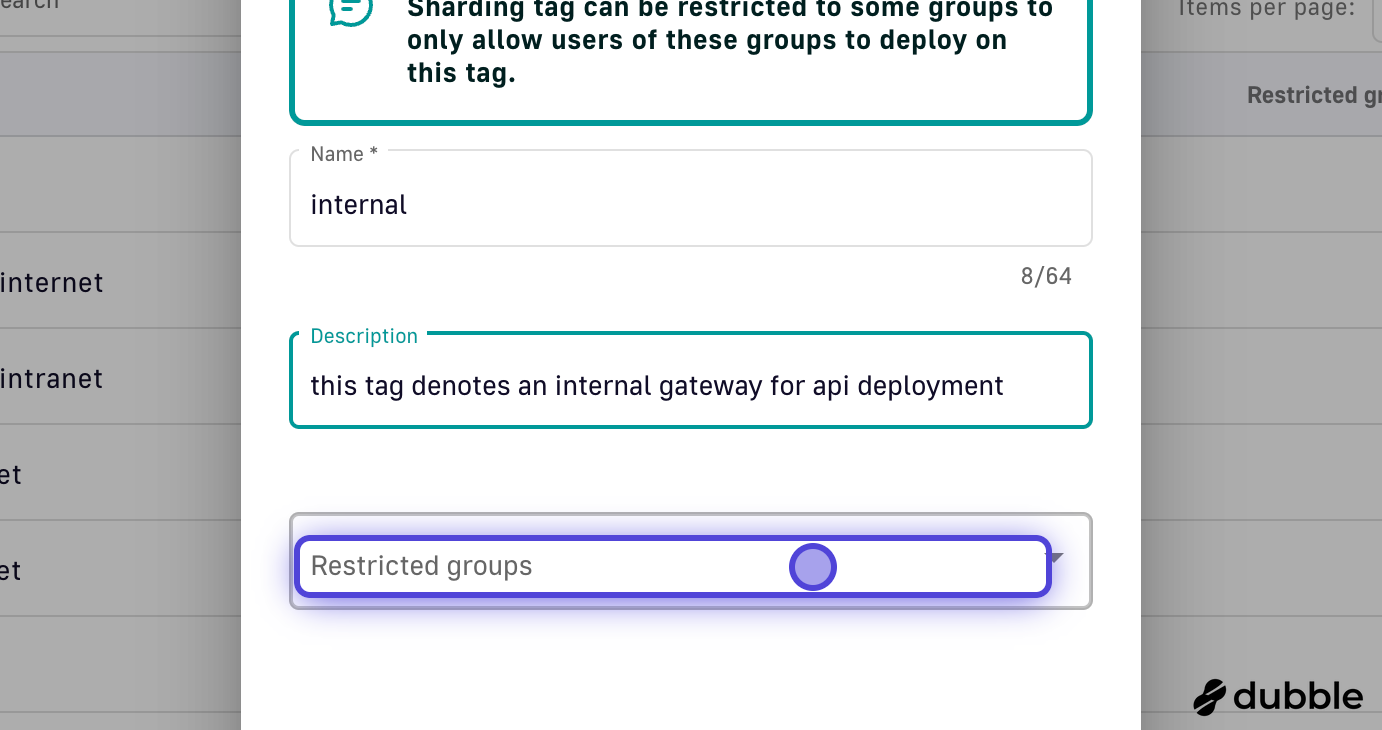
-
Click Ok:
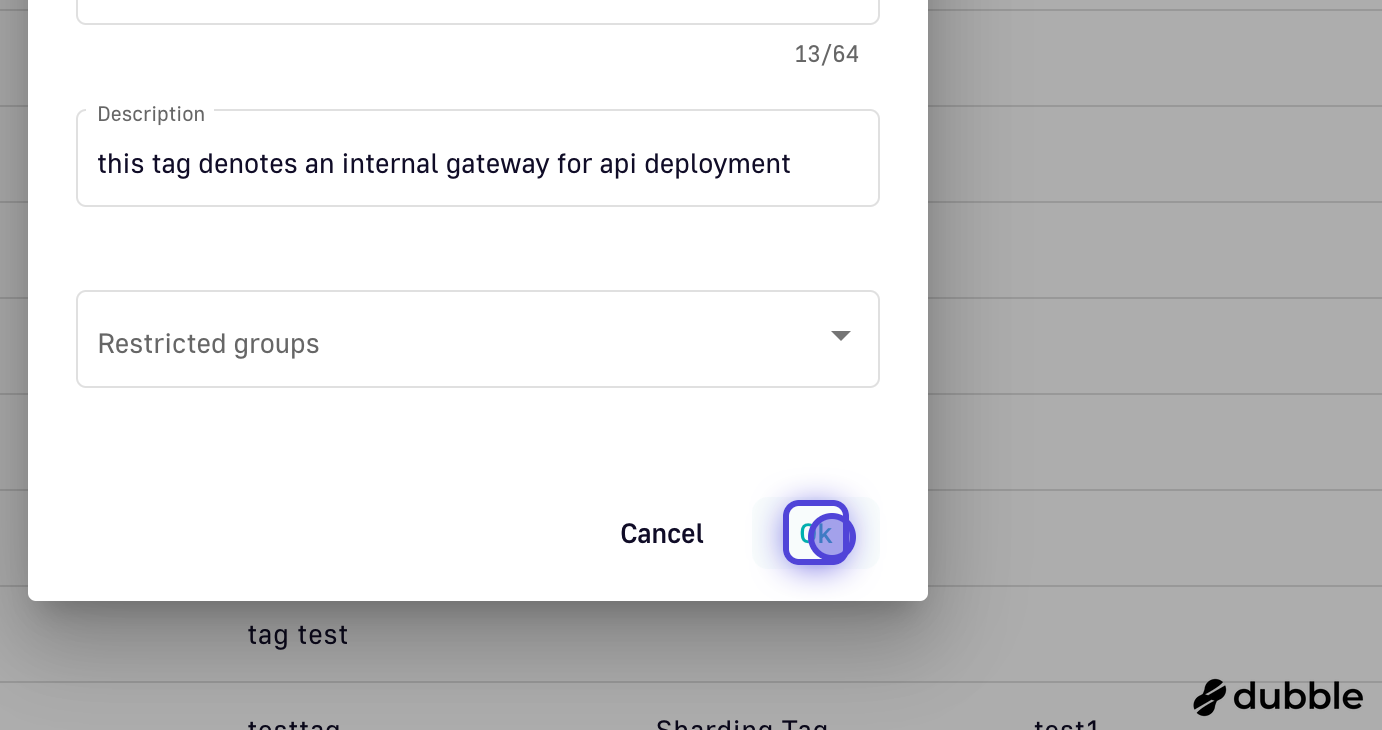
-
Let's add the "external" tag, following the same steps:
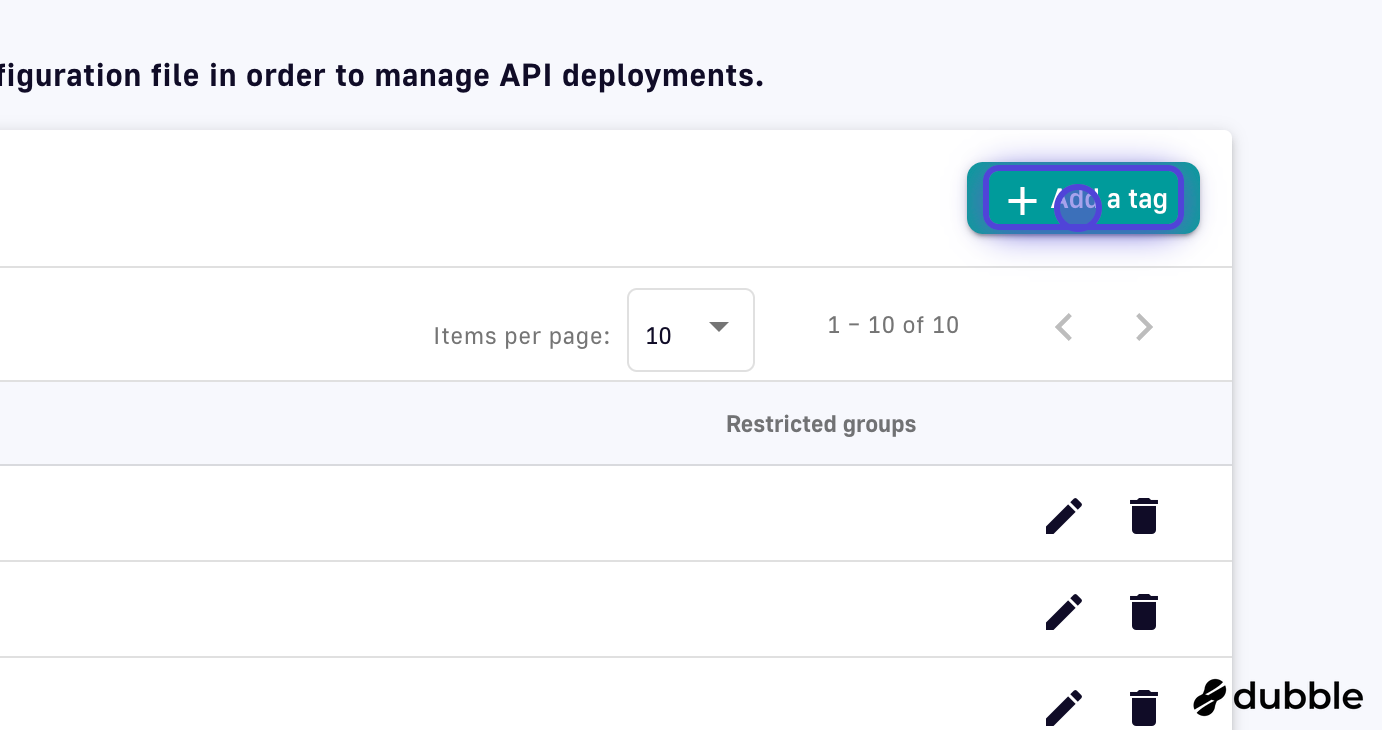
Add sharding tags to an API
Follow the instructions below to add a sharding tag to a v2 API or a v4 API.
-
Log in to your API Management Console
-
Select APIs from the left nav
-
Choose the API you want to tag
-
Select Deployment from the inner left nav:
.png)
-
Select one or more tags from the Sharding tags drop-down menu, then click Save:
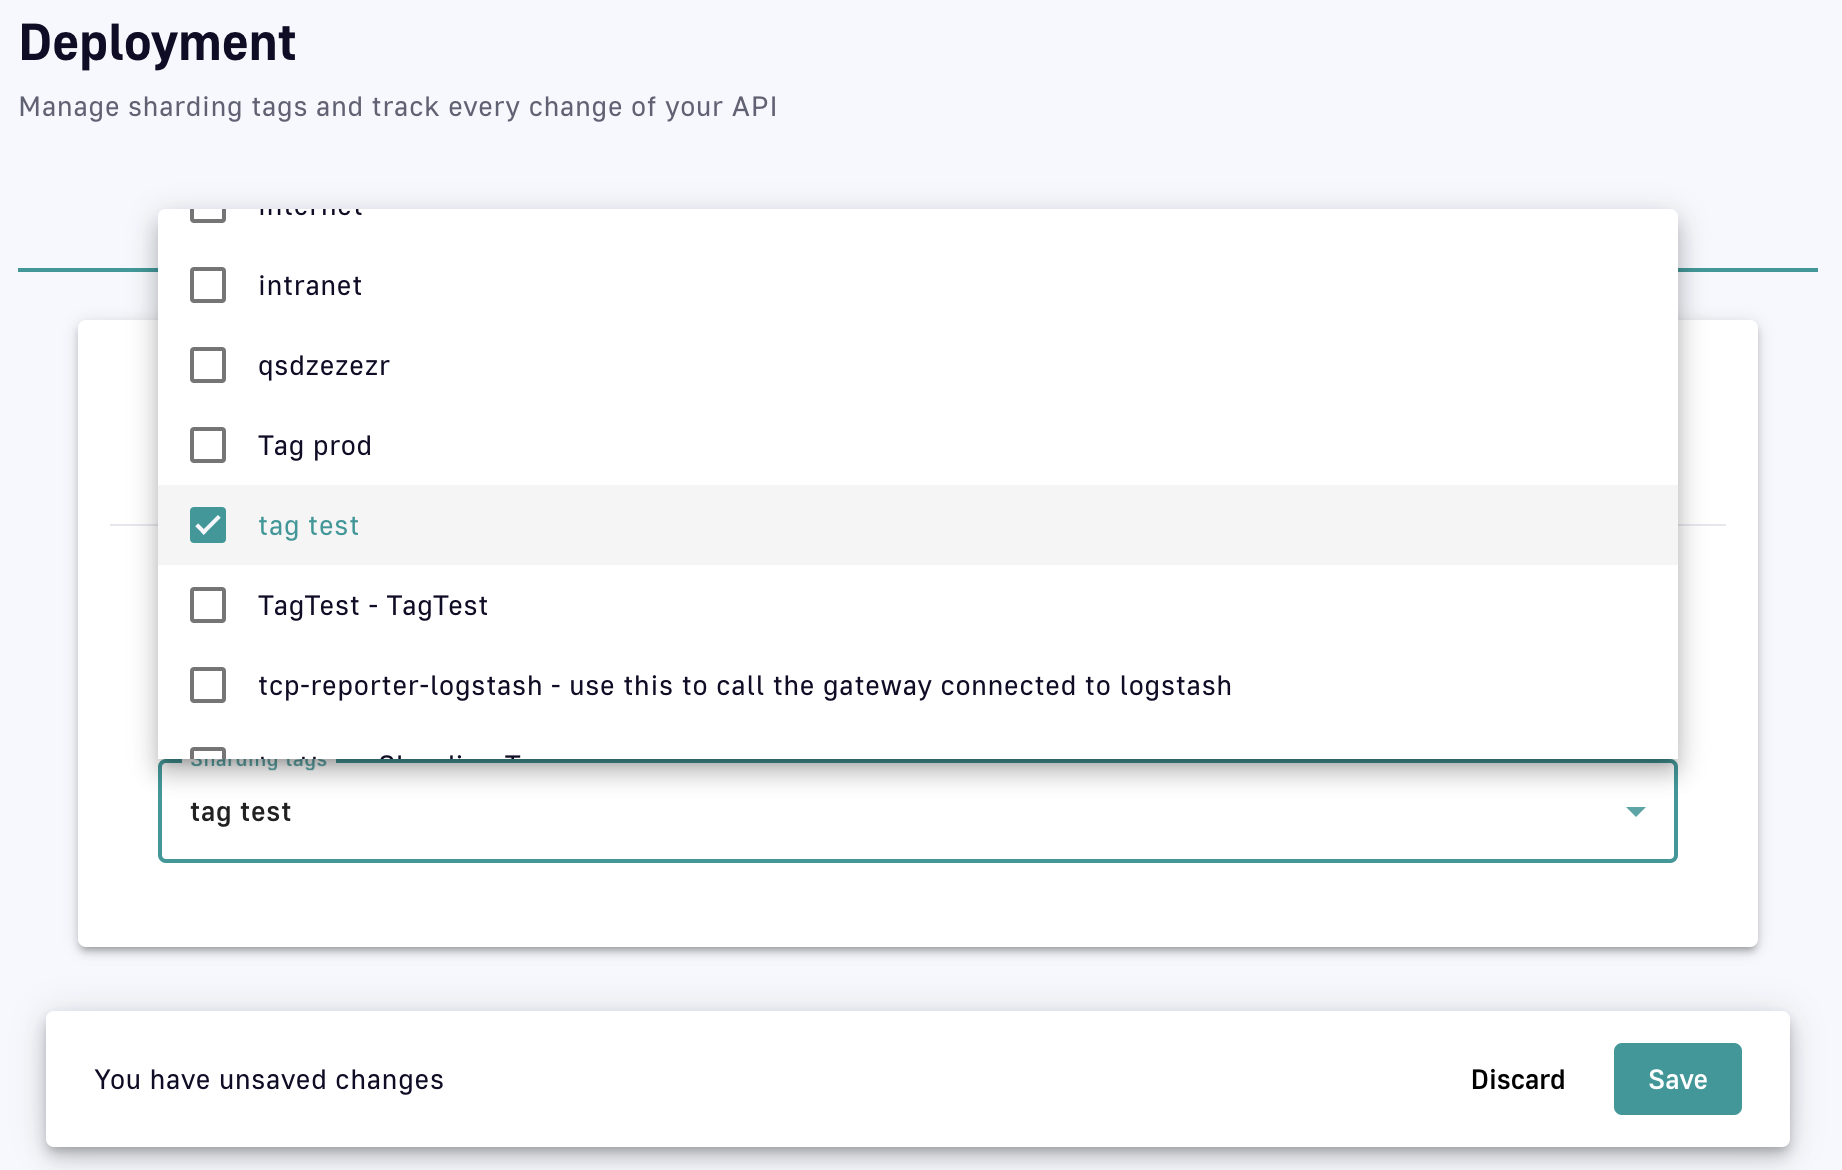
-
Click Deploy API to sync your API:
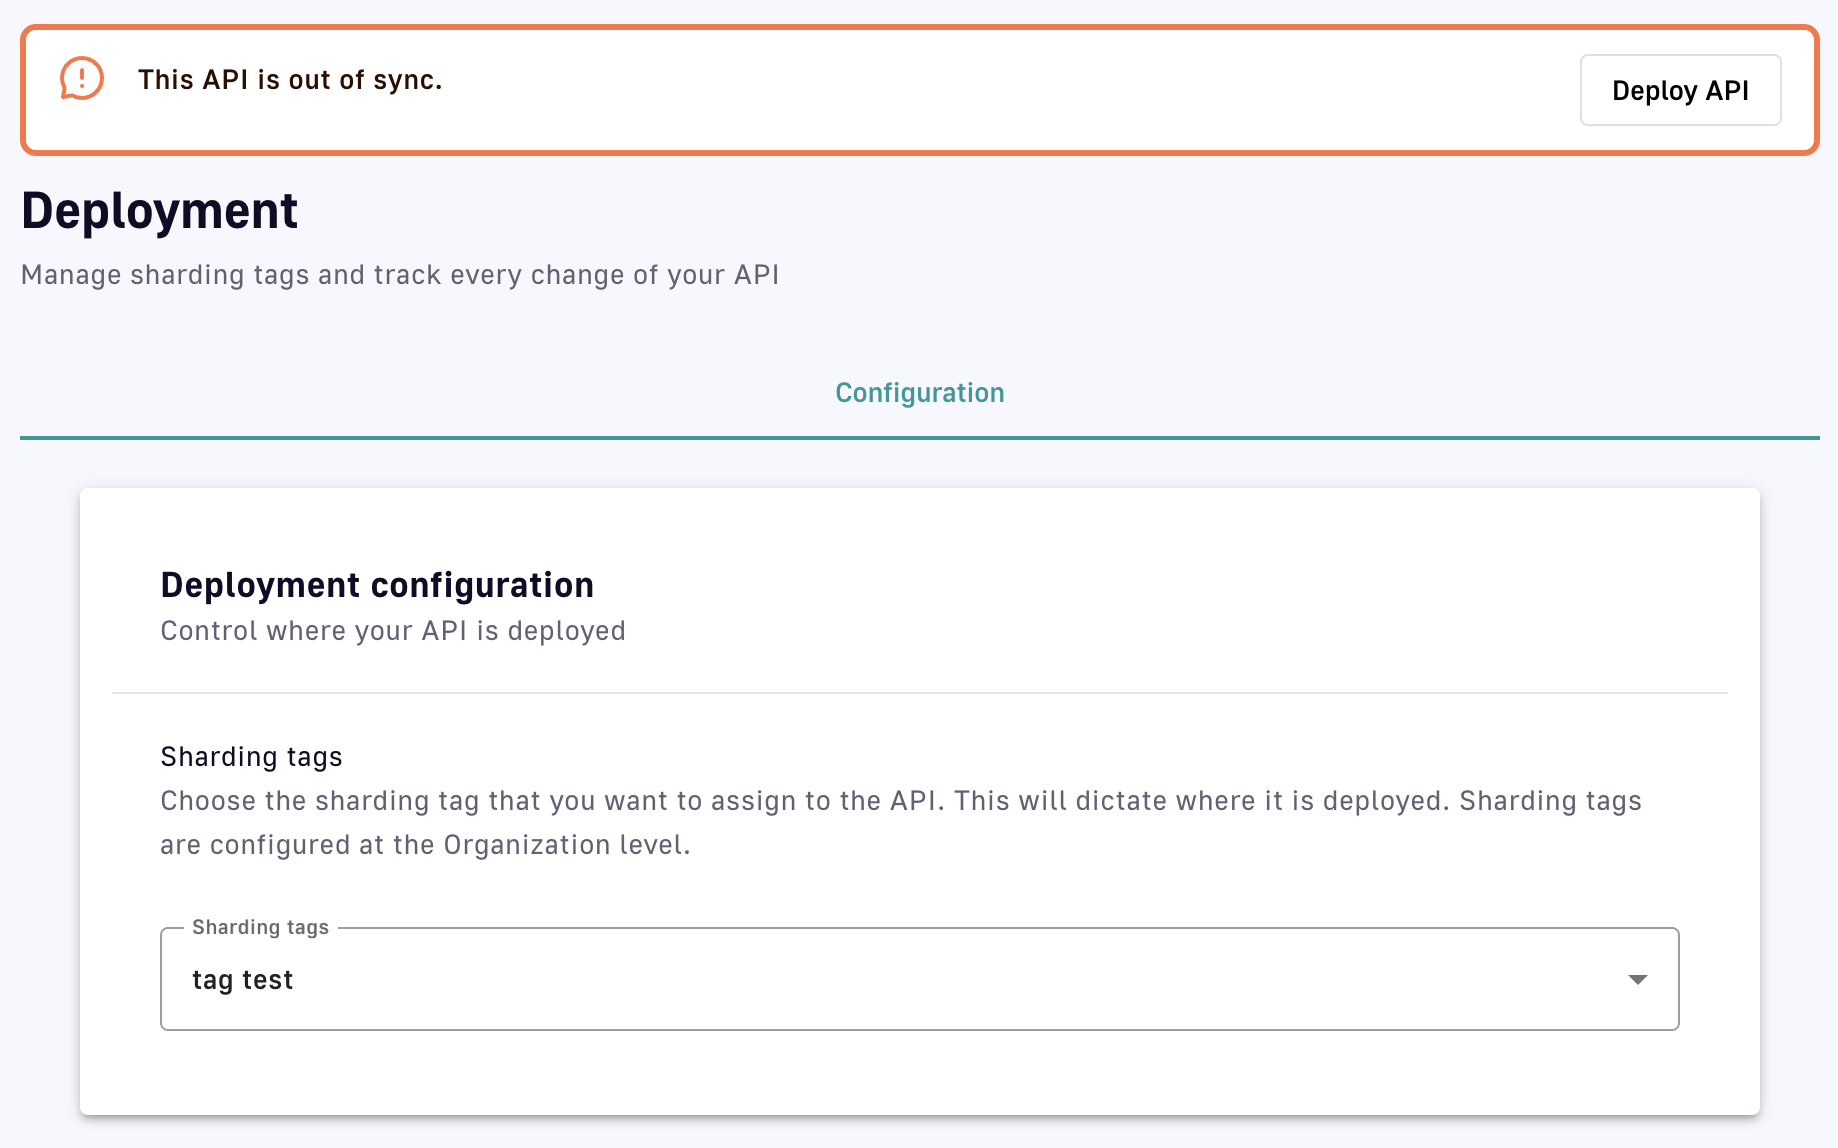
Map entrypoints to sharding tags
If you are using the Developer Portal, DSAPI also provides a way to map different entrypoint URLs to specific sharding tags. The Portal will display available entrypoints based on an API's tag(s).
To demonstrate, let's instruct DSAPI API Manager to apply the “internal test” tag to all APIs tagged with this entrypoint:
-
In your APIM console, select Organization from the left nav
-
Select Sharding tags from the new left nav
-
Select + Add a mapping:
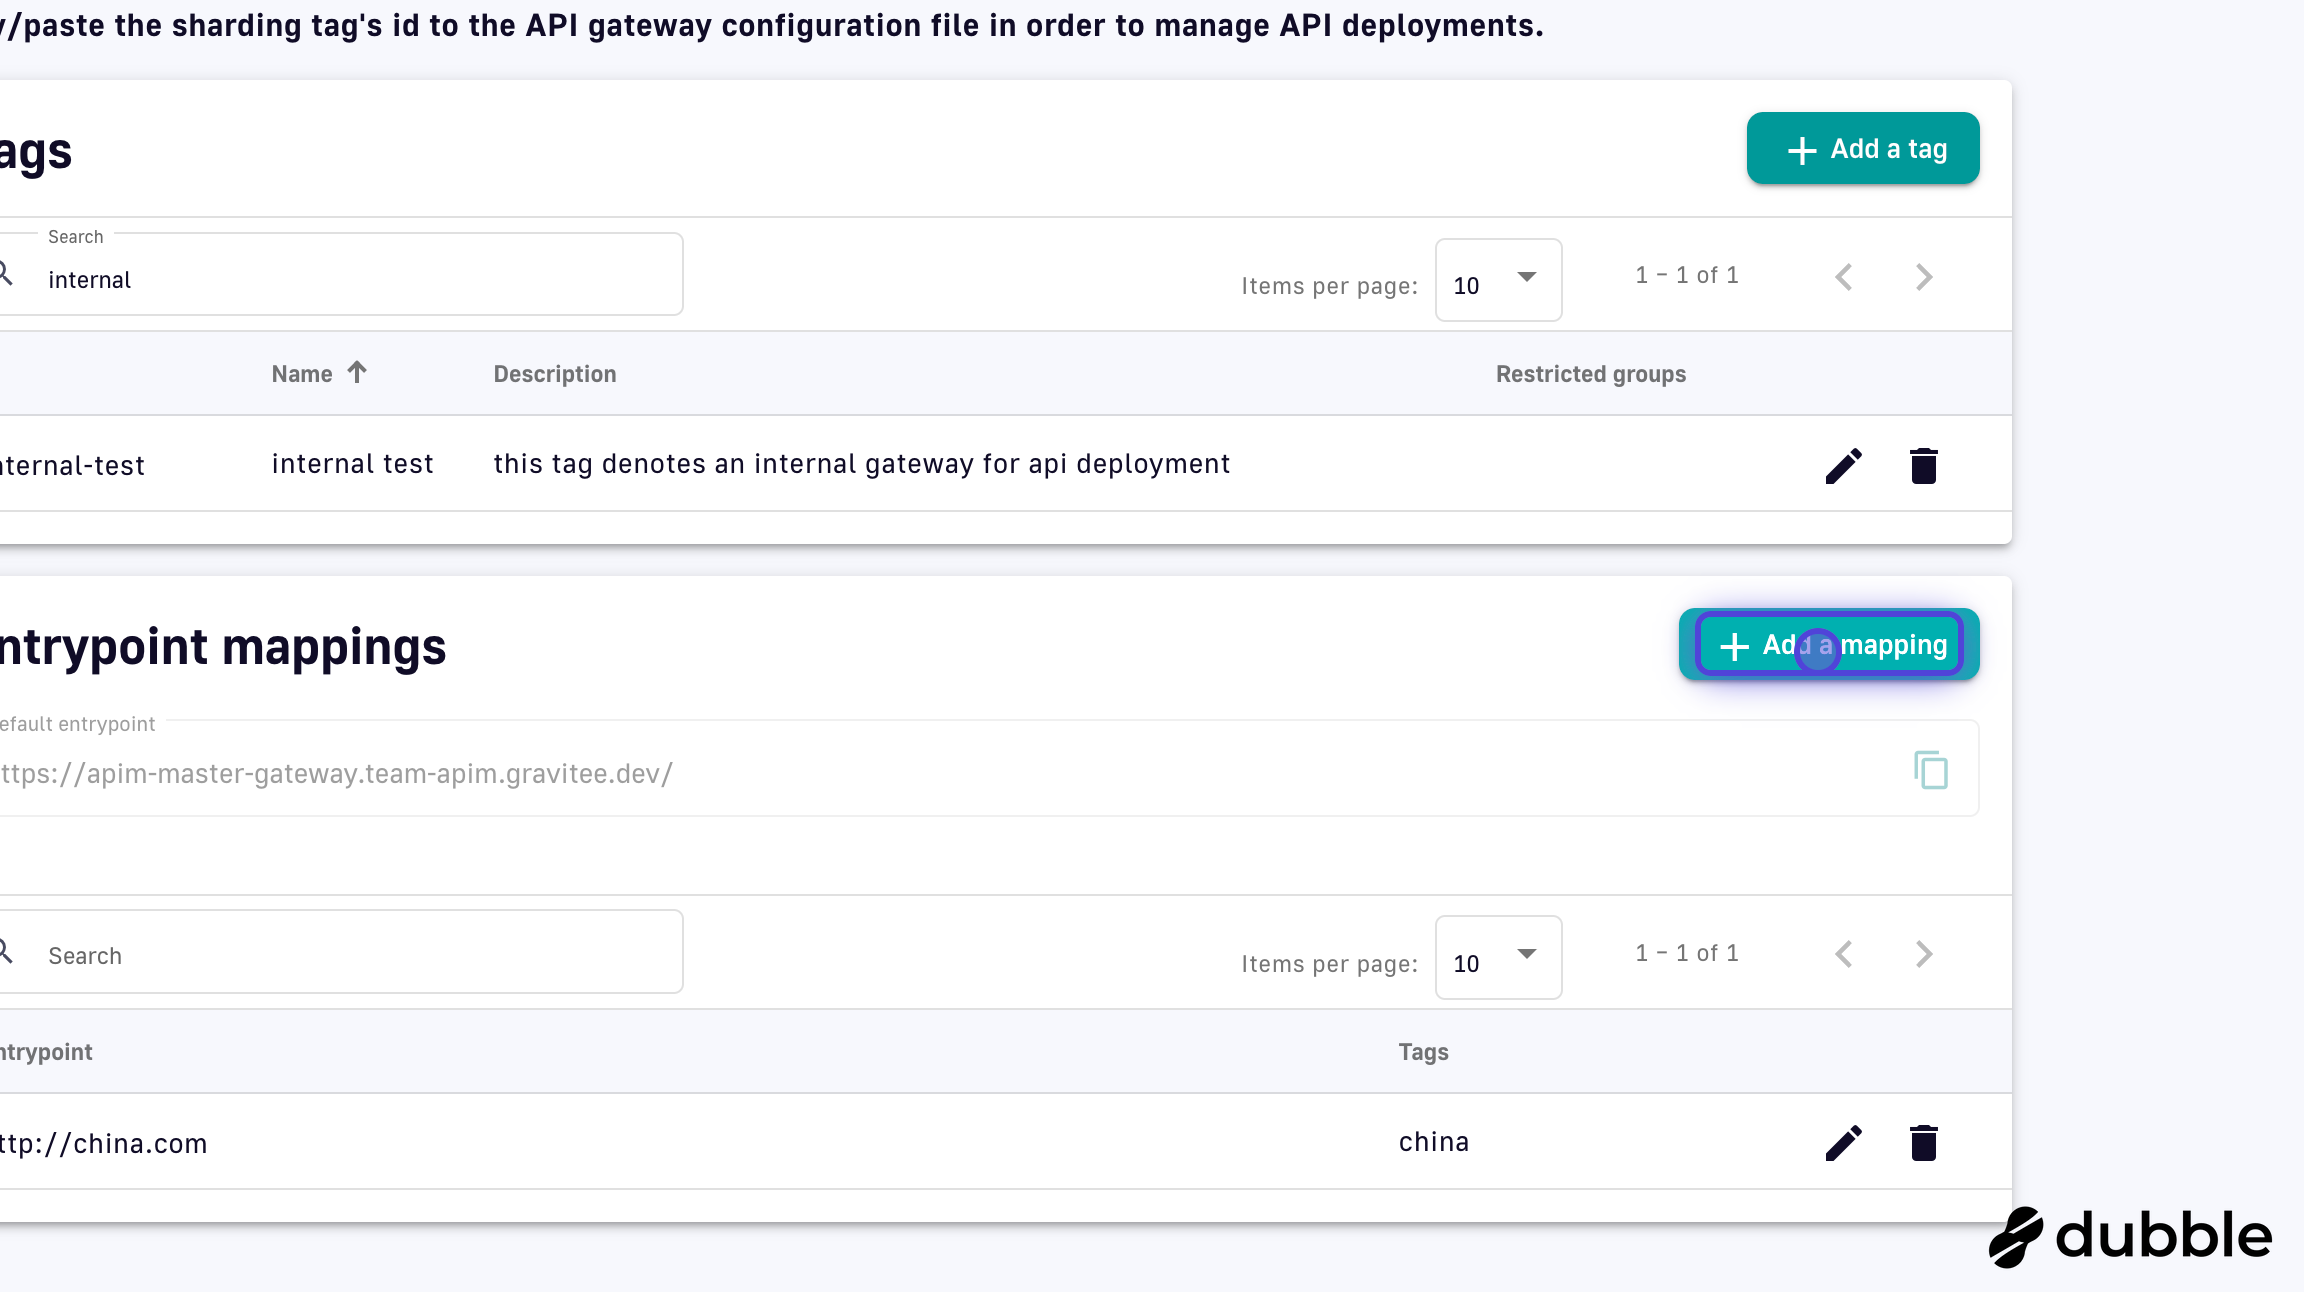
-
In the Entrypoint url field, enter your Entrypoint URL:

-
In the Sharding tags drop-down menu, select the tag that you want mapped to your entrypoint. For this example, let's choose the "internal test" tag.
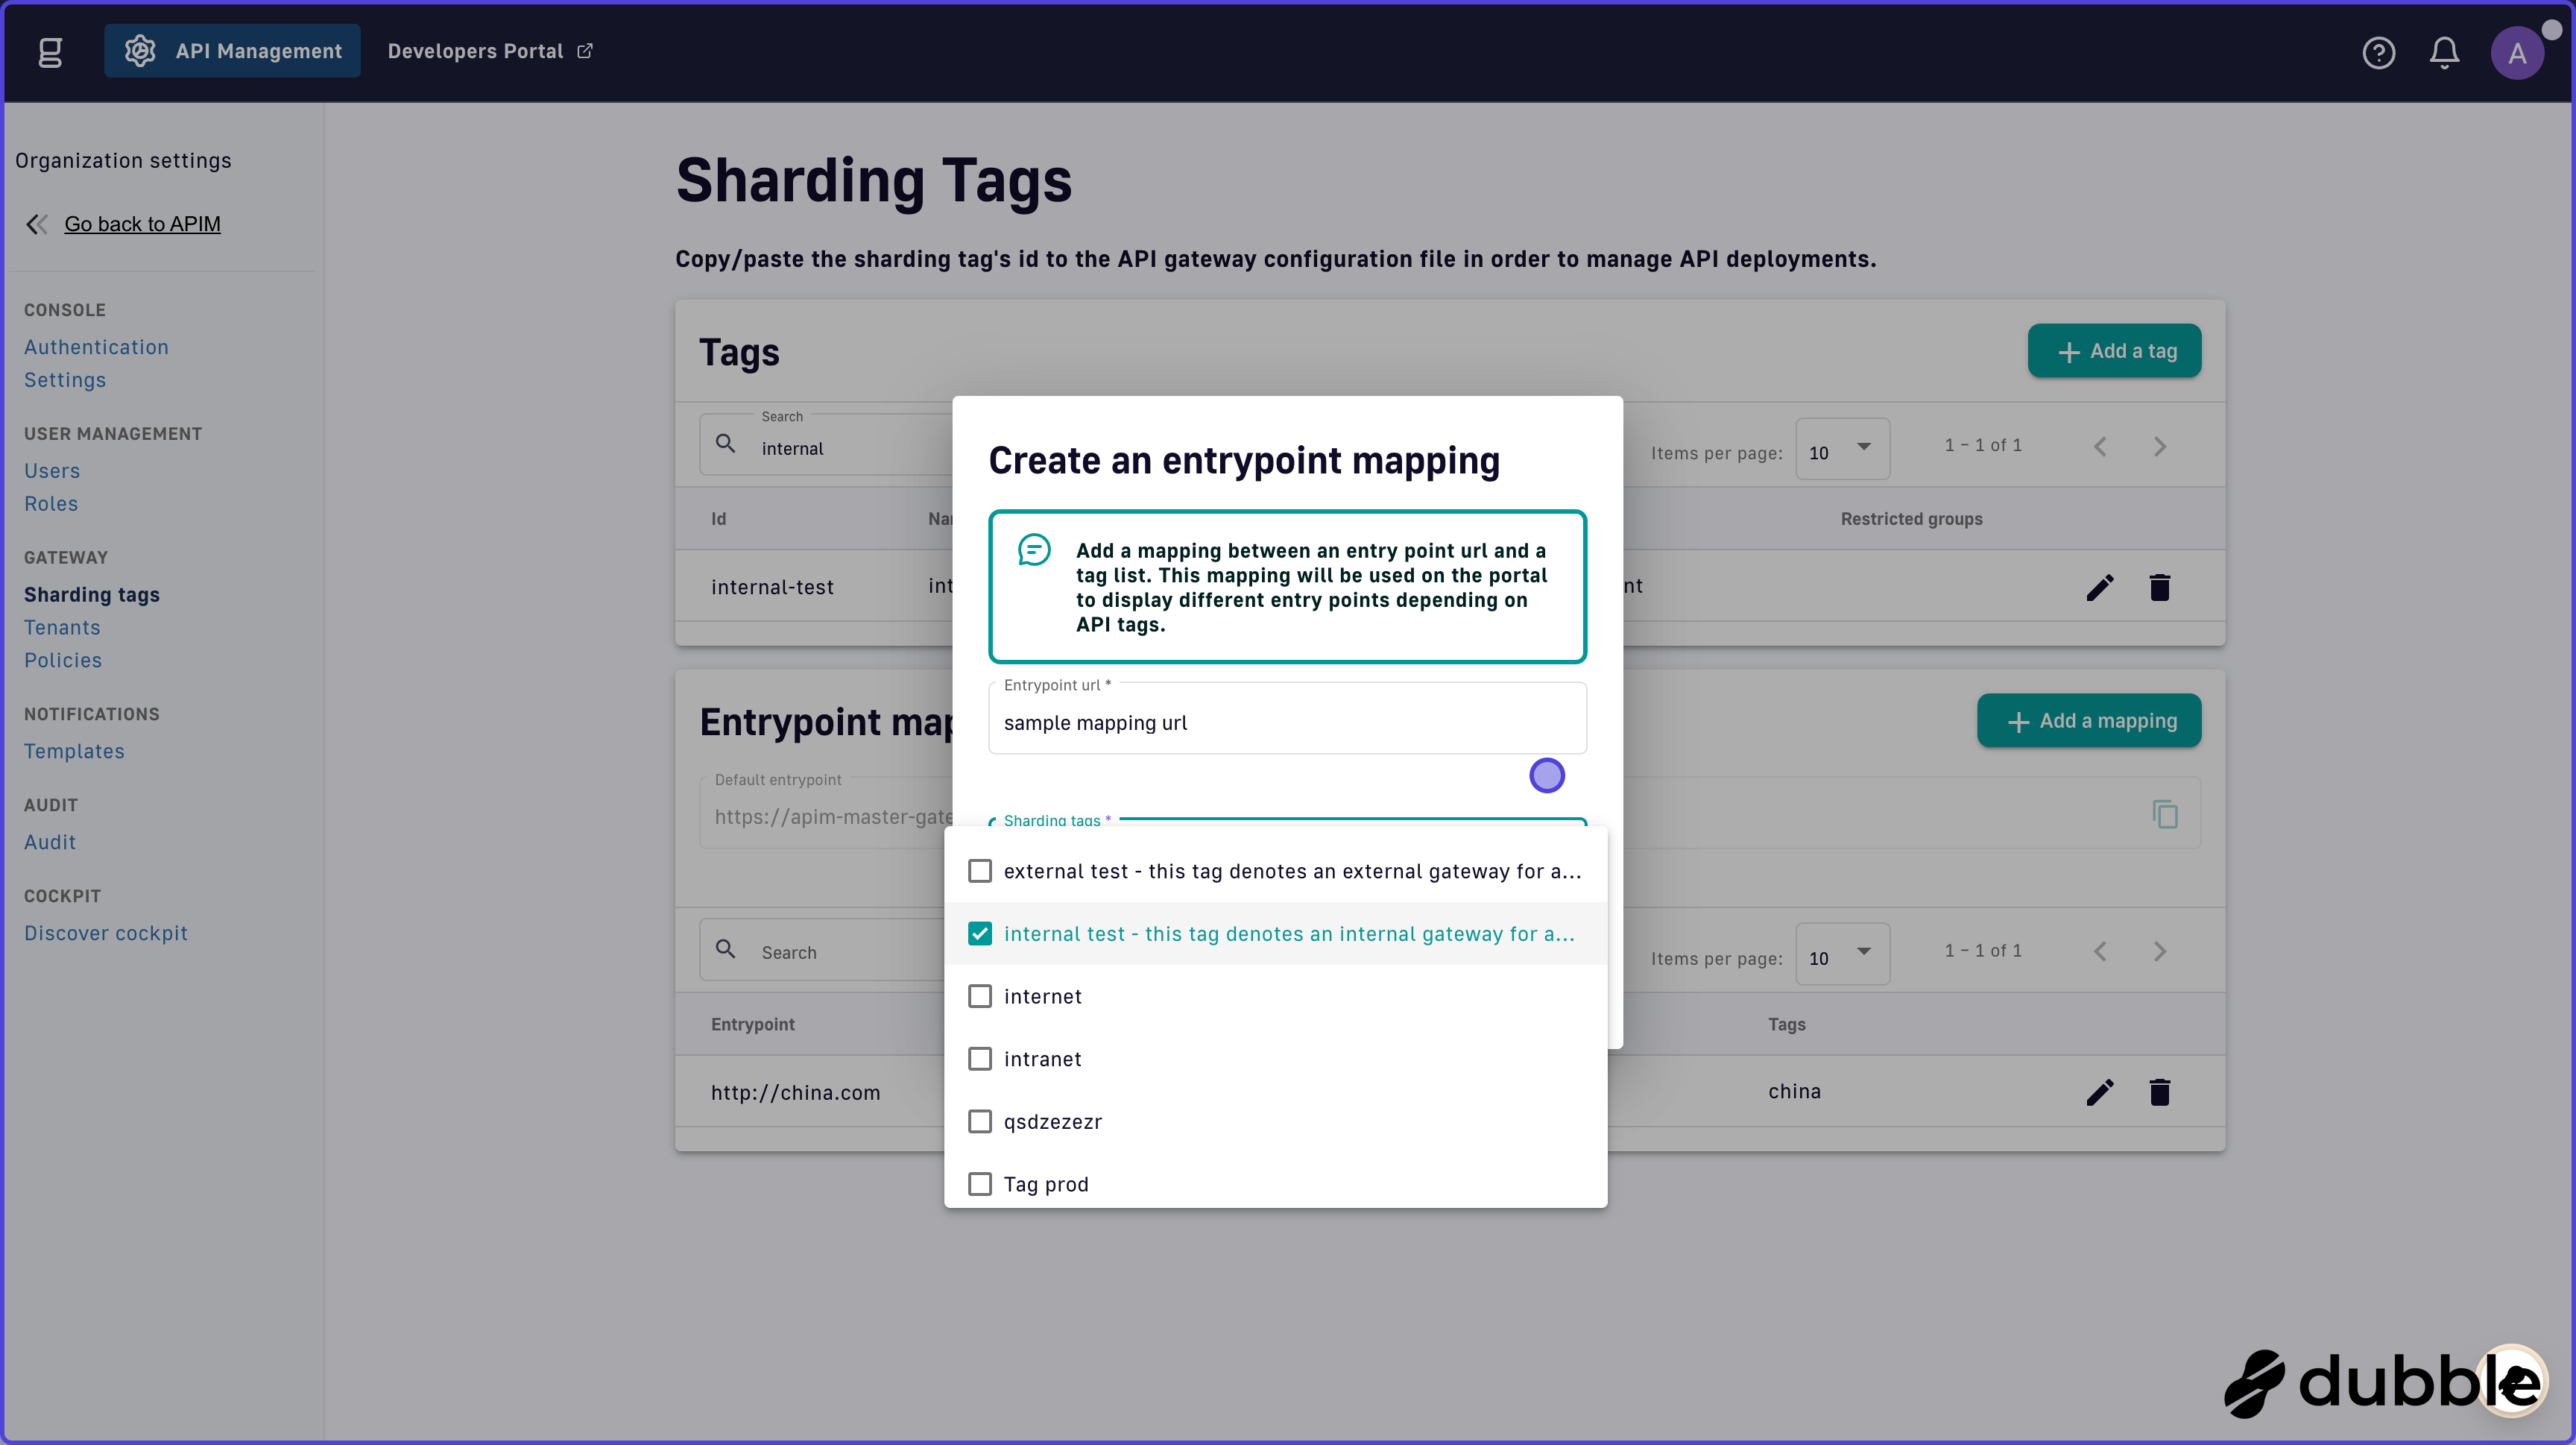
-
Click Ok:
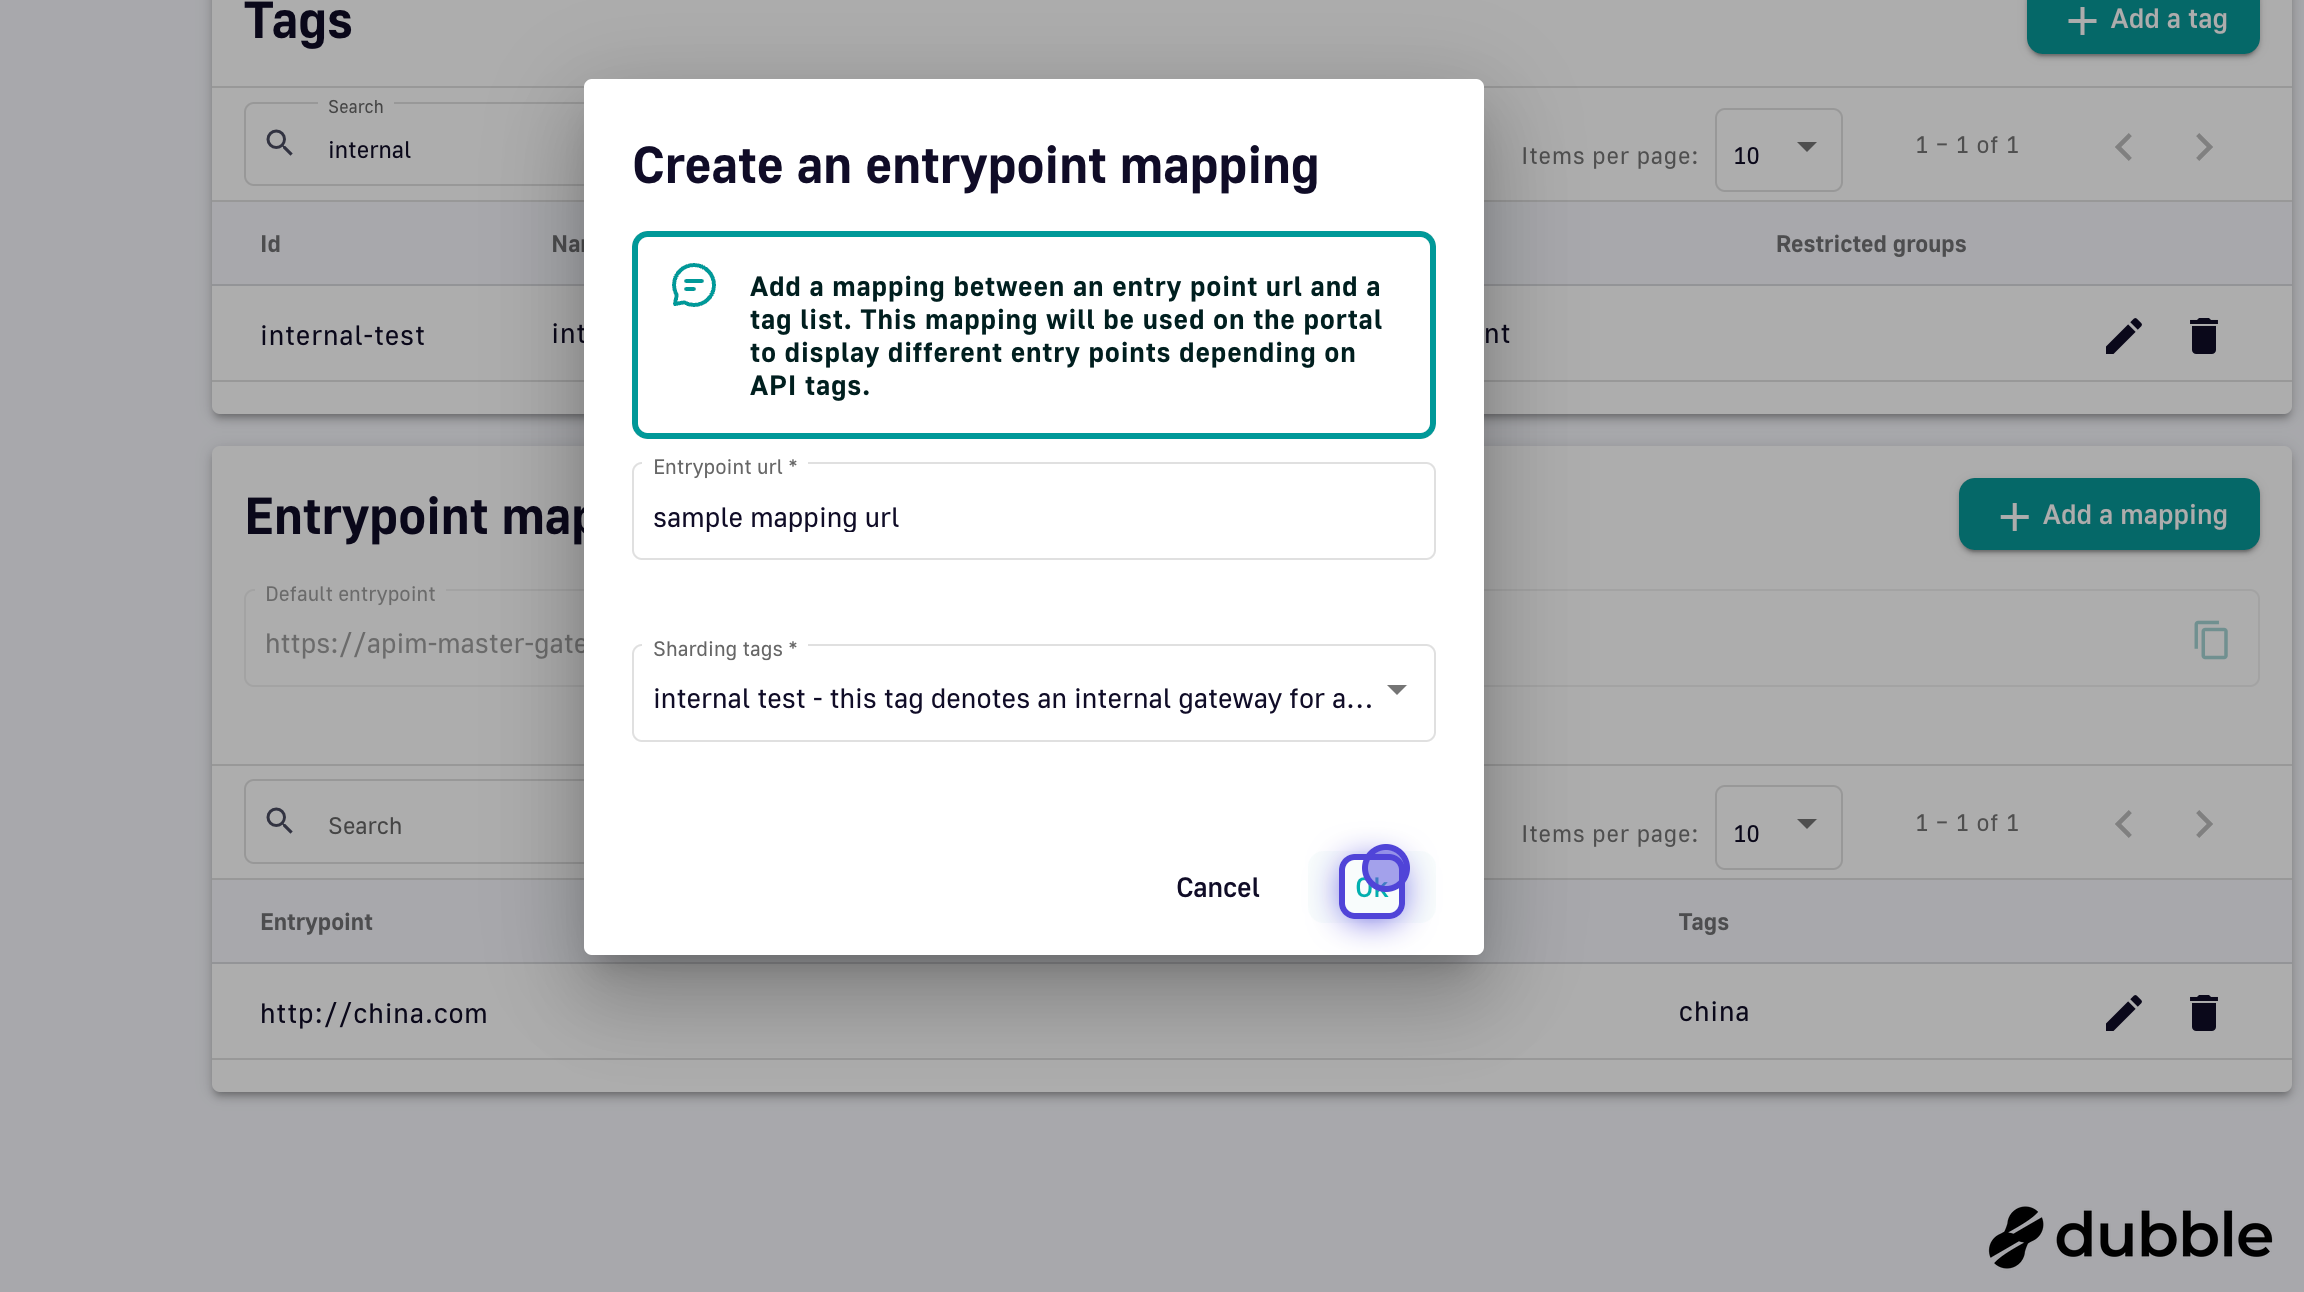
-
You can view your entrypoint mapping in the Entrypoint mappings section:
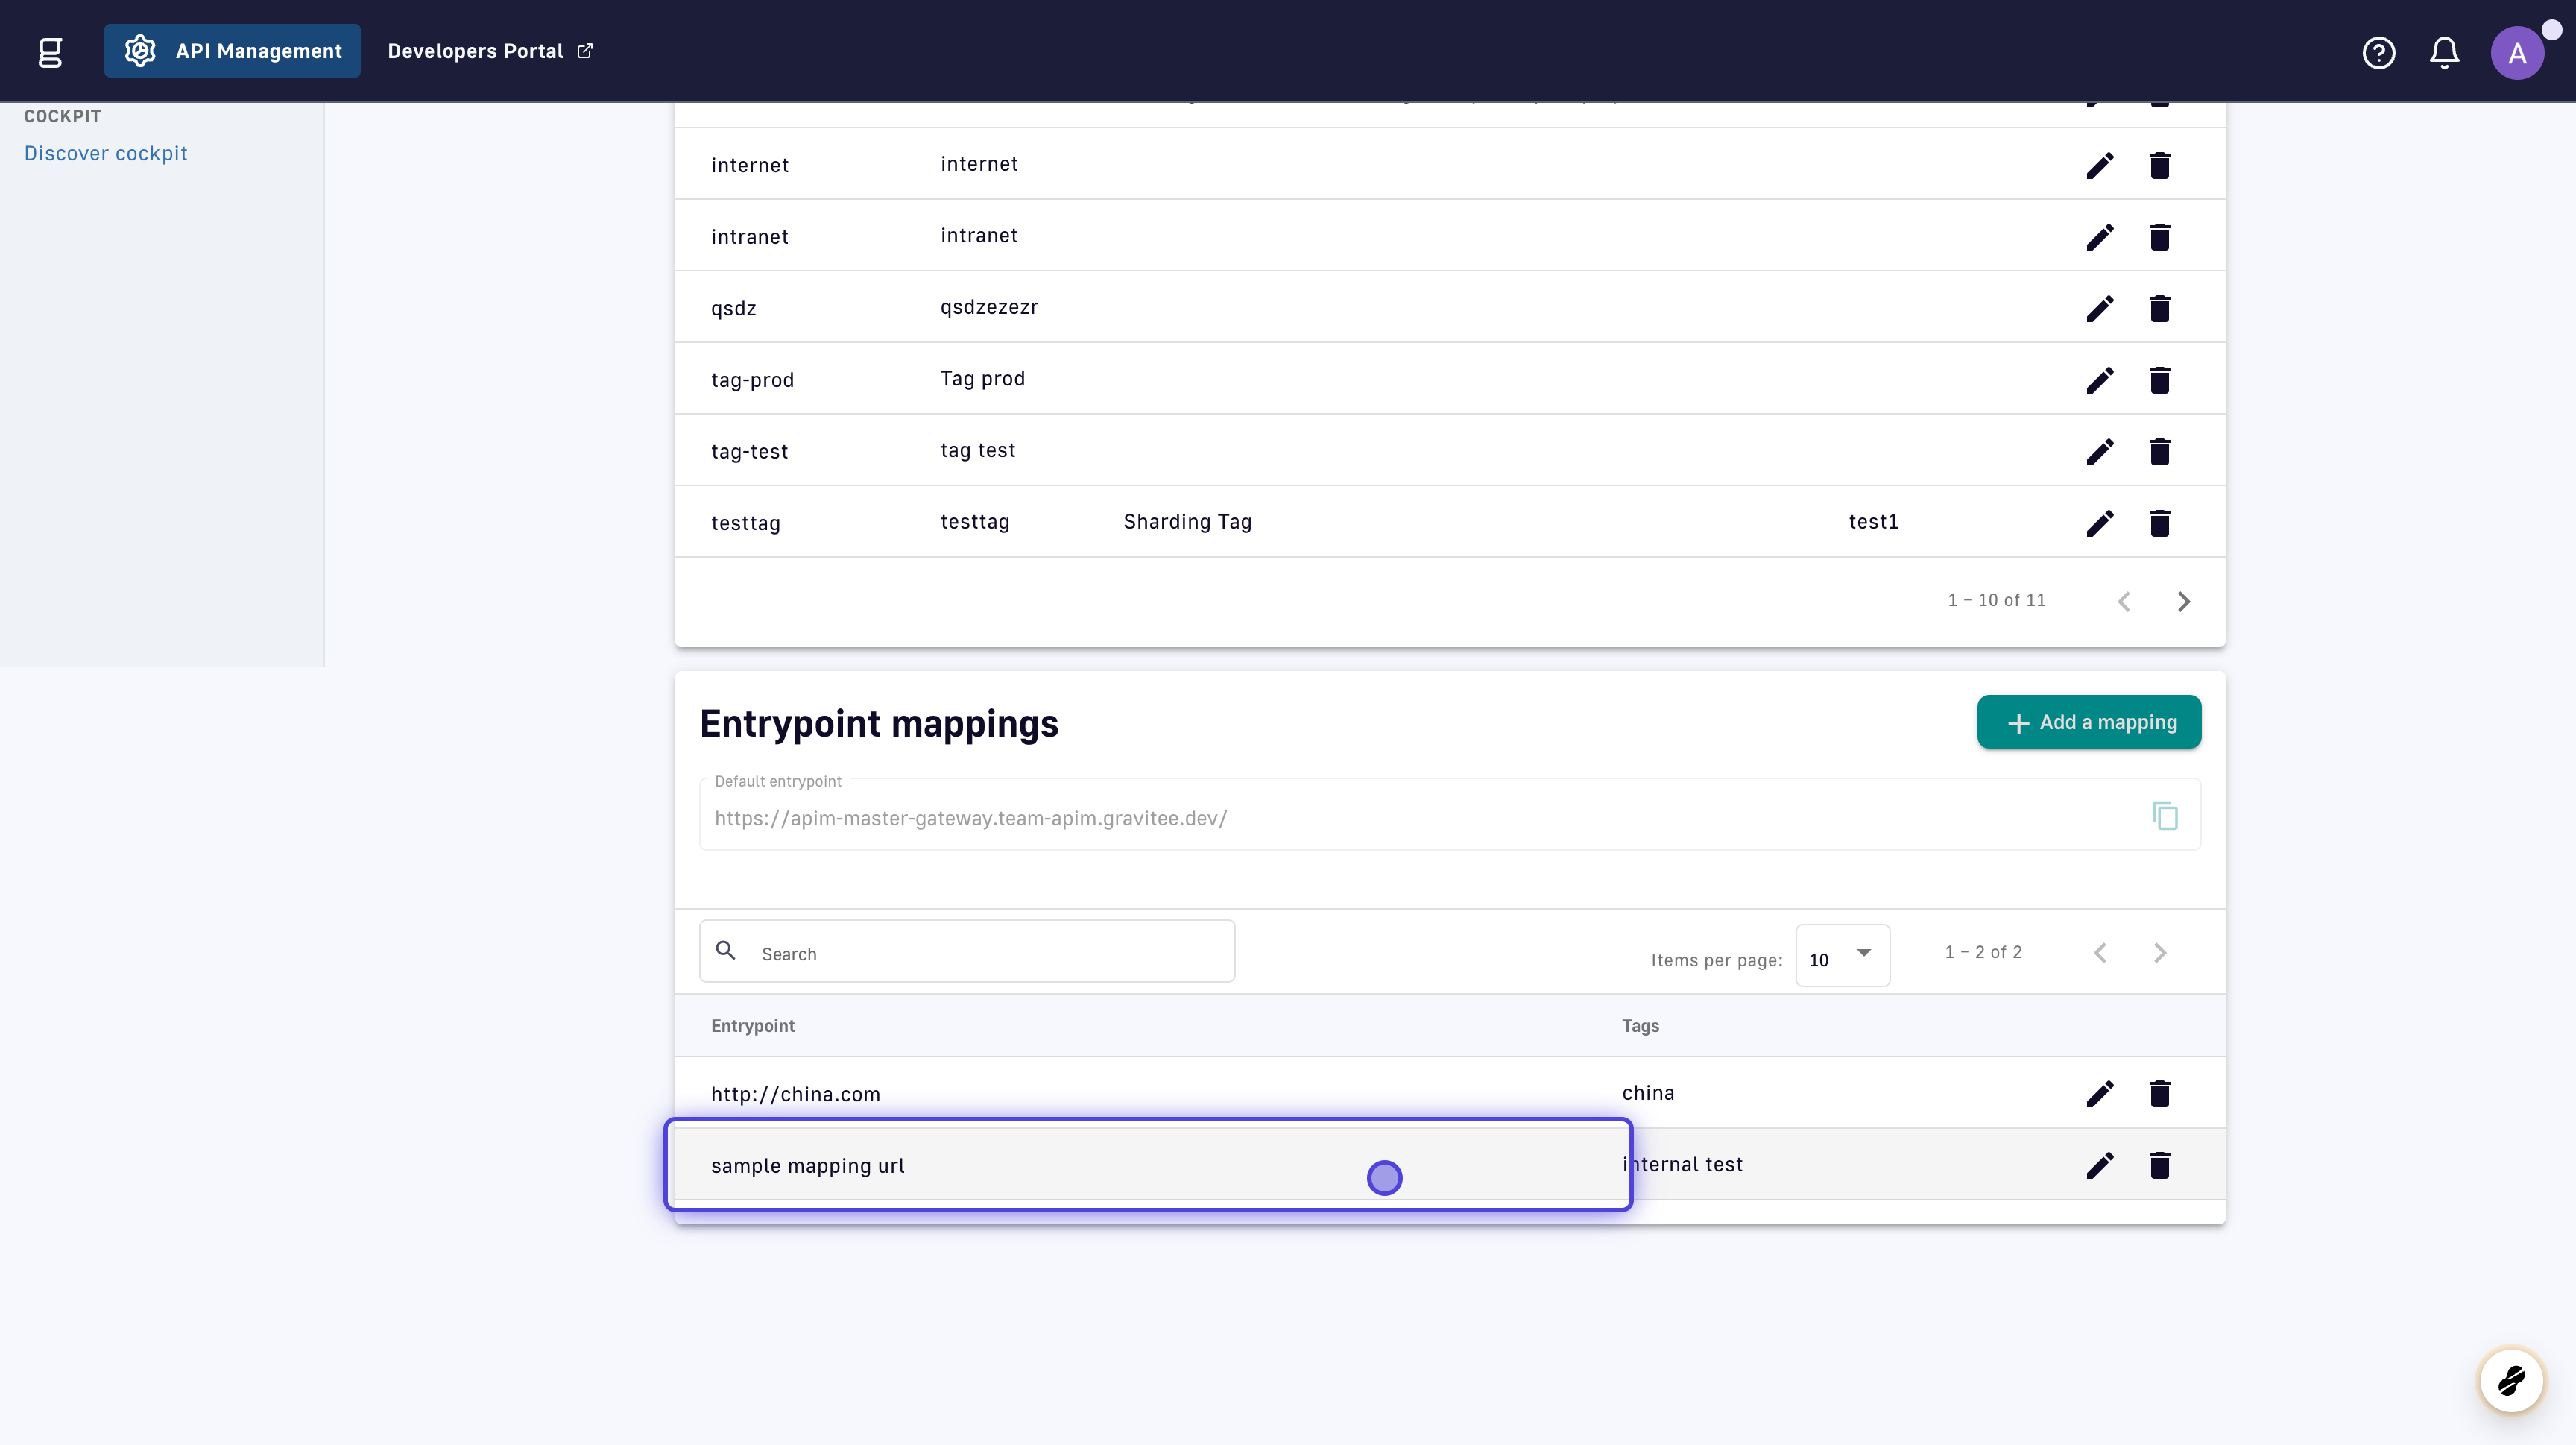
Tenants
Introduction
Tenants are a way to leverage DSAPI's multi-endpoint capability, i.e., the ability to specify multiple upstream systems per single API. DSAPI allows you to assign endpoints and Gateways to specific tenants to control the endpoints to which requests are proxied.
Tagged Gateway / API endpoint behavior
Endpoint deployment is impacted by how tags are applied to API endpoints and Gateways.
Rules
- Tagged Gateway instances will never deploy APIs to tagless API endpoints.
- Tagless Gateway instances will deploy APIs to every API endpoint, regardless of how the API endpoints are tagged.
- A Gateway tagged with a specific tenant will only deploy APIs to API endpoints that have been tagged with that tenant.
- If neither a Gateway nor an API endpoint are tagged with tenants, the Gateway will deploy the API to the API endpoint.
Configuring Tenants
To explain tenant usage and behavior, we will build off of our example use case for sharding tags. A single API can be deployed to many different Gateways and endpoints, but by using sharding tags you can specify the target Gateway(s), and by using tenants you can specify the target endpoint(s).
Similar to sharding tags, tenant configuration is a two-step process. You must “tag” a Gateway to identify in which region it has been deployed. To demonstrate, we will add the following configuration to each Gateway’s DSAPI.yaml file, which tags all USA-deployed Gateways with “usa" and all EU-deployed Gateways with "eu":
# Multi-tenant configuration
  # Allow only a single-value
  USA Region: tenant: ‘usa’
  EU Region: tenant: ‘eu’
Once the Gateway has been configured, the tenant definition must be added via the API Management Console:
-
Navigate to Organization Settings and select Tenants. Select Add a tenant and enter the value for each of your regions, e.g., “usa” and “eu." We also recommend giving each tenant a descriptive name.
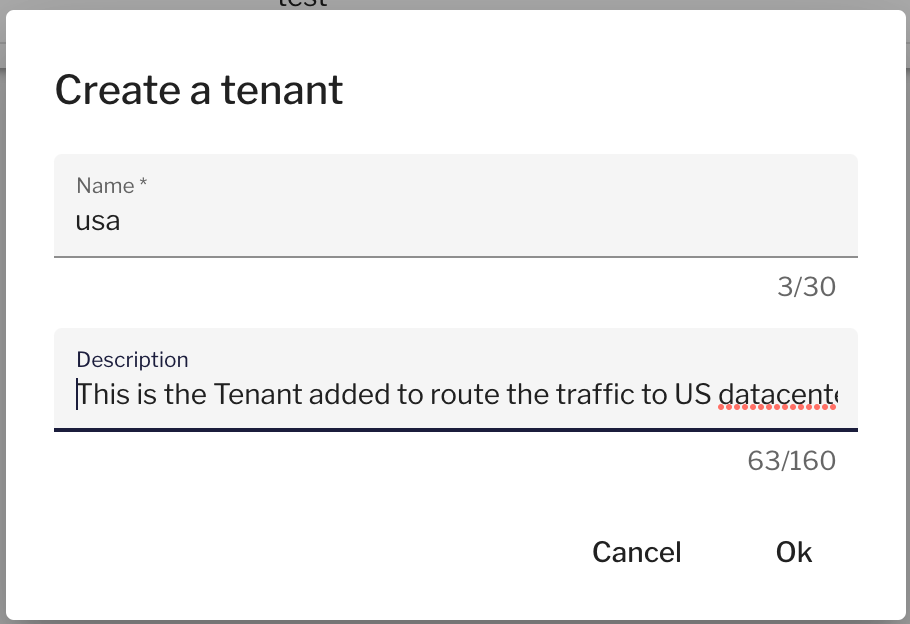
-
Next, configure the Backend and Customer APIs by adding two different endpoints. In our example, these will point to the USA and EU upstream systems (the backend server or the Customer API, depending on which API you are configuring).
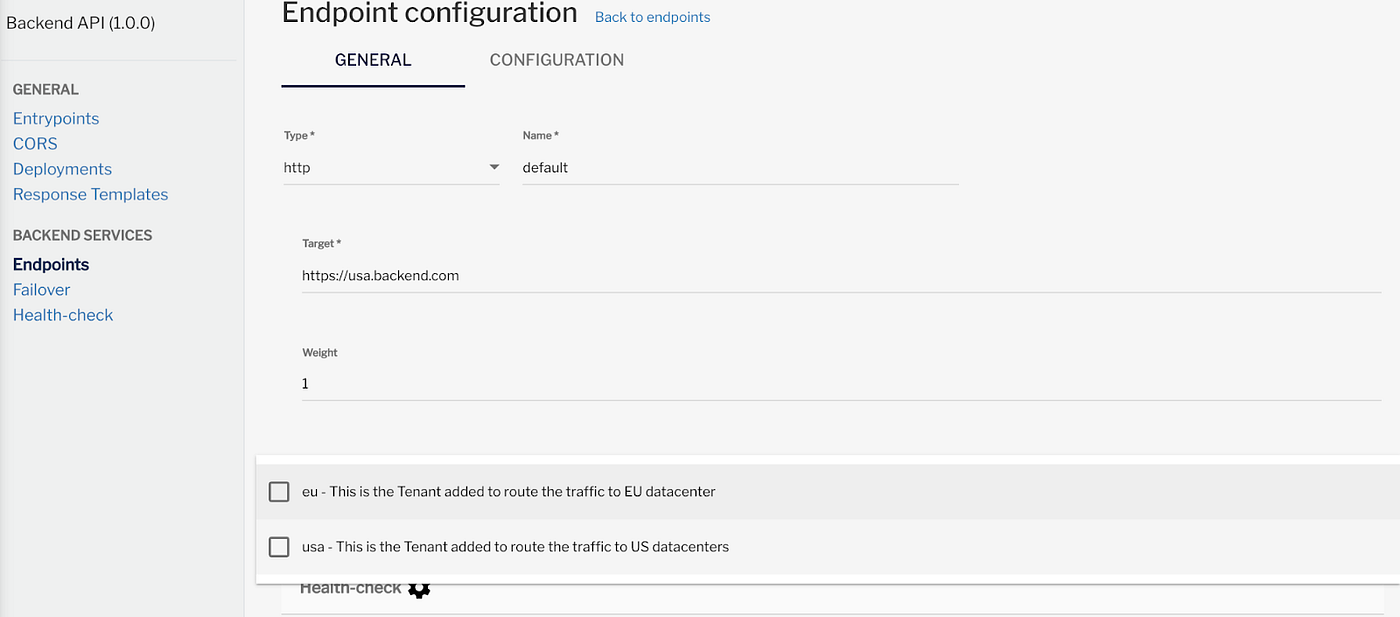
-
Specify which tenant a backend will apply to. Our two endpoints each point to different backends and are each assigned to a different tenant:
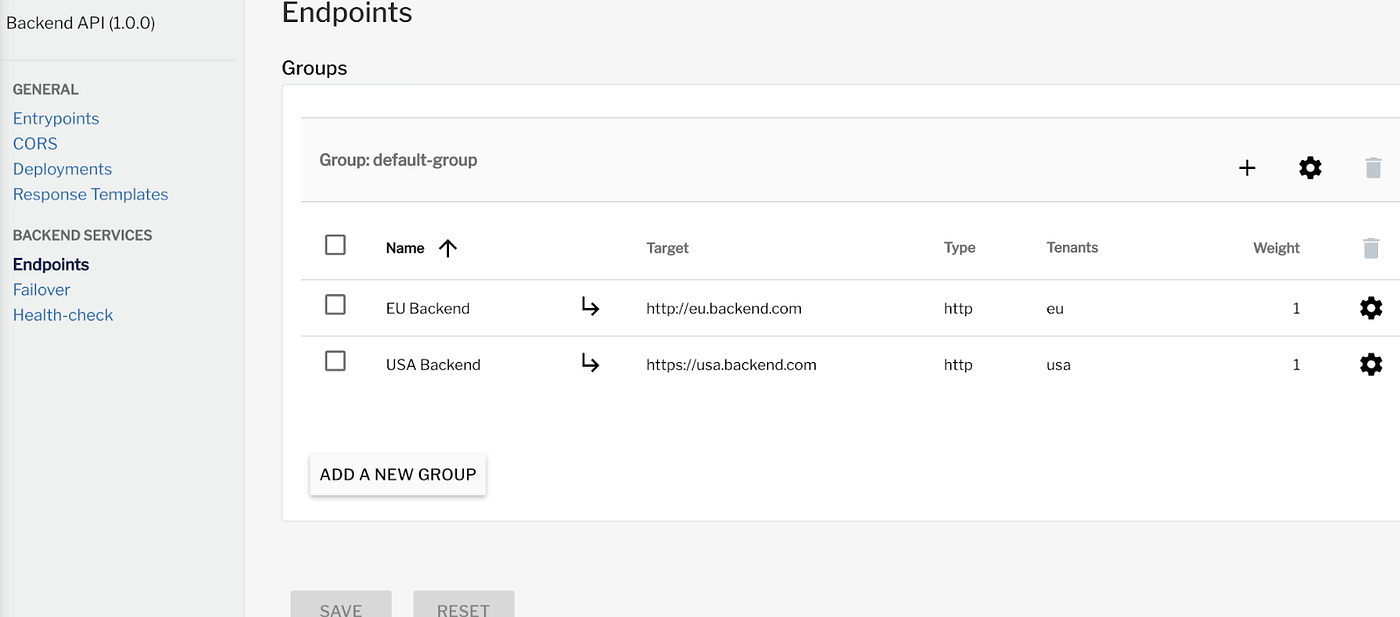
- If a tenant configuration is “eu,” a request to Backend API is proxied to
https://eu.backend.com - If a tenant configuration is “usa,” a request to Backend API is proxied to
https://usa.backend.com
Similarly, Gateways GWE1, GWE2, GWE3, GWE4 will apply the following logic when serving partner requests to the Customer API:
- If a tenant configuration is “eu,” a request to Customer API is proxied to
https://eu.customer-api.com - If a tenant configuration is “usa,” a request to Backend API is proxied to
https://usa.backend-api.com