This guide will walk through how to configure your general DSAPI APIM Management API settings using the DSAPI.yaml file. As detailed in the Configuring APIM Components, you can override these settings by using system properties or environment variables.
The DSAPI.yaml file, found in DSAPI_HOME/config/, is the default way to configure APIM.
Format sensitive
YAML (yml) format is sensitive to indentation. Ensure you include the correct number of spaces and use spaces instead of tabs.
With the DSAPI.yaml file, you can configure the following:
Truststore and Keystore settings defined within the jetty section are only used to secure access to APIM API. These are not used by HTTP client calls for any other purpose (such as Fetch and DCR).
Configure the Management and Portal APIs
You can configure APIM API to start only the Management or Portal API. You can also change the API endpoints from their default values of /management and /portal.
http:api:# Configure the listening path for the API. Default to /# entrypoint: /# Configure Management API.# management:# enabled: true# entrypoint: ${http.api.entrypoint}management# cors: ...# Configure Portal API.# portal:# enabled: true# entrypoint: ${http.api.entrypoint}portal# cors: ...
CORS configuration
CORS (Cross-Origin Resource Sharing) is a mechanism that allows resources on a web page to be requested from another domain.
where the more specific levels override the broader levels: API > Environment > Organization.
You can configure CORS at the organization level using DSAPI.yml, environment variables or directly in APIM Console. Here's an example of configuring CORS using the DSAPI.yml file:
http:api:# Configure the listening path for the API. Default to /# entrypoint: /# Configure Management API.# management:# enabled: true# entrypoint: ${http.api.entrypoint}management# cors:# Allows to configure the header Access-Control-Allow-Origin (default value: *)# '*' is a valid value but is considered as a security risk as it will be opened to cross origin requests from anywhere.# allow-origin: http://developer.mycompany.com# Allows to define how long the result of the preflight request should be cached for (default value; 1728000 [20 days])# max-age: 864000# Which methods to allow (default value: OPTIONS, GET, POST, PUT, DELETE)# allow-methods: 'OPTIONS, GET, POST, PUT, DELETE'# Which headers to allow (default values: Cache-Control, Pragma, Origin, Authorization, Content-Type, X-Requested-With, If-Match, X-Xsrf-Token)# allow-headers: 'X-Requested-With'# Configure Portal API.# portal:# enabled: true# entrypoint: ${http.api.entrypoint}portal# cors:# Allows to configure the header Access-Control-Allow-Origin (default value: *)# '*' is a valid value but is considered as a security risk as it will be opened to cross origin requests from anywhere.# allow-origin: http://developer.mycompany.com# Allows to define how long the result of the preflight request should be cached for (default value; 1728000 [20 days])# max-age: 864000# Which methods to allow (default value: OPTIONS, GET, POST, PUT, DELETE)# allow-methods: 'OPTIONS, GET, POST, PUT, DELETE'# Which headers to allow (default values: Cache-Control, Pragma, Origin, Authorization, Content-Type, X-Requested-With, If-Match, X-Xsrf-Token)# allow-headers: 'X-Requested-With'
Configure in APIM Console
If you change the CORS settings using the DSAPI.yml or environment variables, then the CORS settings will be greyed out in the APIM console.
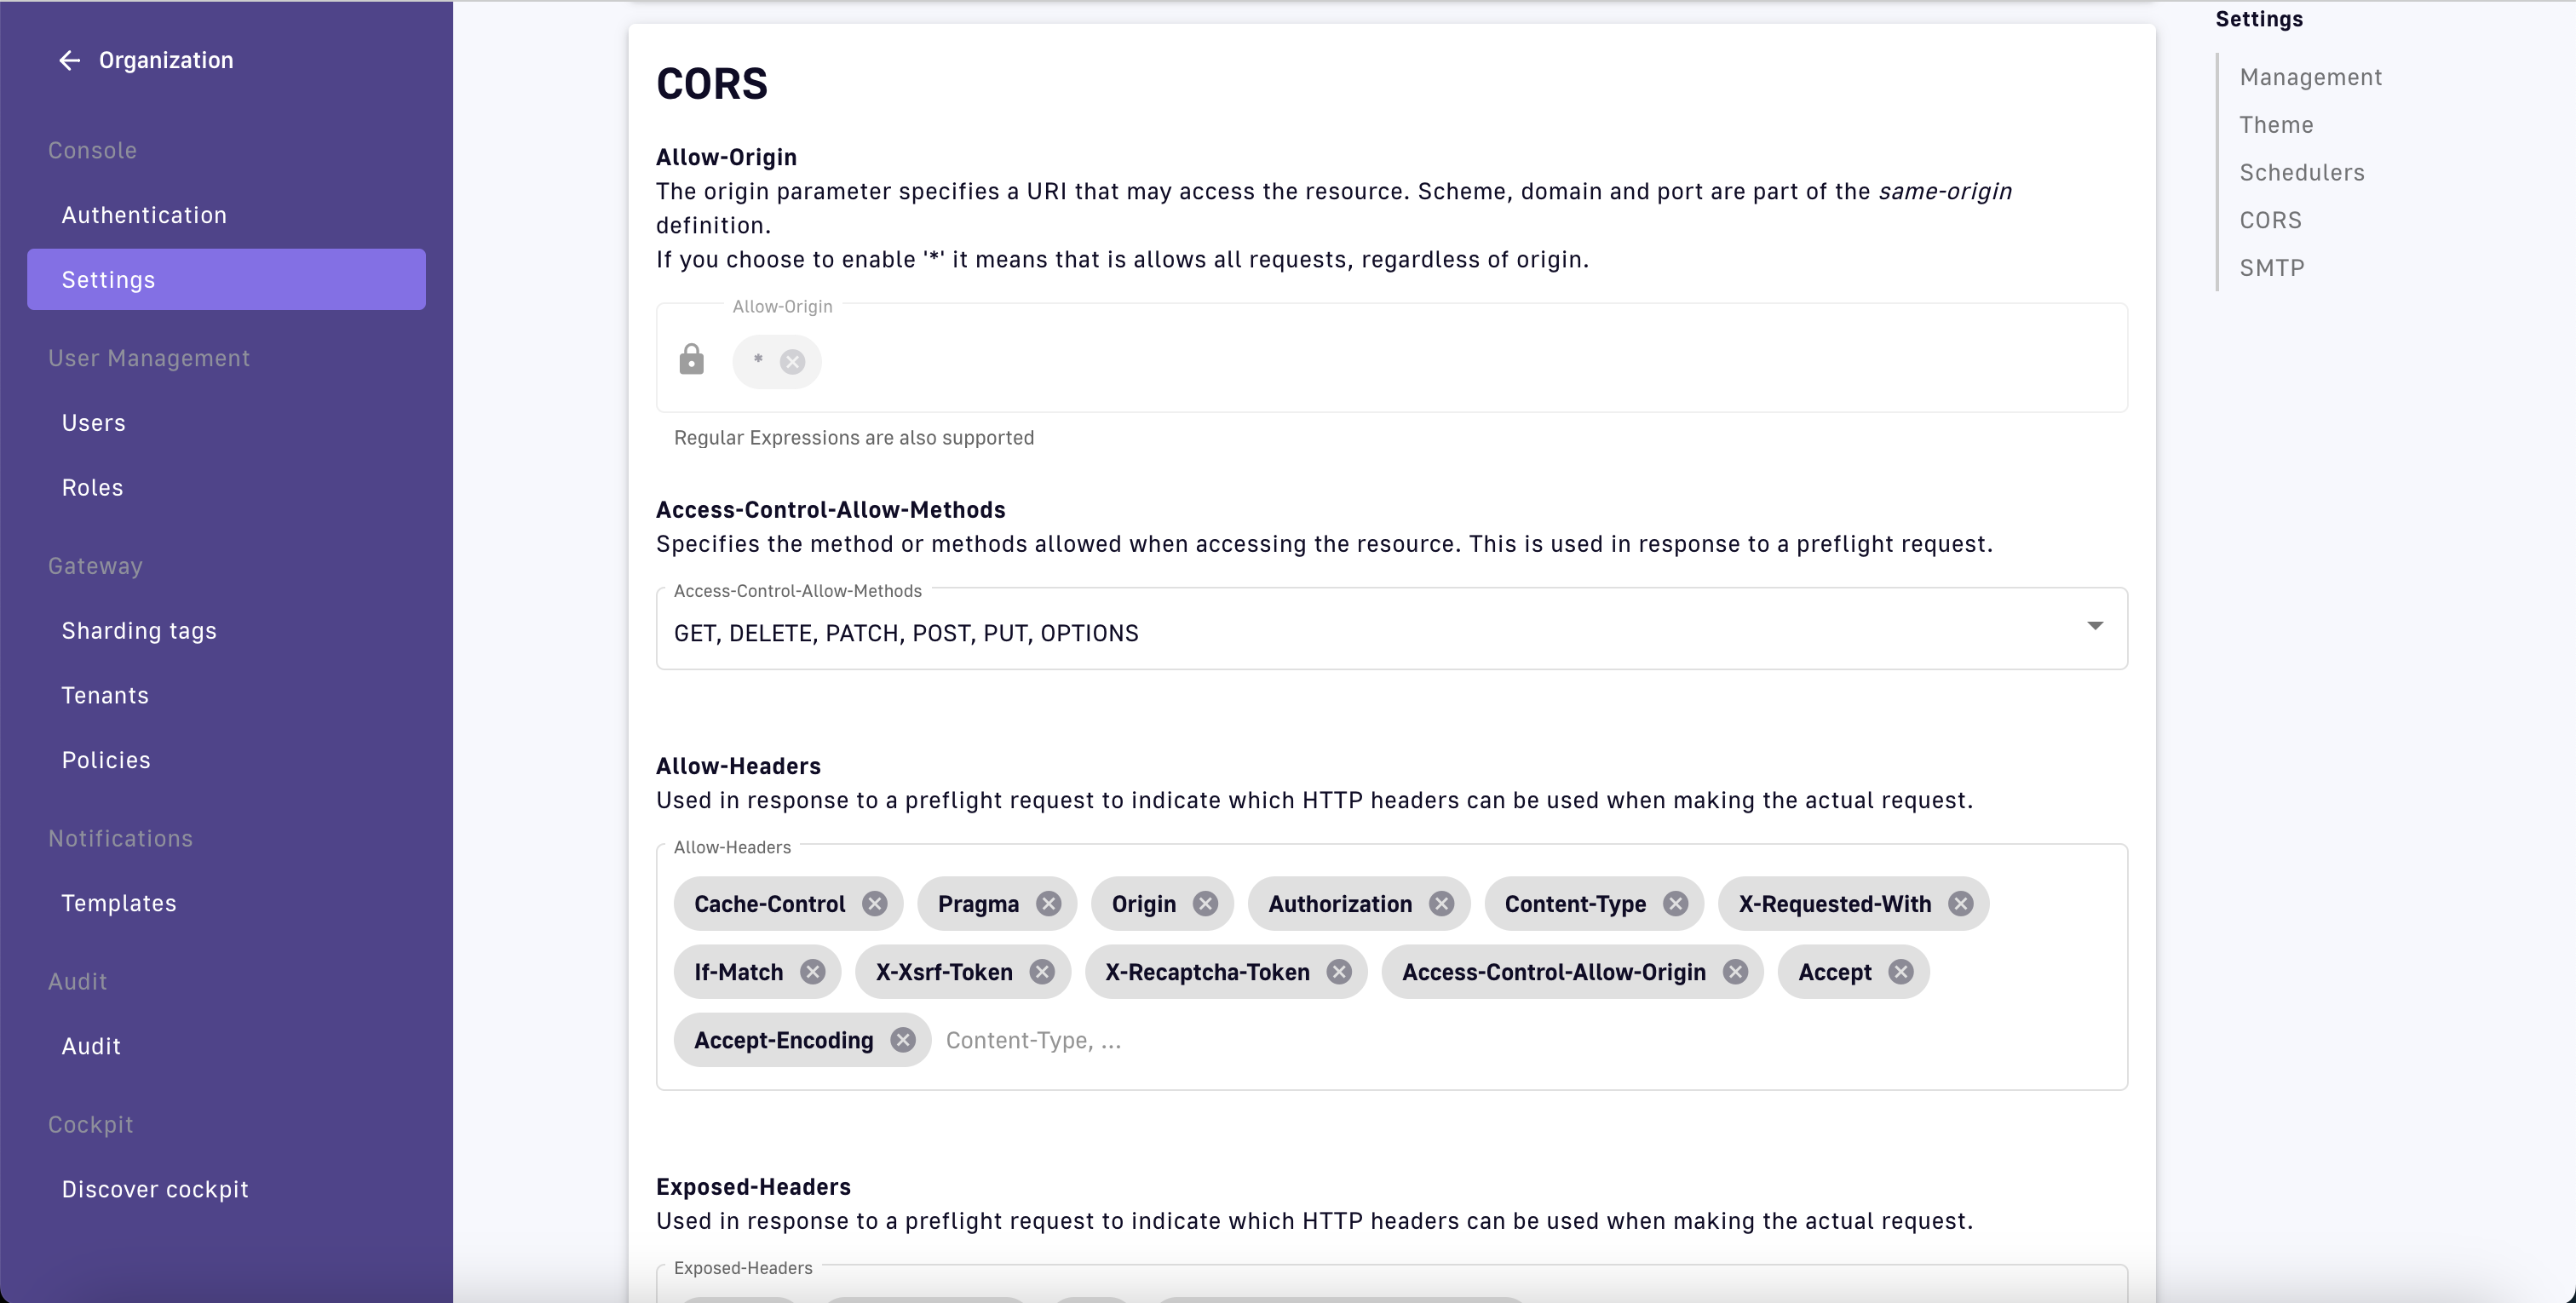
You can also configure CORS at the organization level in the Organization > Settings section of the APIM Console:
Organization CORS settings
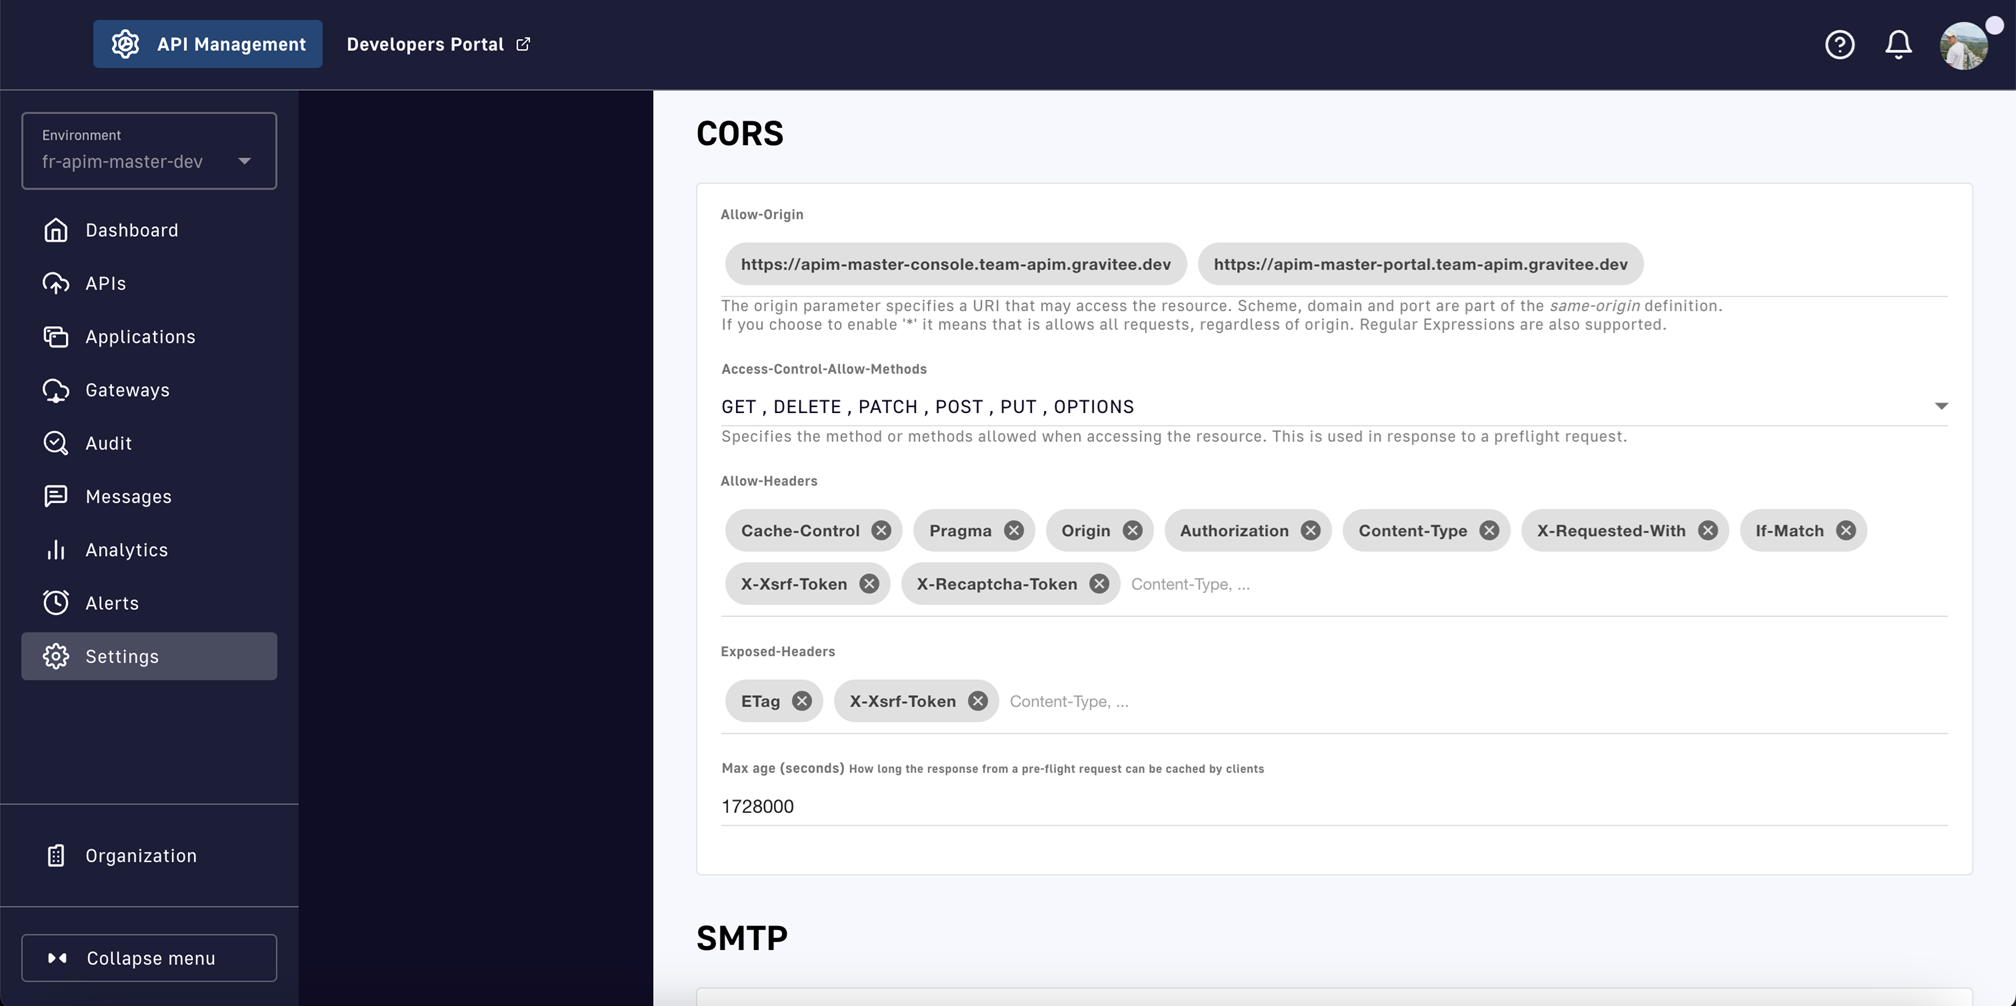
Or at the environment level in the Settings > Settings section of the APIM Console:
Environment CORS settings
Configure the Management repository
The Management repository is used to store global configurations such as APIs, applications, and API keys. The default configuration uses MongoDB (single server).
management:type:mongodbmongodb:dbname:${ds.mongodb.dbname}host:${ds.mongodb.host}port:${ds.mongodb.port}# username:# password:# connectionsPerHost: 0# connectTimeout: 500# maxWaitTime: 120000# socketTimeout: 500# socketKeepAlive: false# maxConnectionLifeTime: 0# maxConnectionIdleTime: 0# serverSelectionTimeout: 0# description: DSAPI.io# heartbeatFrequency: 10000# minHeartbeatFrequency: 500# heartbeatConnectTimeout: 1000# heartbeatSocketTimeout: 20000# localThreshold: 15# minConnectionsPerHost: 0# threadsAllowedToBlockForConnectionMultiplier: 5# cursorFinalizerEnabled: true## SSL settings (Available in APIM 3.10.14+, 3.15.8+, 3.16.4+, 3.17.2+, 3.18+)# sslEnabled:# keystore:# path:# type:# password:# keyPassword:# truststore:# path:# type:# password:## Deprecated SSL settings that will be removed in 3.19.0# sslEnabled:# keystore:# keystorePassword:# keyPassword:# Management repository: single MongoDB using URI# For more information about MongoDB configuration using URI, please have a look to:# - http://api.mongodb.org/java/current/com/mongodb/MongoClientURI.html#management:# type: mongodb# mongodb:# uri: mongodb://[username:password@]host1[:port1][,host2[:port2],...[,hostN[:portN]]][/[database][?options]]# Management repository: clustered MongoDB#management:# type: mongodb# mongodb:# servers:# - host: mongo1# port: 27017# - host: mongo2# port: 27017# dbname: ${ds.mongodb.dbname}# connectTimeout: 500# socketTimeout: 250
Configure the Analytics repository
The Analytics repository stores all reporting, metrics, and health-checks for all APIM Gateway instances. The default configuration uses Elasticsearch.
This section shows the SMTP configuration used for sending email.
You can configure SMTP using DSAPI.yml, environment variables or directly in APIM Console. If SMTP is configured with DSAPI.yml or environment variables, then that configuration will be used, even if settings exist in the database.
SMTP can be applied at two different levels:
Environment
Organization
where the more specific level overrides the broader level: Environment > Organization.
Here's an example of configuring SMTP using the DSAPI.yml file:
The following sections discuss user and management configuration.
User configuration
You can configure various user options:
user.login.defaultApplication: boolean (default: true): Creates a new application for all new users
user.creation.token.expire-after: number (default: 86400): Number of seconds before the user registration token expires
user.reference.secret: 32 characters (default: s3cR3t4grAv1t33.1Ous3D4R3f3r3nc3): Secret used to generate a unique anonymous reference to a user; You must change this value
user.anonymize-on-delete:enabled: boolean (default: false): If true, the user's first name, last name, and email are anonymized when a user is deleted
Management configuration
You can configure various management settings in the APIM Console Settings page with environment variables. For a complete list of these settings. Once you override these properties with environment variables, APIM Console configures them as read-only to prevent you from overwriting the new values in the interface.
For array properties, separate your environment variable properties with a comma. For example: my_var=item1,item2,item3.
For example, you can override the analytics client timeout with either of the following environment variables:
A brute-force attack is the submission of a high volume of authentication requests consisting of password permutations. Even with OAuth 2.0 enabled, you can leave behind a login form for in-memory or local users. Some tools can help you to prevent malicious actions by banning IPs.
Fail2Ban
This section explains how to secure the APIM UI components (Management and Portal) and APIM APIs against brute-force attacks using Fail2Ban. For instructions on installing Fail2Ban, see the Fail2Ban website.
Configuration
APIM API logs all authentication failures in the DSAPI log file. Follow the steps below to configure Fail2Ban to work with the DSAPI log file.
Each time you modify Fail2Ban configuration resources, you need to restart the service.
Configure a Fail2Ban filter to extract DSAPI authentication failure events:
2019-05-03 16:03:03.304 [DSAPI-listener-31] WARN i.g.m.s.l.AuthenticationFailureListener - Authentication failed event for : admin - IP : 10.50.24.18
Add a configuration file to declare filters: /etc/fail2ban/filter.d/DSAPI.conf.
The DSAPI API Management (APIM) Management API component includes its own internal API for monitoring and retrieving technical information about the component.
Configuration
Enable the API as a service in the DSAPI.yml file and update any other required configuration:
Probes can be filtered using the optional probes query parameter, which can handle a list of probes separated by commas (,). If no query param is provided, the health of all probes is returned. If the return status is 200, everything is ok; if it is 500, there is at least one error.
This endpoint can be used by a load balancer, e.g., to determine if a component instance is not in the pool.
The following probes are not displayed by default and you must explicitly use the query param to retrieve them:
- cpu
- memory
- api-sync
These probes are considered healthy if they are under a configurable threshold (default is 80%). To configure the default, add it to your DSAPI.yml:
The Developer Portal is a web application that provides a simplified, user-friendly interface tailored to the API consumption process. It acts as a centralized catalog where internal and external API consumers can find and subscribe to APIs that are developed, managed, and deployed by API publishers.
API consumers can easily discover and explore APIs, read documentation, test API endpoints, generate access tokens, view API analytics, and manage their API subscriptions in a single location. Additionally, administrators have significant control over the look and feel of the Developer Portal to deliver an accessible and on-brand experience to external API consumers.
For more information about the DSAPI Developer Portal, see the following the articles:
Accessing the DSAPI Developer Portal
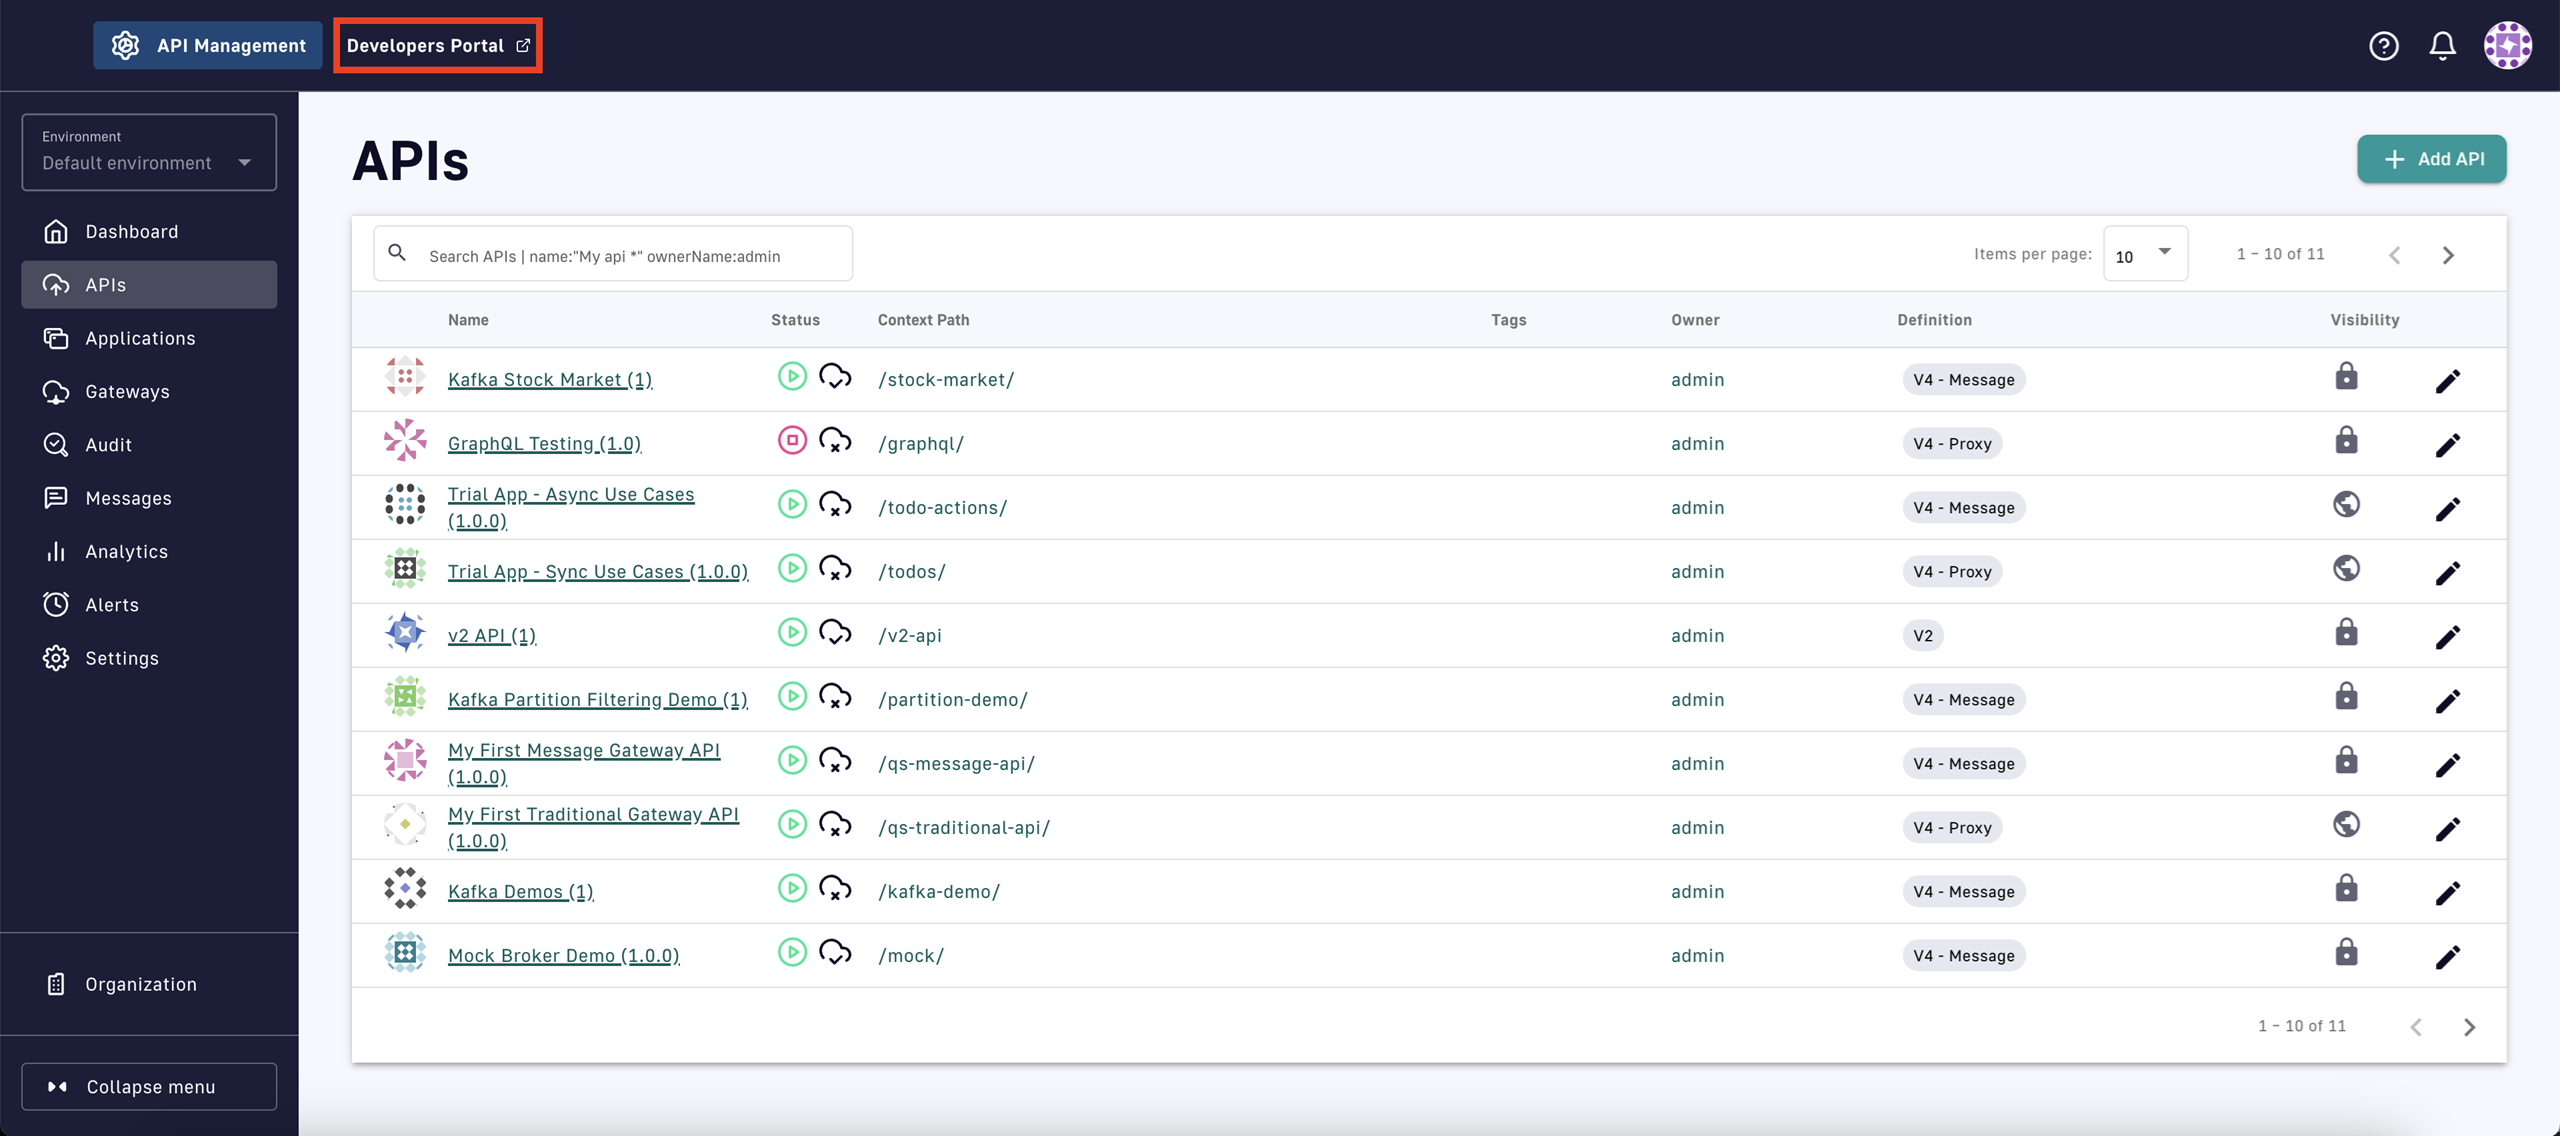
Users should be able to immediately access the Developer Portal from the APIM Console by selecting the Developer Portal link in the top left of the Console's nav bar.
Self-managed installation: Adding a Developer Portal link
The Developer Portal host of self-managed installations can easily be modified. You can manually add the Portal URL to see the Developer Portal link in the Console UI.
Your Developer Portal URL will depend on your deployment, so please reference the respective installation docs. For example, with the default Docker installation, you can access the Developer Portal at http://localhost:8085 in your browser.
Click Settings in the sidebar
Click Settings in the inner sidebar
Scroll down to Portal settings and provide a Portal URL based on your deployment configuration
Scroll to the bottom of the page and click Save
Access Developer Portal from APIM Console
Select the Developer Portal link in the top left of your Console's nav bar
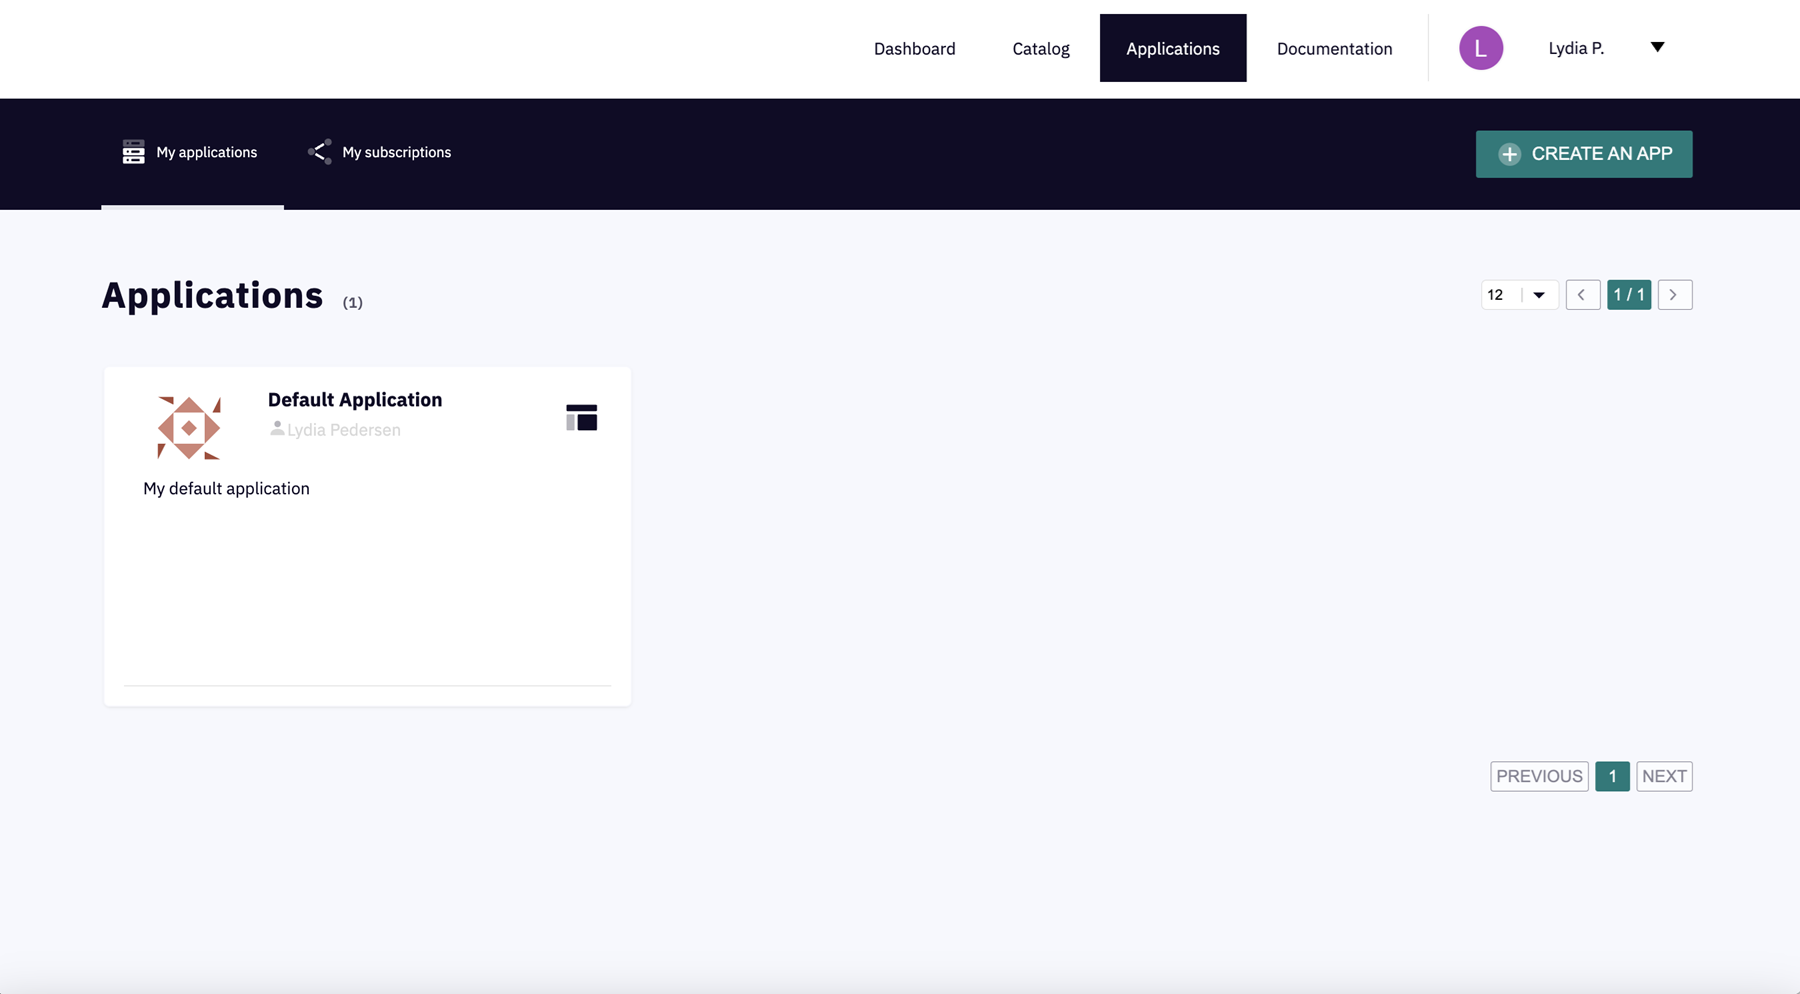
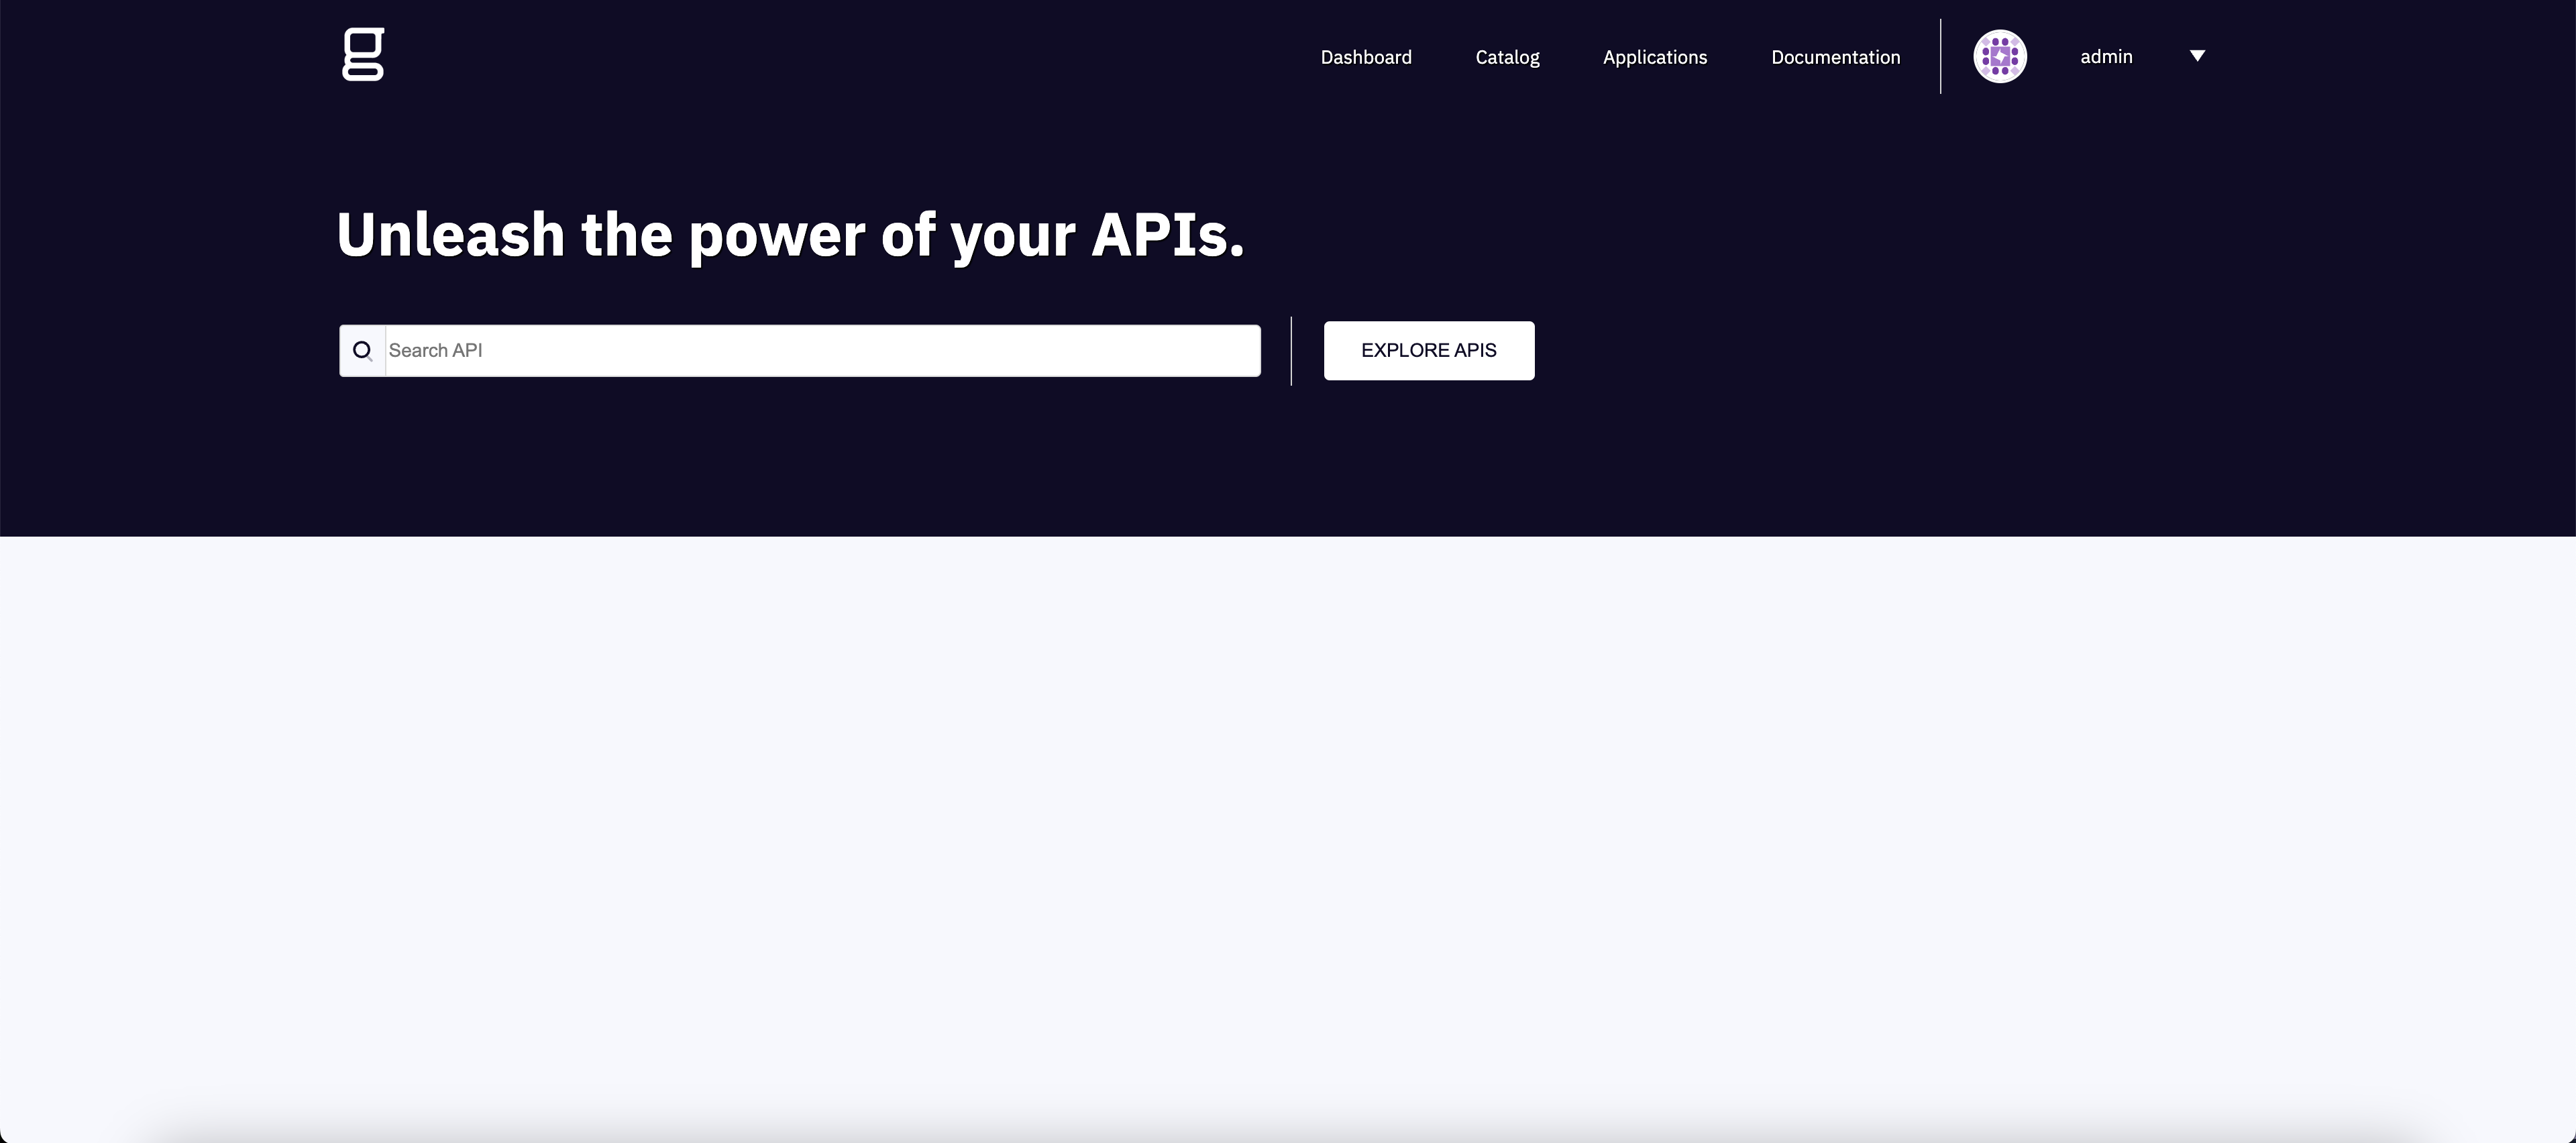
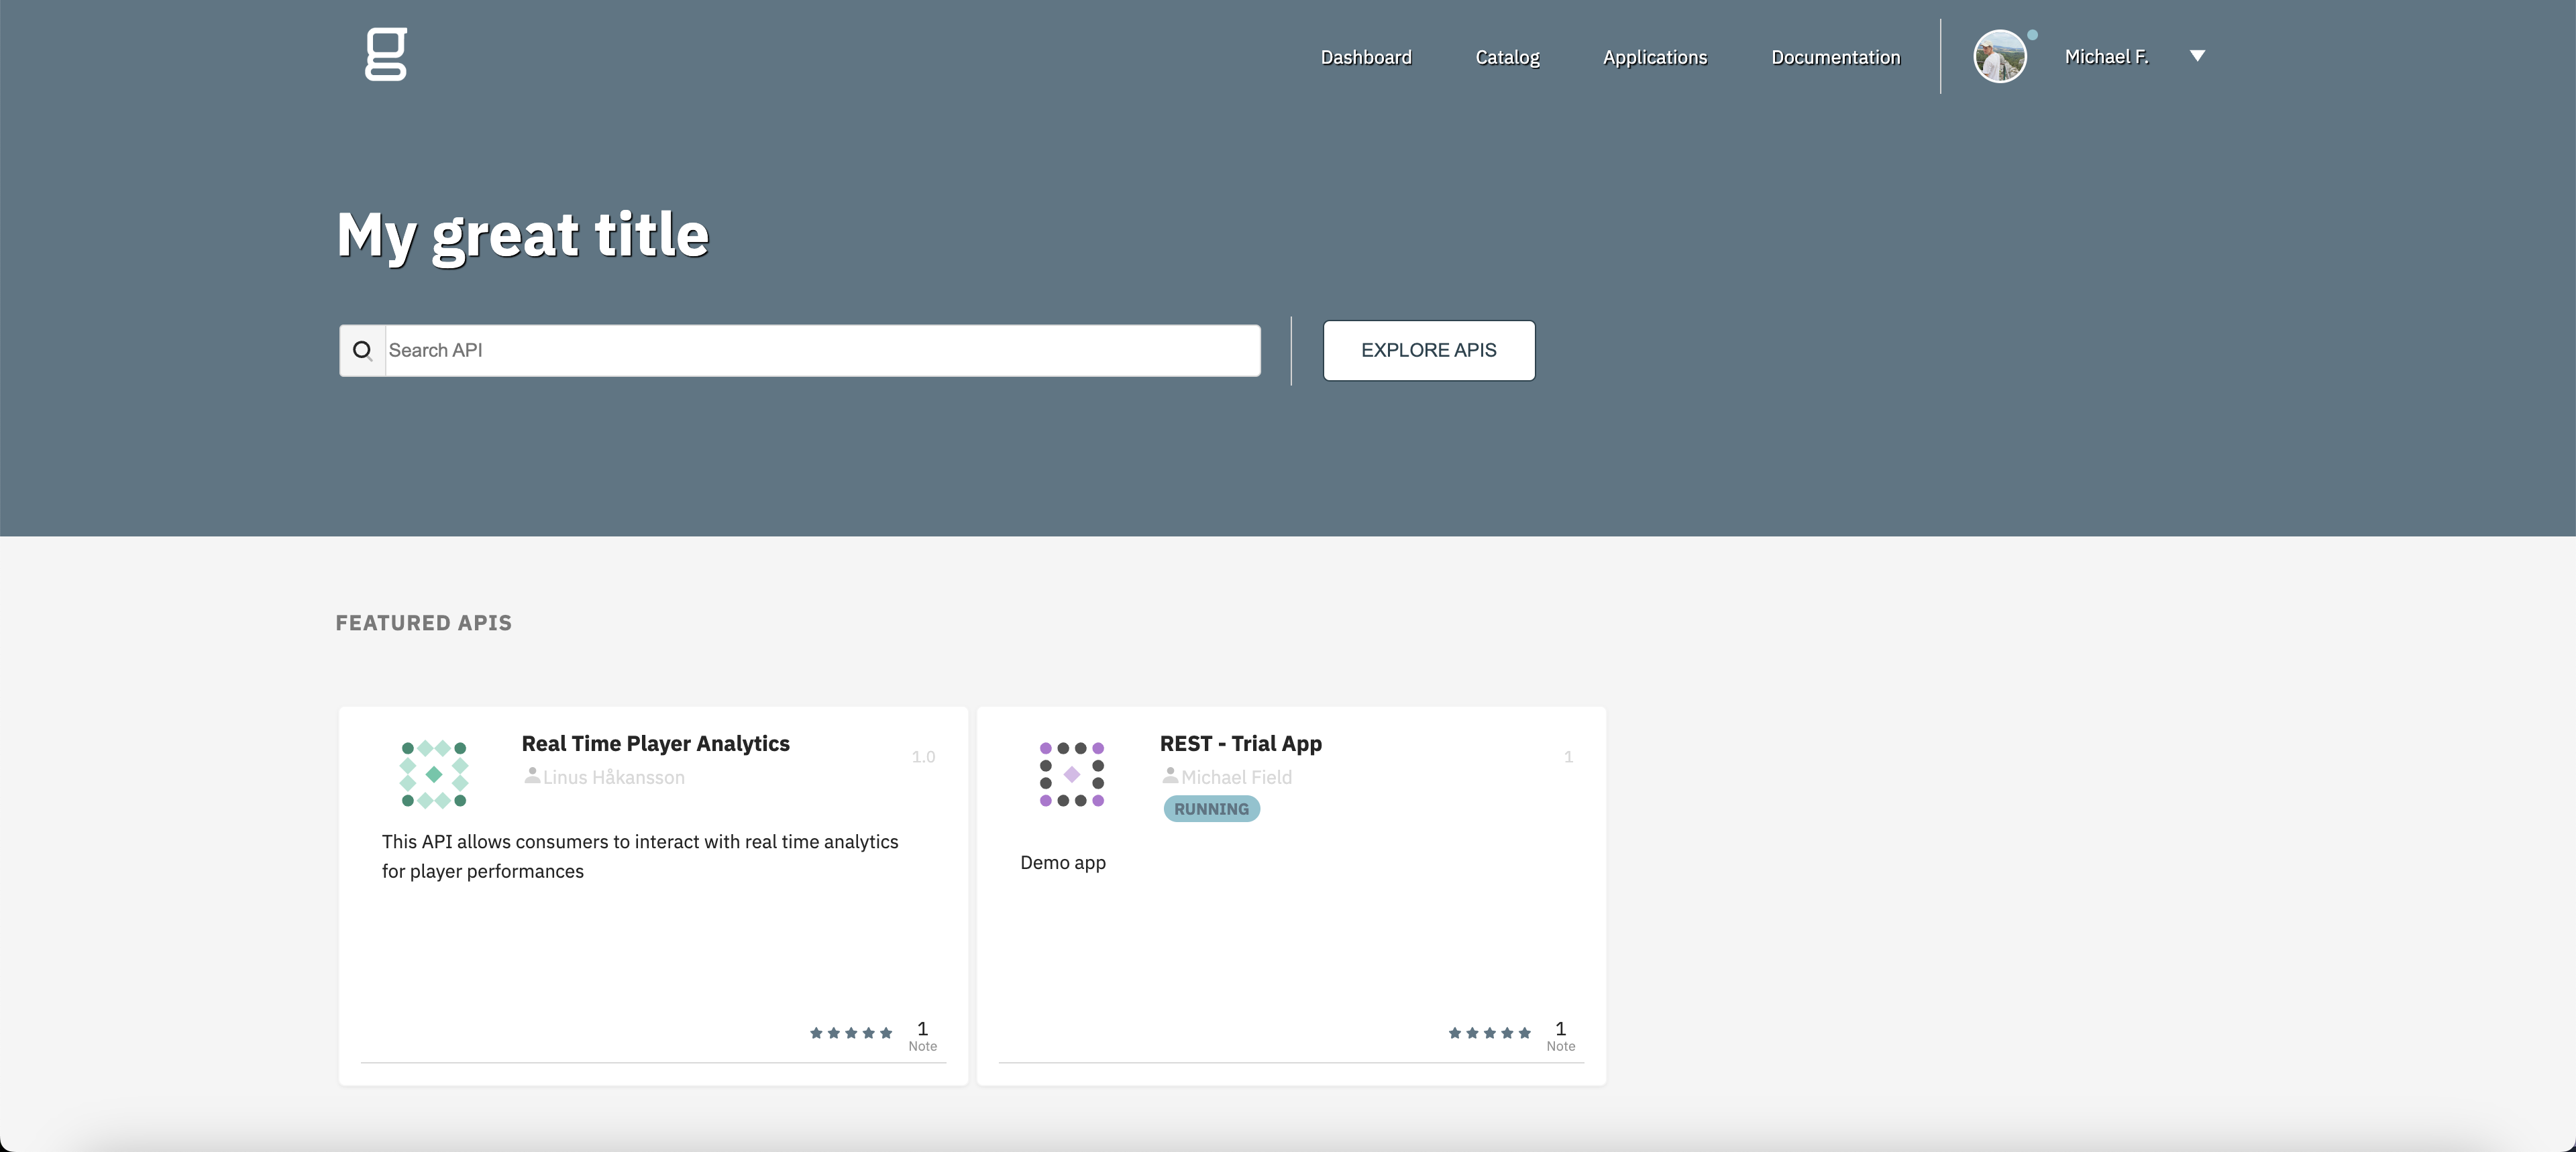
This will bring you to the homescreen of the Developer Portal.
Your default Developer Portal
From here, you can immediately begin searching for APIs using the Developer Portal's full-context[^1] search. However, you will not be able to subscribe to any APIs until you create an application.
[^1]: Full-context meaning it searches through the definition and metadata of all published APIs that you have access to
Creating and managing users with the DSAPI Developer Portal
Overview
When you access the Developer Portal directly from the Management Console, you are automatically signed in with the same account. However, to expose your APIs to consumers you will need to create new accounts, which requires additional configuration.
User sign-up
To create new user accounts you must:
Enable the Allow User Registration option. This option is a general setting and enabled by default.
Configure simple mail transfer protocol (SMTP) to confirm user account creation. See the sections below for detailed instructions.
Configure SMTP
To configure SMTP settings:
Log in to the Management Console
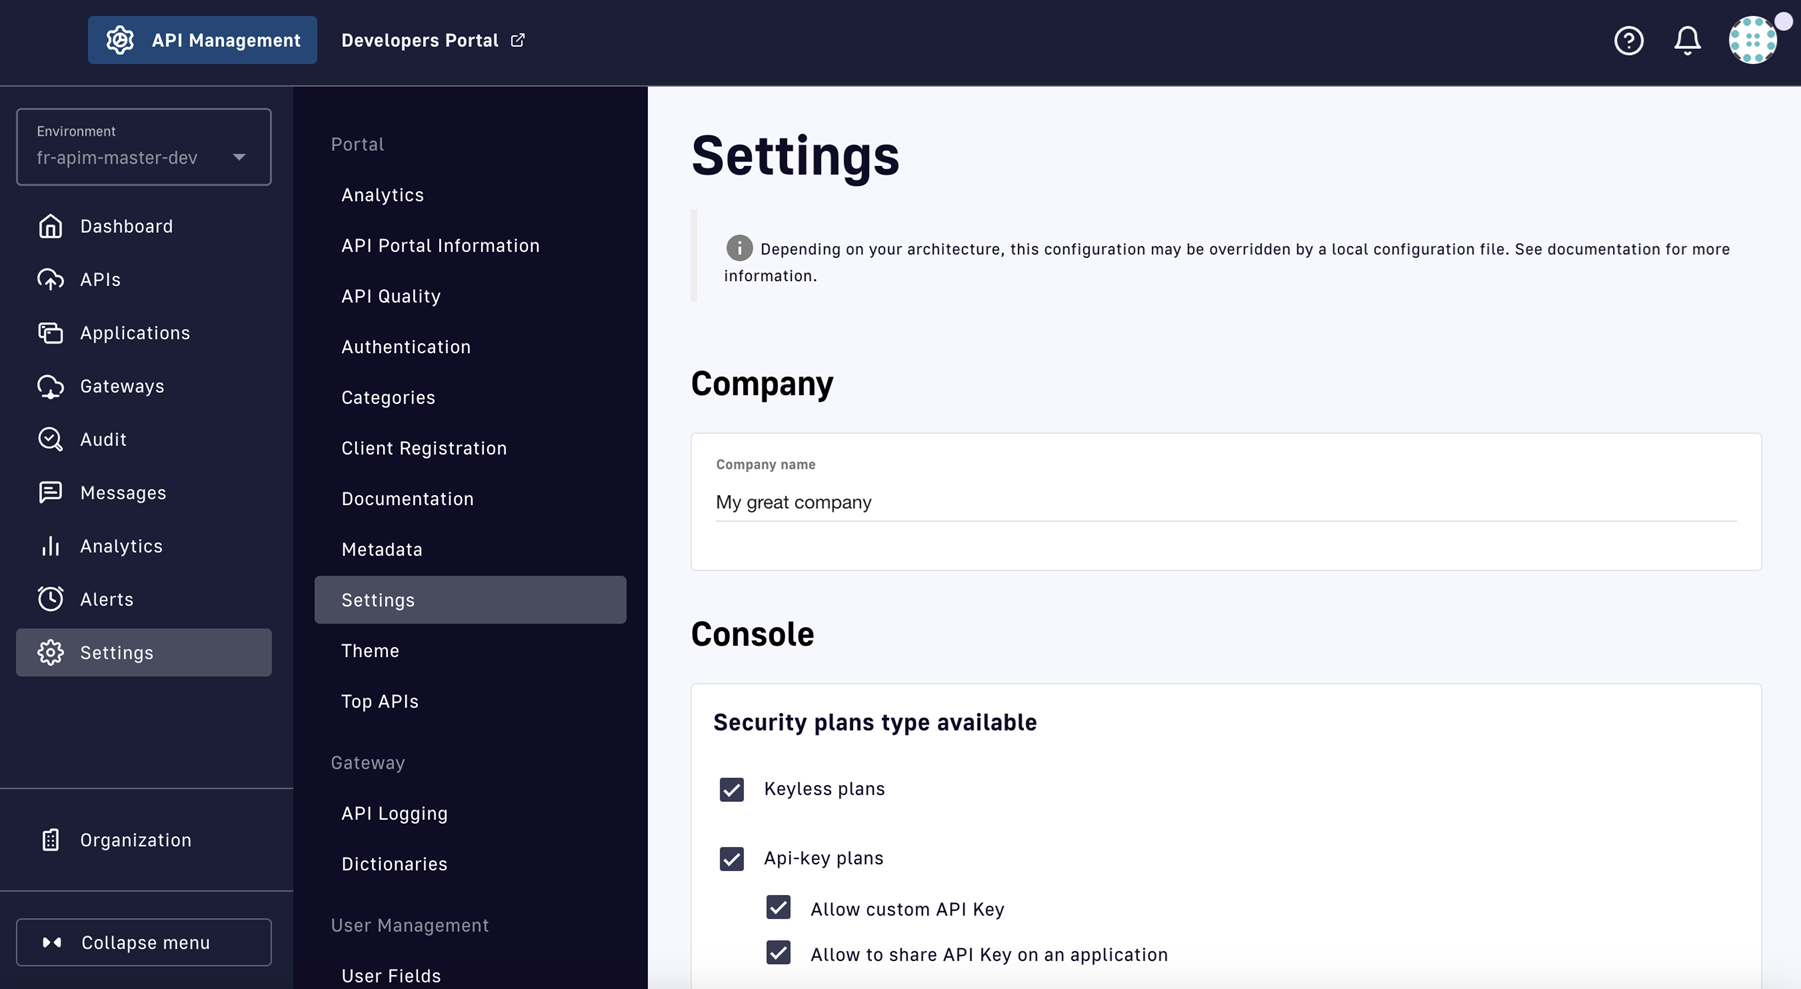
Select Settings from the left sidebar
Select Settings from the inner left sidebar
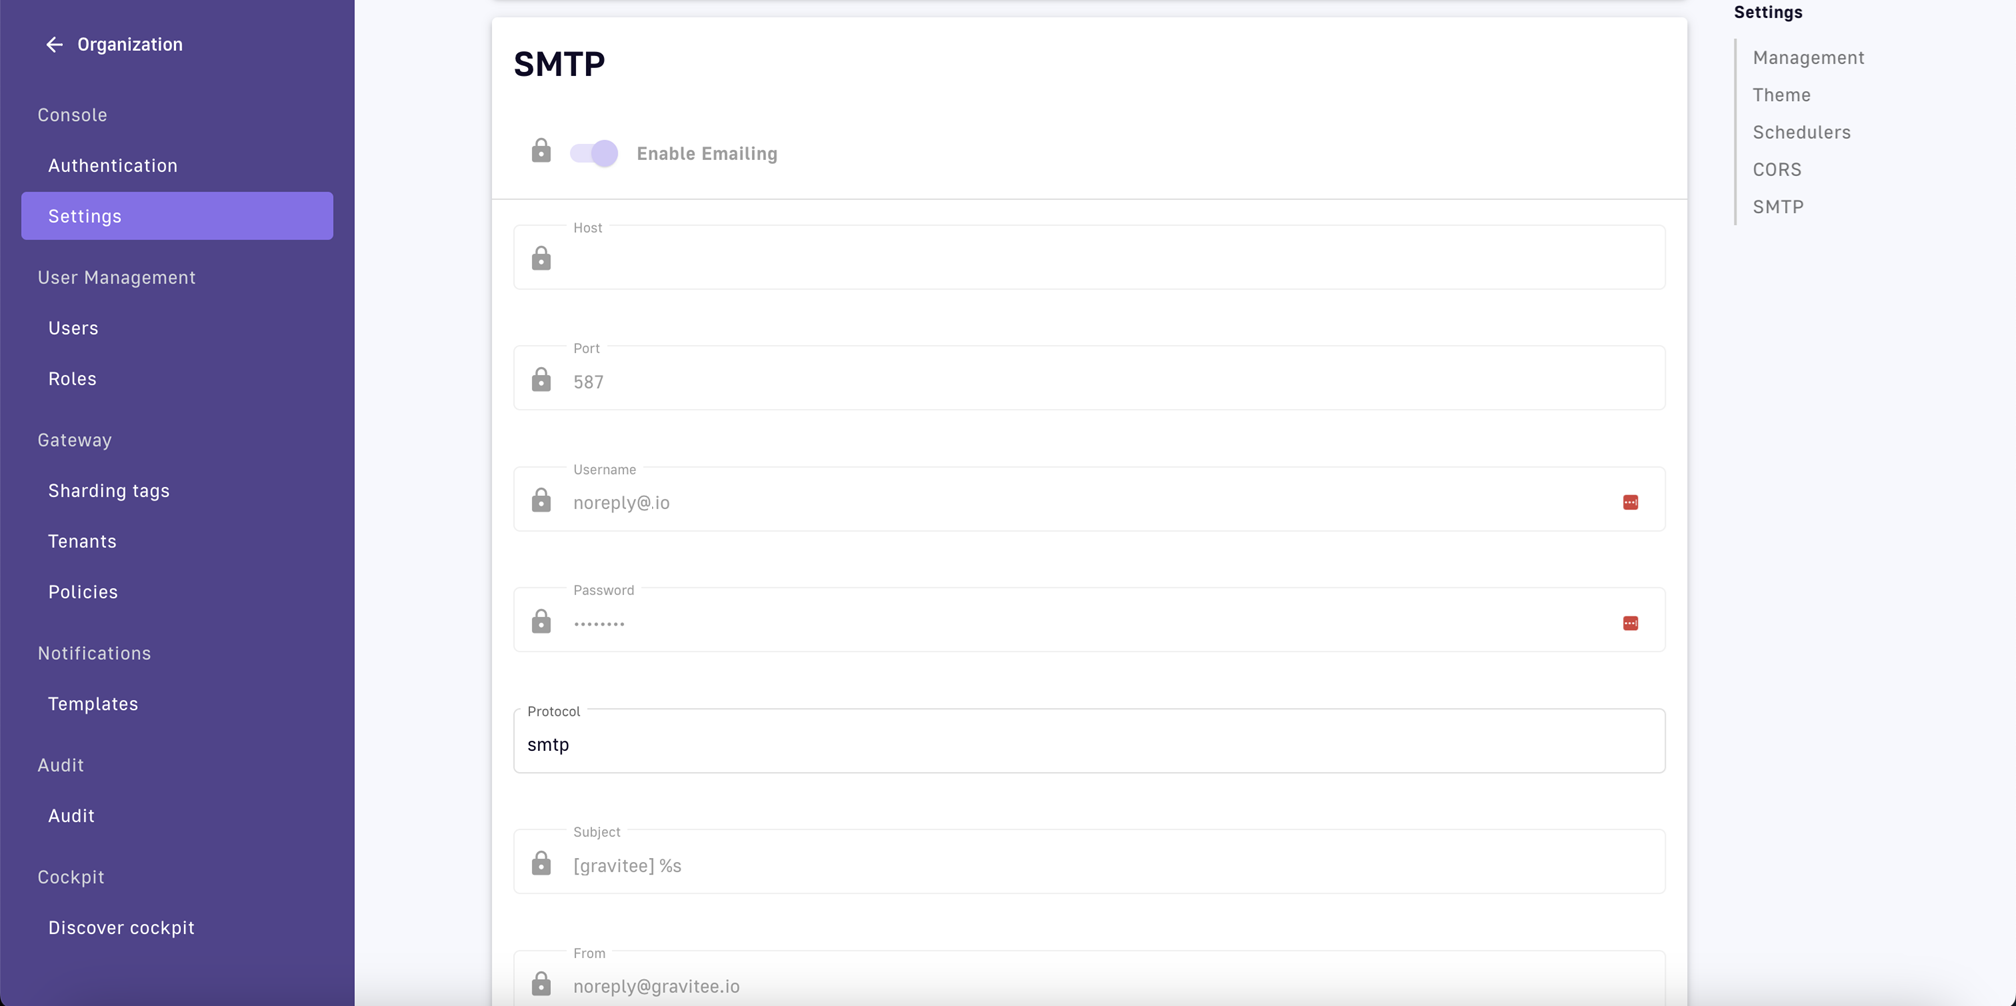
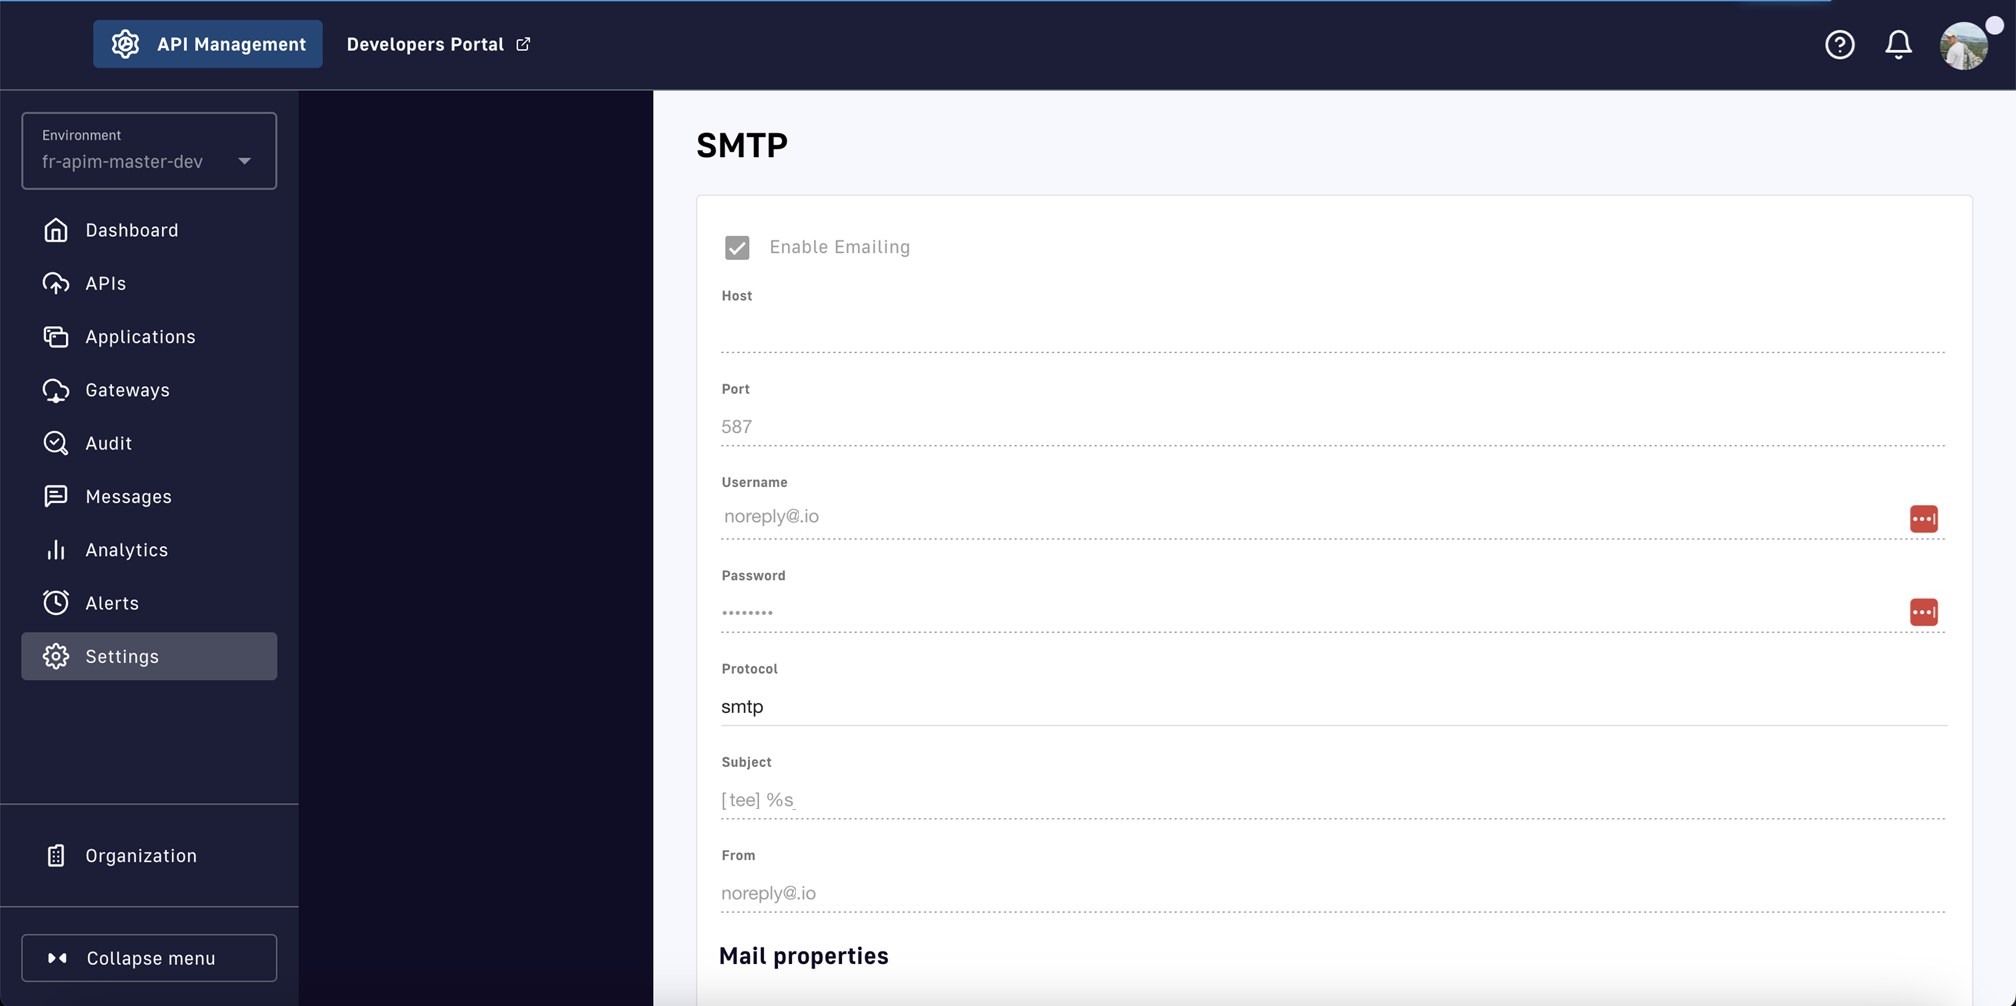
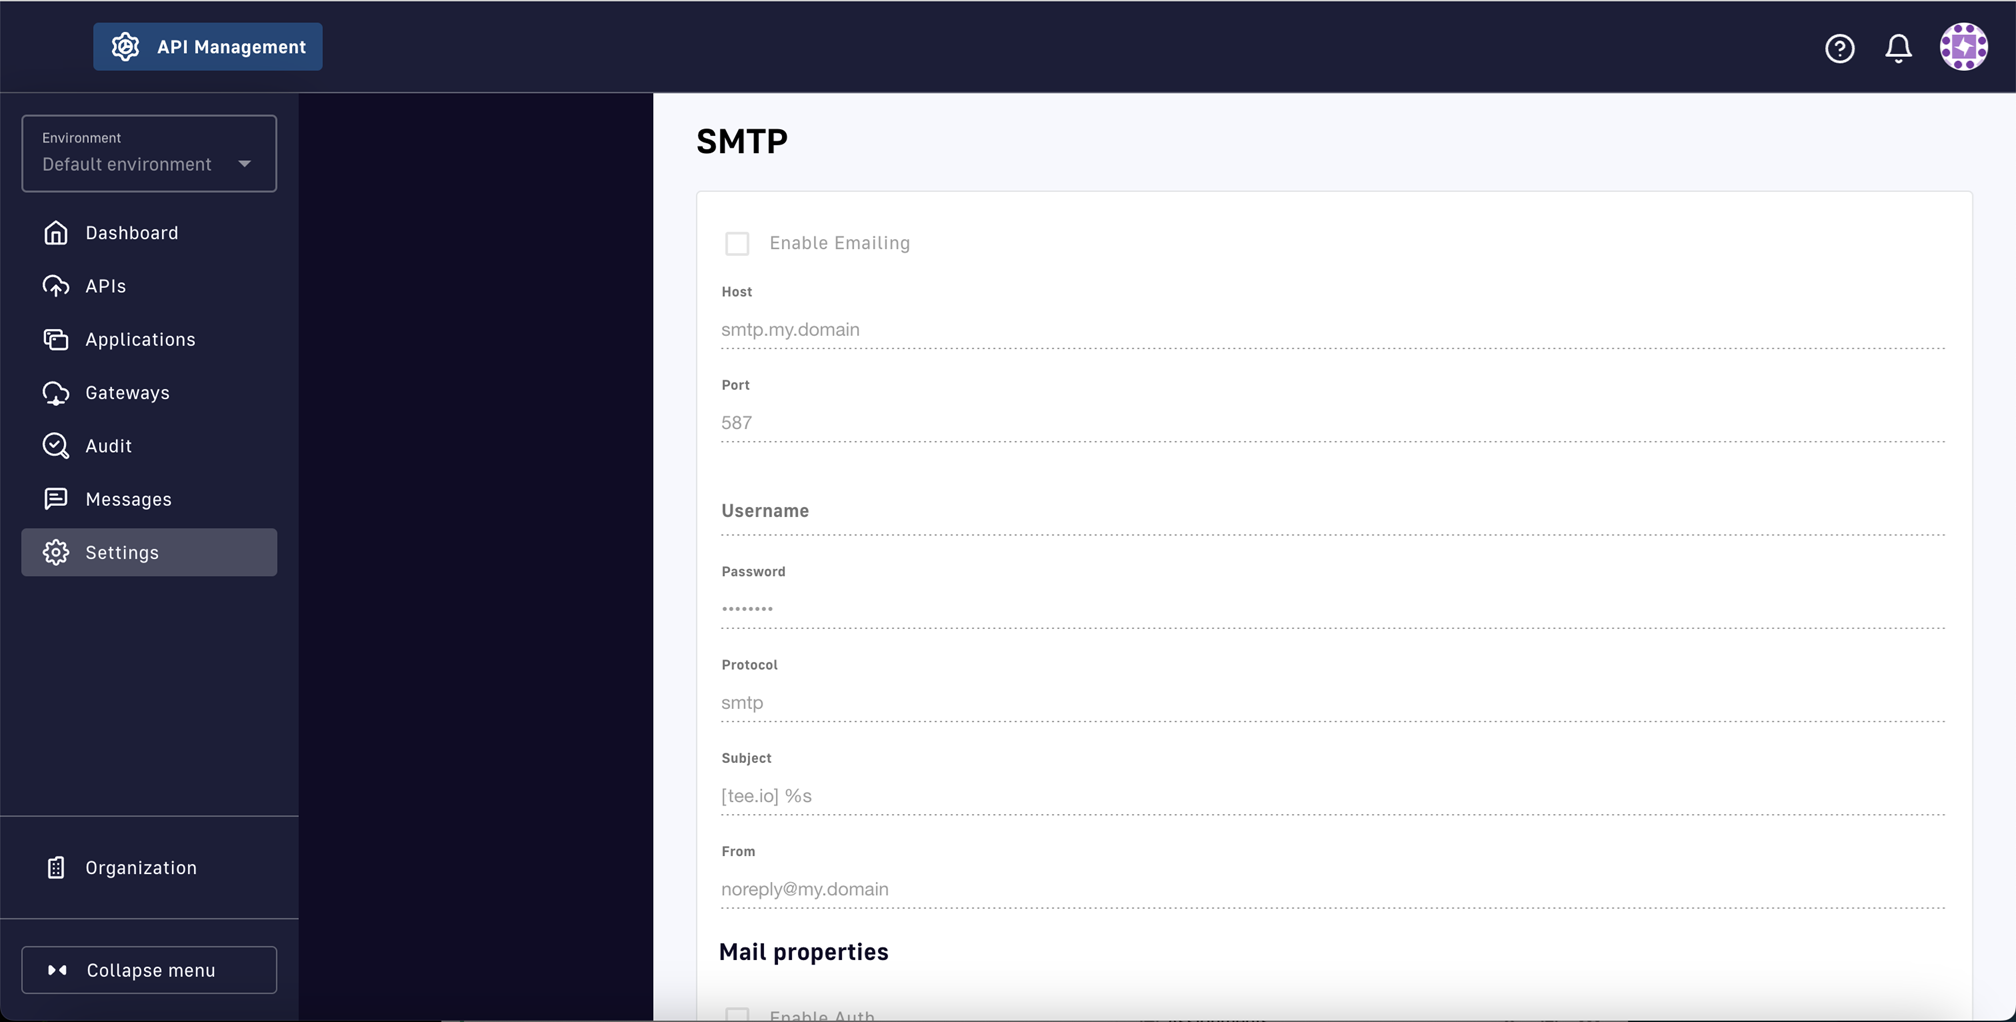
Configure the SMTP settings are at the bottom of the page
By default, the DSAPI.yml configuration file disables email because email requires configuring an SMTP email service. You must set up email for your APIM deployment per the SMTP configuration guide to be able to modify the SMTP settings.
SMTP default settings
Create a user
After configuring SMTP, you can create a new user in the Developer Portal:
Open the Developer Portal in an incognito window to avoid being automatically signed in with the same account used by the Management Console
In the new incognito window, select Sign up at the bottom of the modal
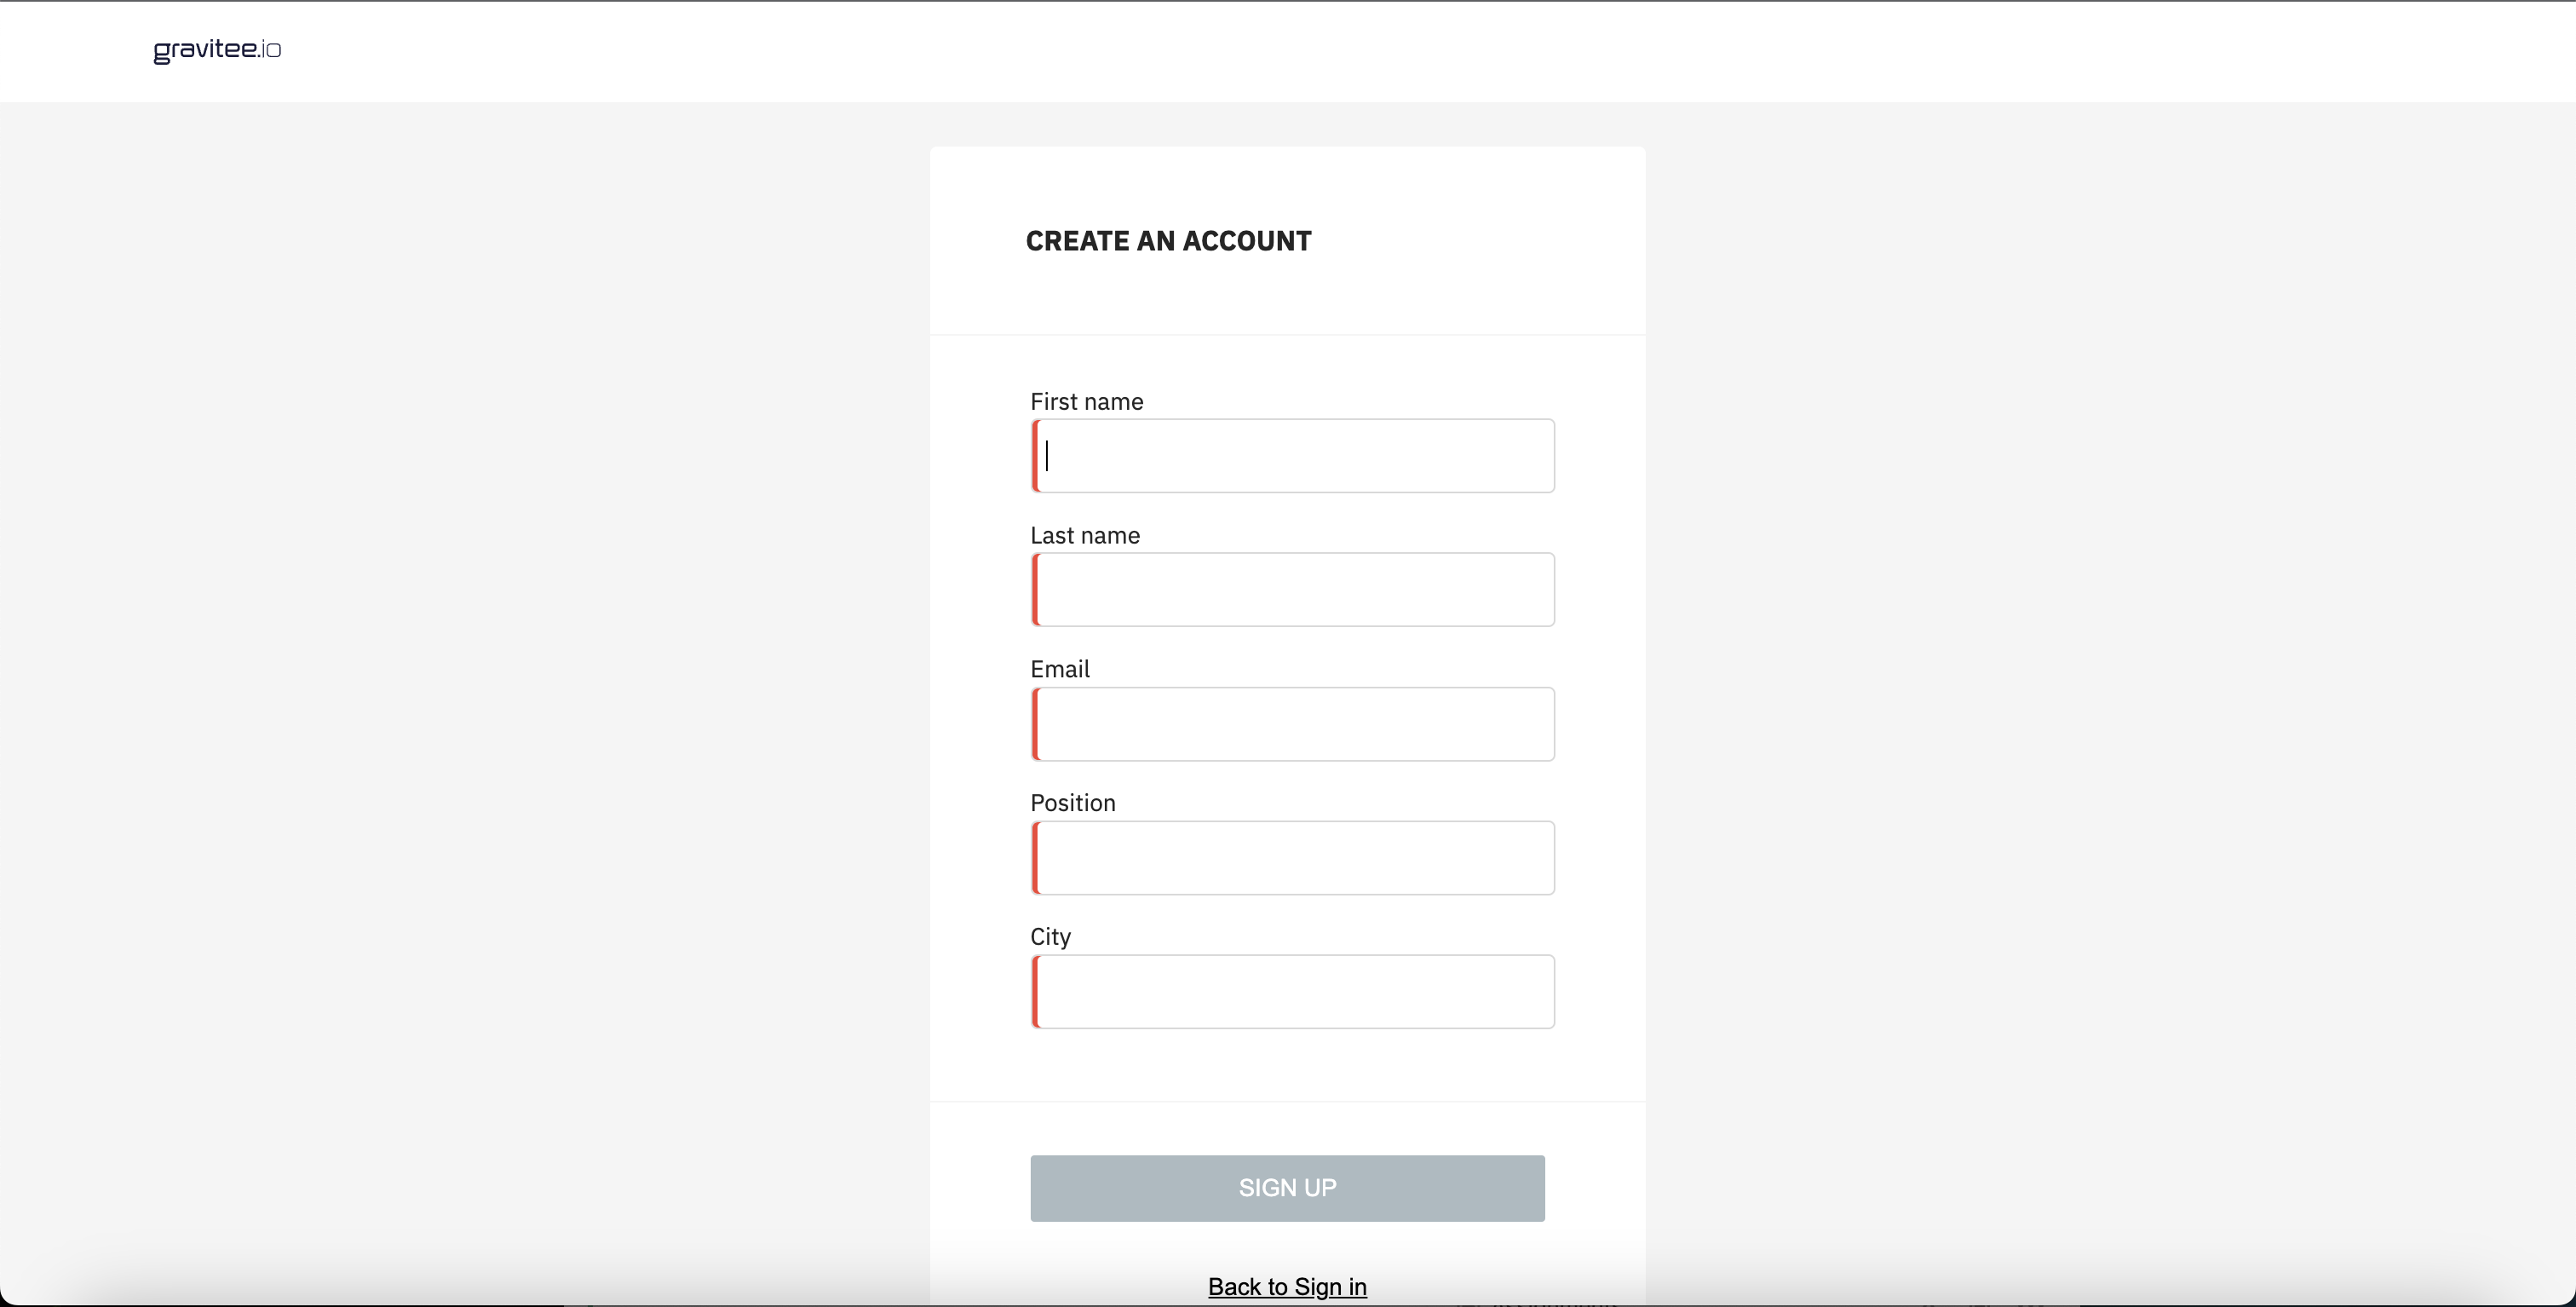
Provide the required information and click the Sign Up button
Developer portal sign up page
You will receive a registration confirmation at the email address you provided.
Complete sign-up
To complete the sign-up process:
Open the email and click the link
Ensure the link opens in the incognito tab (otherwise, the Developer Portal will use the same account as the Management Console)
Finalize your account and add a password that meets the following requirements:
8 to 32 characters
No more than 2 consecutive identical characters
Minimum of 1 special character (@ & # …)
Minimum of 1 uppercase character
Password customization
Password requirements can be modified by changing the regex pattern under User Management Configuration in the DSAPI.yml file or by using environment variables.
Once your password has been created, you will be able to sign in.
User overview
All users can be viewed in the Management Console by anyone with administrator privileges. To view users:
Select Organization at the bottom of the left sidebar
Select Users from the organization's left sidebar to display a list of all current users tied to the organization
As an administrator, you can click on an entry for user details and to apply administrative policies. Additionally, admins can pre-register users by clicking the Add user button on the top right of the page.
Management Console user overview
Detailed user administration
For additional information on user management, including roles, groups, and permissions, see the Administration guide.
Webhook Subscription Management
Overview
API consumers can configure their Webhook subscriptions from the Developer Portal. Configuration involves adding a callback URL, choosing an application, and validating the request.
Configuration
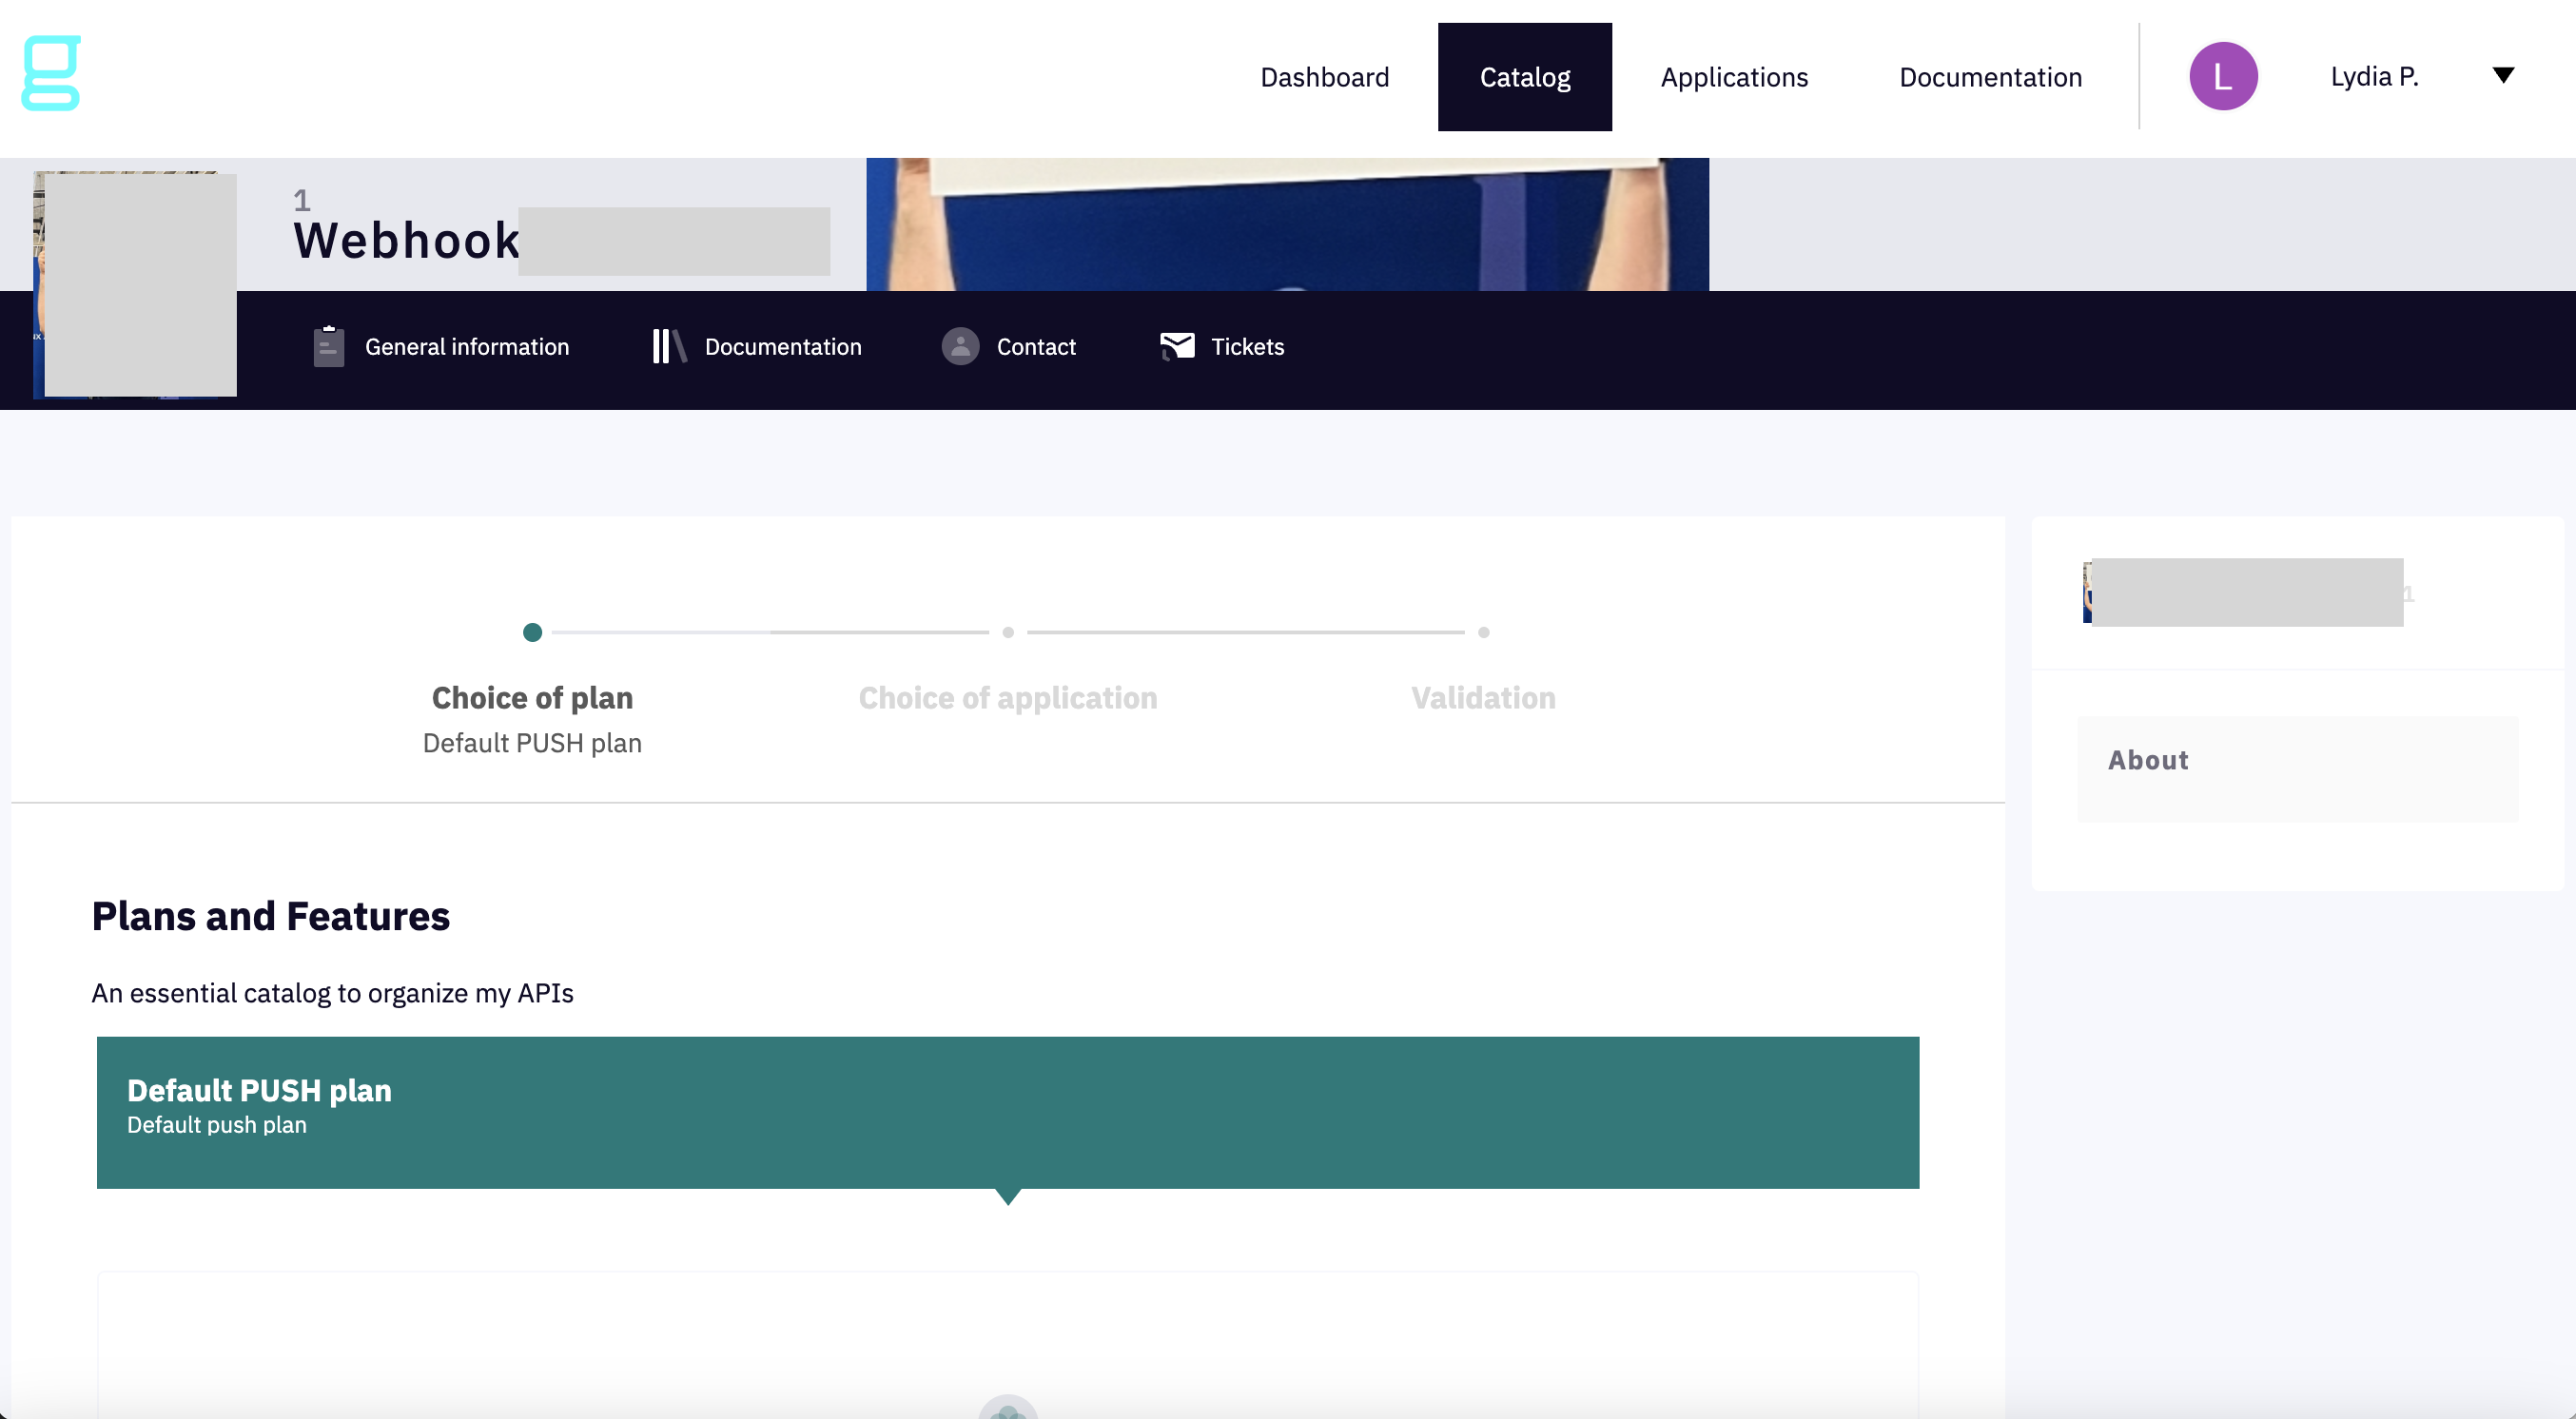
Before you can define and configure your Webhook subscription, you'll need to find it in the Developer Portal:
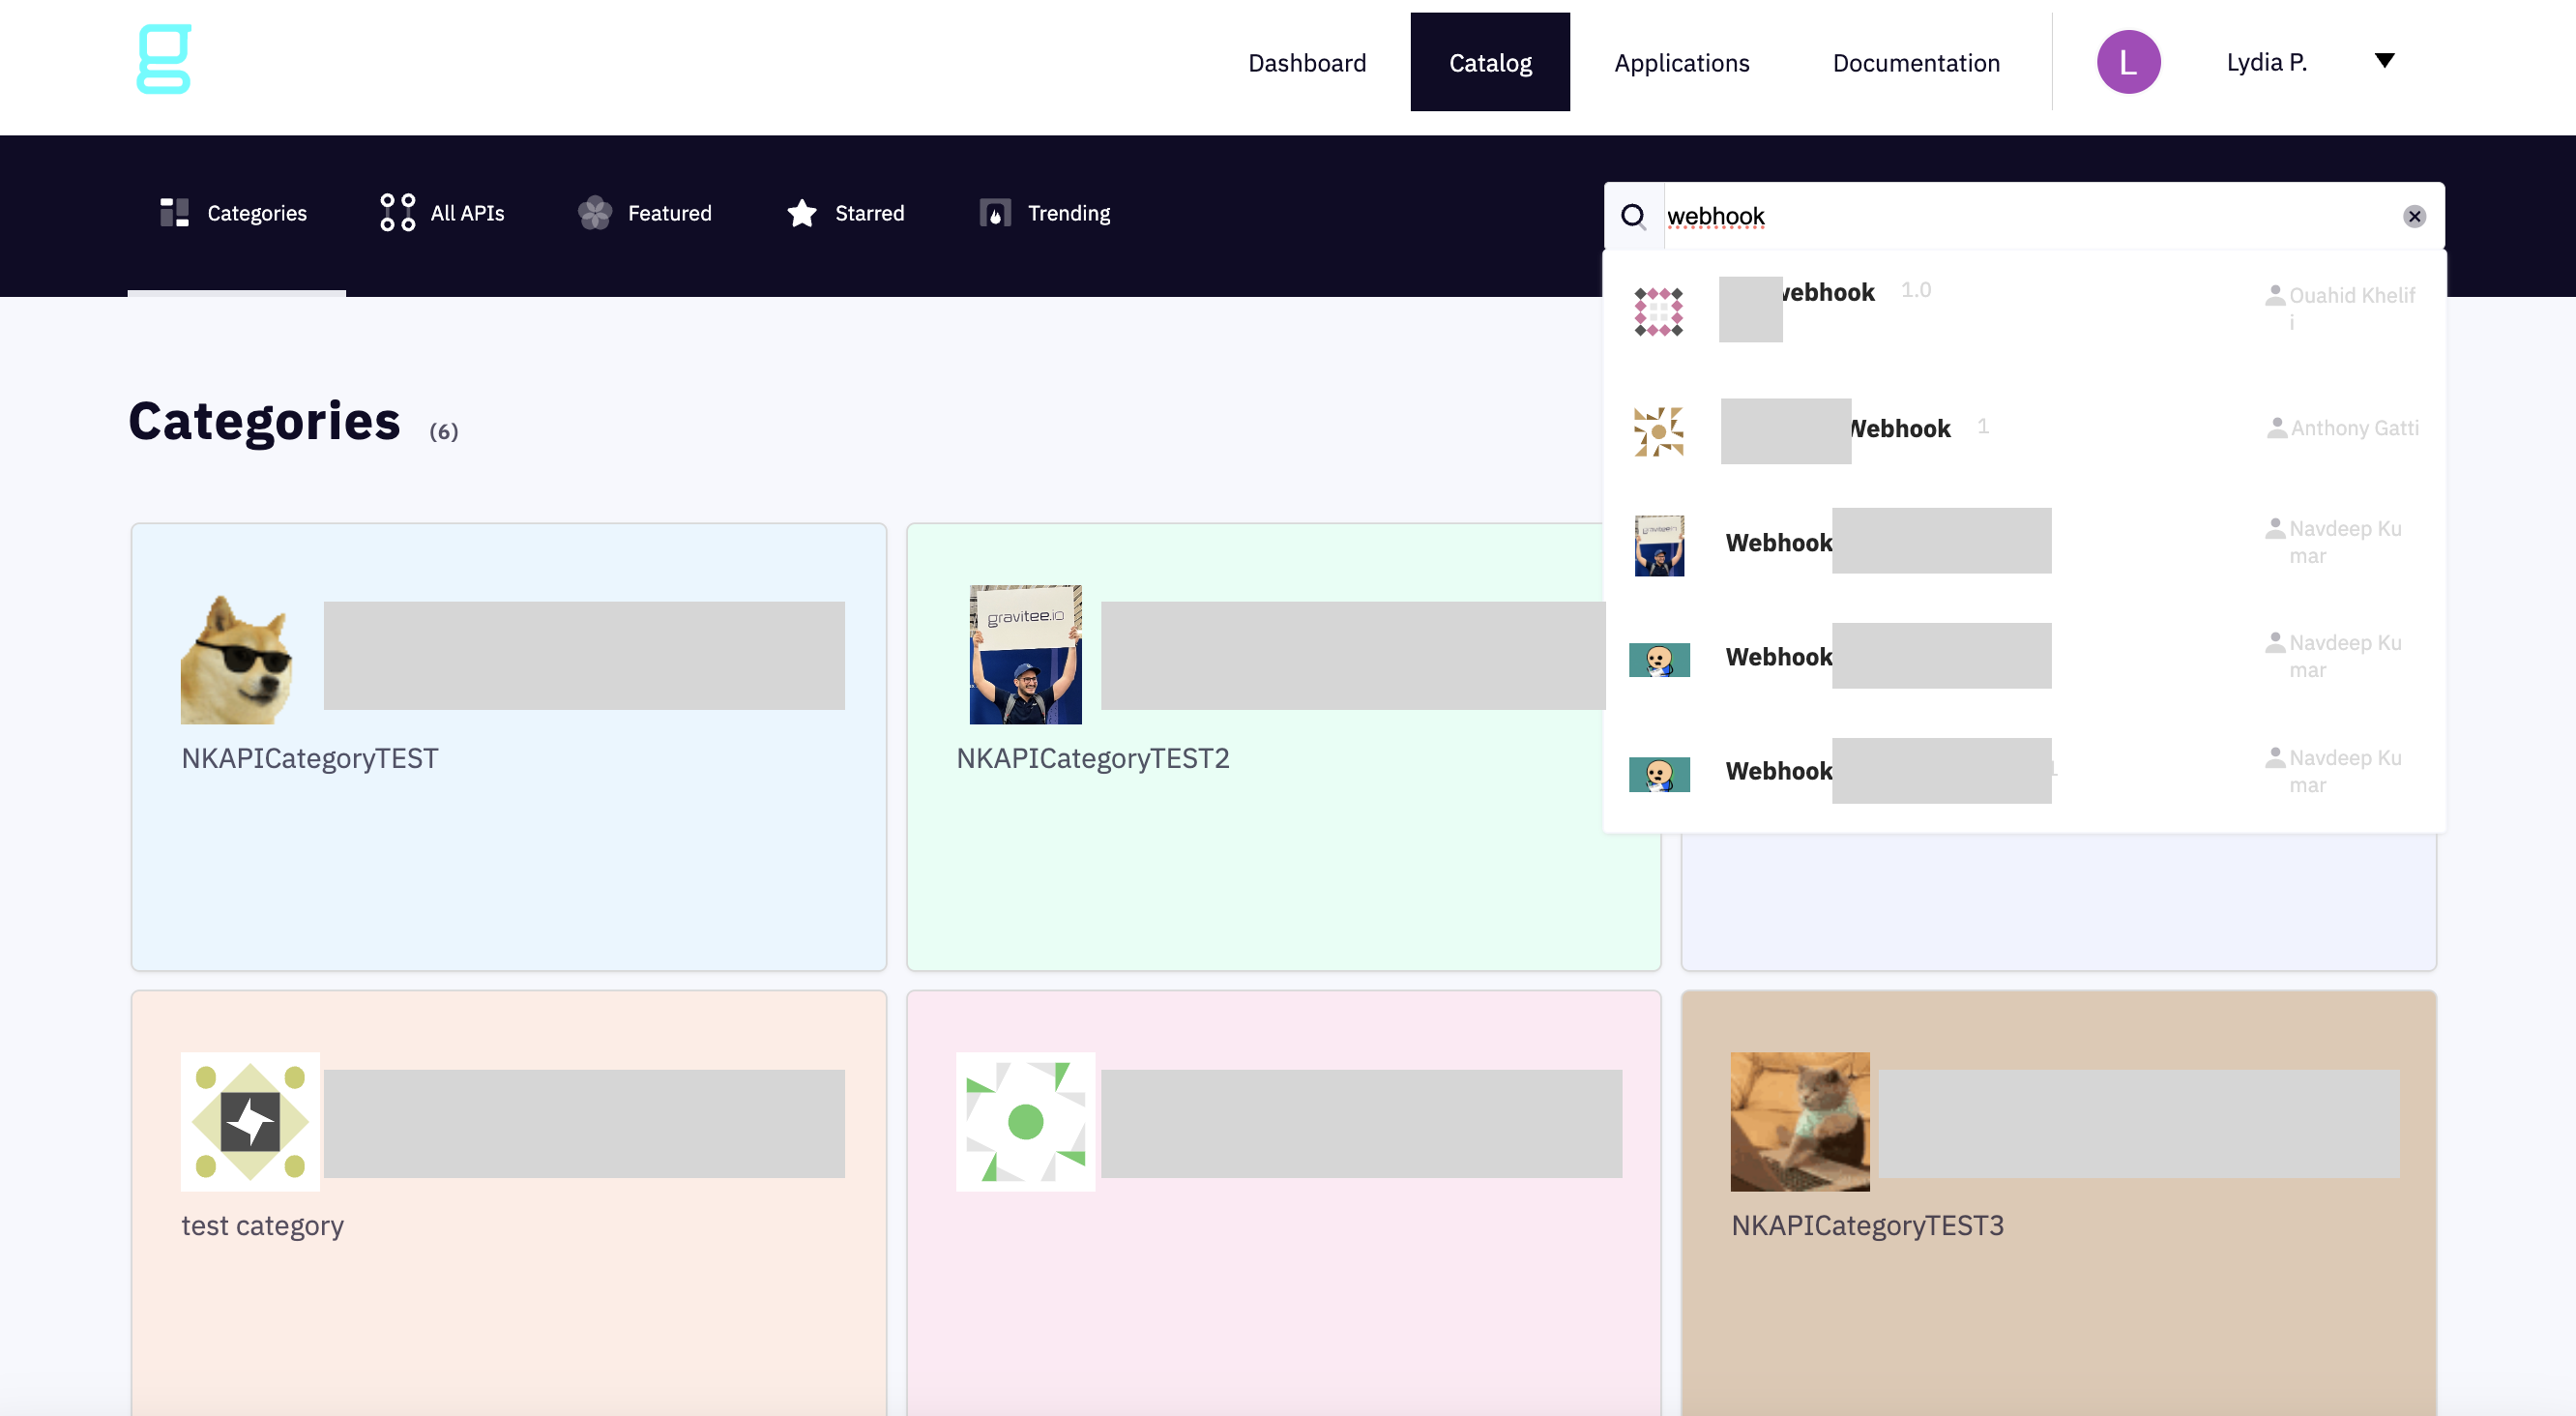
Click on Catalog in the header
(Optional) Use the search field
Find your Webhook subscription in the Developer Portal
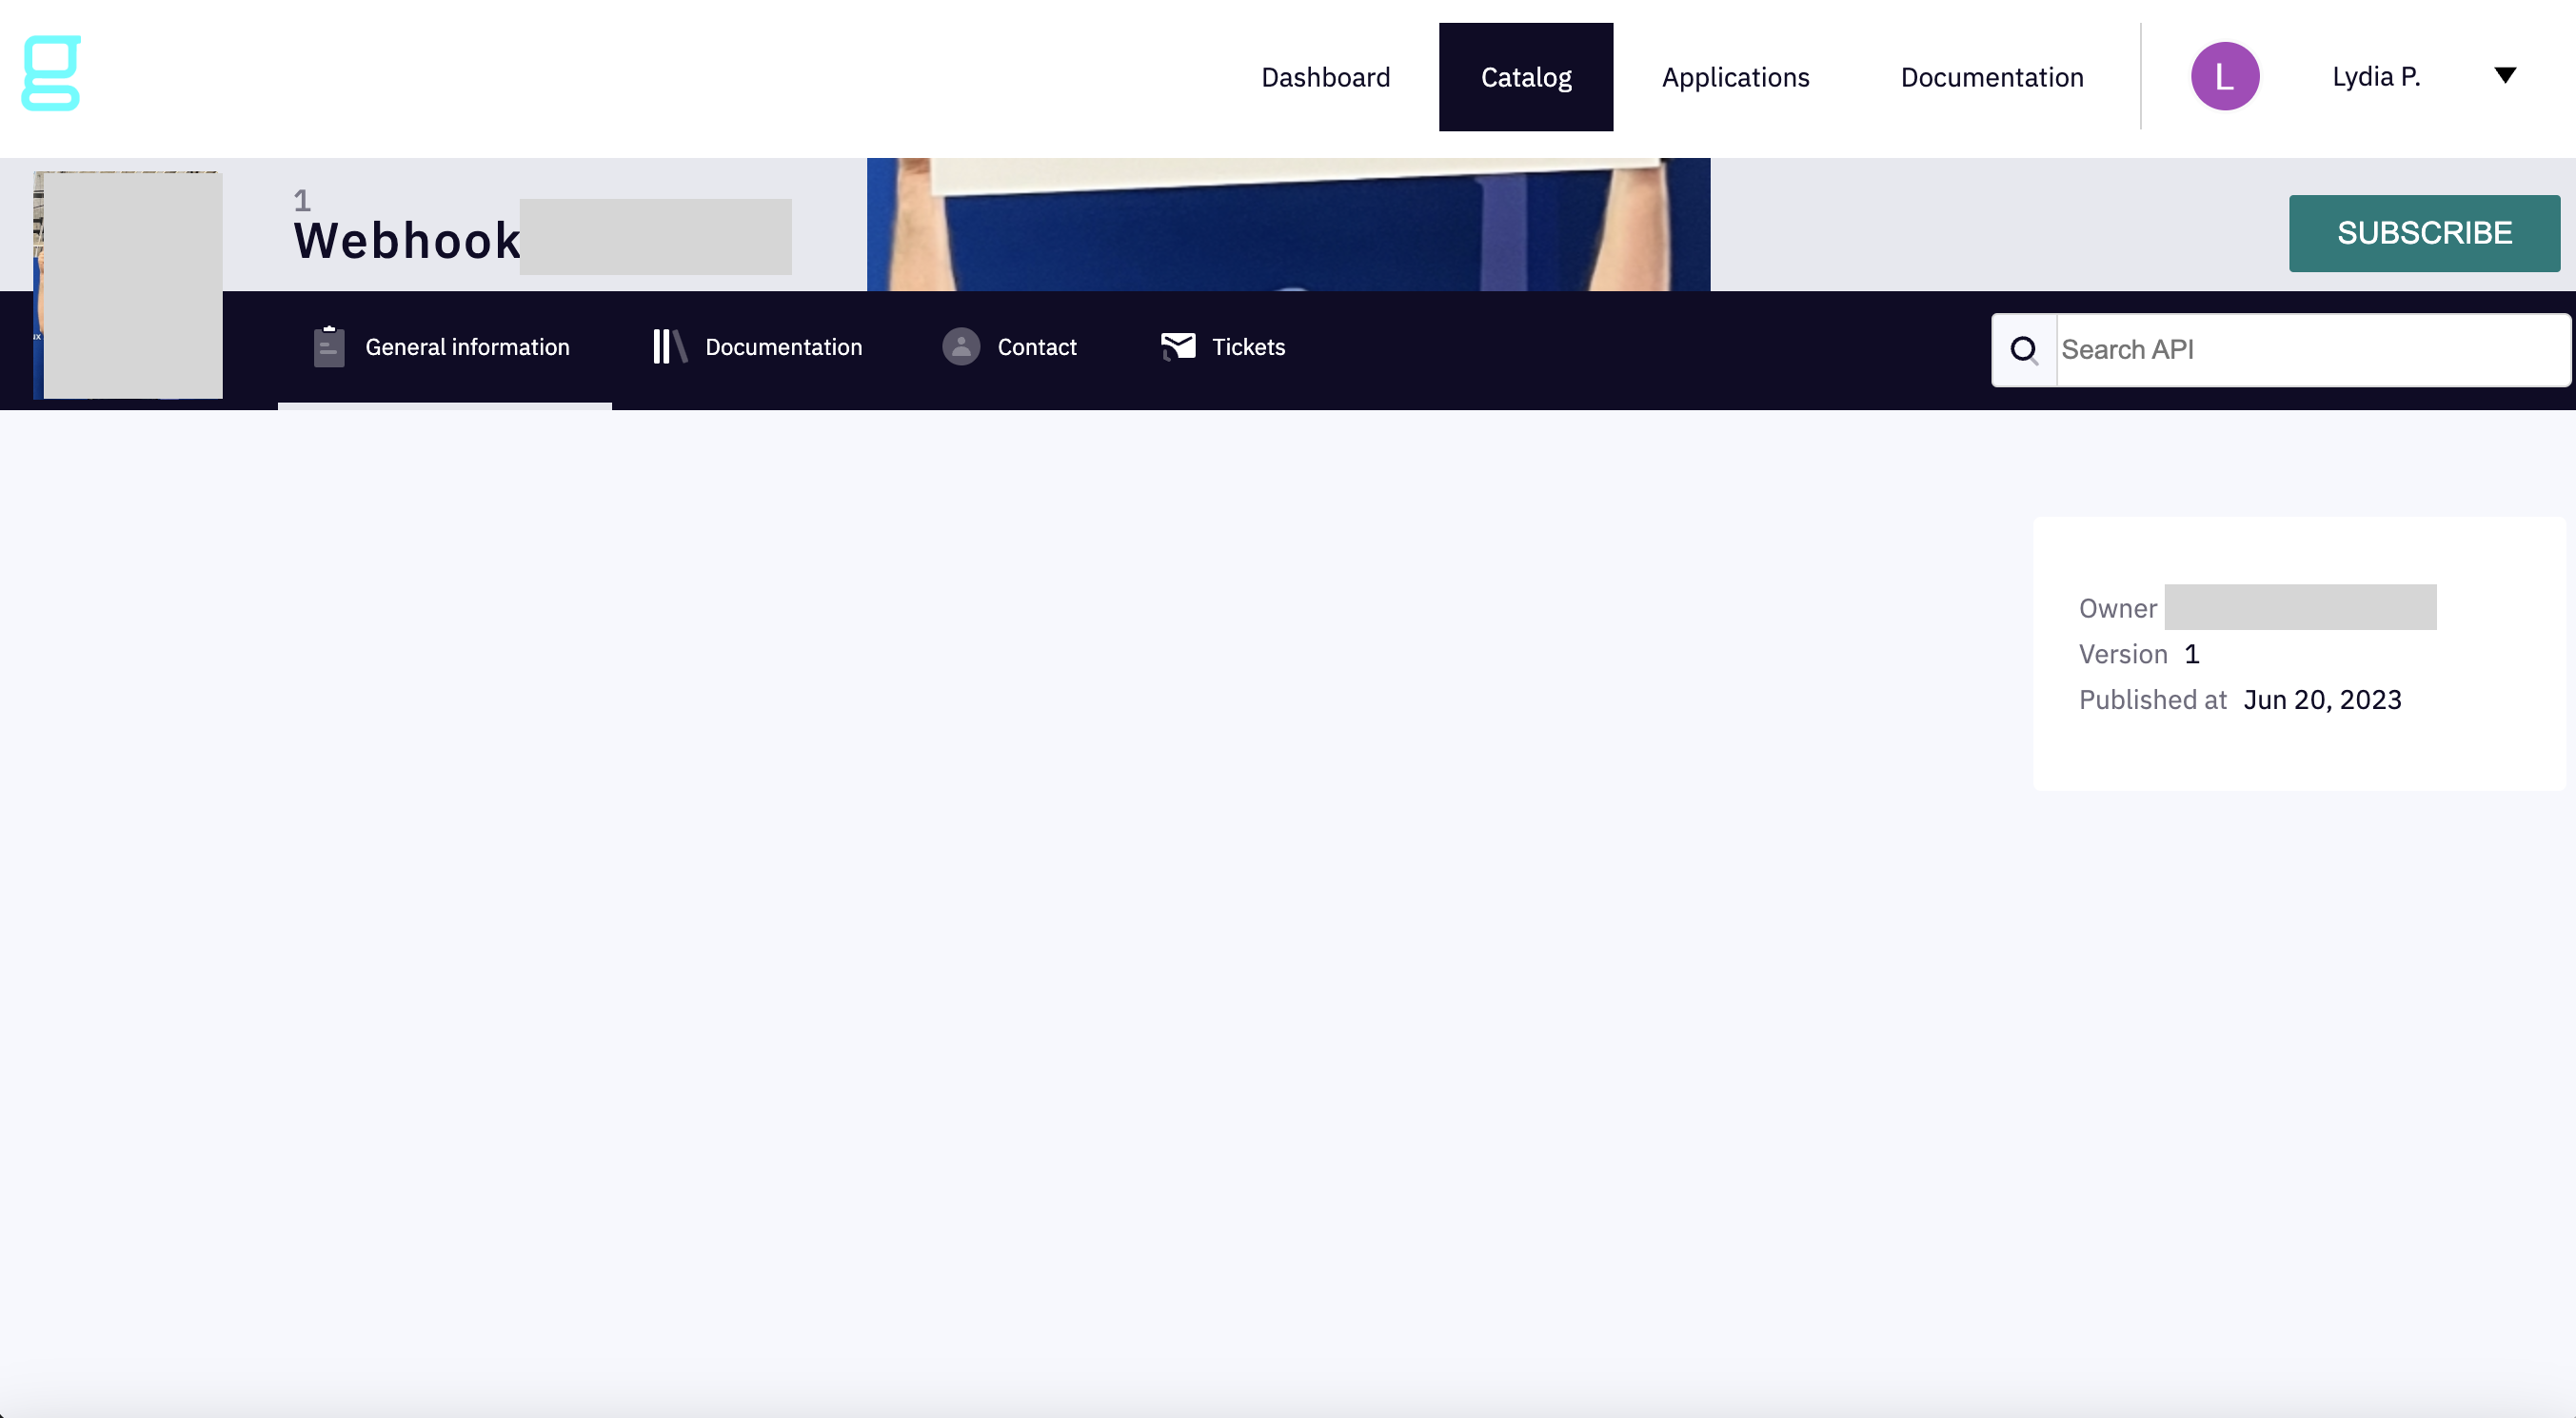
Click on the subscription, then on Subscribe
Subscribe to your Webhook subscription
Choose a PUSH plan. A PUSH plan is limited to Webhooks and enables you to subscribe to APIs that have a subscription listener (currently also limited to Webhooks).
Choose a PUSH plan
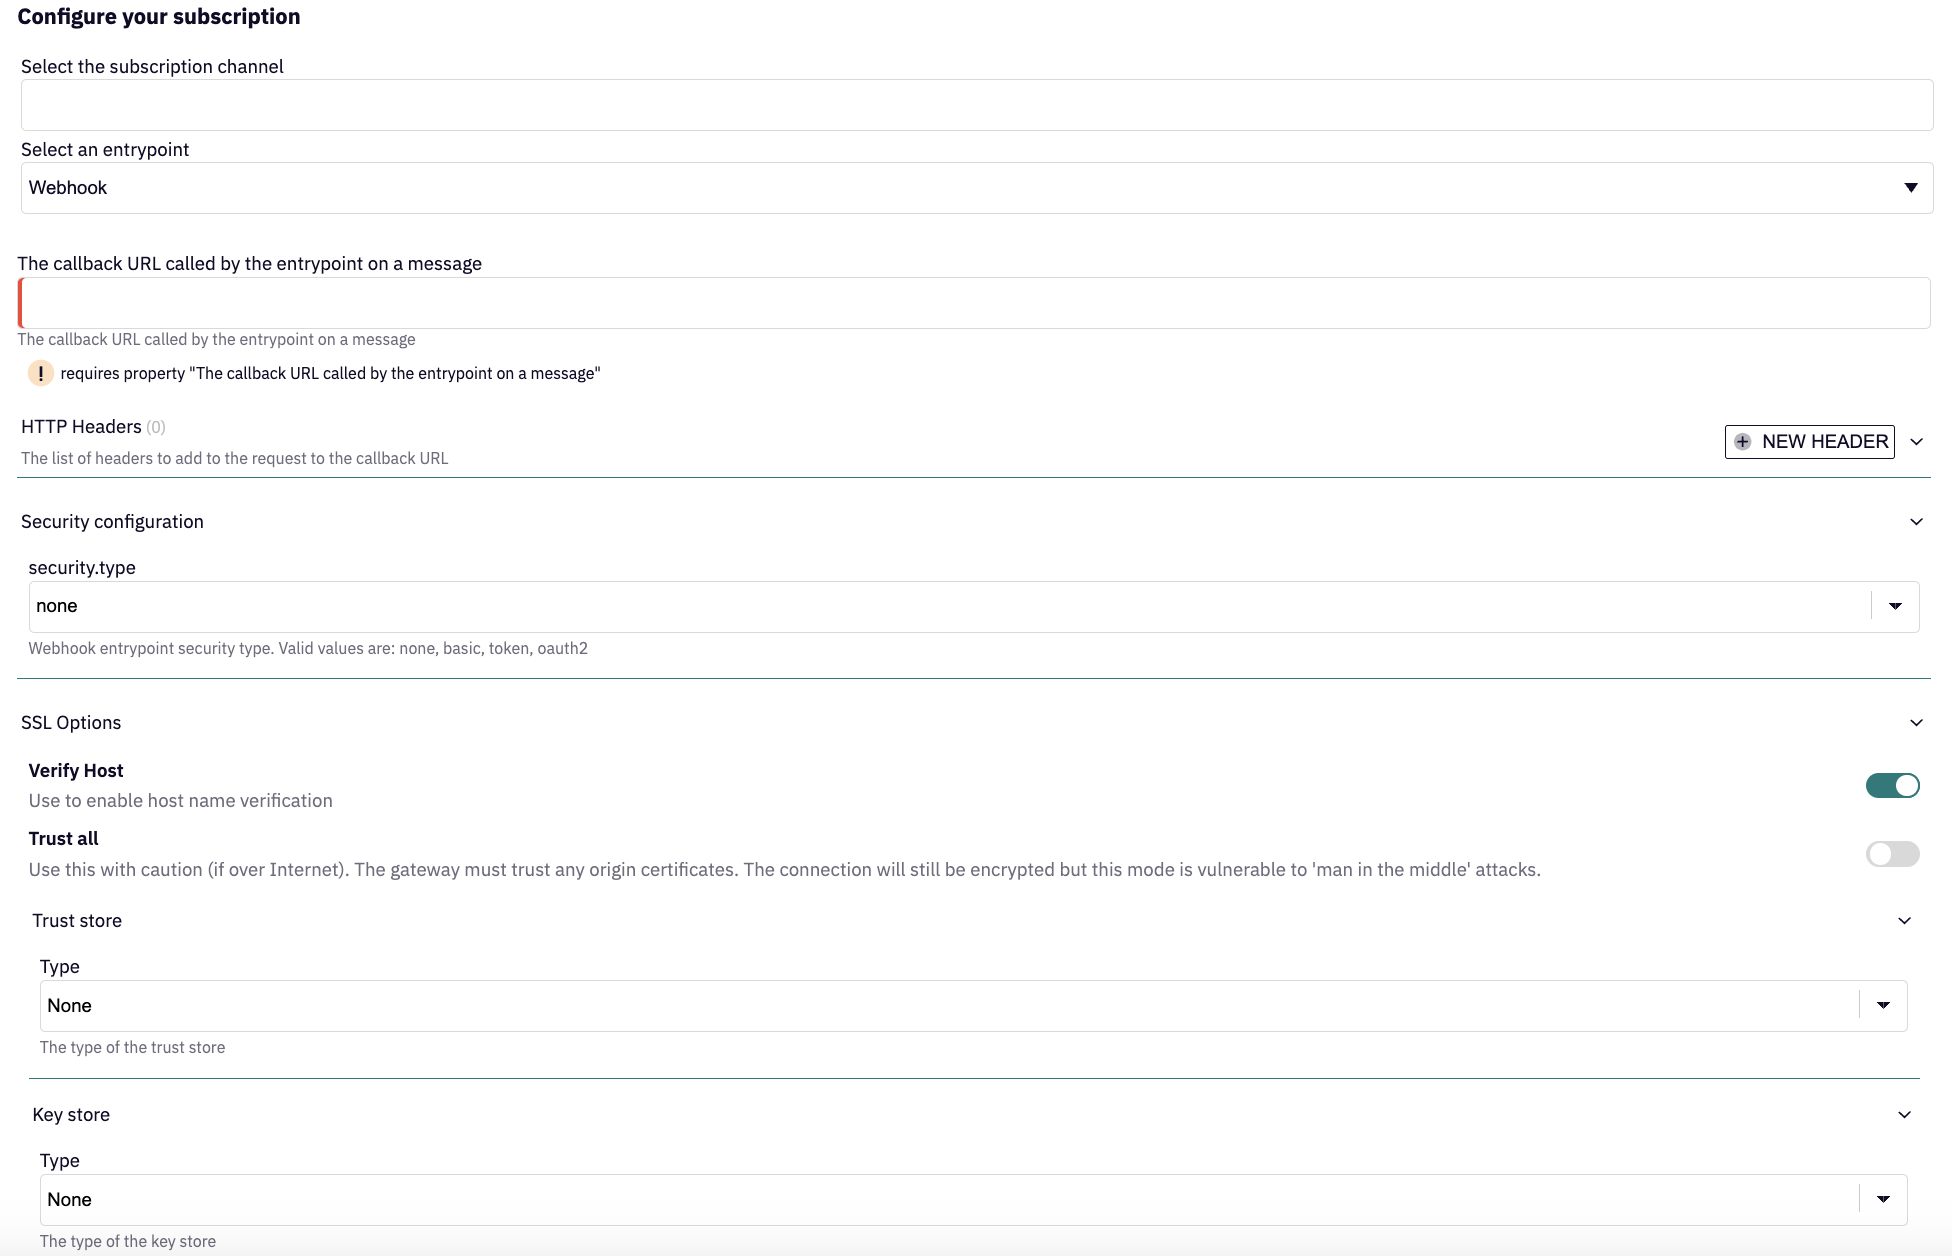
Next, select your subscription channel and Webhook entrypoint, then define:
Callback URL
HTTP headers
Security config
Security type (basic, token, or OAuth2)
SSL options:
Enable or disable Verify Host
Enable or disable Trust all
Define your Trust store
Define your Key store
Define your Webhook subscription settings
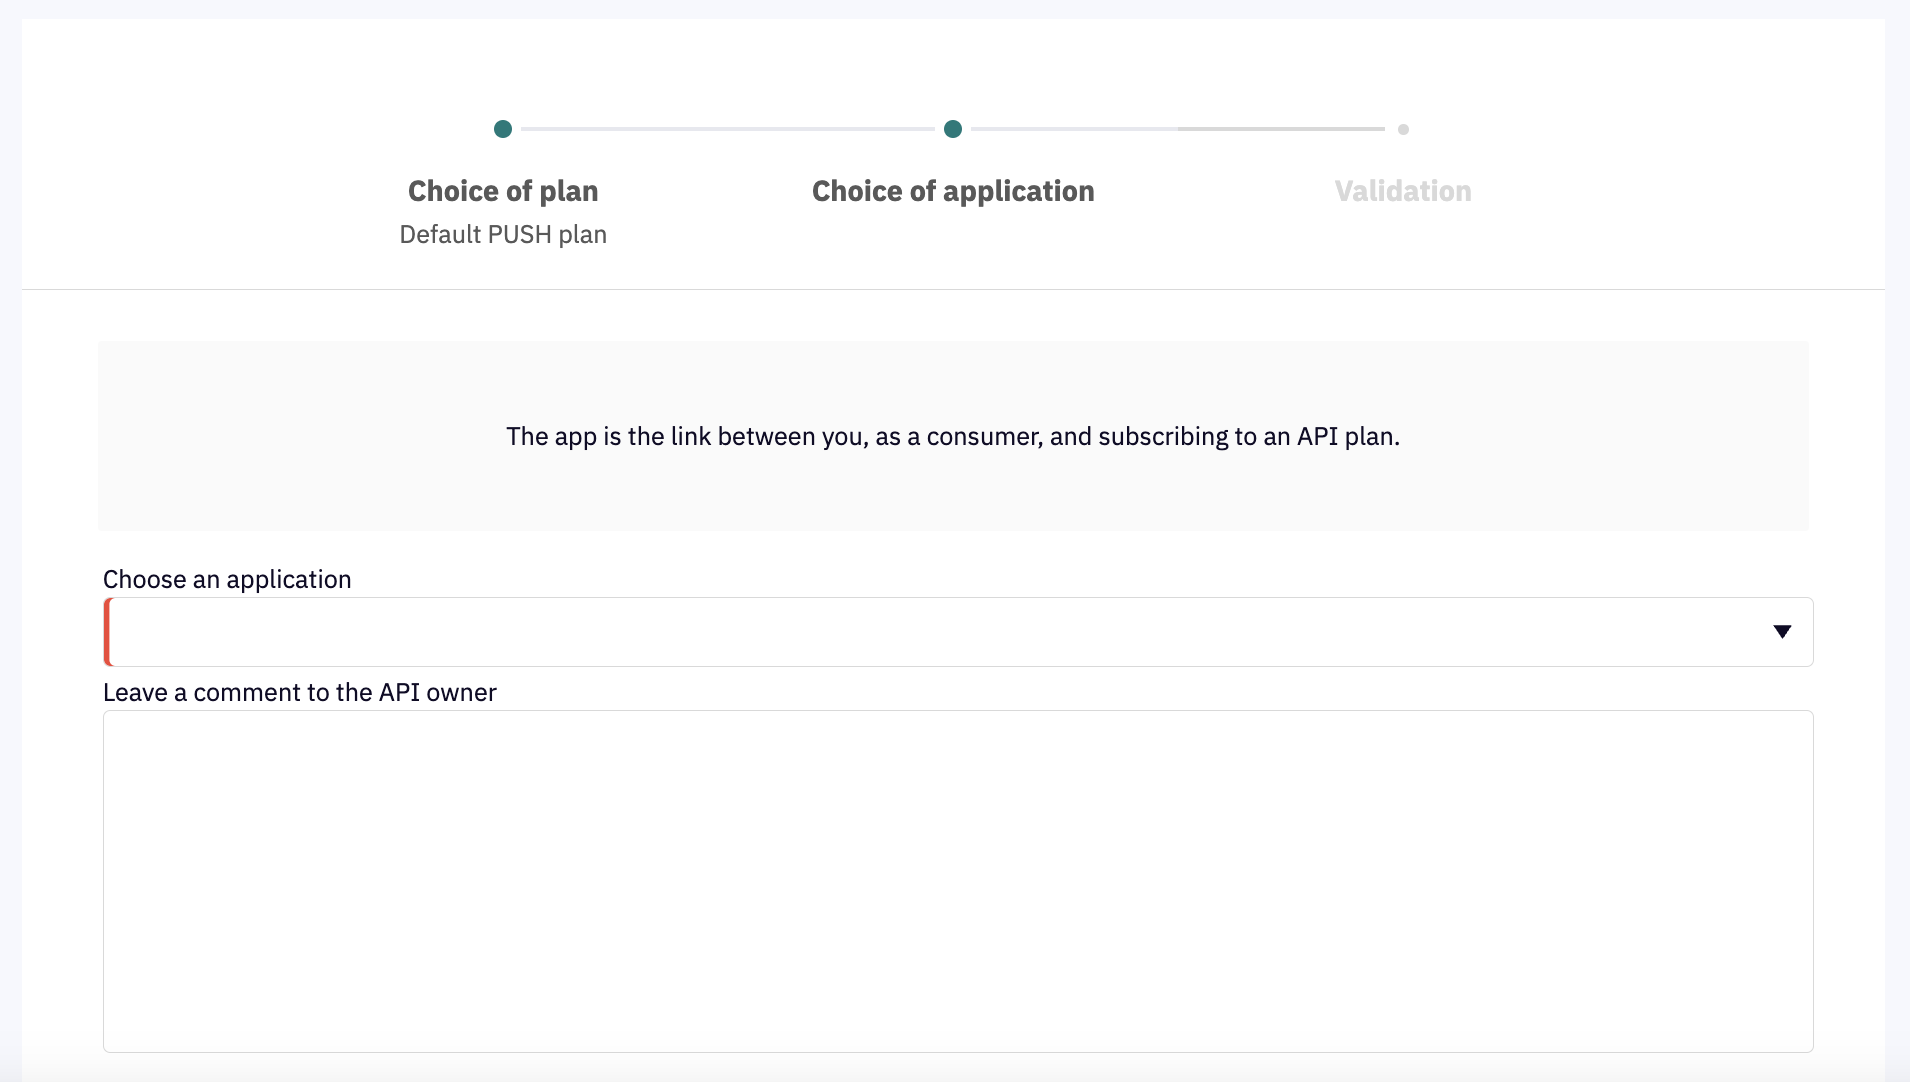
Next, choose which application will be the subscriber and (optionally) leave a message for the API Owner.
Choose the subscriber application
Select Next to validate your subscription request
Submit to validate your Webhook subscription
Viewing API Documentation with DSAPI Developer Portal
Overview
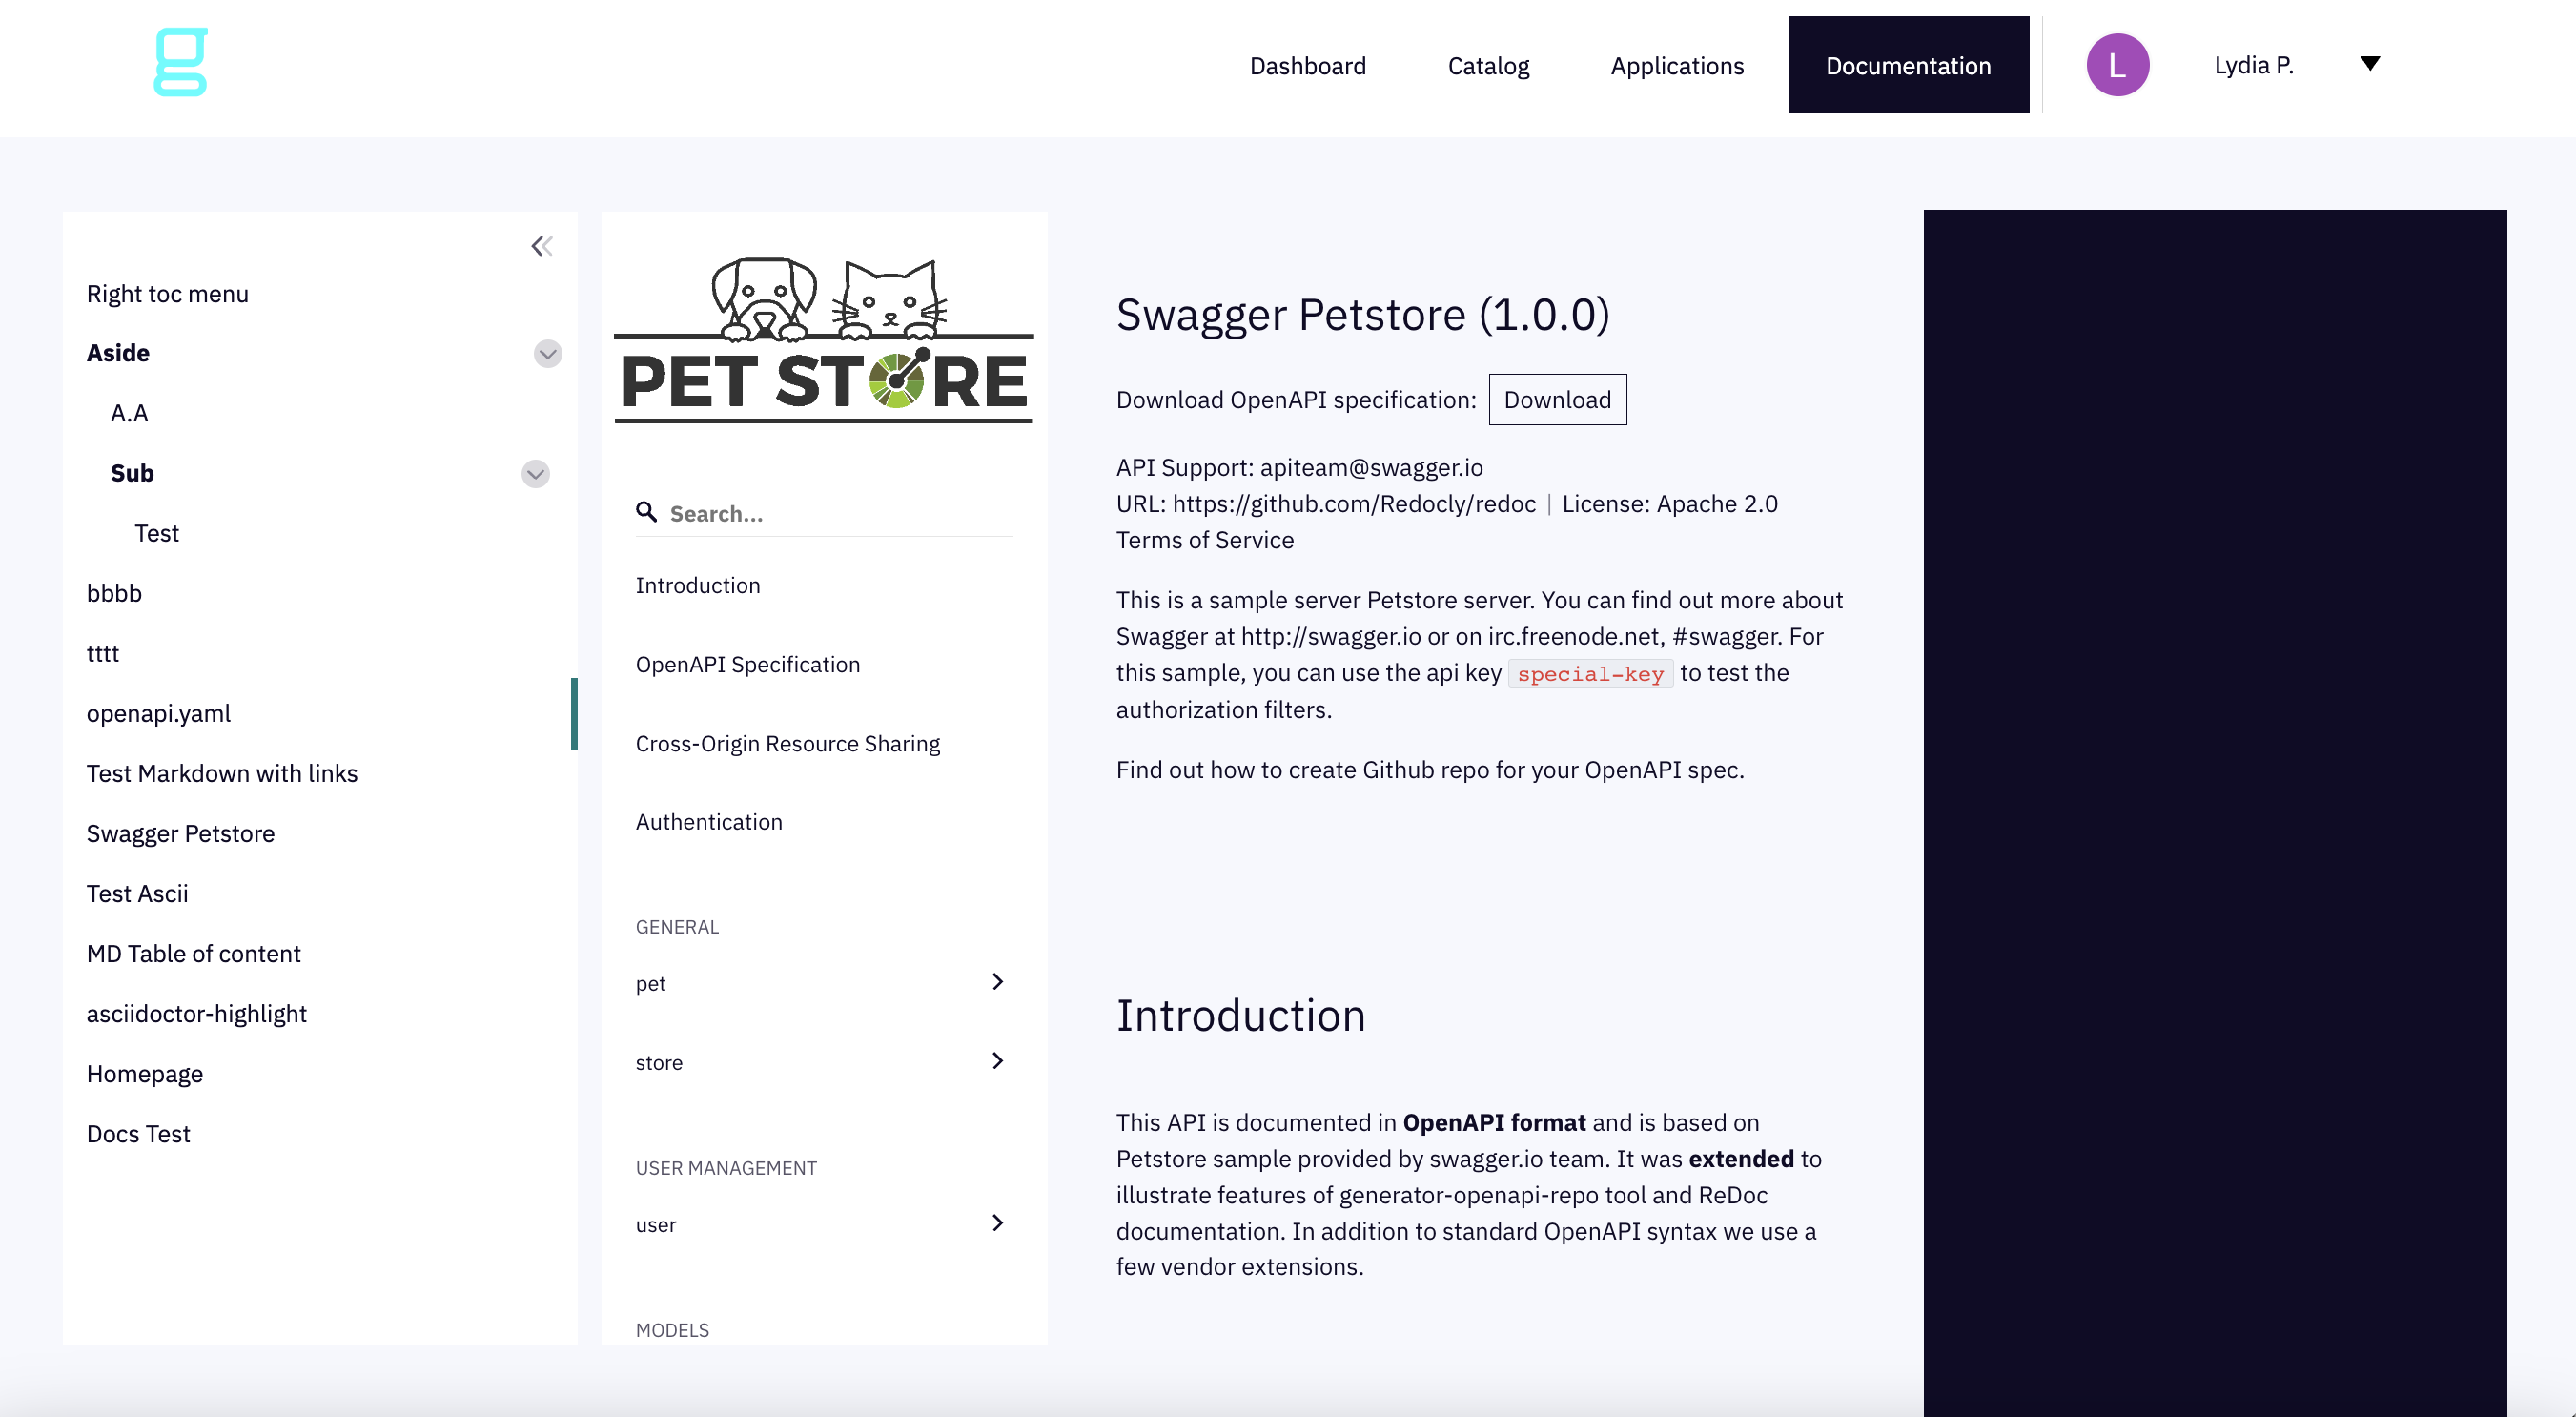
The Developer Portal contains a Documentation section where API consumers can access information on published APIs.
View documentation
To find and view API documentation:
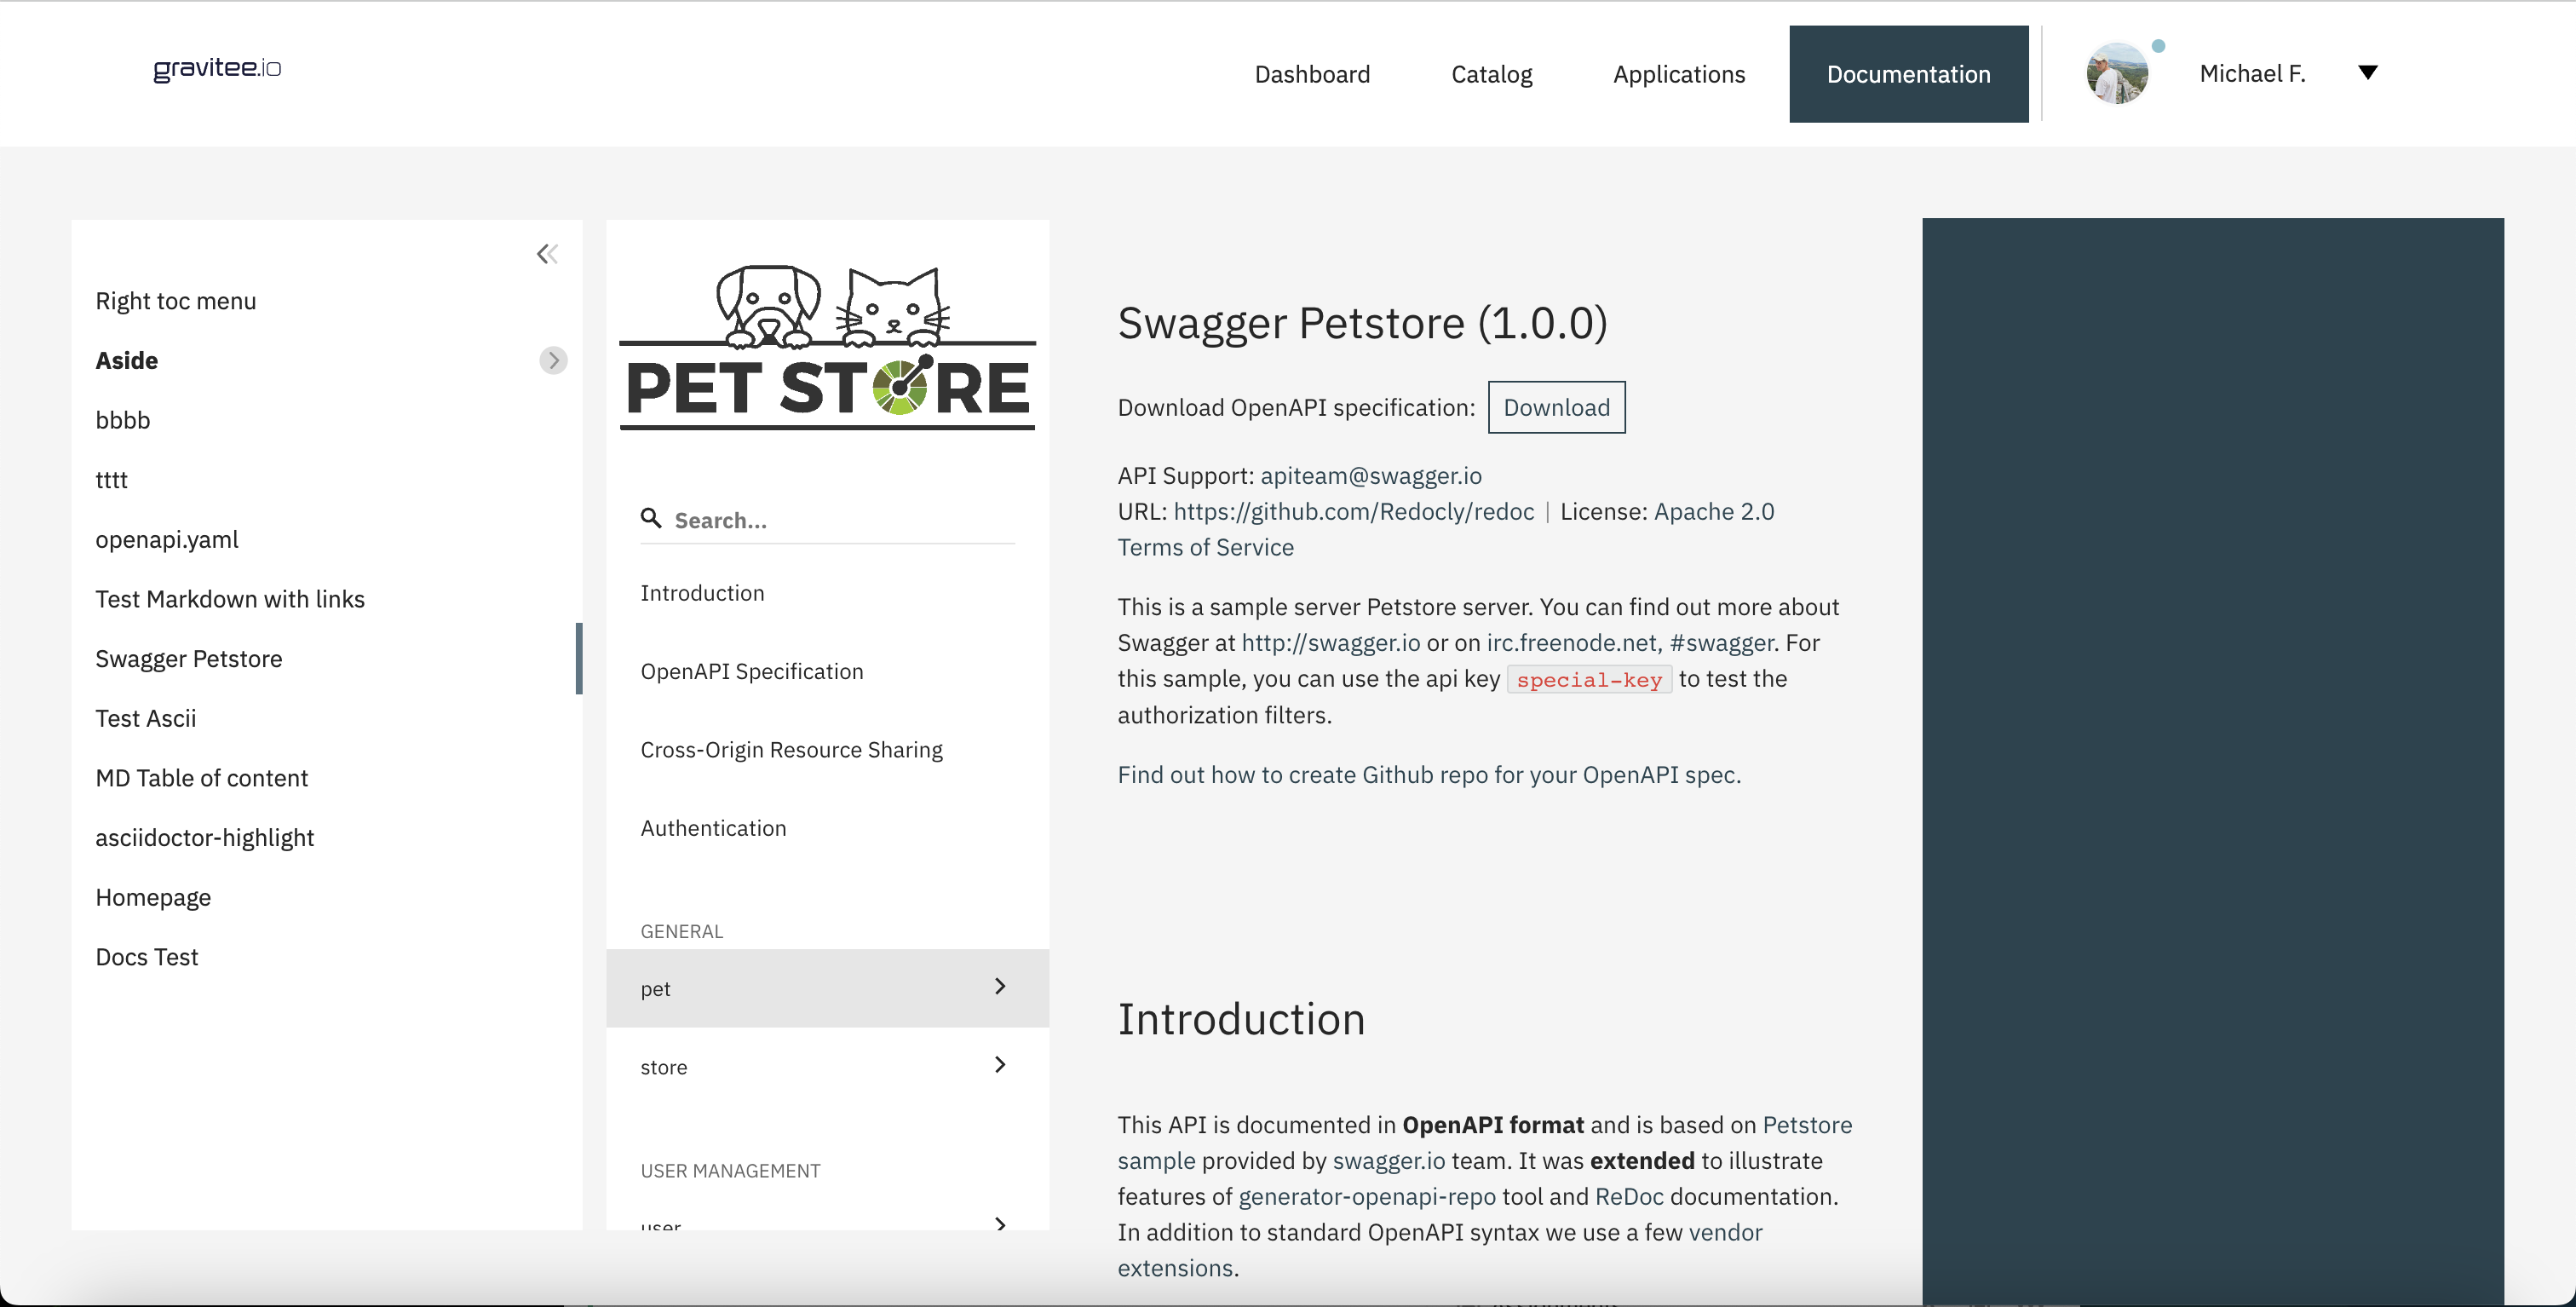
Click on Documentation in the Developer Portal header
Click on an entry in the left panel to view the documentation for that API
Sample API documentation
An administrator can create documentation following the process described here.
Configuring and customizing the DSAPI Developer Portal
You can configure and custmize the Developer Portal for your environment. For more information about configuring and customizing the Developer Portal, see the following articles:
Customizing the layout and theme of the DSAPI Developer Portal
Overview
Administrators have the option to modify the layout and theme of the Developer Portal to customize how APIs are presented to API consumers. The following sections describe which elements can be modified and provide instructions:
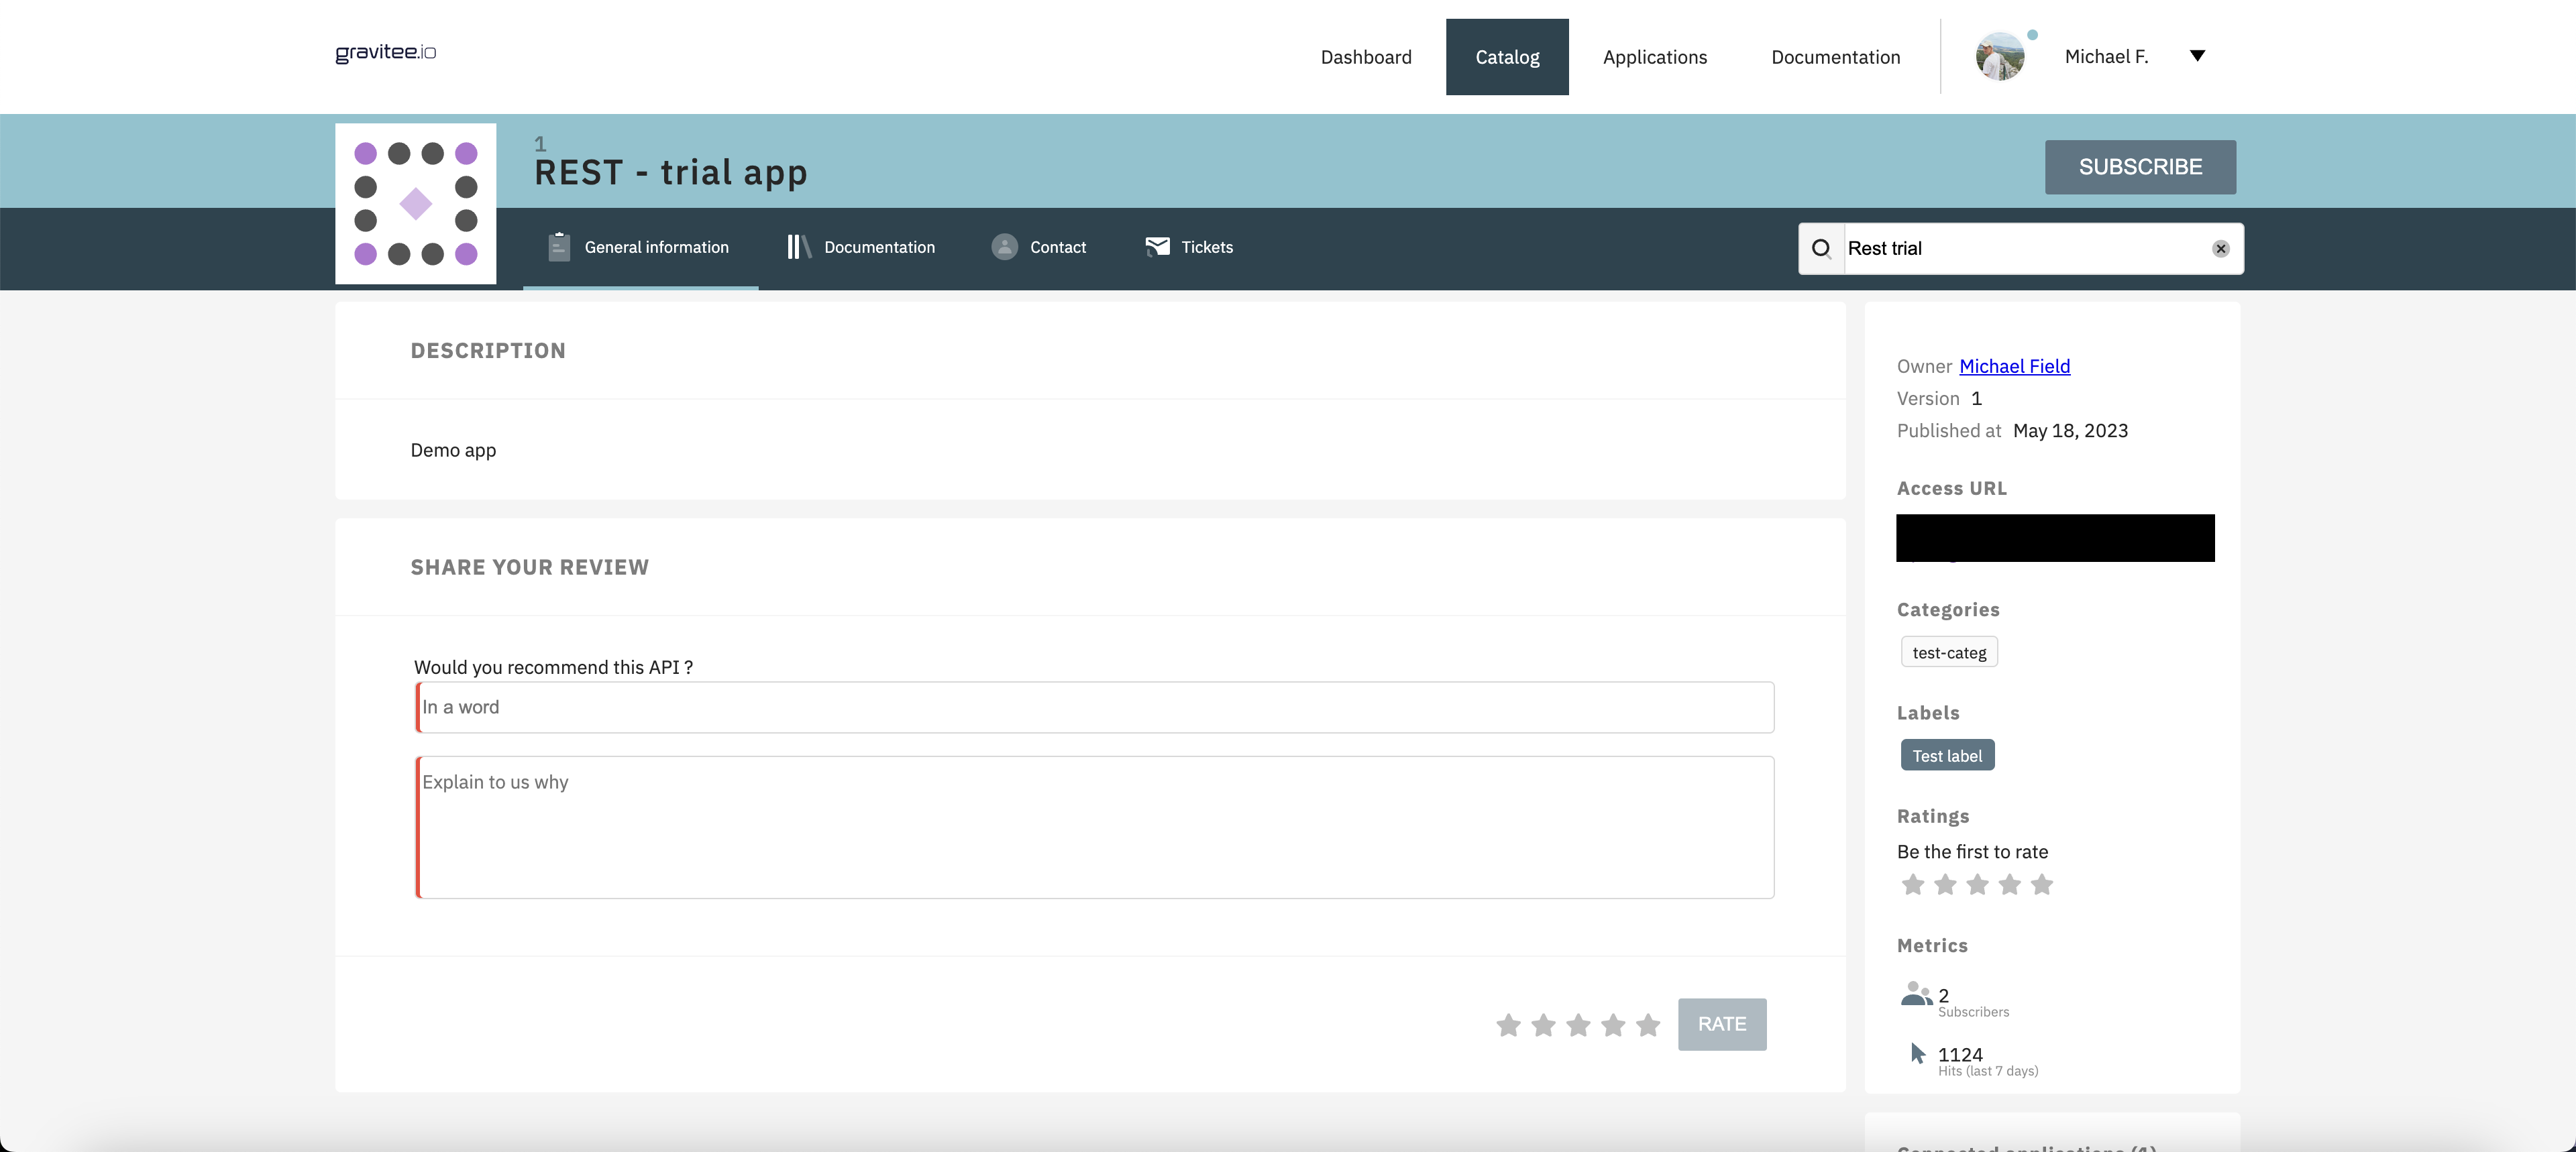
You can click on an API in the Developer Portal to access its details. Selecting the General information header tab will display the API's description and reviews (if any have been submitted), as well as a sidebar on the right that contains additional information.
Developer Portal API sidebar
Administrators can control what is shown in the sidebar. To modify the access URL:
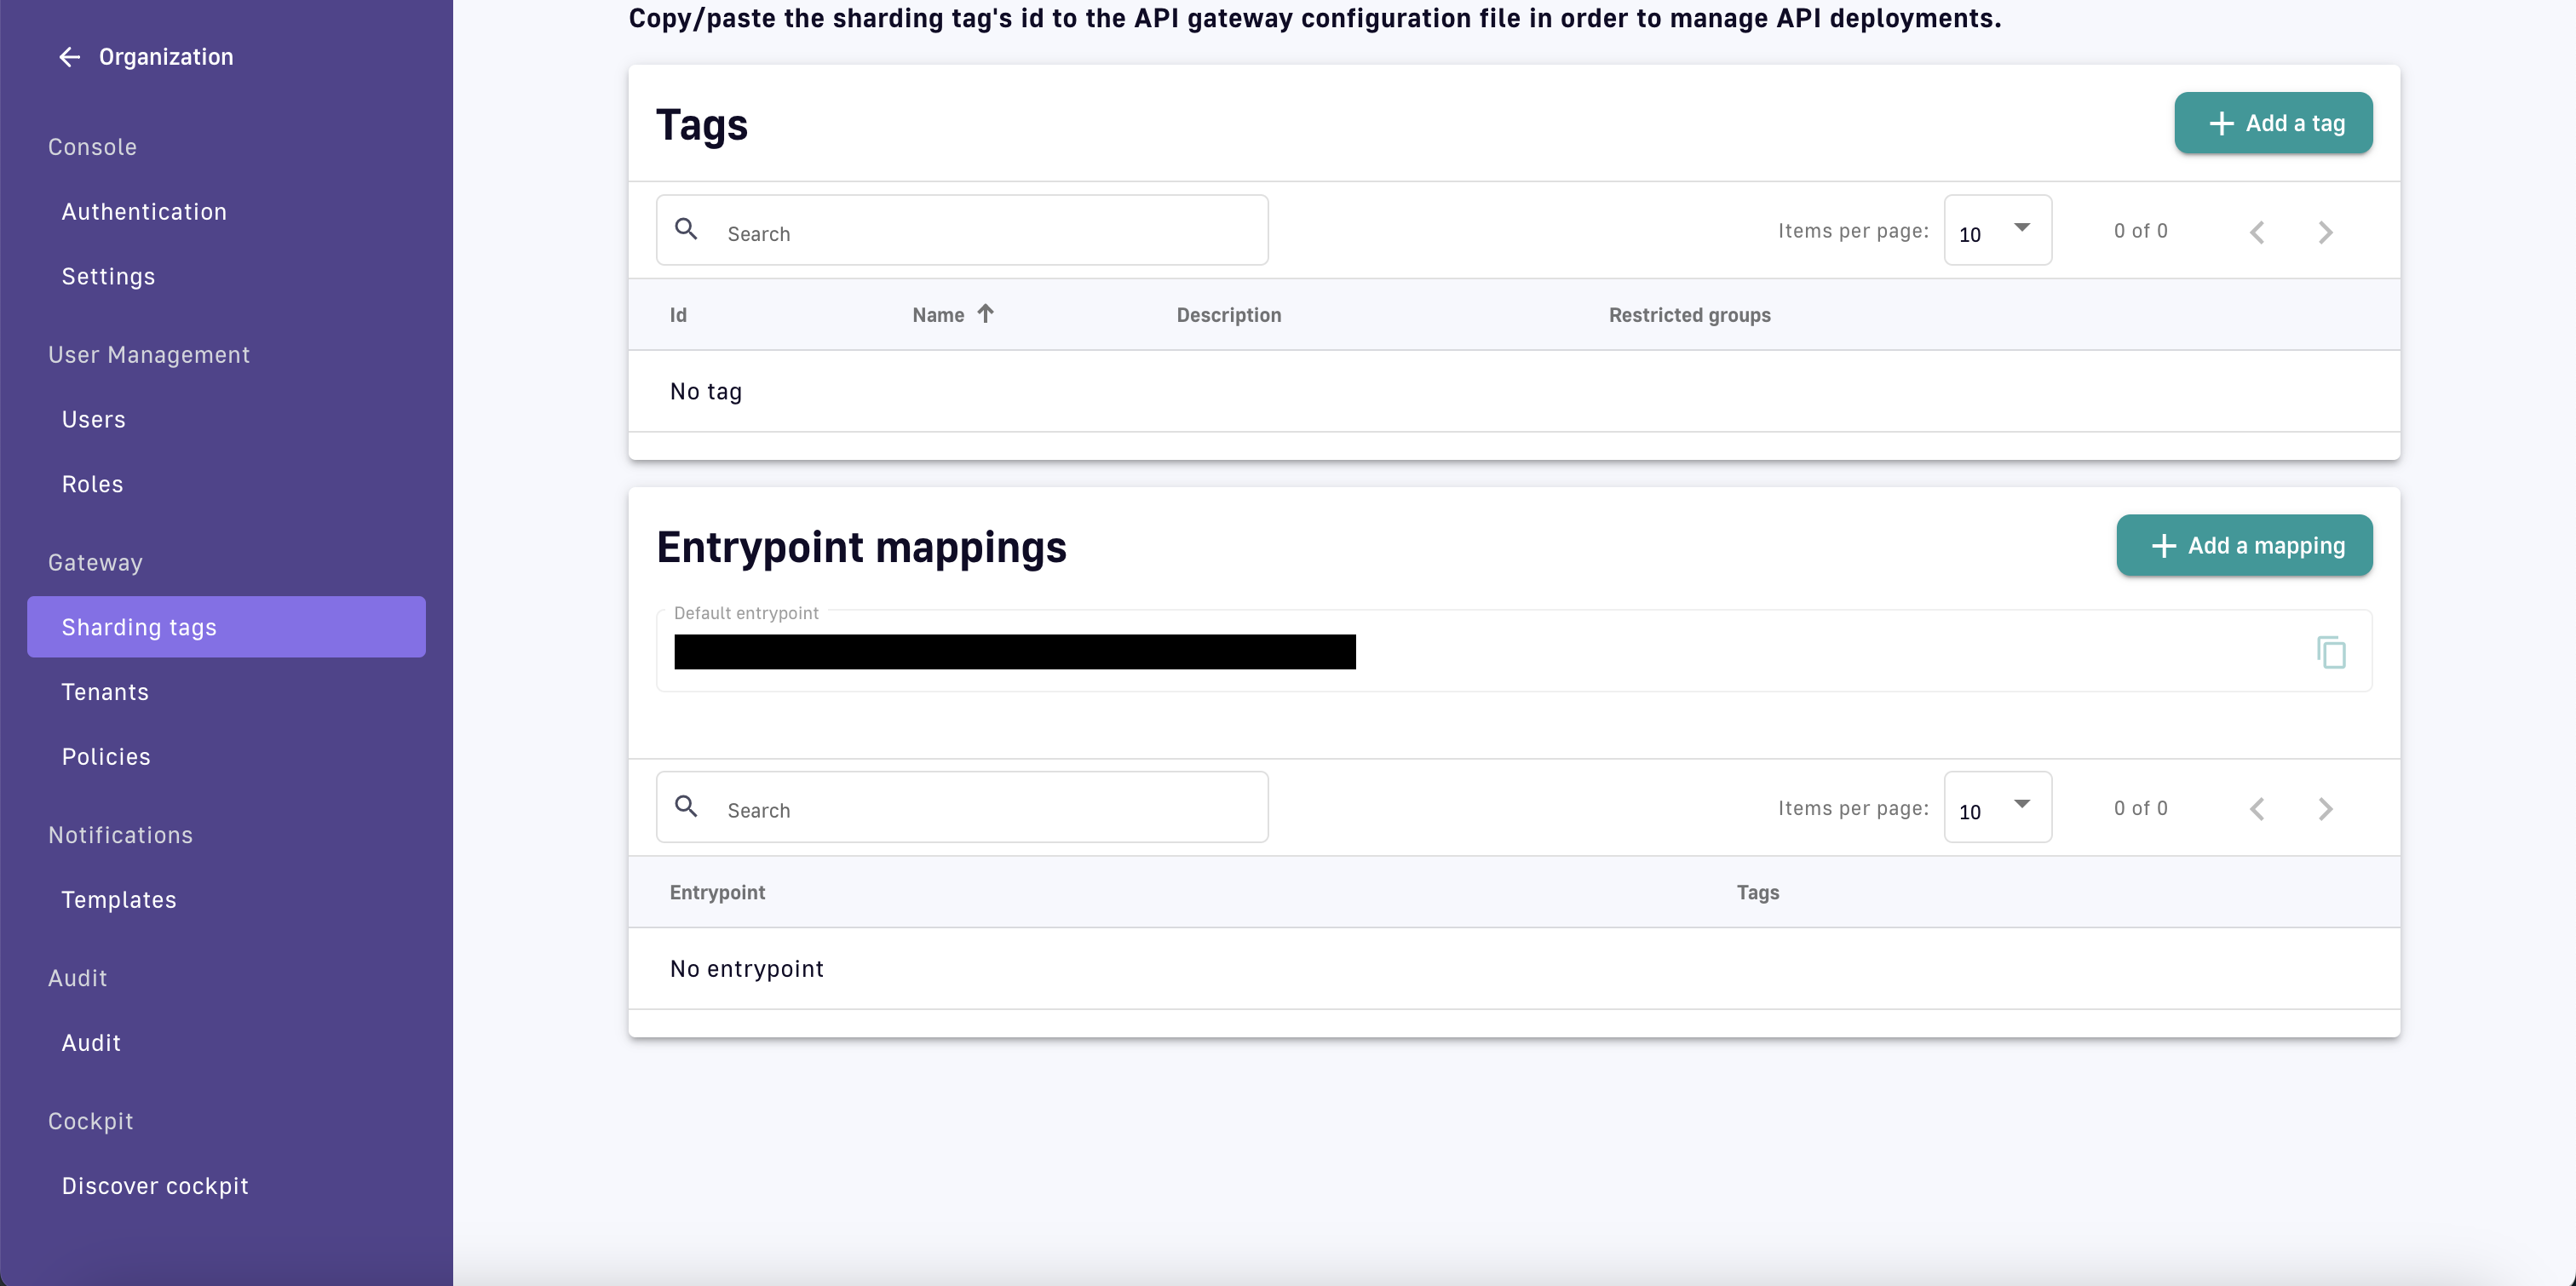
Select Organization at the bottom of the left sidebar of the Management Console
In the organization's left sidebar, select Sharding tags under the Gateway subheader
Modify the Default entrypoint of the DSAPI Gateway
The access URL for each API in the Developer Portal is the default entrypoint followed by that API's context path.
Modify the access URL
Sharding Tags and Gateway Entrypoint Mappings
Sharding Tags tags are used to help manage complex distributed architectures:
By assigning sharding tags to APIs and DSAPI Gateways, an API is deployed to a subset of the available Gateways.
By mapping sharding tags to a Gateway’s entrypoint URL, the Developer Portal can intelligently display different entrypoints based on an API's sharding tags.
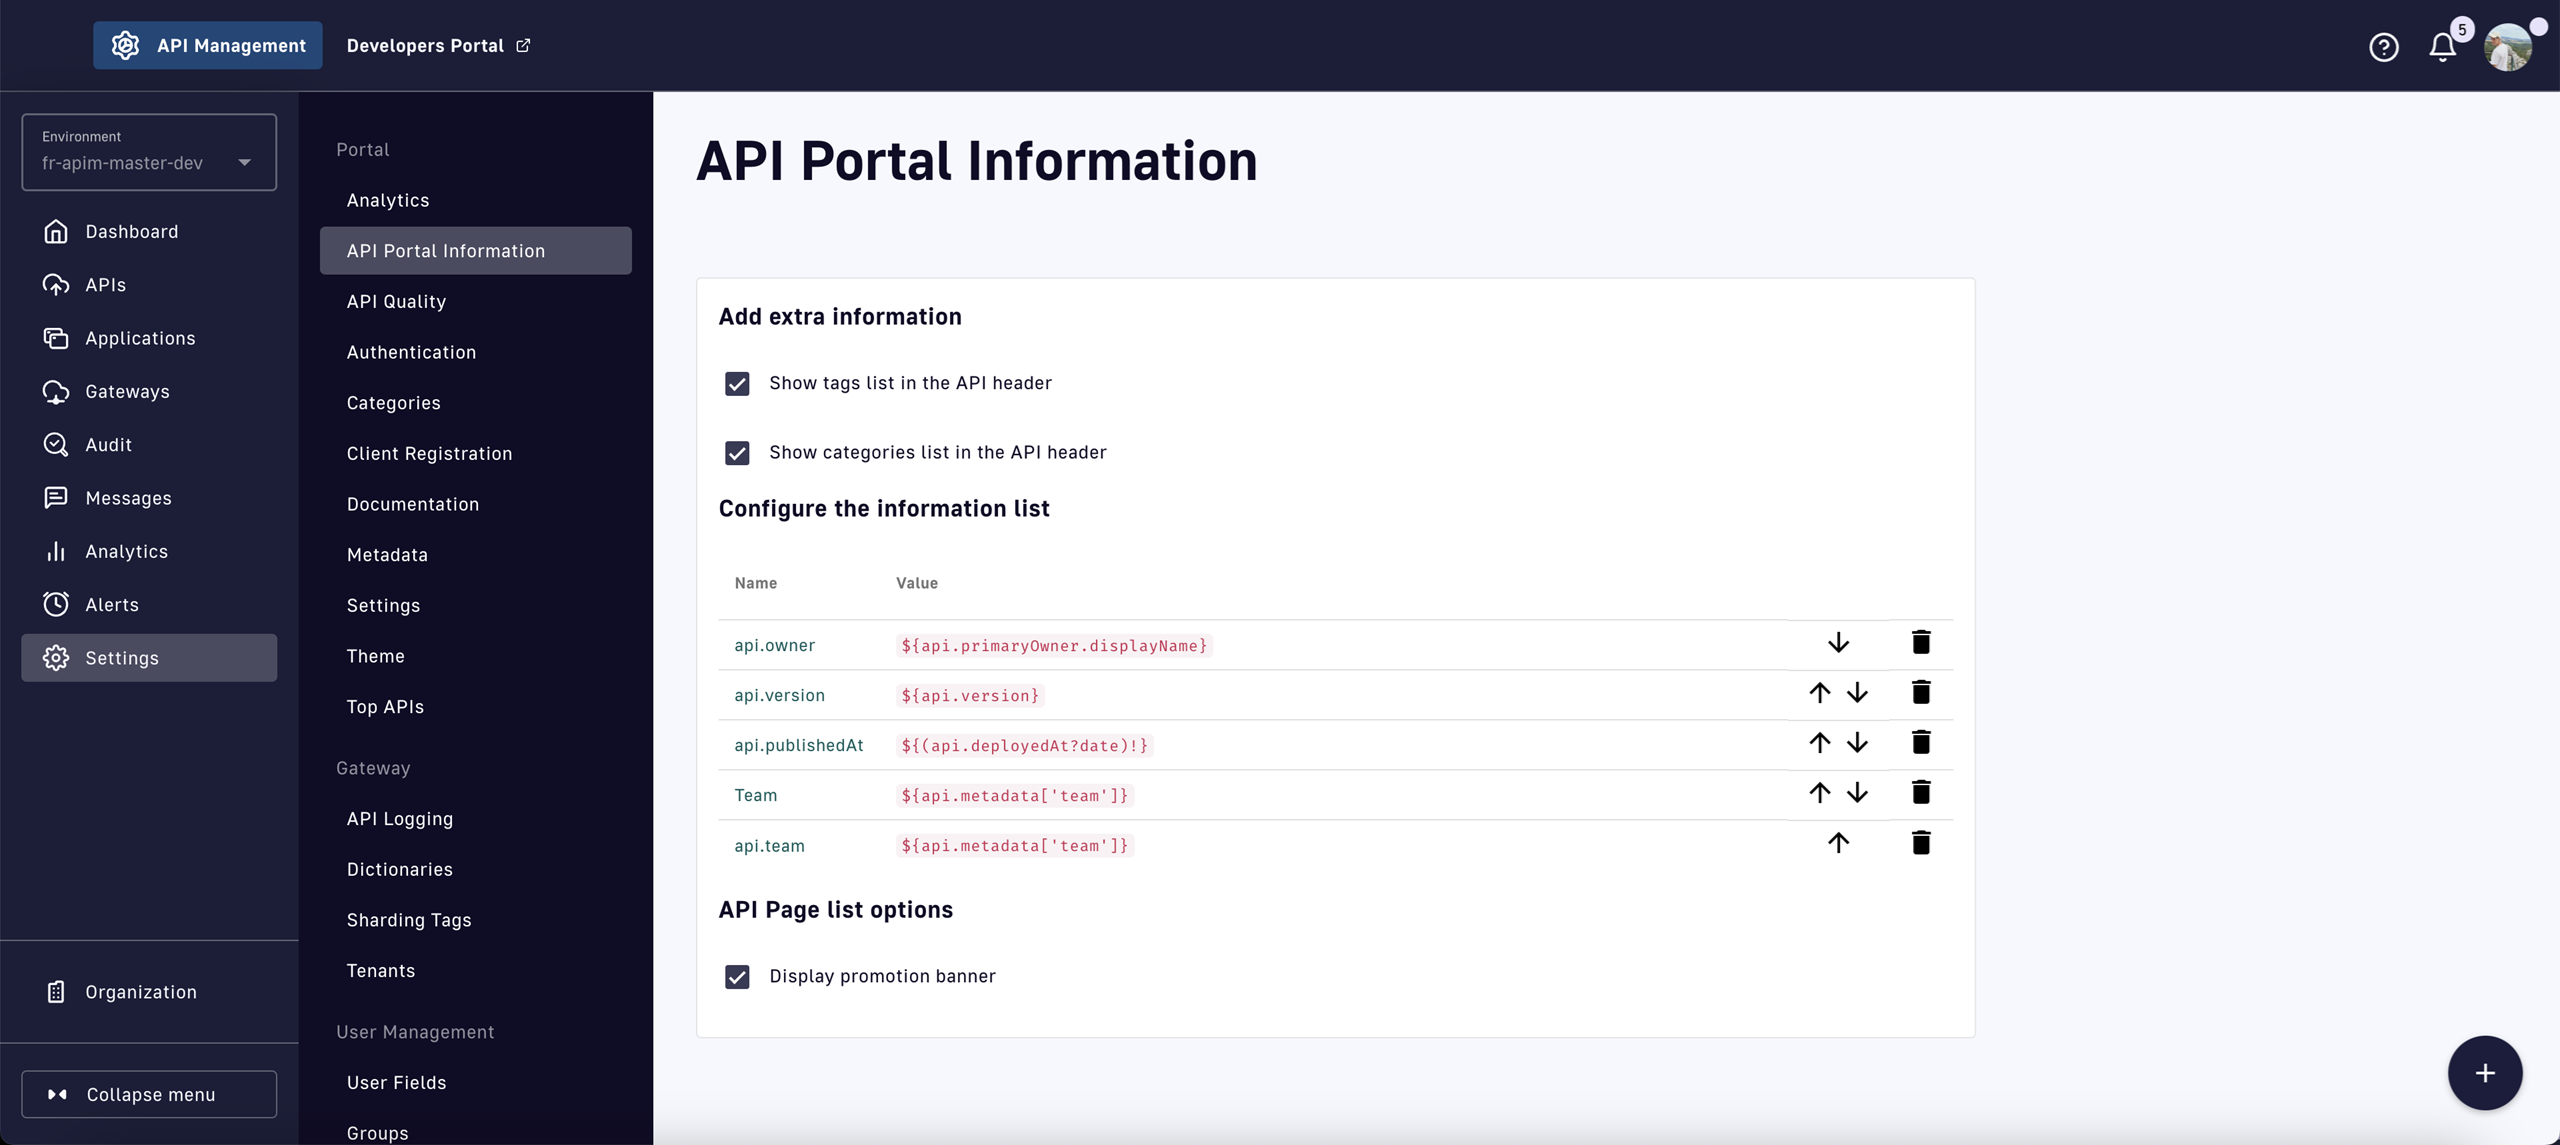
To modify the sidebar settings:
Return to the Management Console's home page
Select Settings from the left sidebar
Select API Portal Information from the inner left sidebar to display the following options:
Developer Portal API sidebar display settings
Add extra information
Show tags list in the API header: Display all API labels in the Developer Portal
Show categories list in the API header: Display all API categories in the Developer Portal
Configure the information list: Display custom values in the Developer Portal. Use the + icon on the bottom right of the page to add new values.
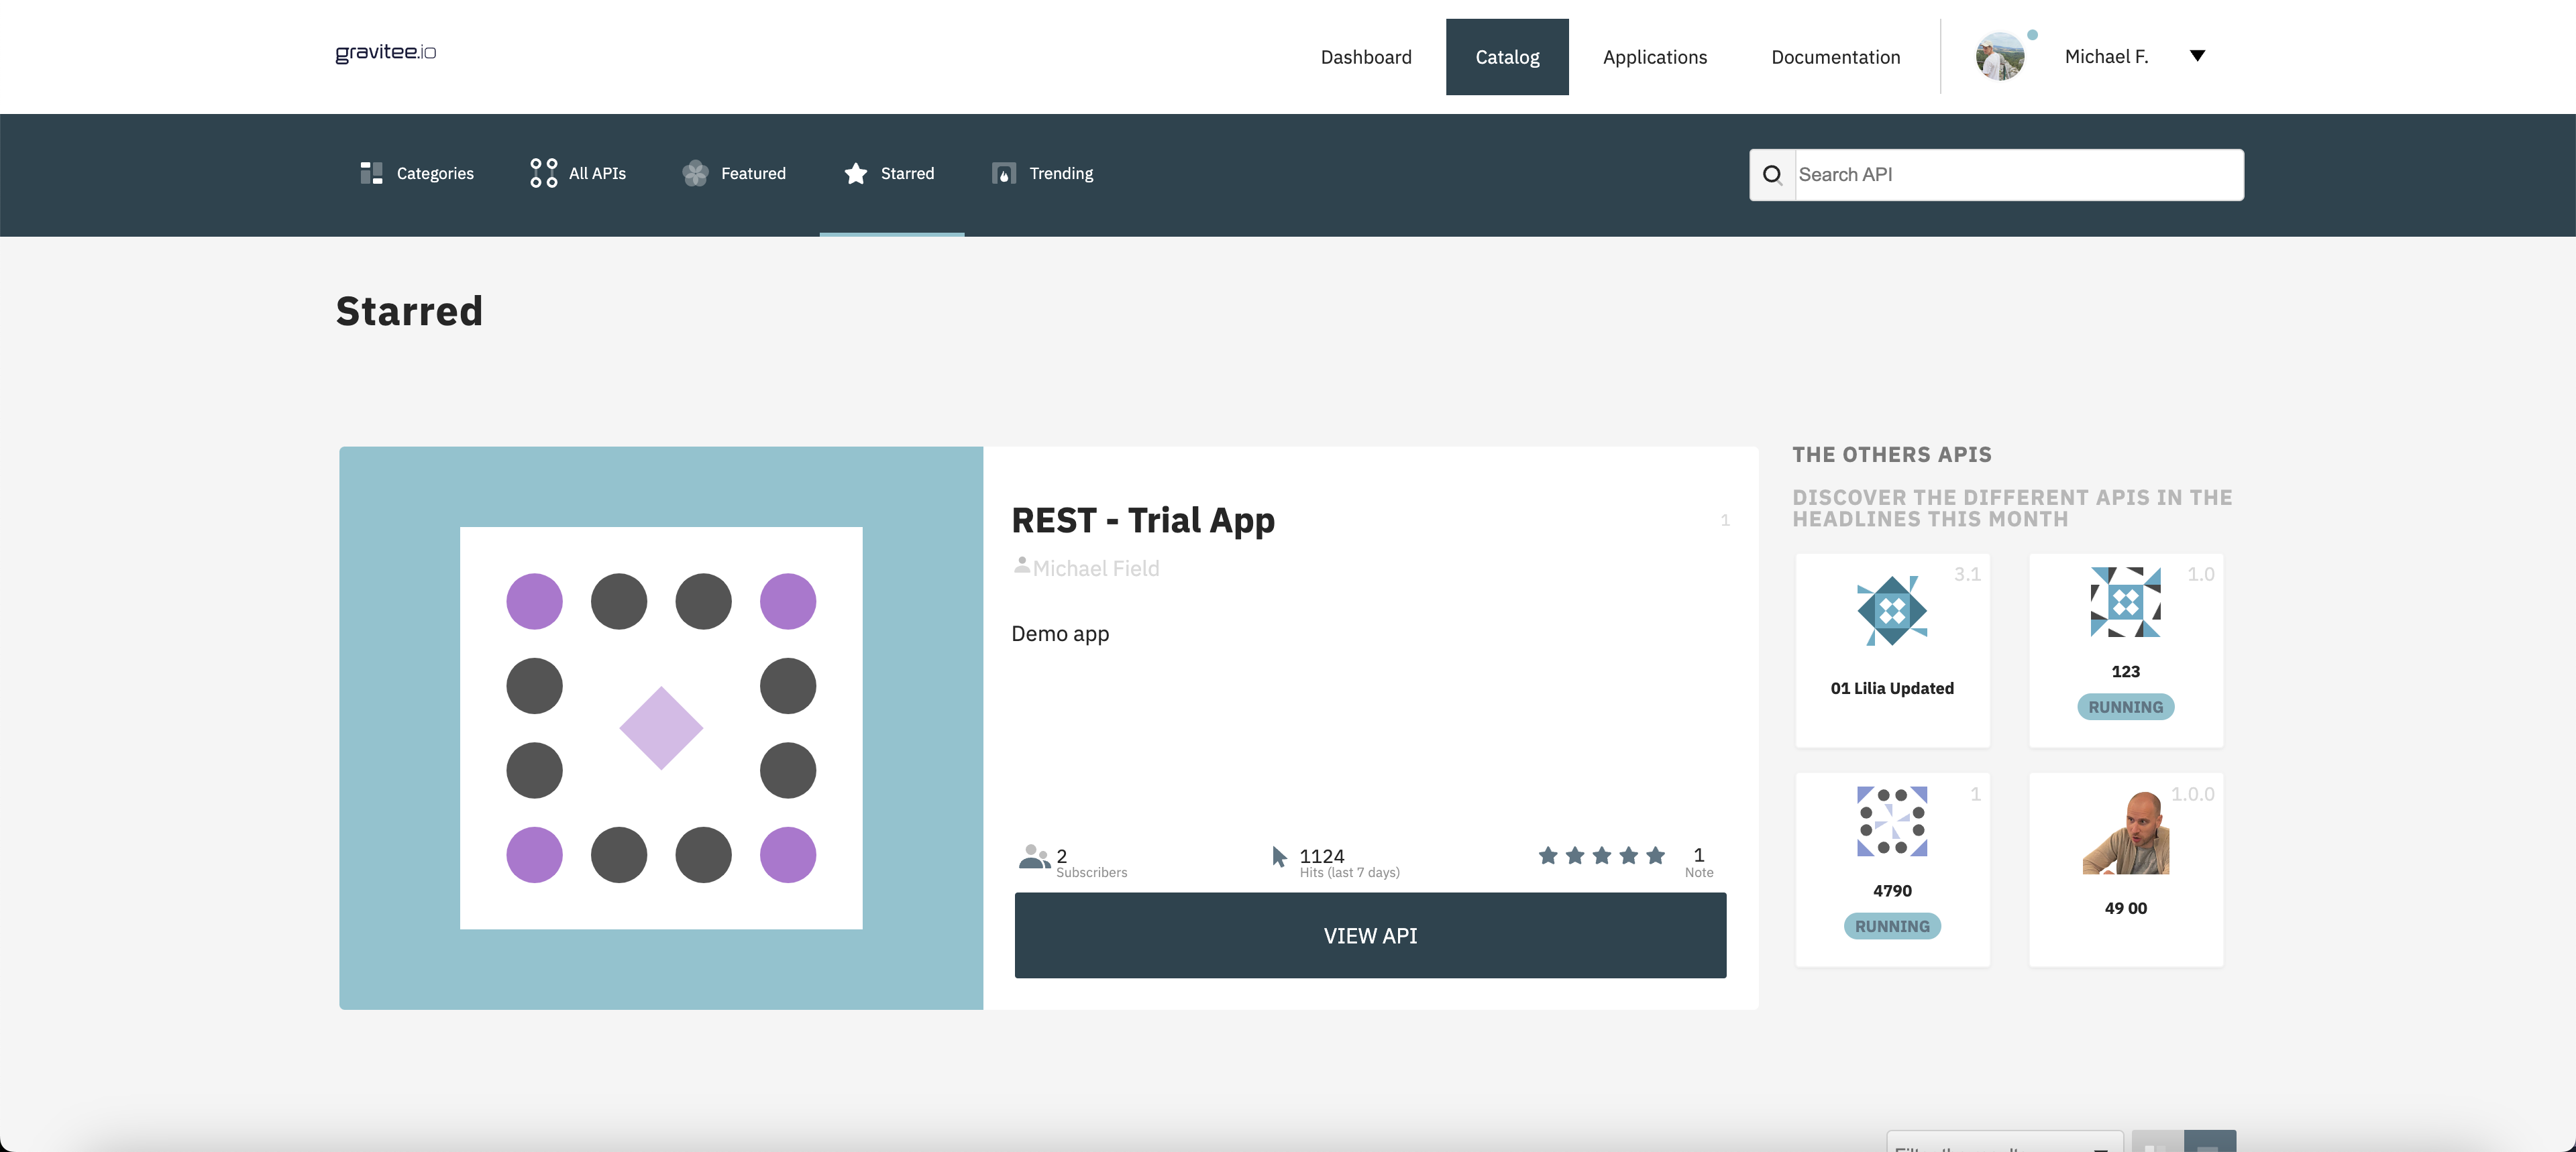
API Page list options: Display a banner at the top of each page in the API Catalog to promote a particular API. The tab automatically determines which API to promote, e.g., the Starred tab will feature the API that was most recently reviewed.
Developer Portal promotion banner
API Catalog
Categories
At least one API inside the category must be published for the category to be visible. You can publish an API from its Info page in the Management Console.
Administrators can modify the browsing experience offered by the Developer Portal's API Catalog. To organize APIs by category:
API categories must be added
One or more categories must be applied to each API
The Categories tab must be added to the API Catalog
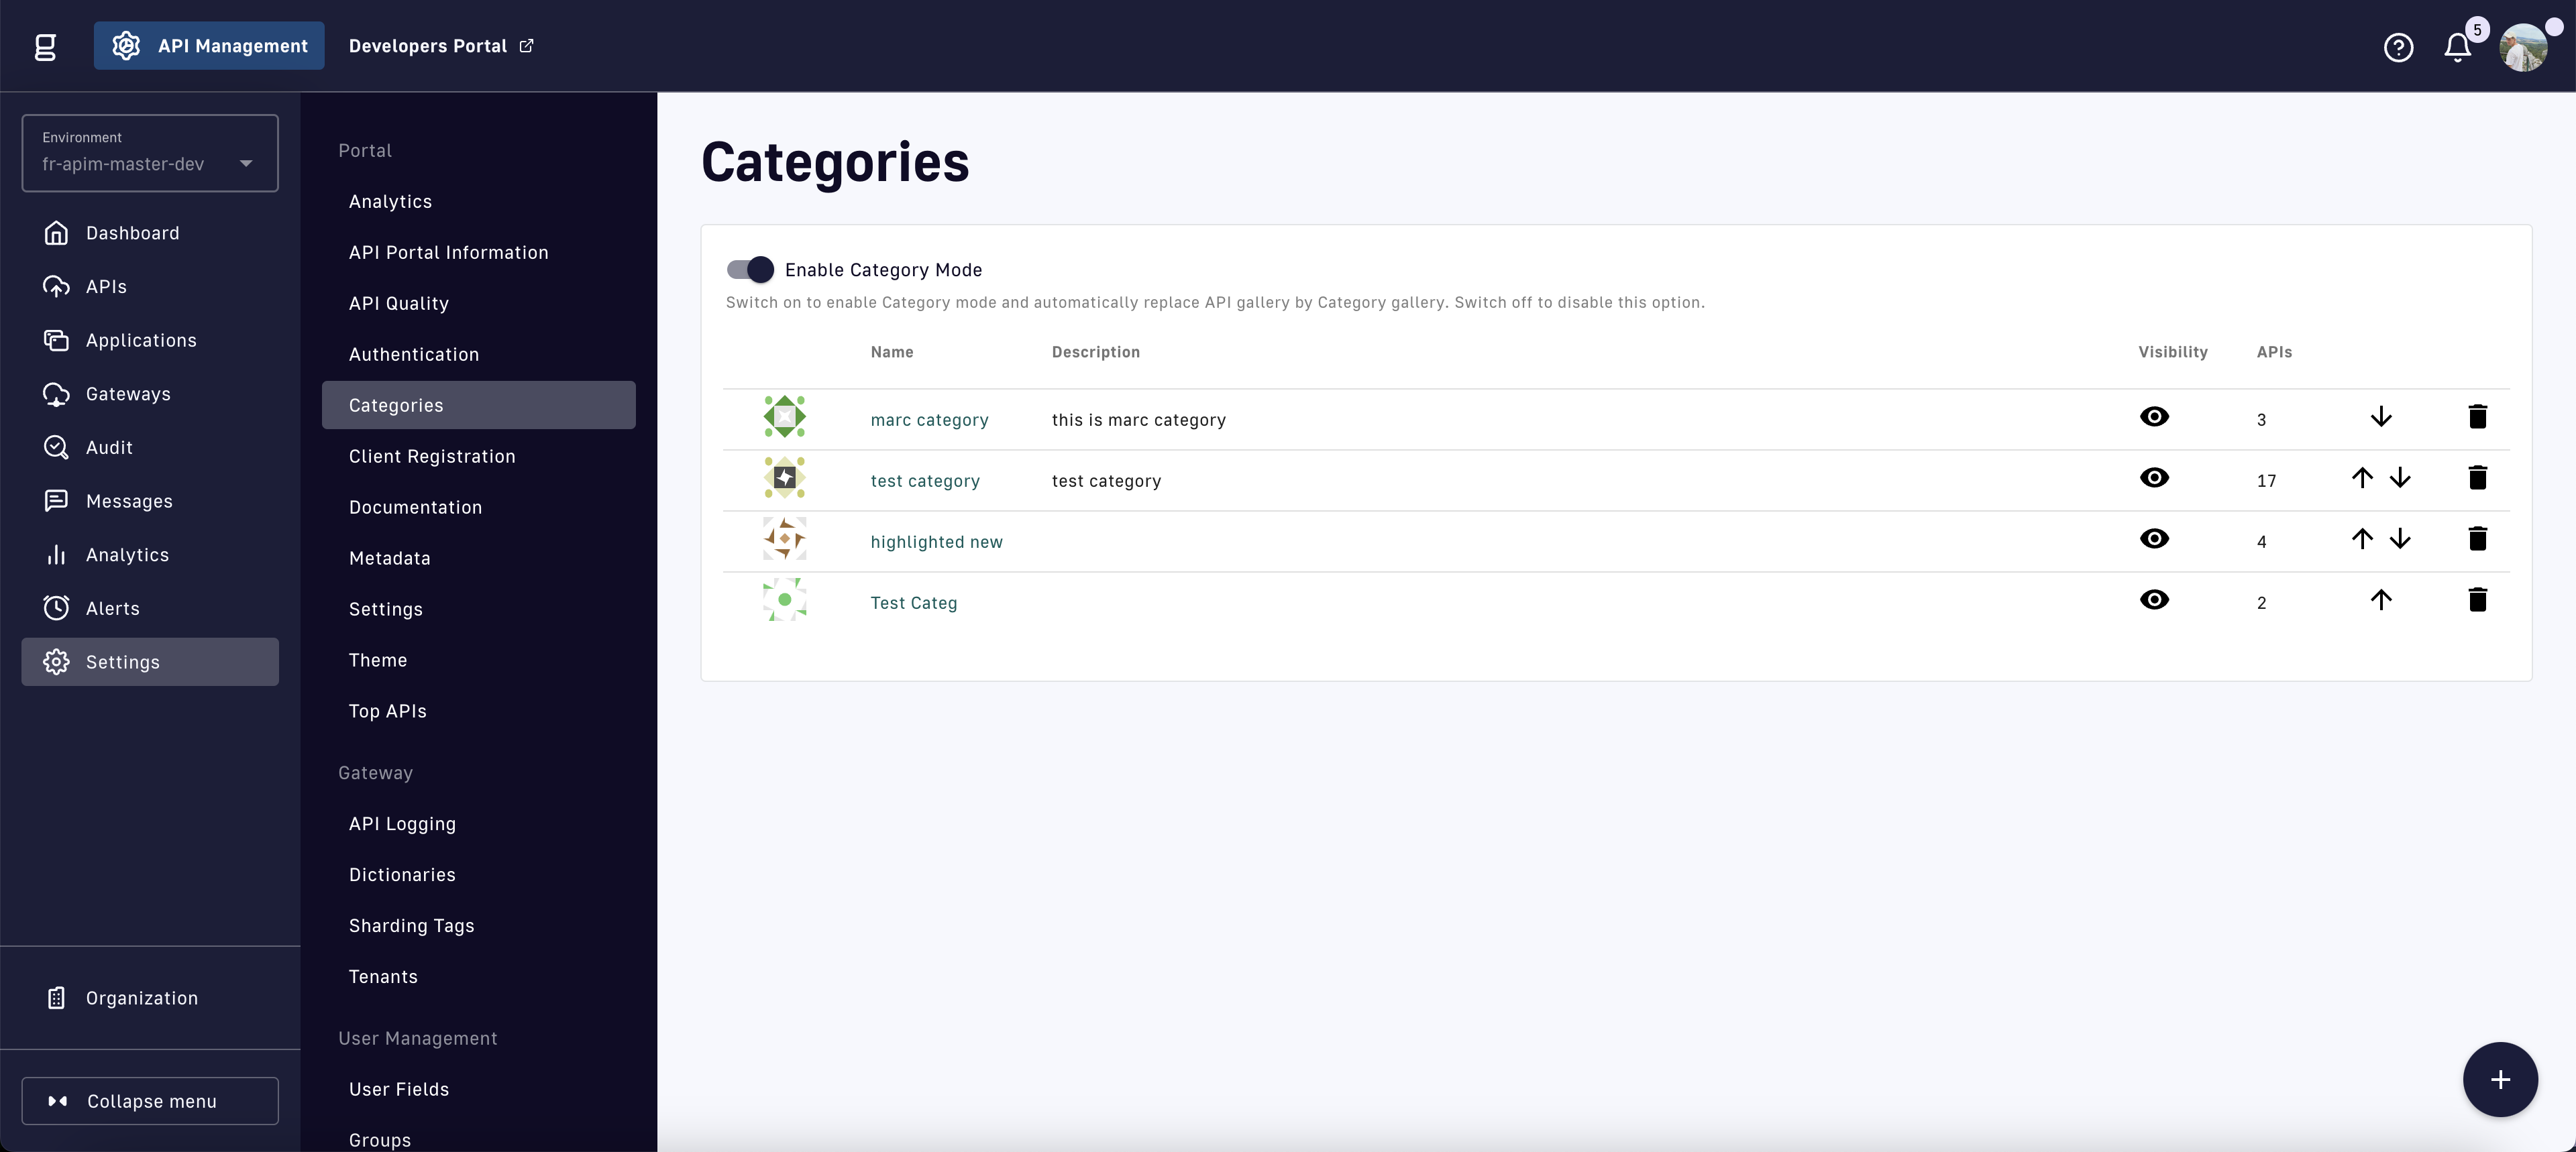
To enable the Categories tab and modify categories:
Select Settings from the left sidebar of the Management Console
Select Categories from the inner left sidebar
Toggle Enable Category Mode to display the Categories tab
Create new categories and/or modify or delete existing categories
APIM categories settings page
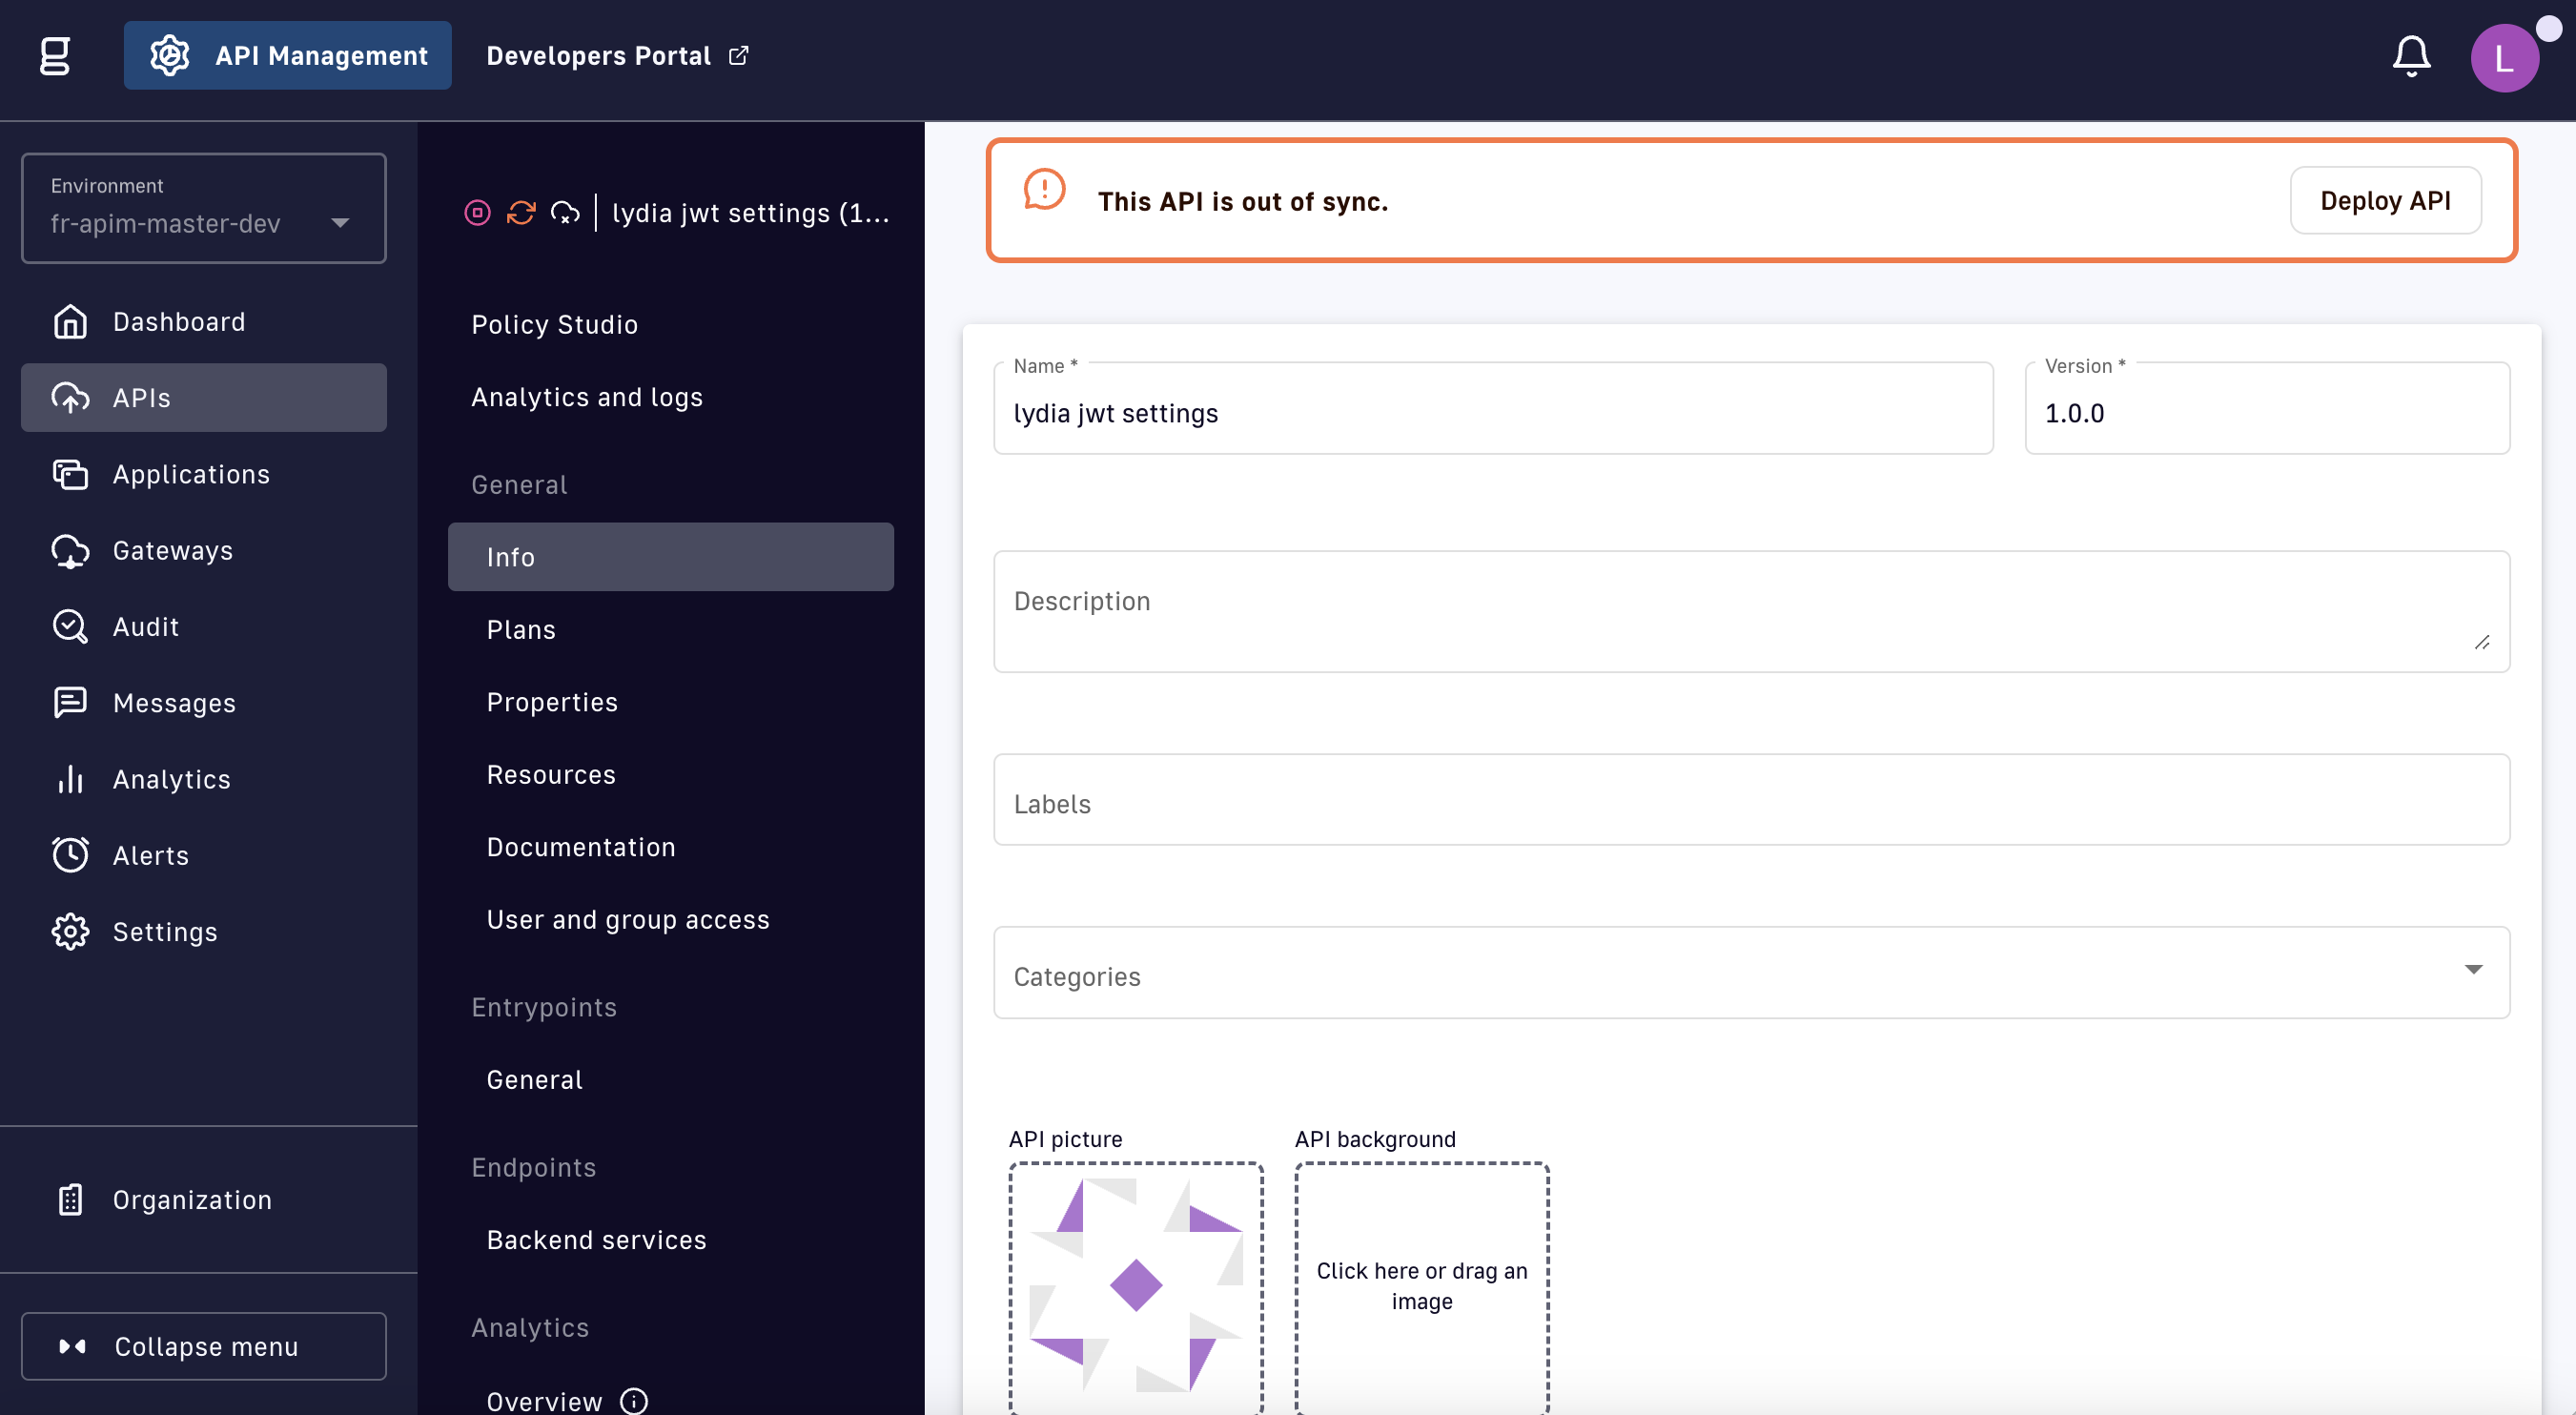
To apply categories:
Select APIs from the left sidebar of the Management Console
Select the API to which you want to add categories
Select Info from the inner left sidebar
Use the Categories dropdown to select one or more categories to apply to the API
Apply categories to a Gateway API
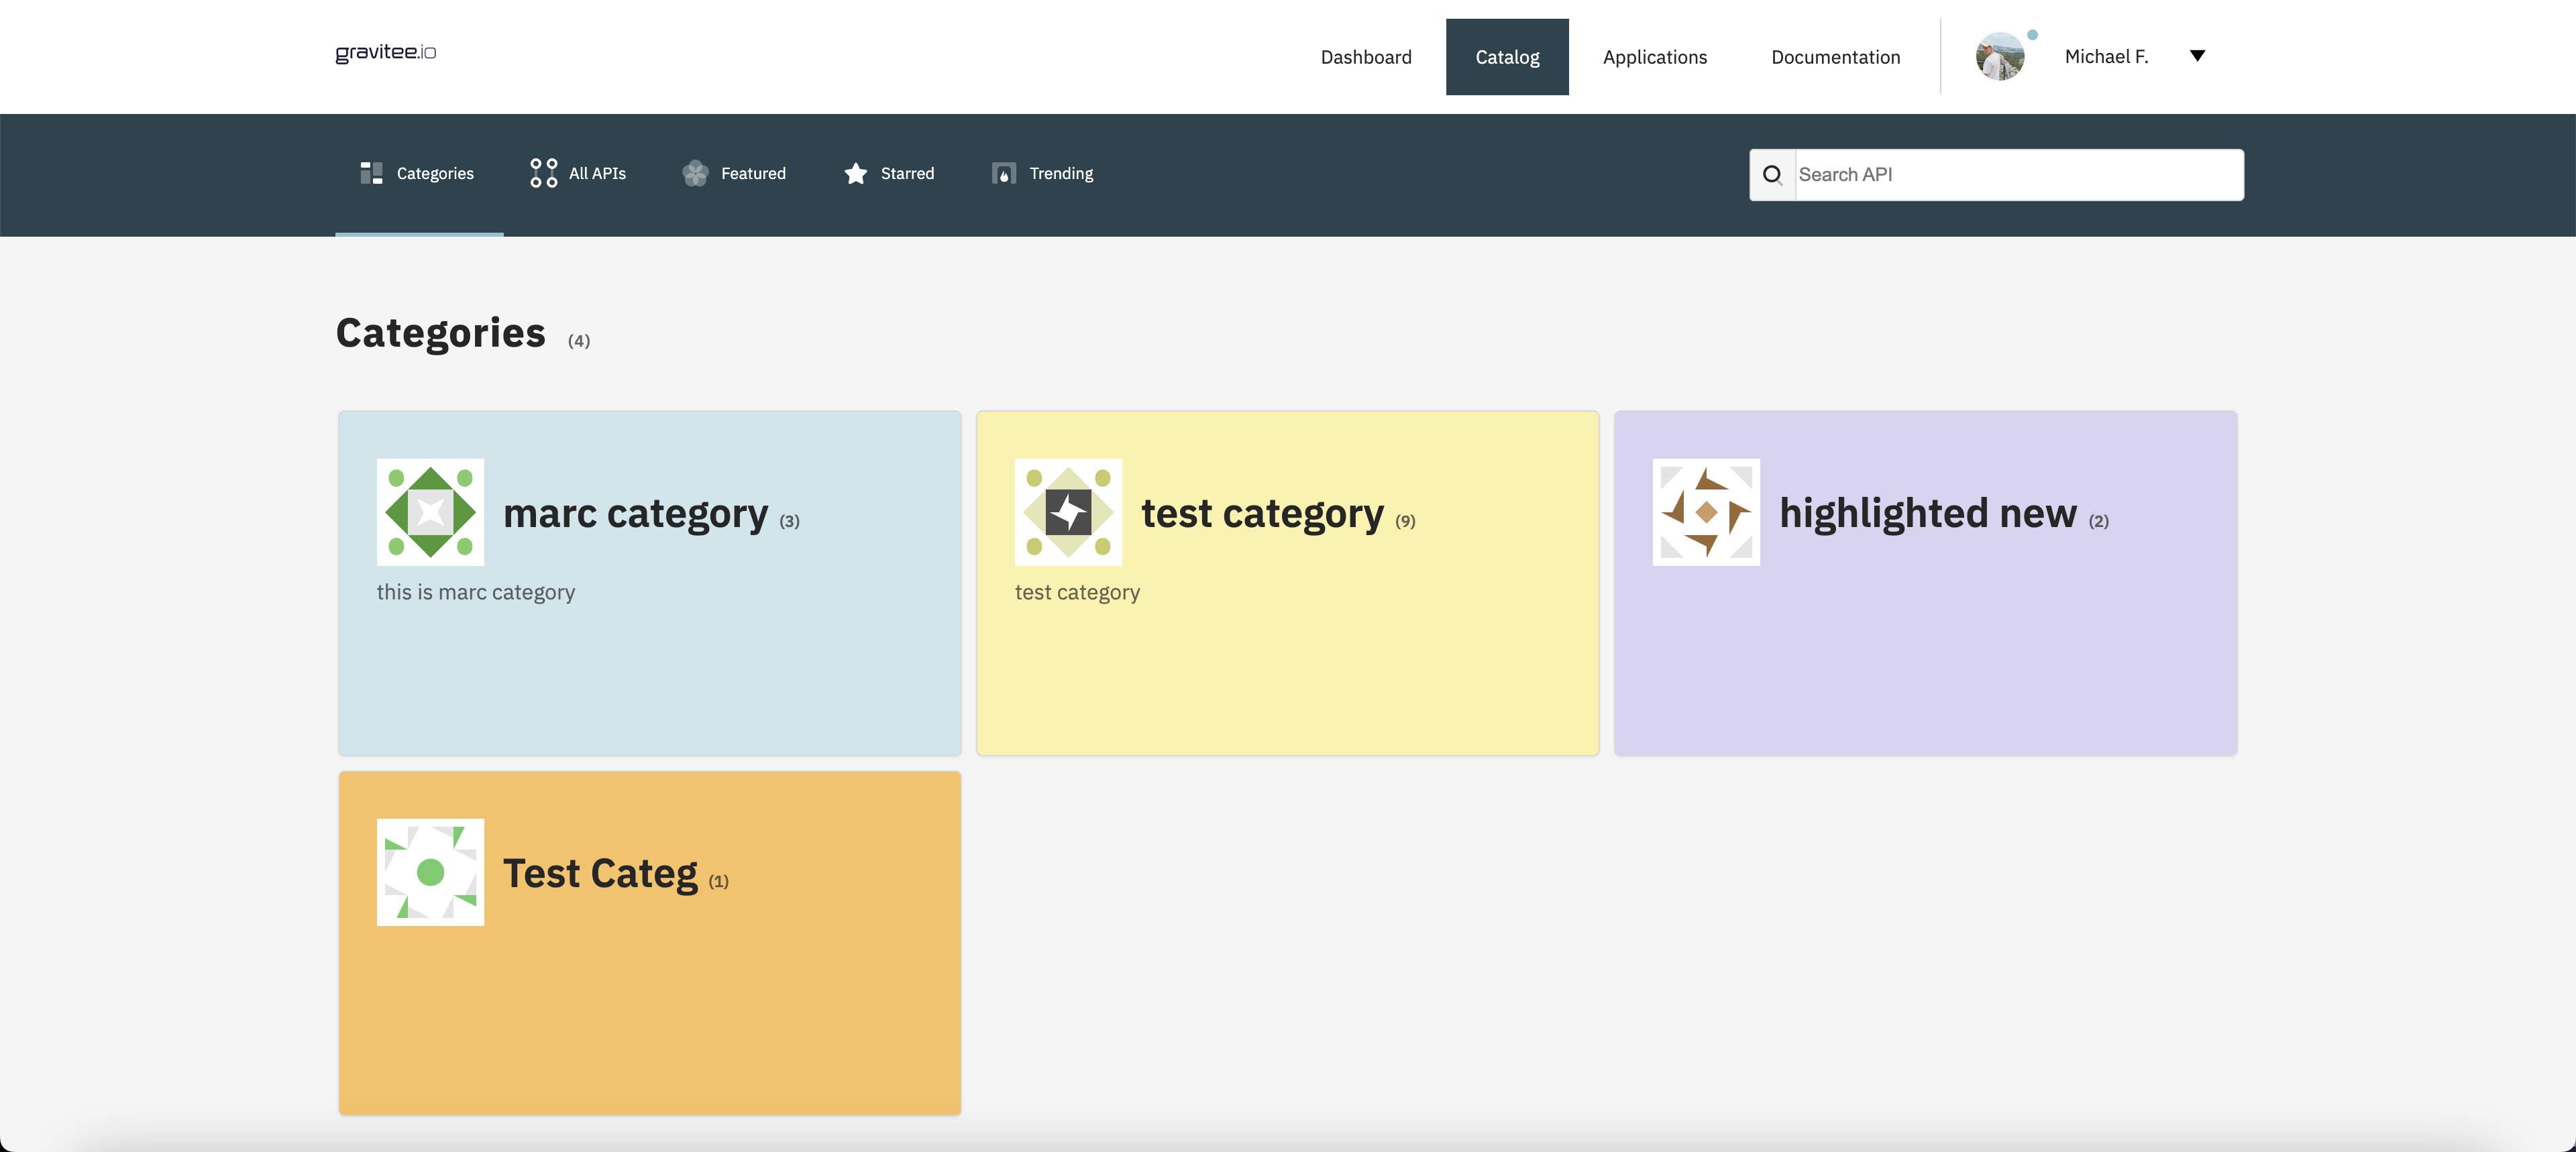
With the toggle enabled, a Categories tab will appear in the header of the API Catalog:
Dev Portal categories page
Top/featured APIs
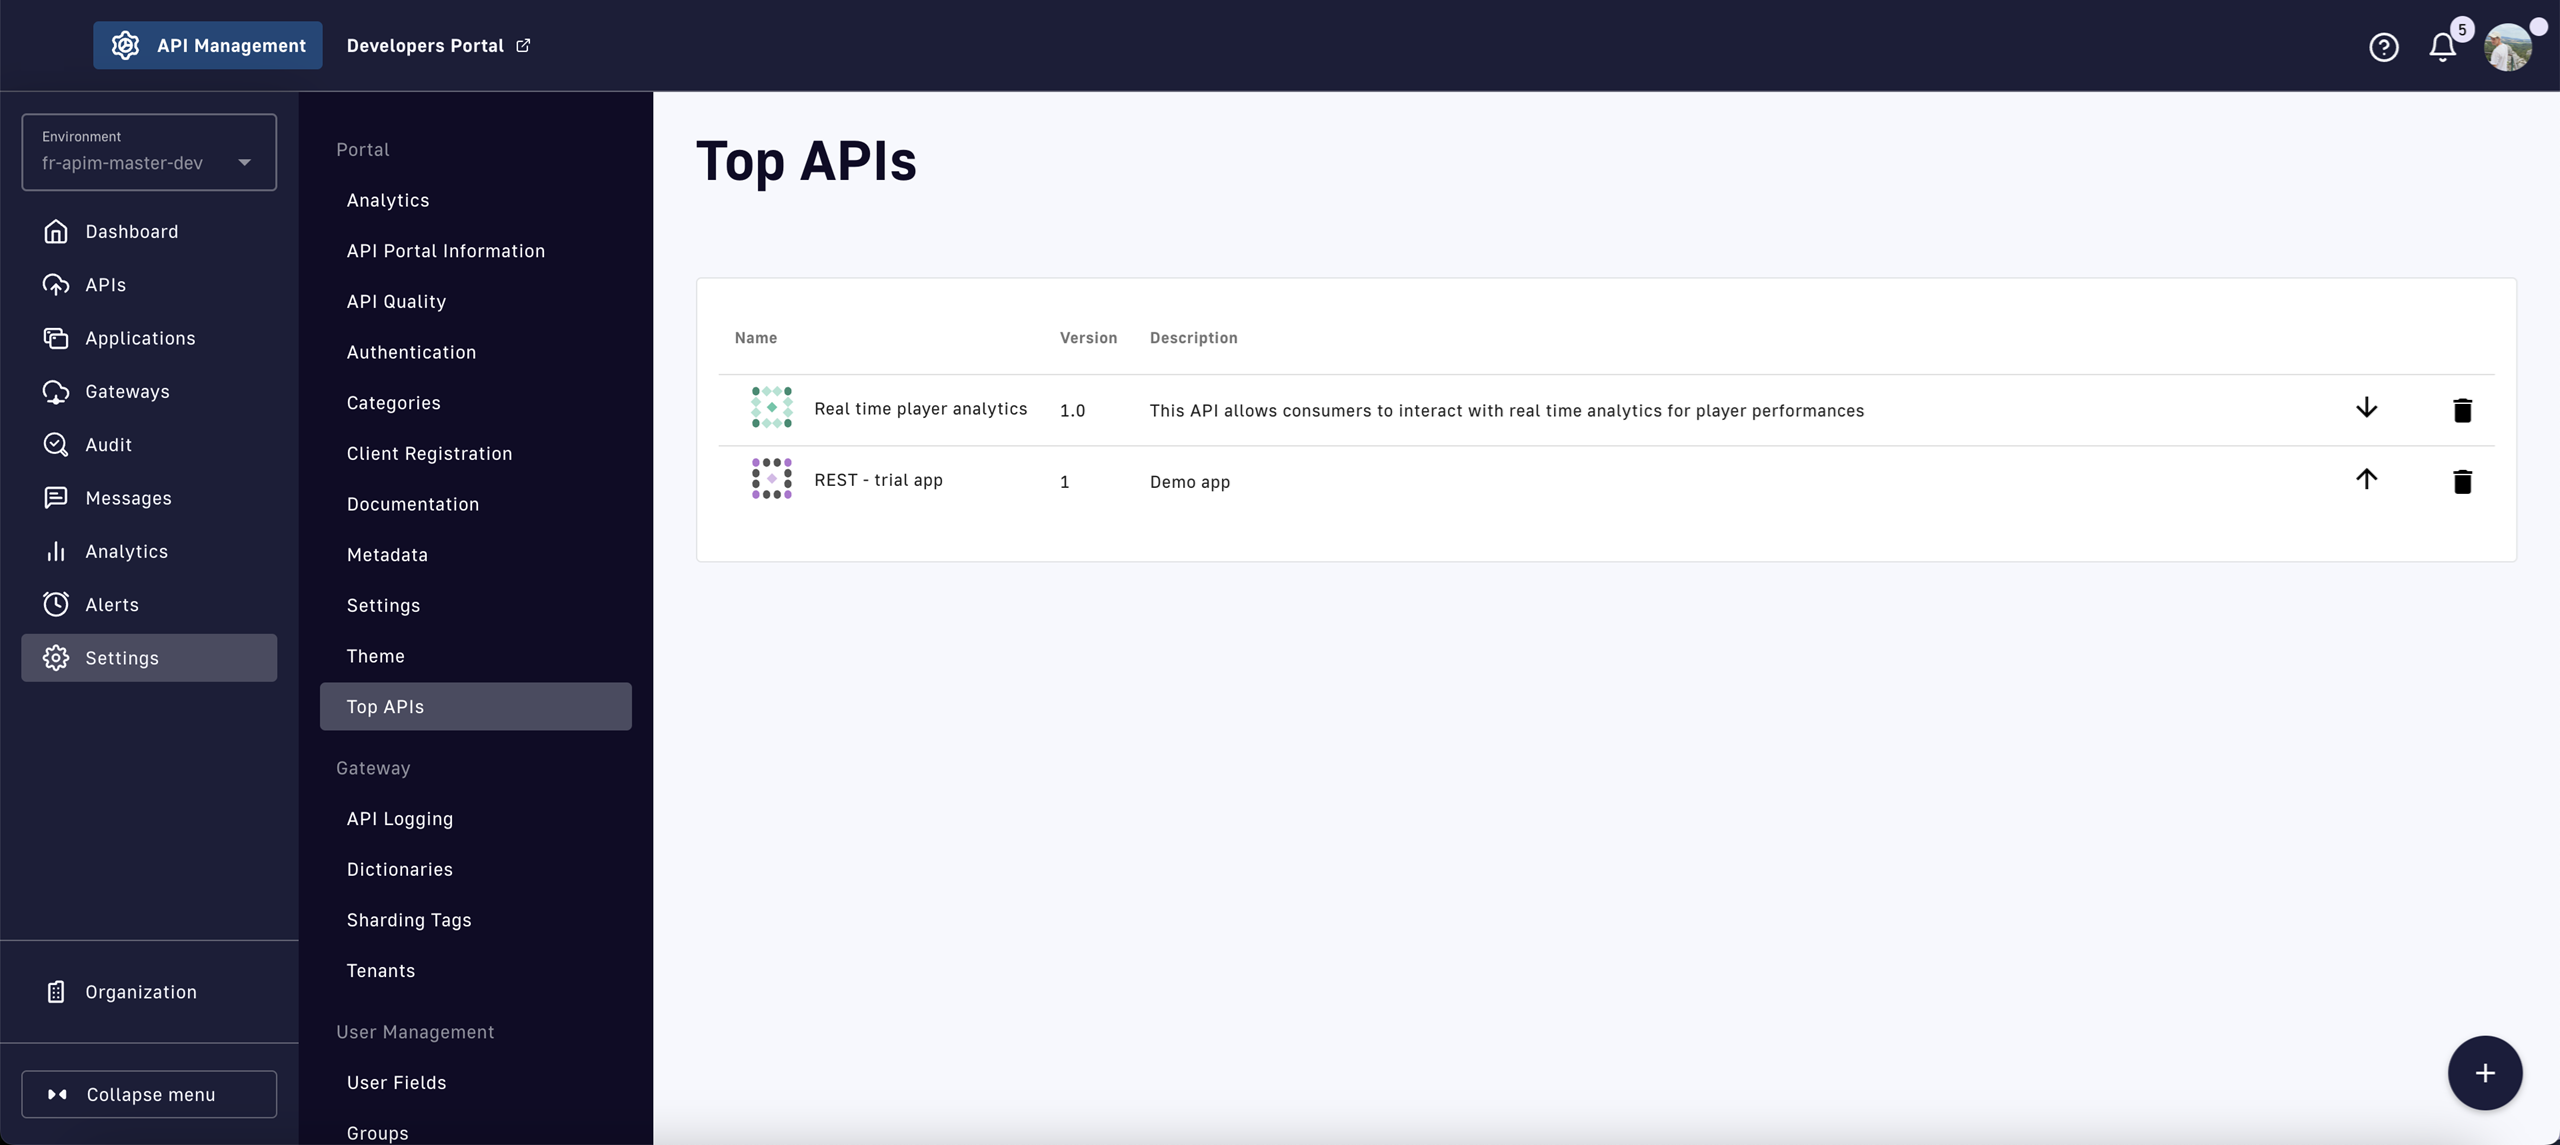
Administrators can also control what is displayed on the Featured page of the API Catalog by modifying the top APIs:
Select Settings from the left sidebar of the Management Console
Select Top APIs from the inner left sidebar
Top APIs settings
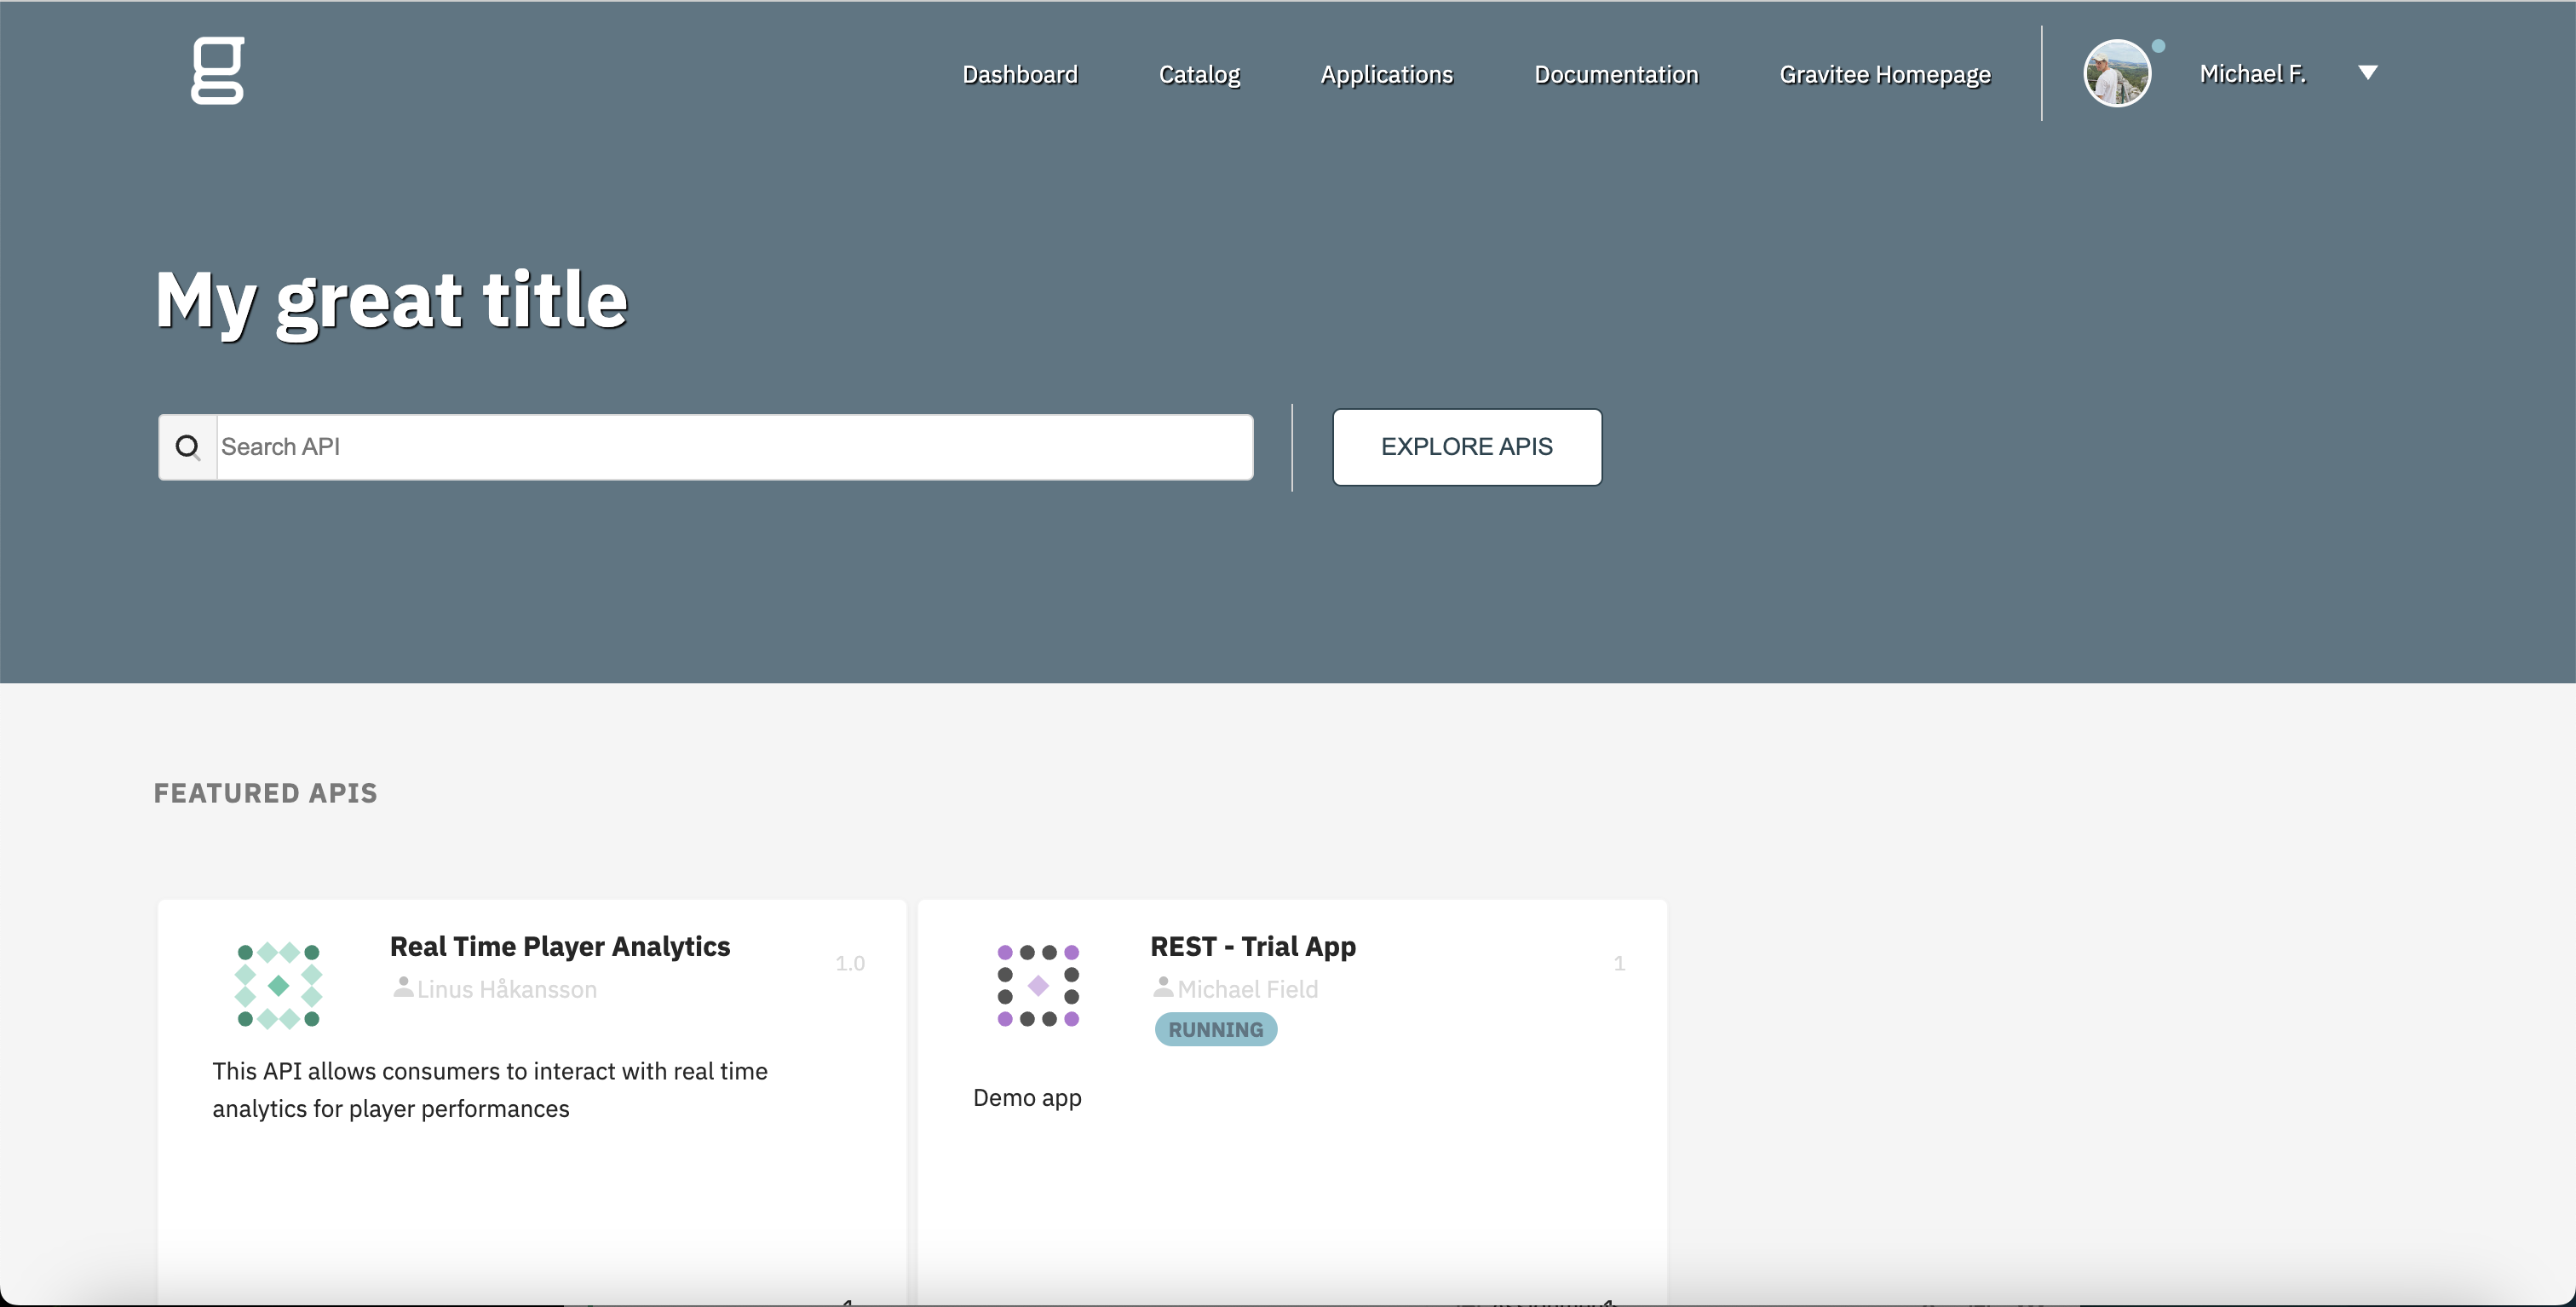
Administrators can use the + icon to add new APIs, reorder APIs, and remove APIs from the list. APIs added here are displayed on both the Developer Portal's homepage and on the API catalog's Featured page:
Developer Portal homepage displaying top APIs
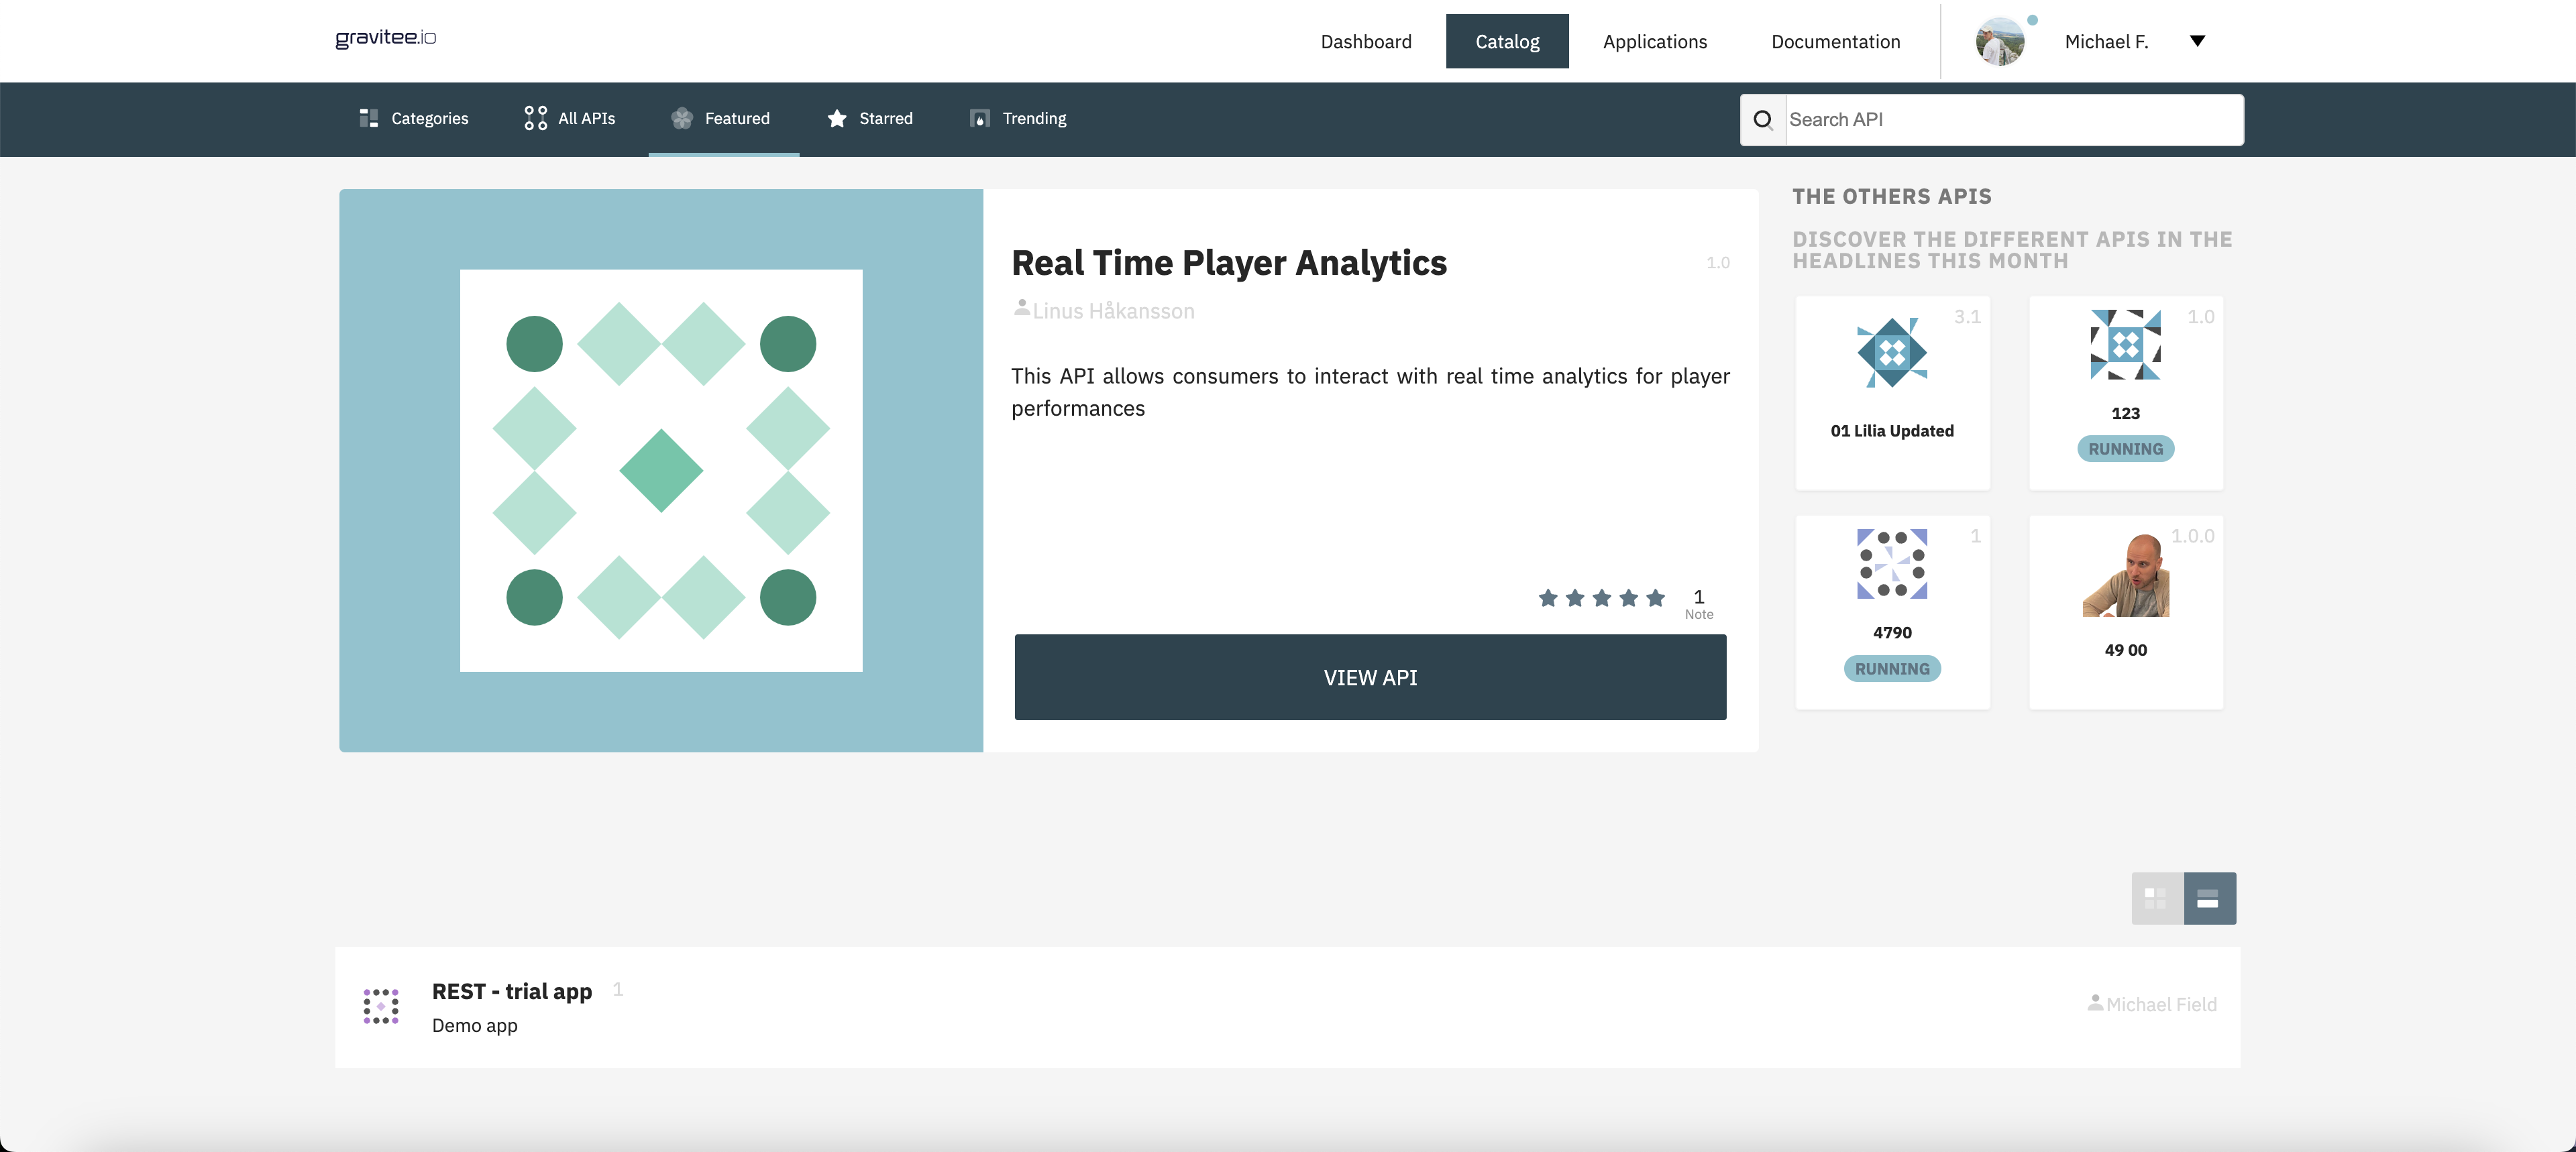
Developer Portal Featured page in the API Catalog
Top API visibility
Administrators can view all of the Gateway APIs added to the Top APIs list
The Top APIs visible to individual users are restricted to public APIs and APIs they have been granted access to through user and group access settings
Custom navigation
Administrators can customize the header and footer navigation of the Developer Portal by creating link pages in DSAPI's system folders. There are three types of links:
External link
Link to an existing documentation page
Link to a category
Each link is treated as a new documentation page. To learn about the features and functionality of Developer Portal documentation, see Documentation.
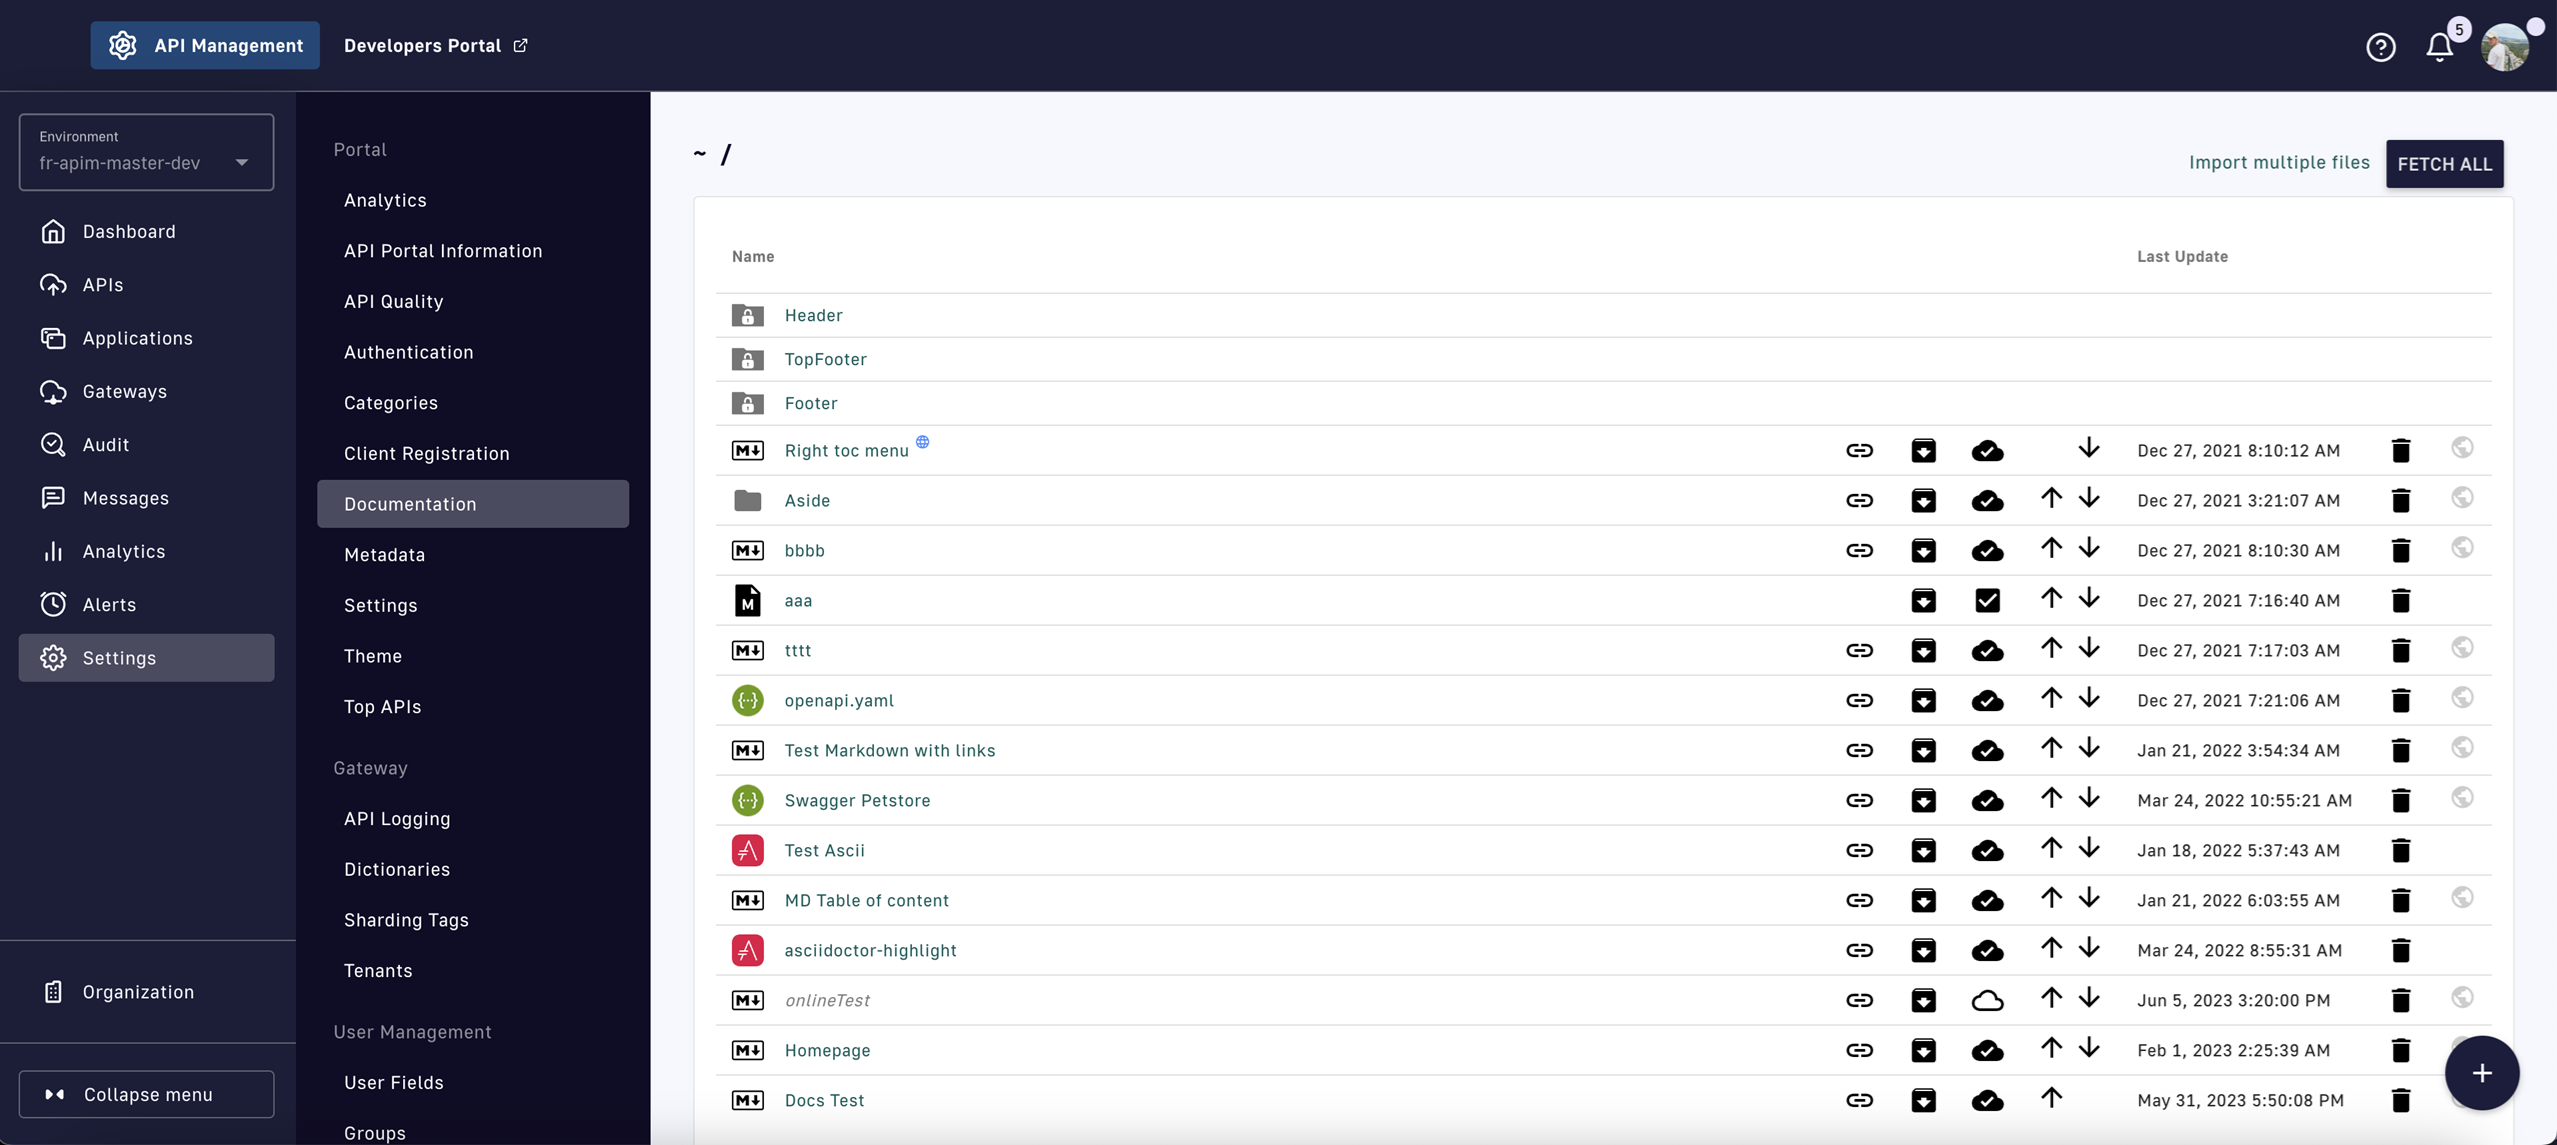
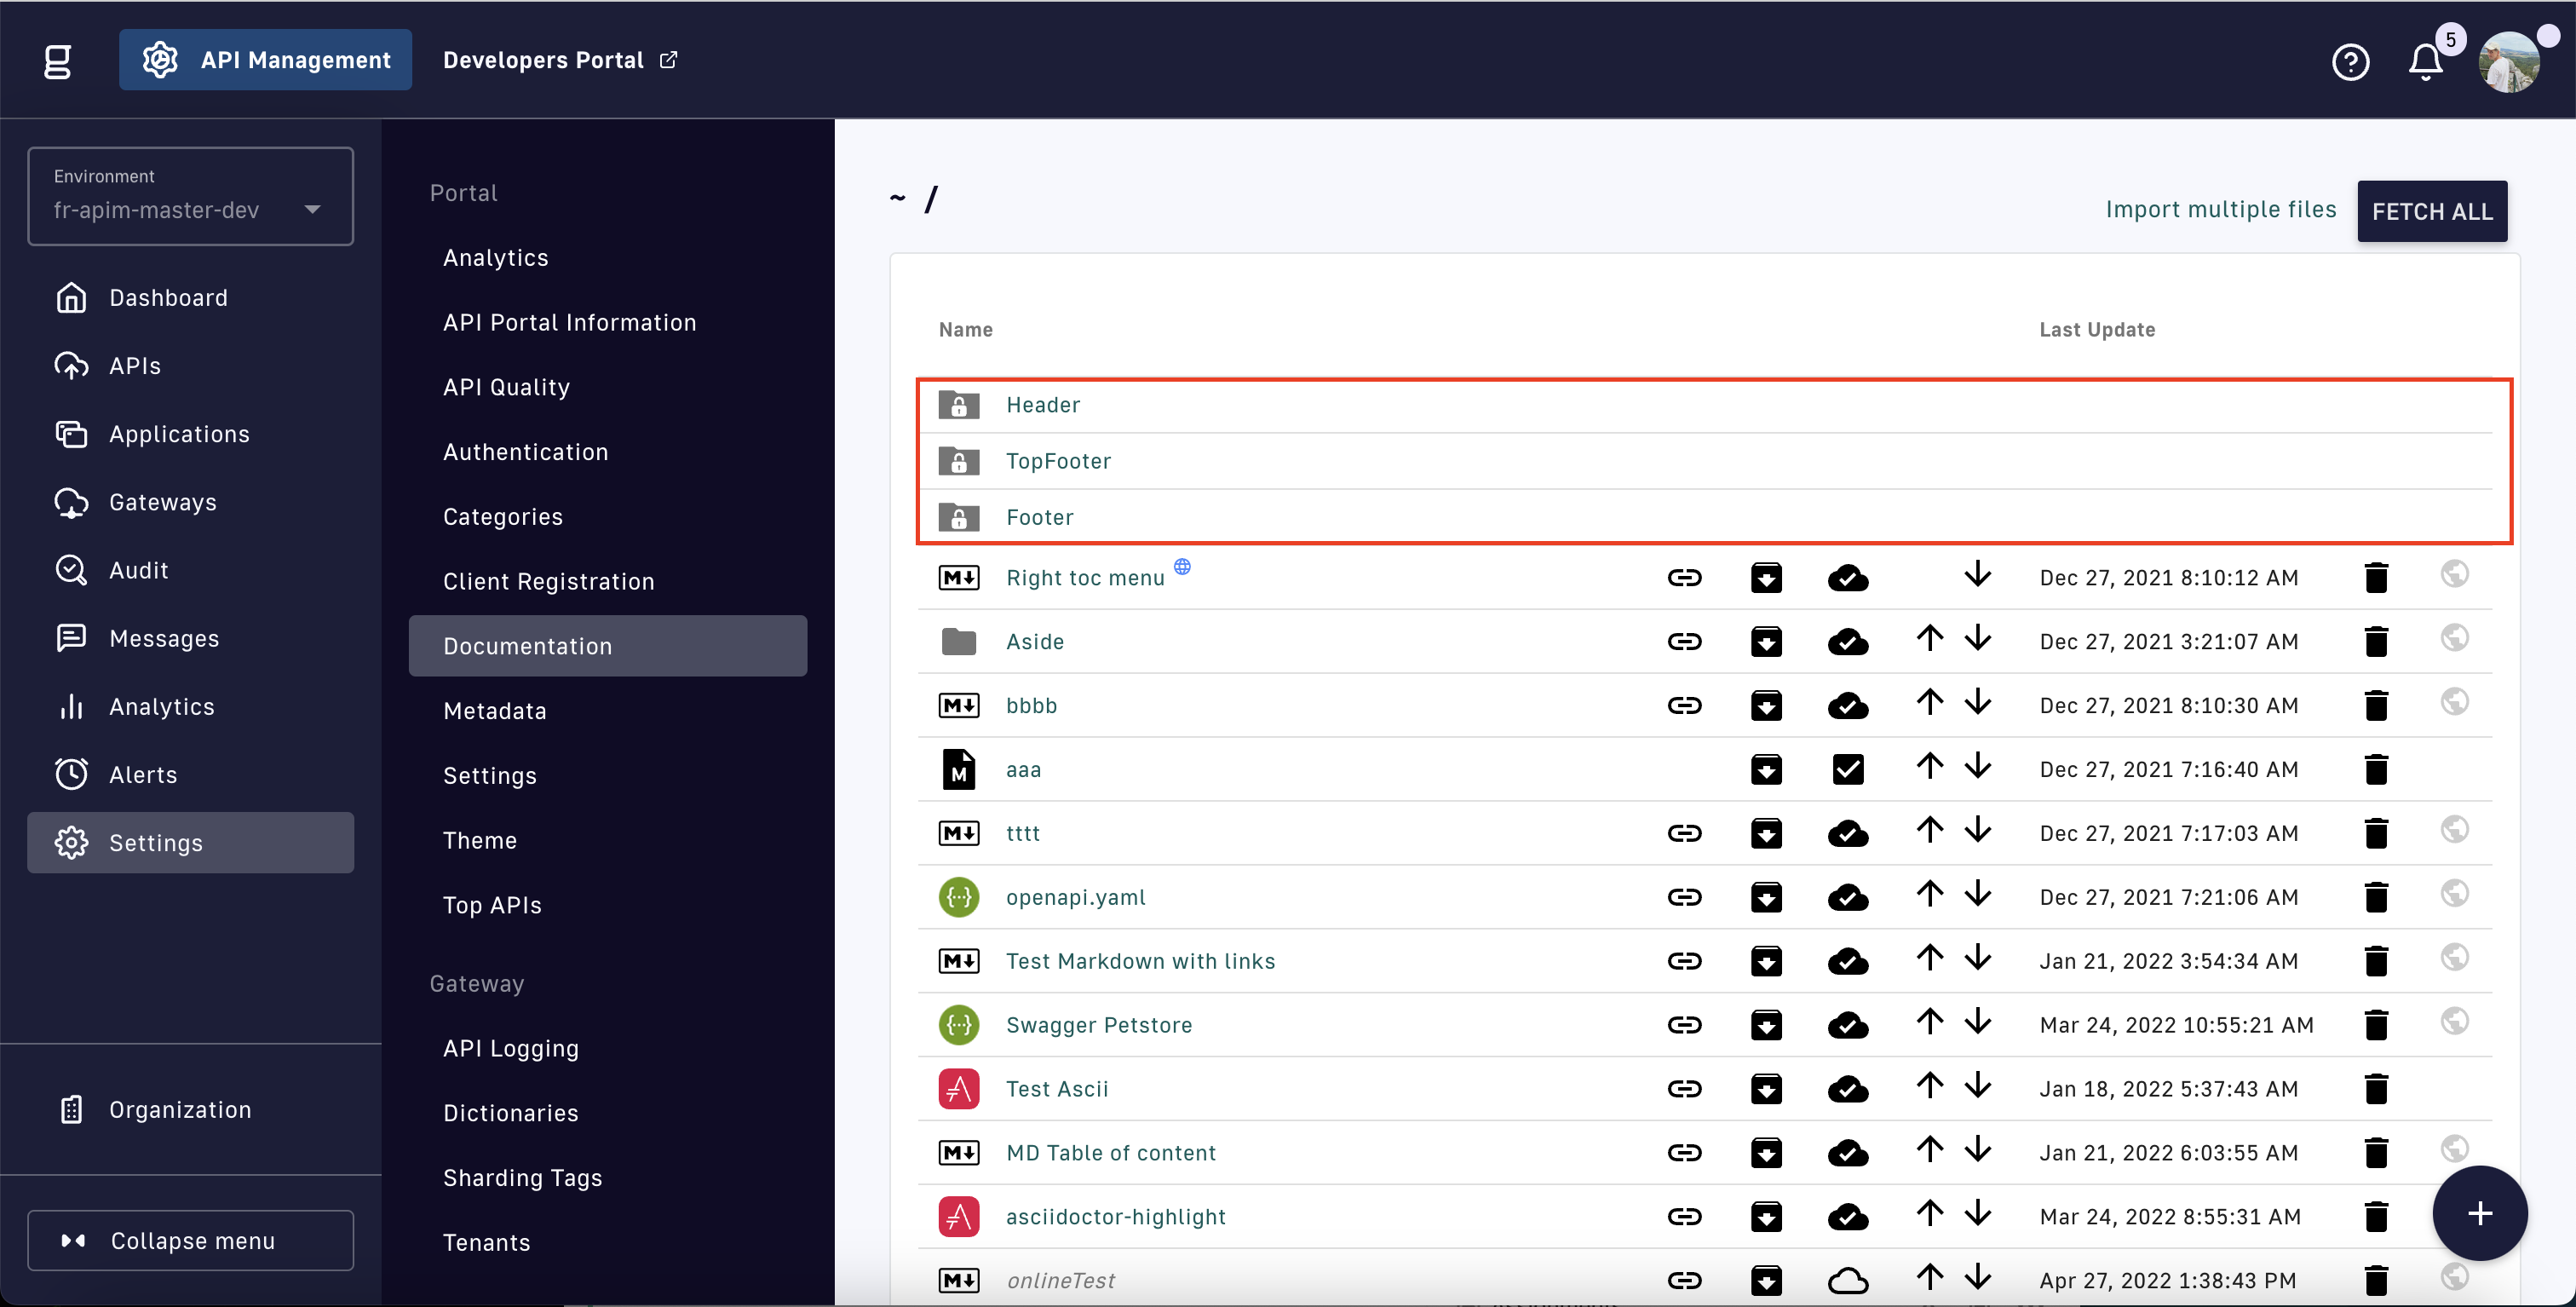
To access DSAPI's system folders:
Select Settings from the left sidebar of the Management Console
Select Documentation from the inner left sidebar
System folders are identified by a padlock icon:
DSAPI's system folders
There are three system folders: Header, TopFooter and Footer. Each system folder corresponds to an area of the Developer Portal:
Developer Portal - system folder mapping
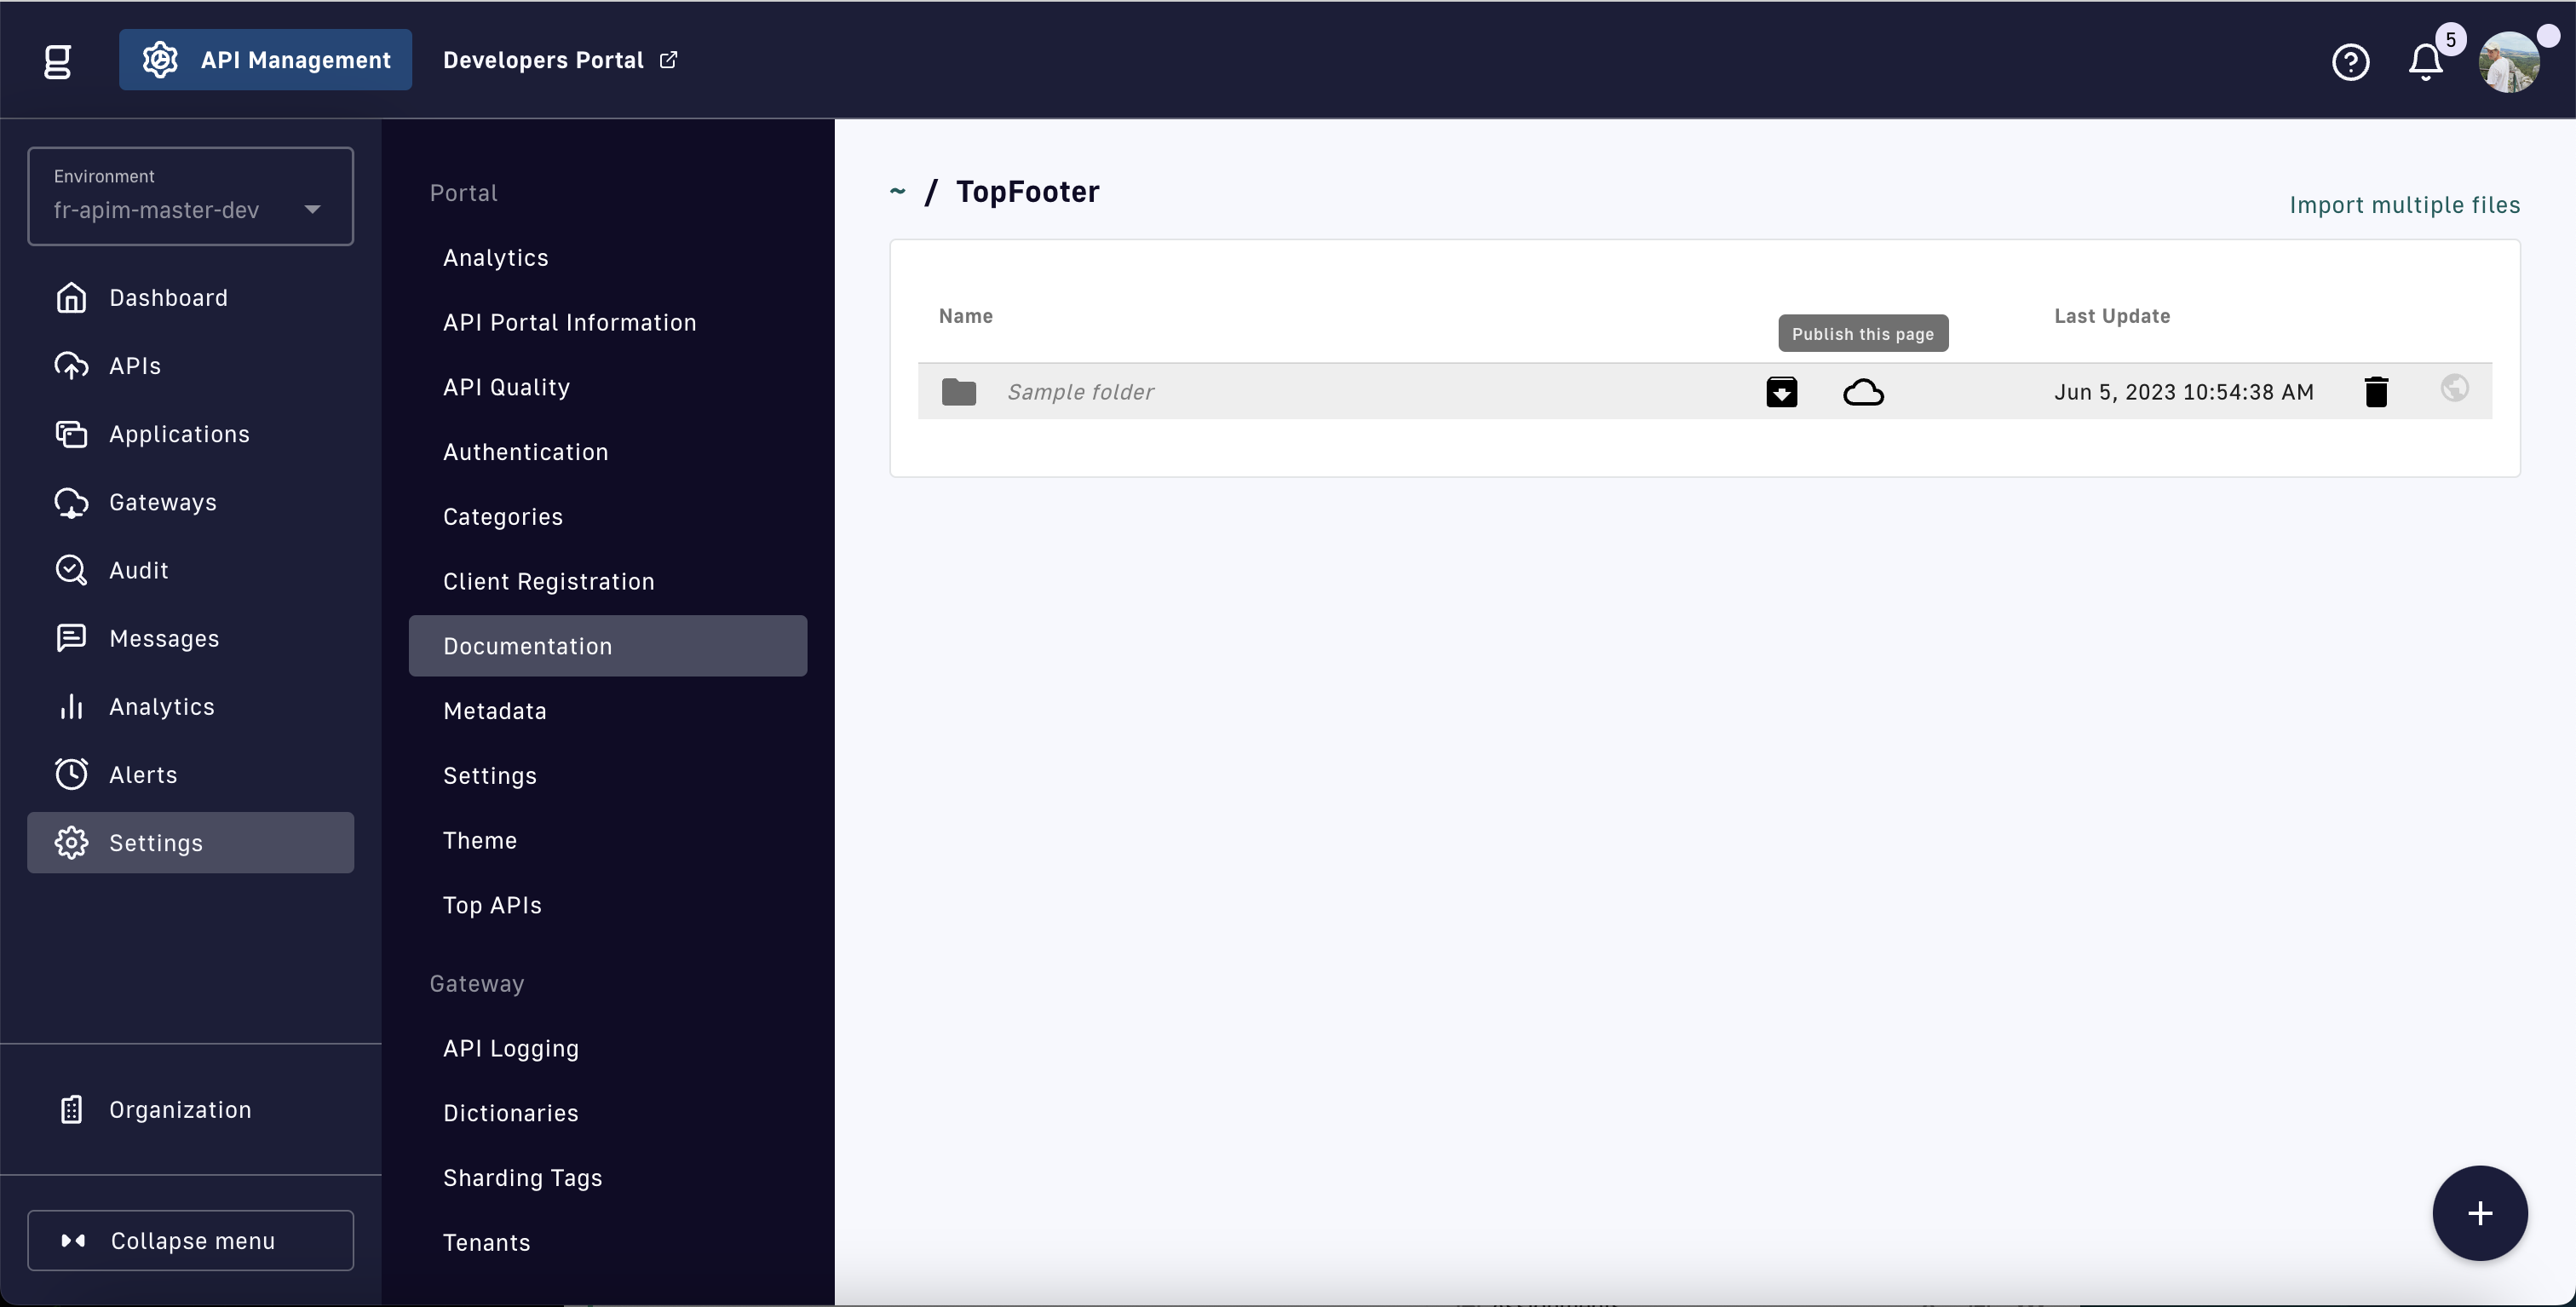
TopFootersystem folder nesting
TheTopFootersystem folder is the only system folder that accepts nested folders, which are used to group links together. Nested folders must be published to be visible in the Developer Portal.
To create a link:
Open a system folder
Select the + icon
Select the Link icon
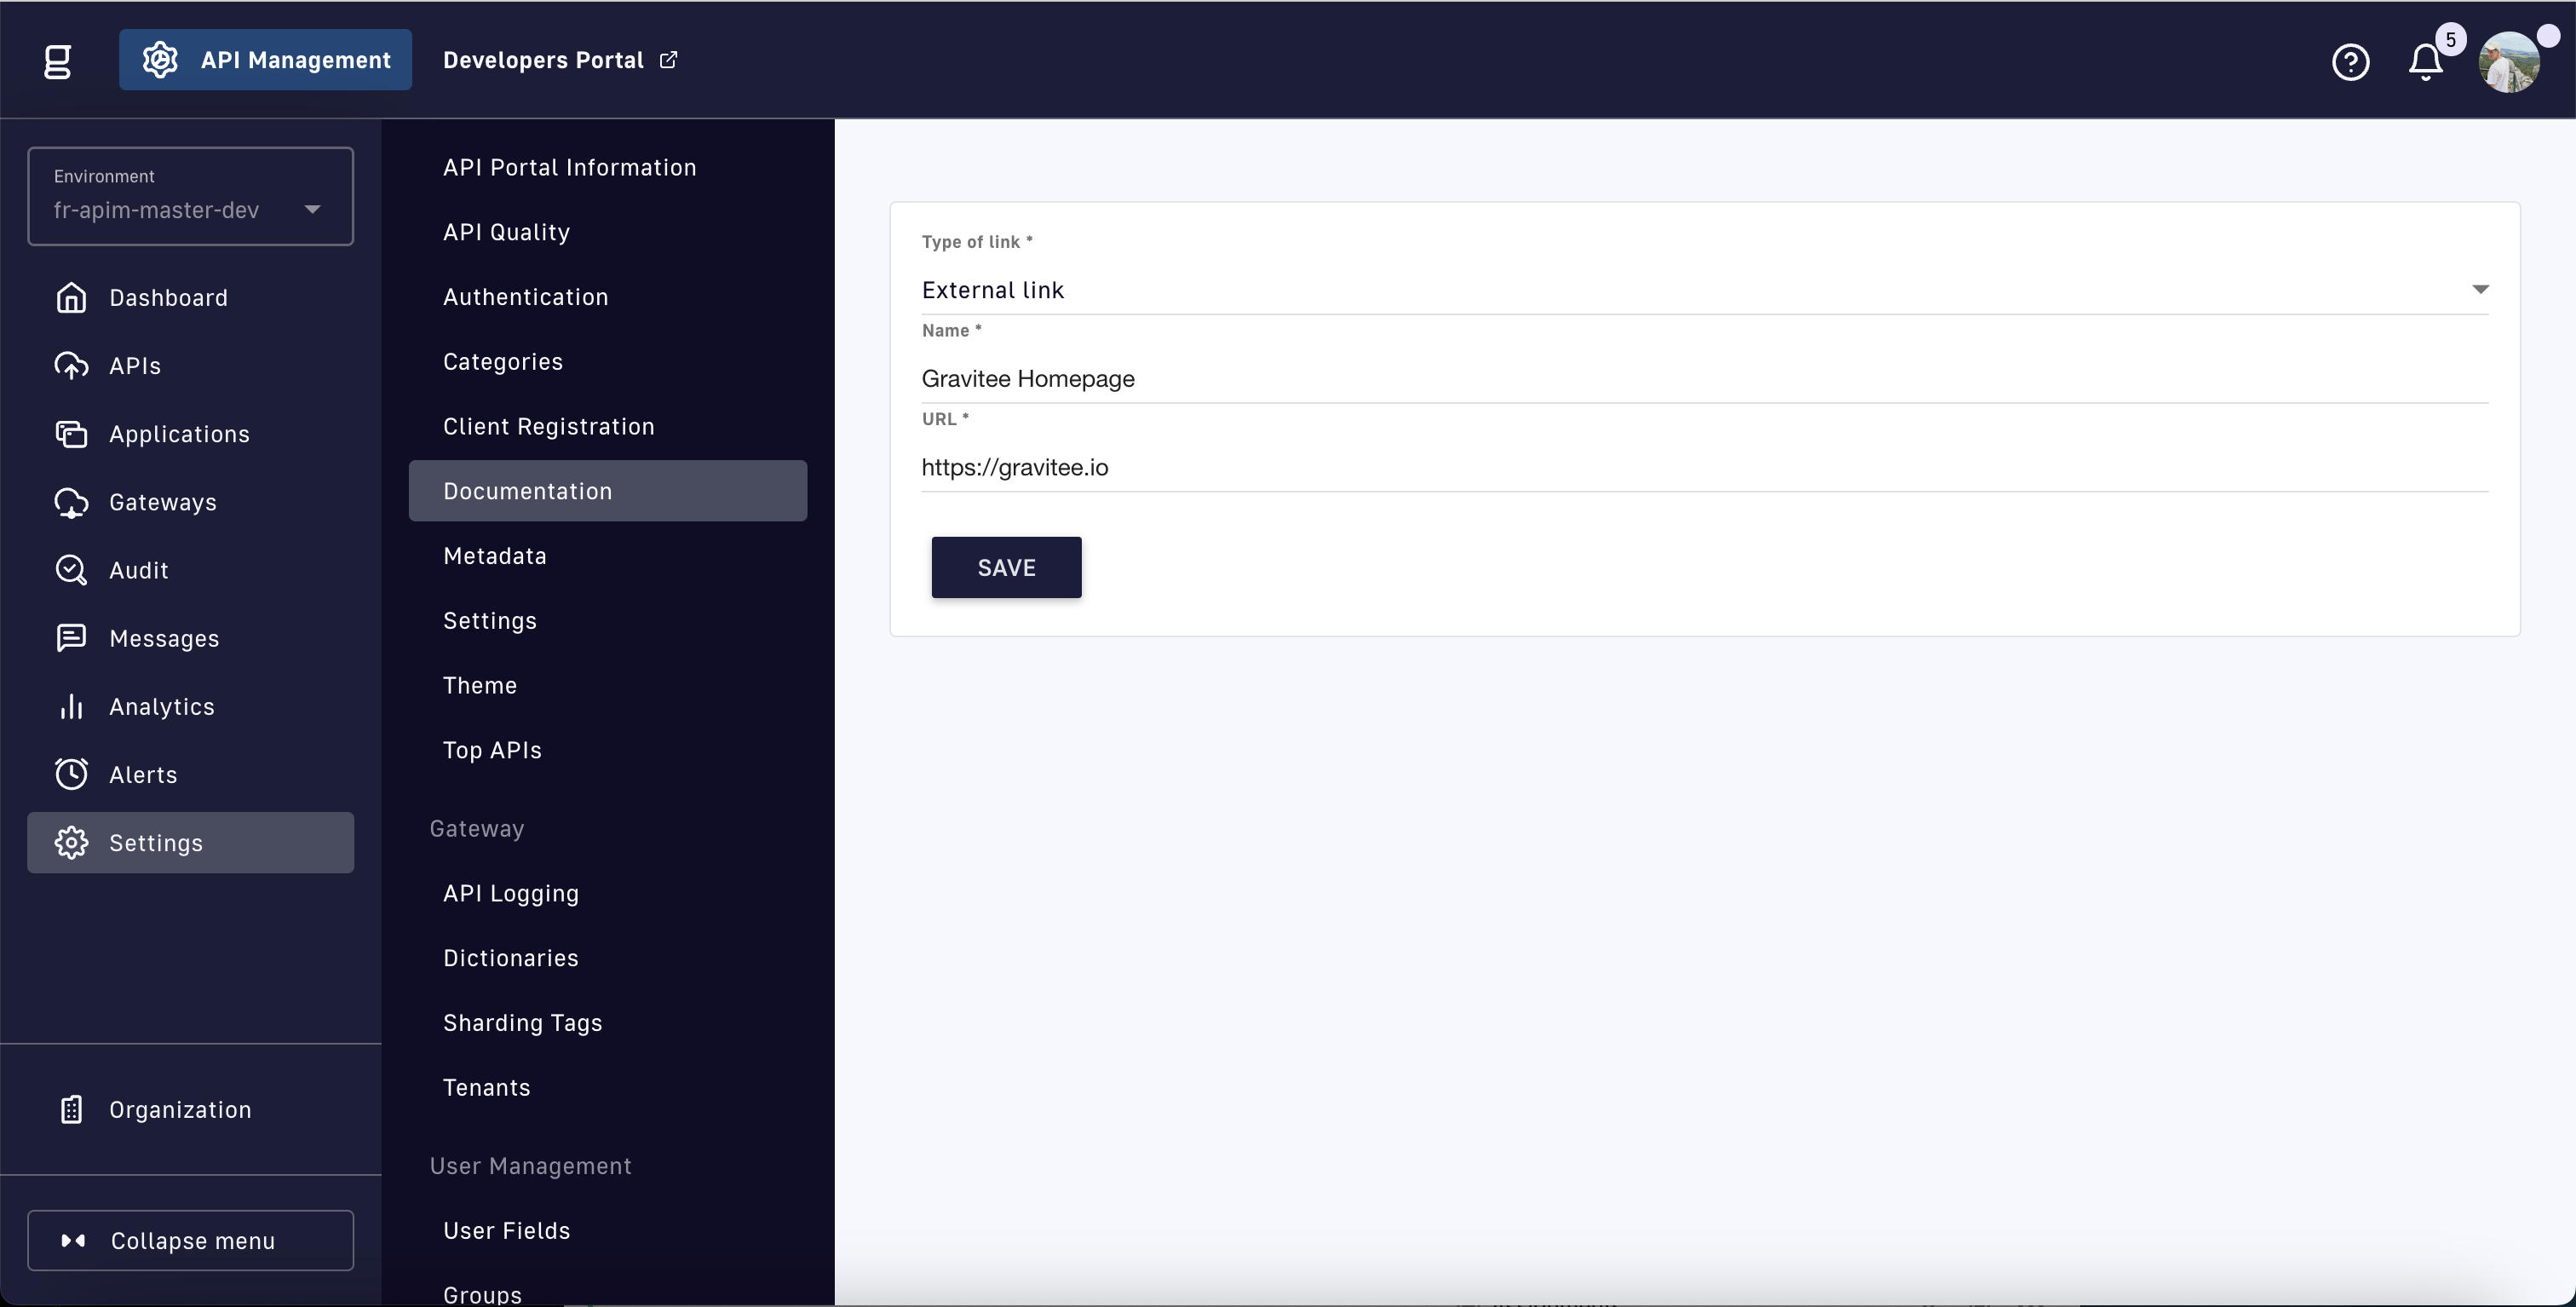
This will take you to a new page to select your link type and provide additional information about your link:
Create a new Developer Portal link
To view your new link, click Save and navigate to the Developer Portal:
Sample "DSAPI Homepage" custom link
Each custom link offers additional features such as translations and access control. See Documentation for more information.
Theming
Administrators can change the default theme of the Developer Portal to a custom theme. To modify the theme:
Select Settings from the left sidebar of the Management Console
Select Theme from the inner left sidebar
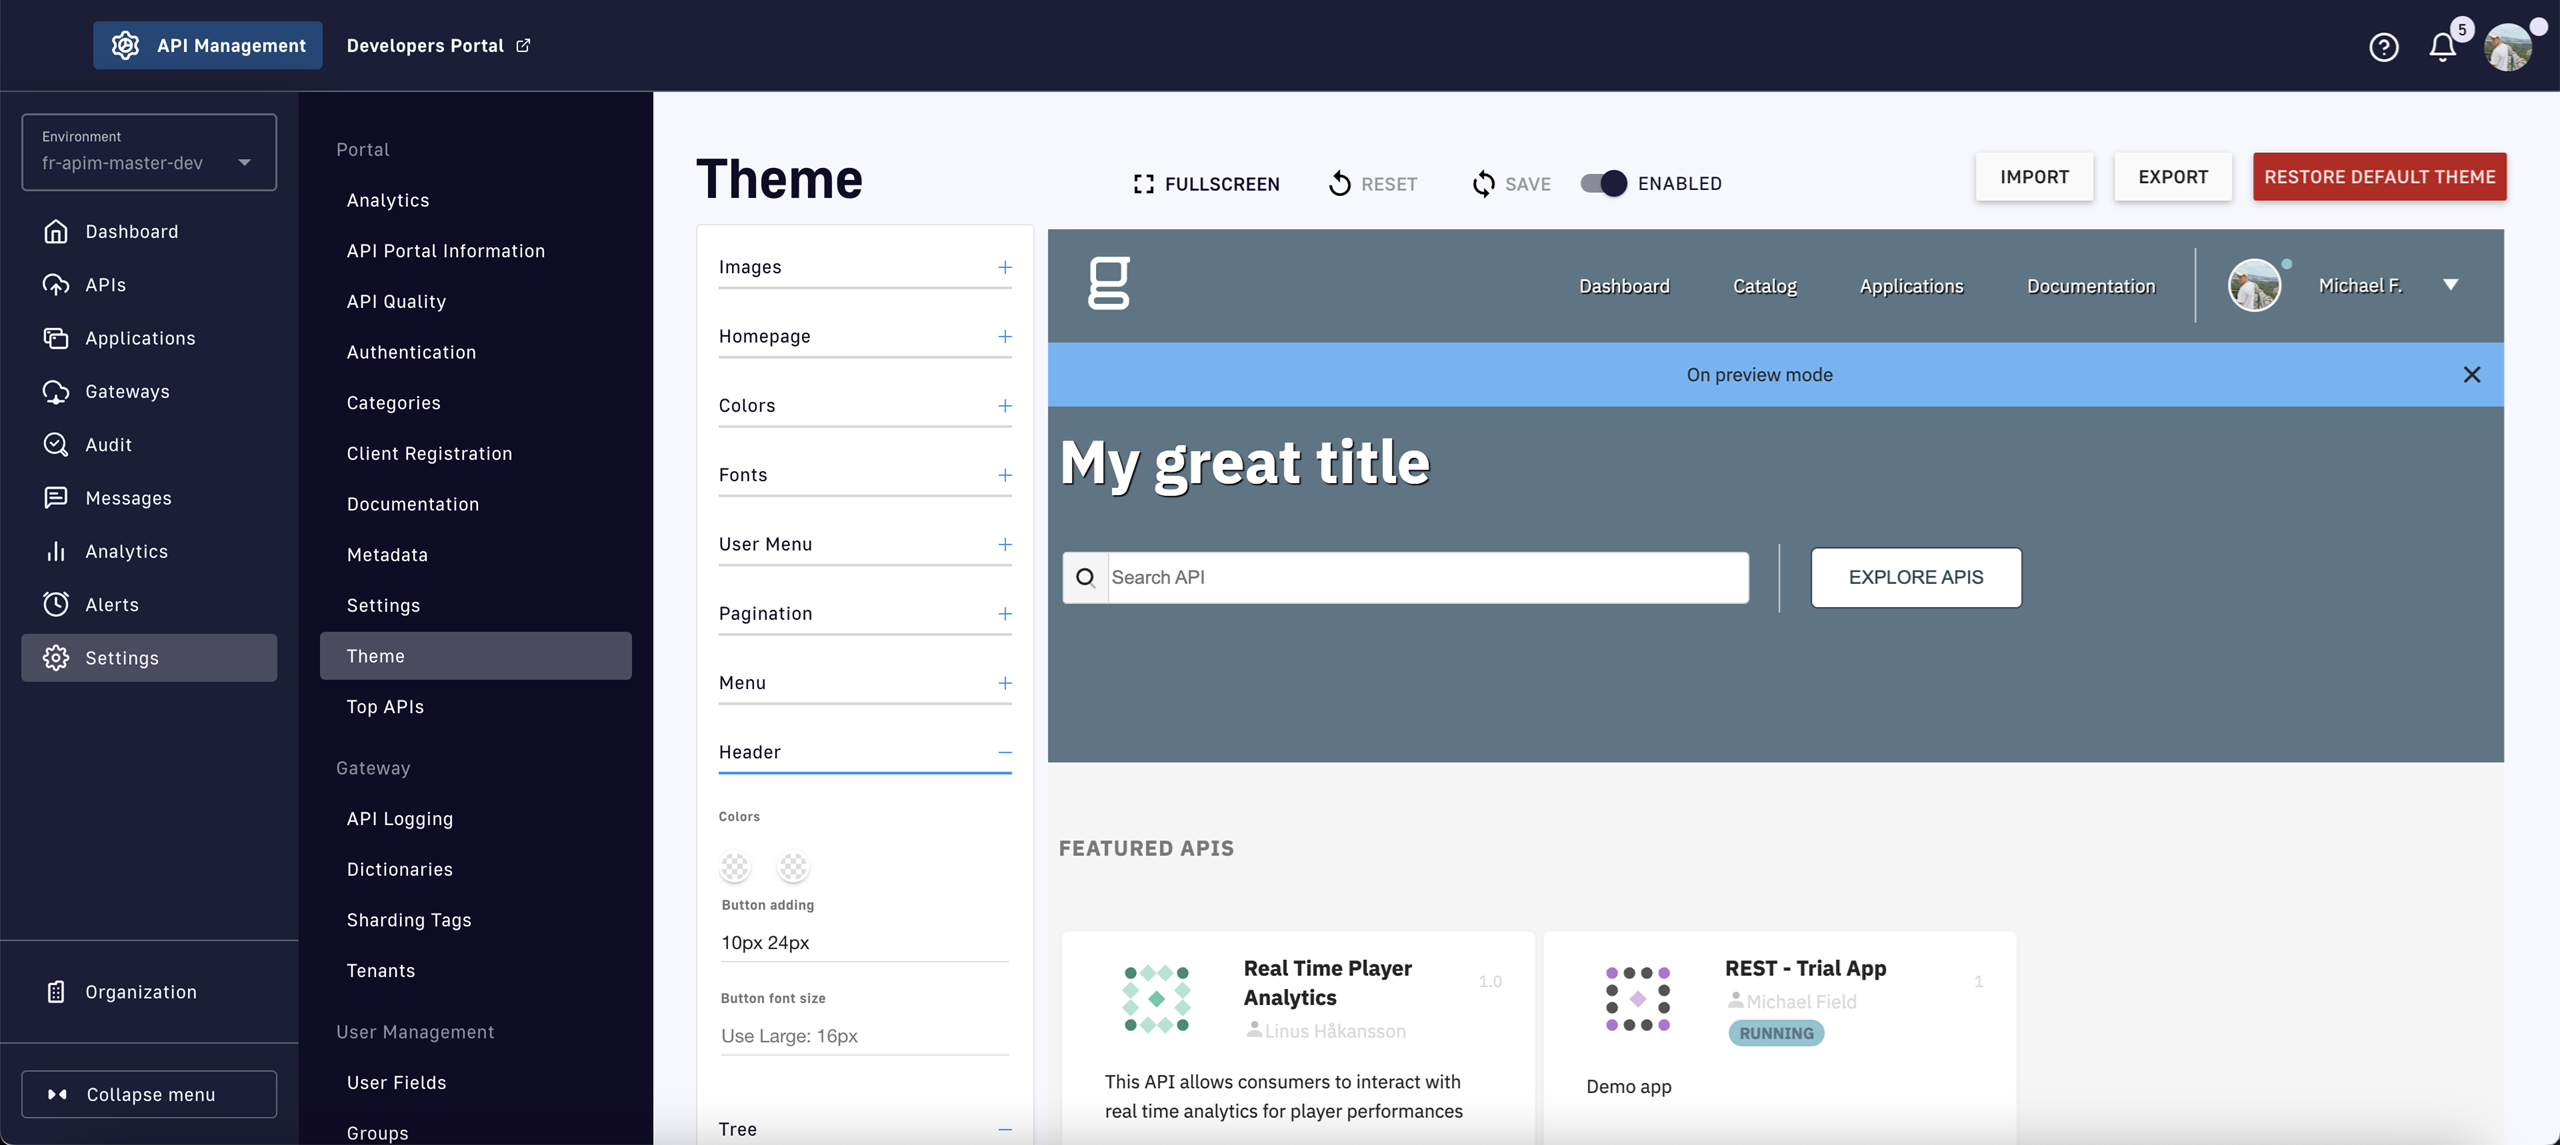
Developer Portal theme settings
This page allows the administrator to customize every aspect of the Developer Portal's look and feel. Edits are shown in a live preview on the right.
Fullscreen: Opens the preview in a new window to avoid switching screens when editing.
Reset: Resets the theme from the last backup. Backups occur when you select the Save button.
Save: Saves your theme.
Enabled: Activates the theme in APIM Portal.
Import: Upload a custom theme in JSON format. To view the required structure of the JSON file, Export the current theme.
Export: Downloads your current theme in JSON format.
Restore Default Theme: Overwrites your modifications with the default theme.
Basic customization
Property
Use case
Images
Show logos. Optional logo is used for the homepage and the footer. Using the default logo overrides the optional logo.
Homepage
Add a Homepage background image.
Colors
Define primary, neutral, and font colors.
Fonts
Choose font family and sizes. Medium sizes are used by default.
Advanced customization
Each component uses its own properties but, where possible, the properties are grouped into common variables. To further customize the Developer Portal, you can define the graphic properties to expose for each component.
For example, hover your mouse over the color bubble to see common component colors. For other property types, if a common property is used, it appears in the placeholder field.
Override theme files
APIM API includes a default theme and two default logos, located in the /themes folder of the API distribution folder:
definition.json
logo.png
logo-light.png
To customize the Developer Portal theme, either modify these three files or specify a new folder in the DSAPI.yml file:
By default, this configuration is commented out and the path is ${DSAPI.home}/themes.
For assistance creating a theme, use the editor in Settings > Theme and export it to a JSON file via the EXPORT button in the header menu. Keep in mind:
Images and logos cannot be changed using this method. The two files must be edited in the distribution.
Exported themes do not have the same format as the provided definition.json file, requiring minor edits to the exported theme.
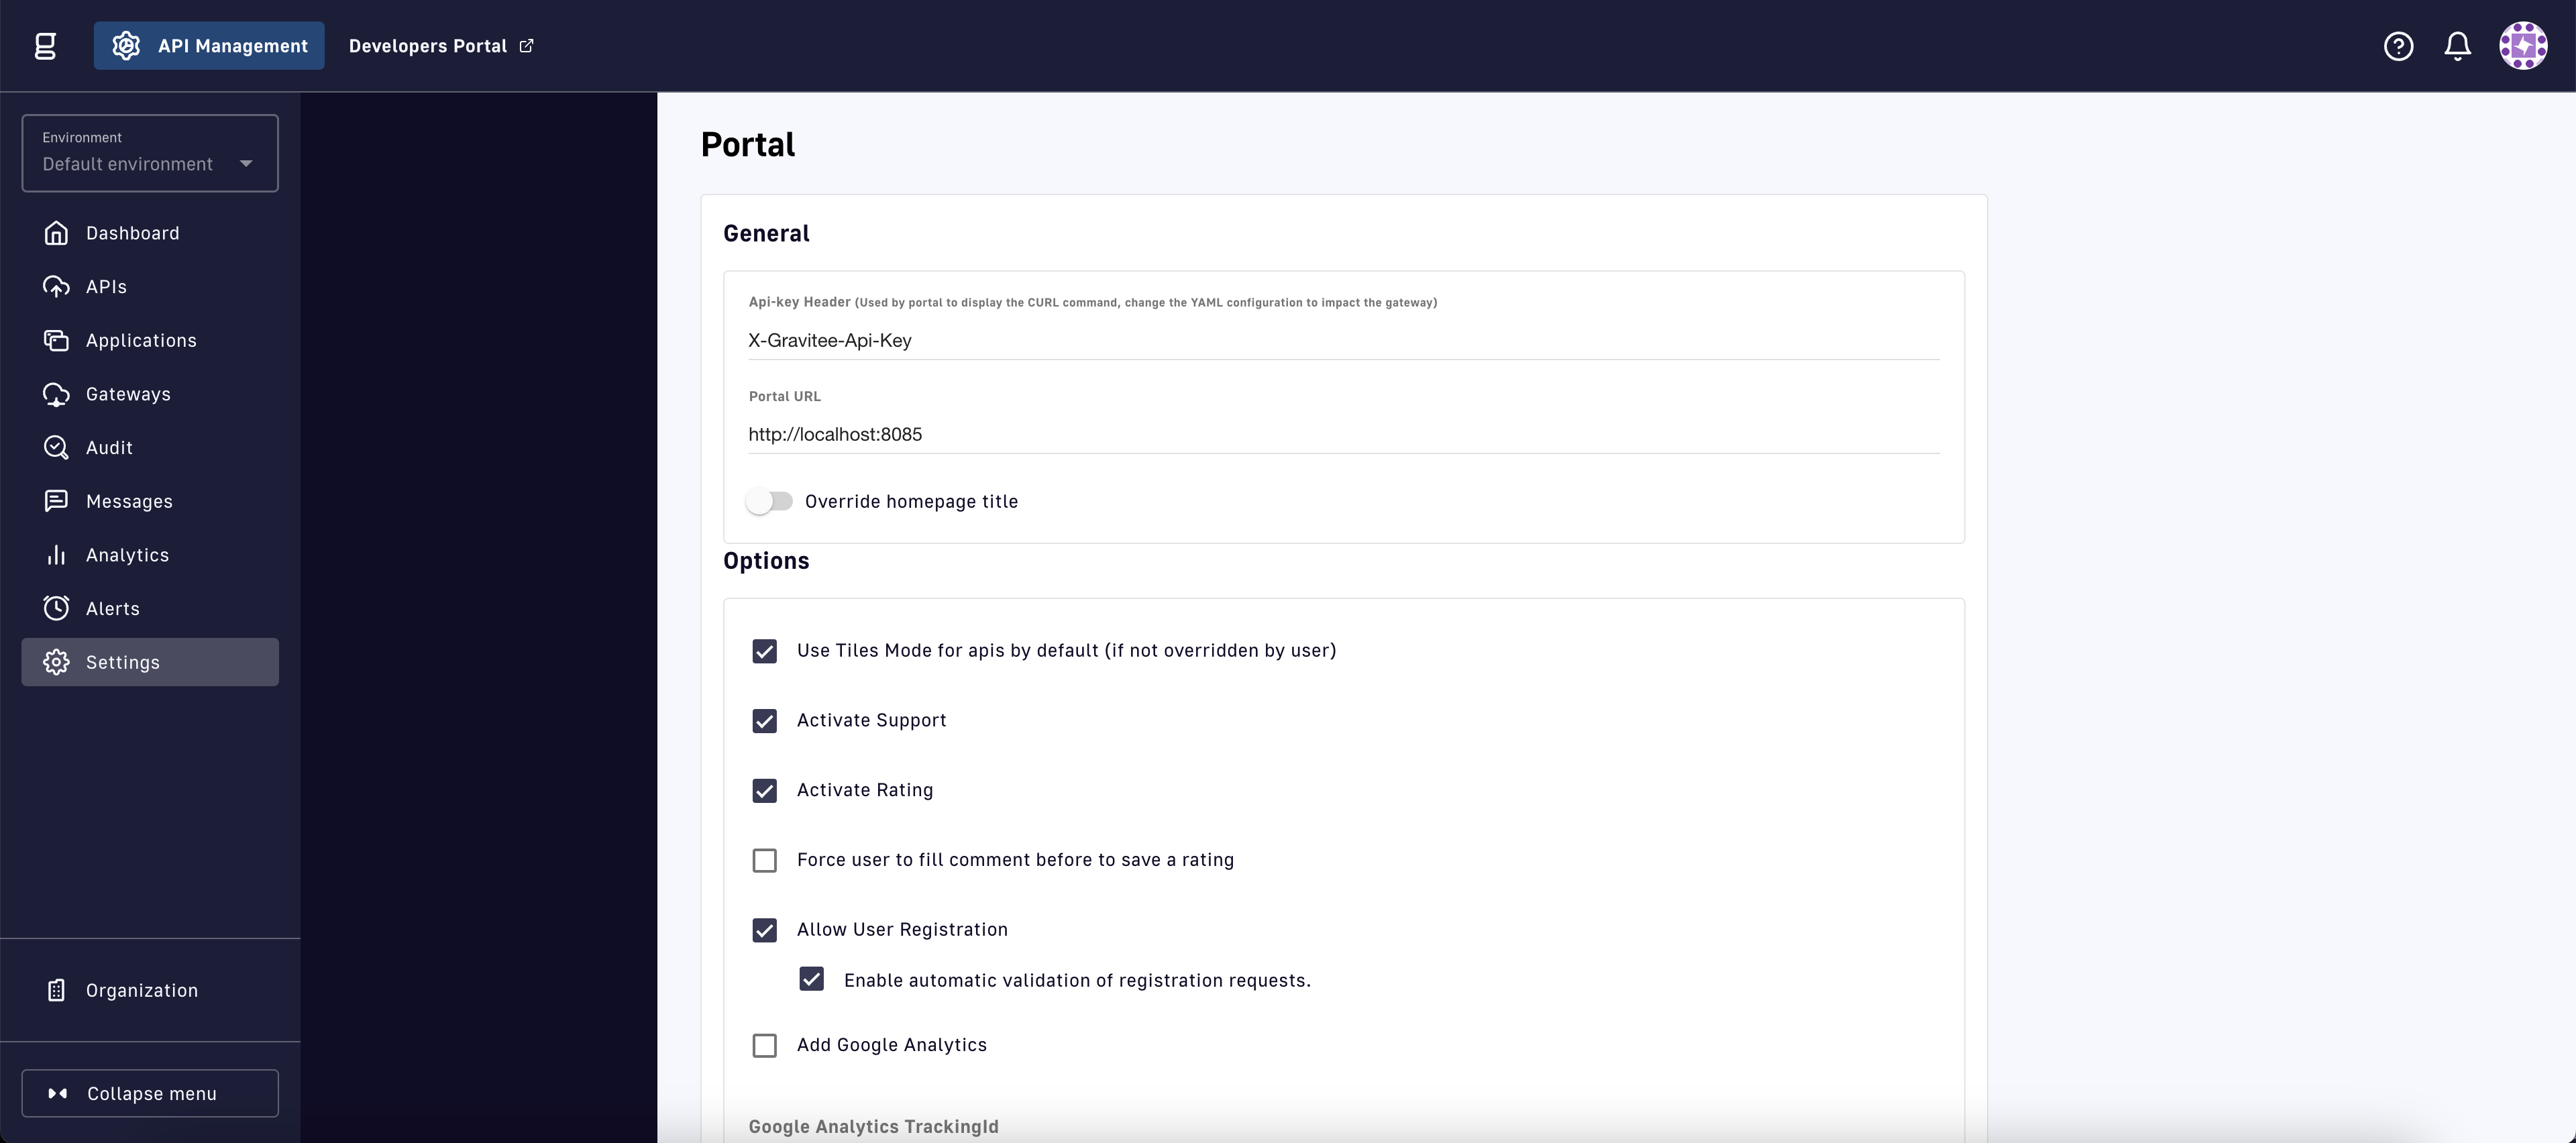
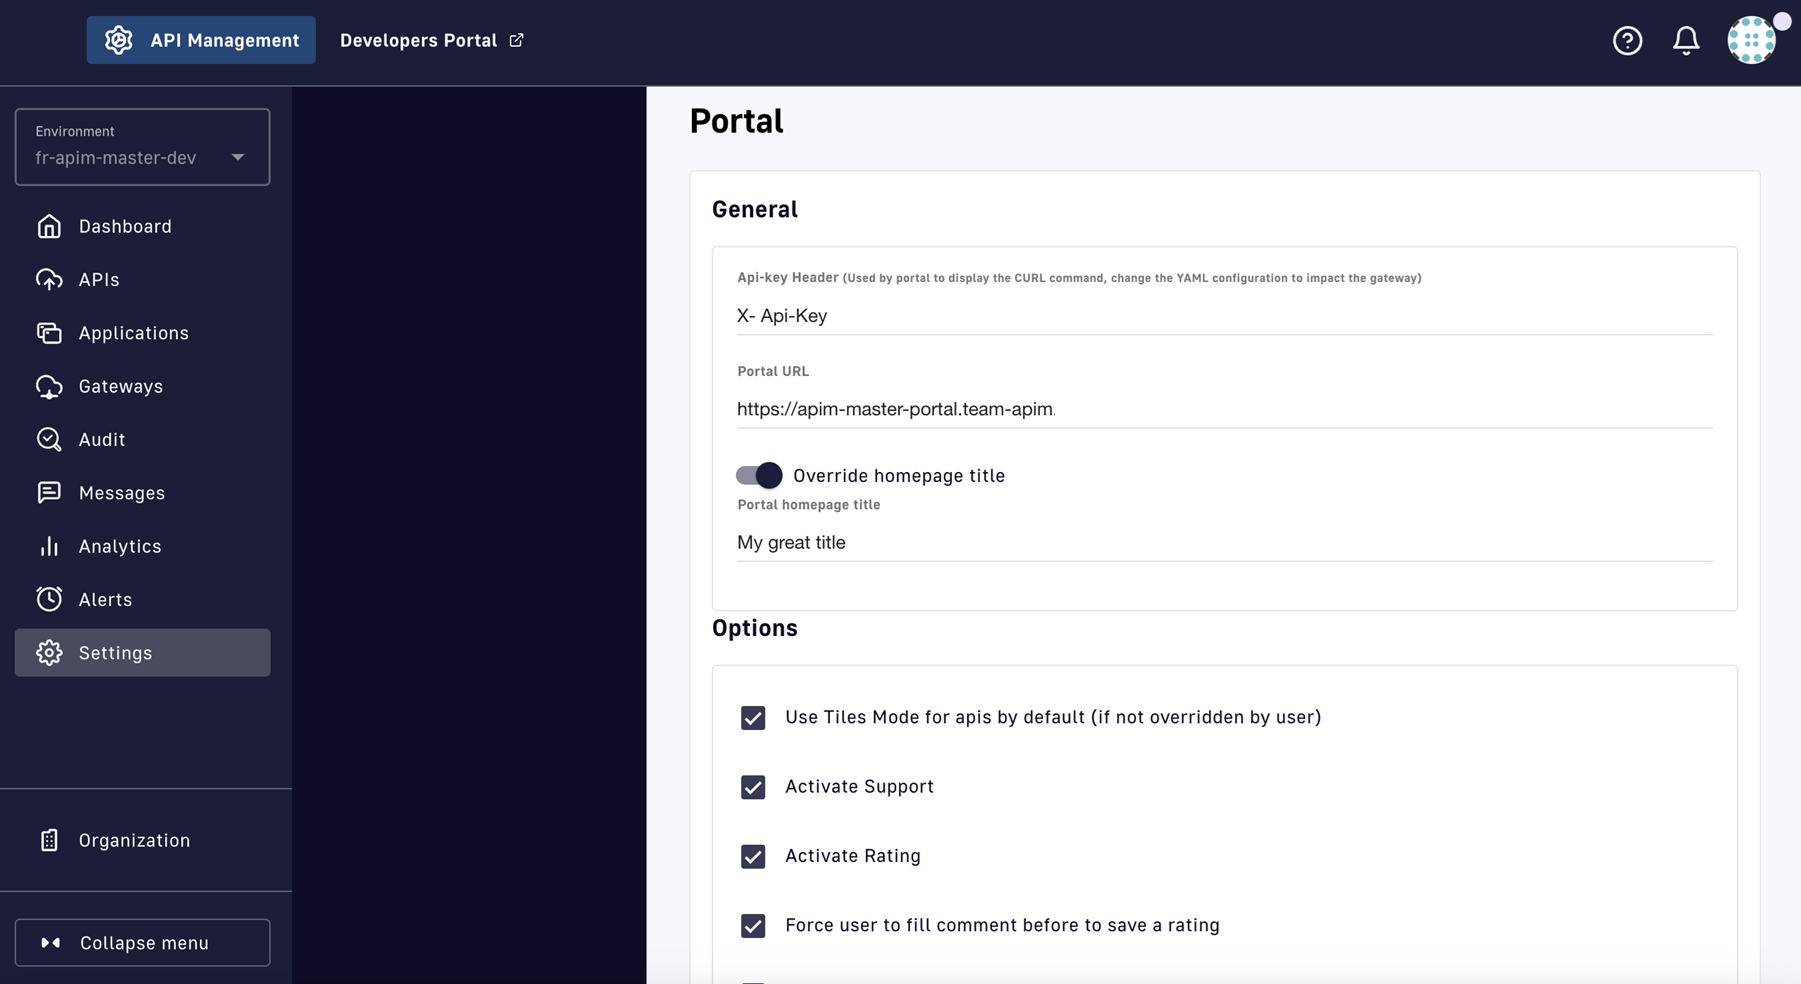
The general settings of the Developer Portal can be overridden with the DSAPI.yaml file. For more information about the DSAPI.yaml file, see the APIM Configuration documentation.
Api-key Header: Modify the api-key header shown in the Developer Portal's CURL commands. This only impacts what is displayed in the Developer Portal's UI. You must modify the DSAPI.yaml file to change how the Gateway handles the api-key header.
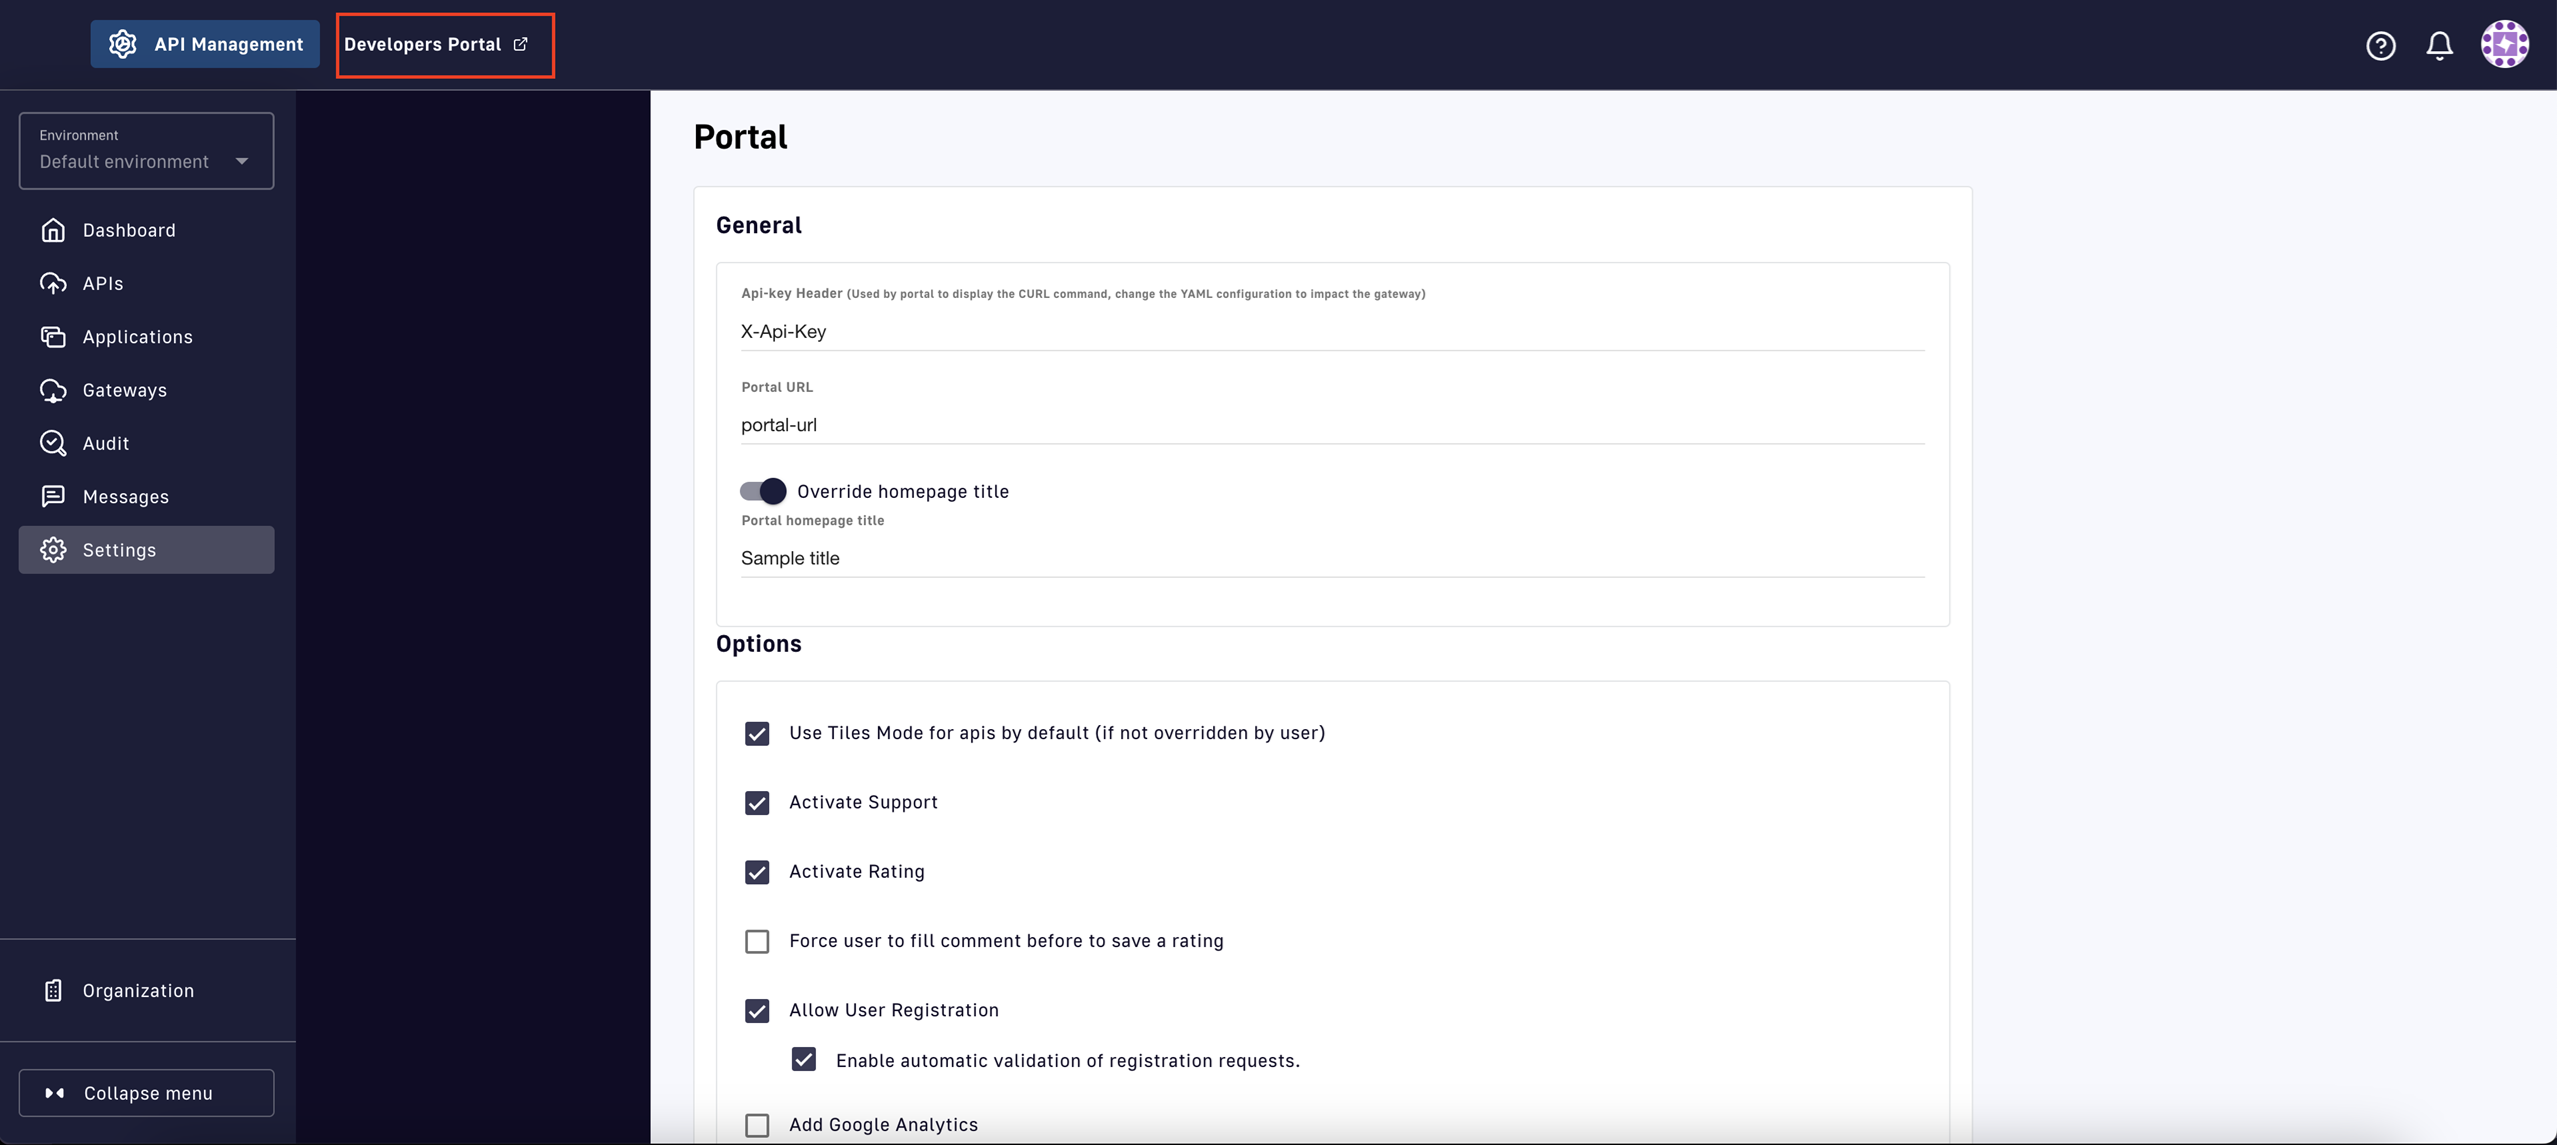
Portal URL: Enter the URL of the Developer Portal. This will add a link to the Developer Portal on the top navigation bar of the Management Console. Additionally, the theme editor will show a live preview of the Developer Portal.
Link to Developer Portal from Management Console
Override homepage title: Toggling to ON allows you to change the Developer Portal title from "Unleash the power of your APIs." to a custom title
Options
Use Tiles Mode: Sets the default view of APIs to tiles as opposed to a list
Activate Support: Adds a Contact and Tickets tab to each API. Email must be configured per the Email configuration section to use the contact form.
Activate Rating: Allow API consumers to leave written reviews and ratings
Force user to fill comment: Requires all subscription requests to include a comment
Allow User Registration: Allow API consumers to create an account from the Developer Portal. Email must be configured per the Email configuration section to enable registration.
Enable automatic validation: Automatically approve all accounts created on the Developer Portal
Add Google Analytics: Add a Google Analytics tracking ID to the Developer Portal
Allow Upload Images: Allows documentation owners to attach images as additional resources
Max size upload file (bytes): Controls the size of images that documentation owners are allowed to attach
OpenAPI Viewers: Choose a viewer to display your API documentation
Schedulers: Configure the frequency with which the Developer Portal runs background tasks such as syncing data and sending/receiving notifications
(v2 APIs only) Documentation URL: Set the URL shown at the end of the v2 API creation flow
Documentation URL setting for v2 API creation flow
APIM Developer Portal
Configuration file
The configuration file for APIM Portal is assets\config.json. The default configuration is shown below:
The only mandatory value in config.json file is baseURL, which describes the location of the APIM API Portal endpoint. You must set this value for APIM Portal to send requests to the endpoint.
Creating and maintaining applications with DSAPI Developer Portal
For more information about creating and maintaing applications, see the following articles:
Creating an application with the DSAPI Developer Portal
Overview
Unless the API has a keyless plan, a consumer must register an application and subscribe to a published API plan to access an API. Applications act on behalf of the user to request tokens, provide user identity information, and retrieve protected resources from remote services and APIs.
Create an application
In the Developer Portal, click on Applications in the header
Create an app
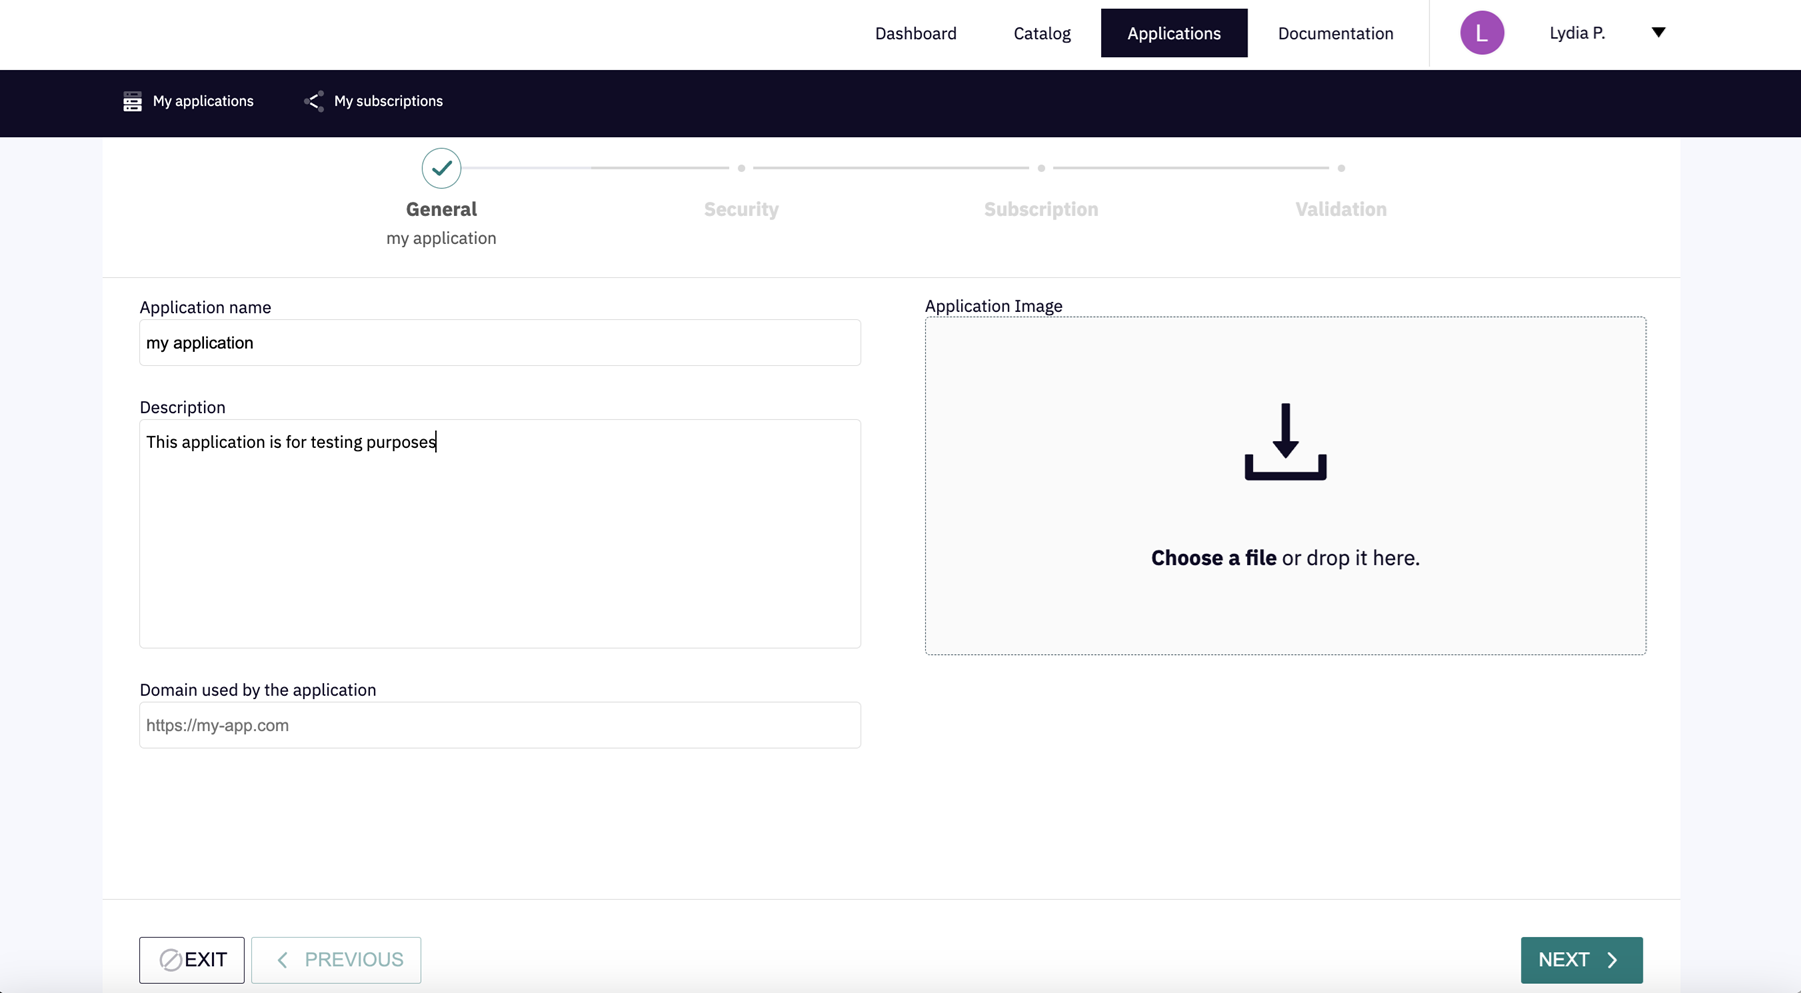
On the General page, specify:
Application name: Give your application a name (required)
Description: Describe the purpose of your application (required)
Domain used by the application: Enter the domain to be used by the application or keep the pre-filled default
(Optional) Application Image: Select an image for your application
General application configuration
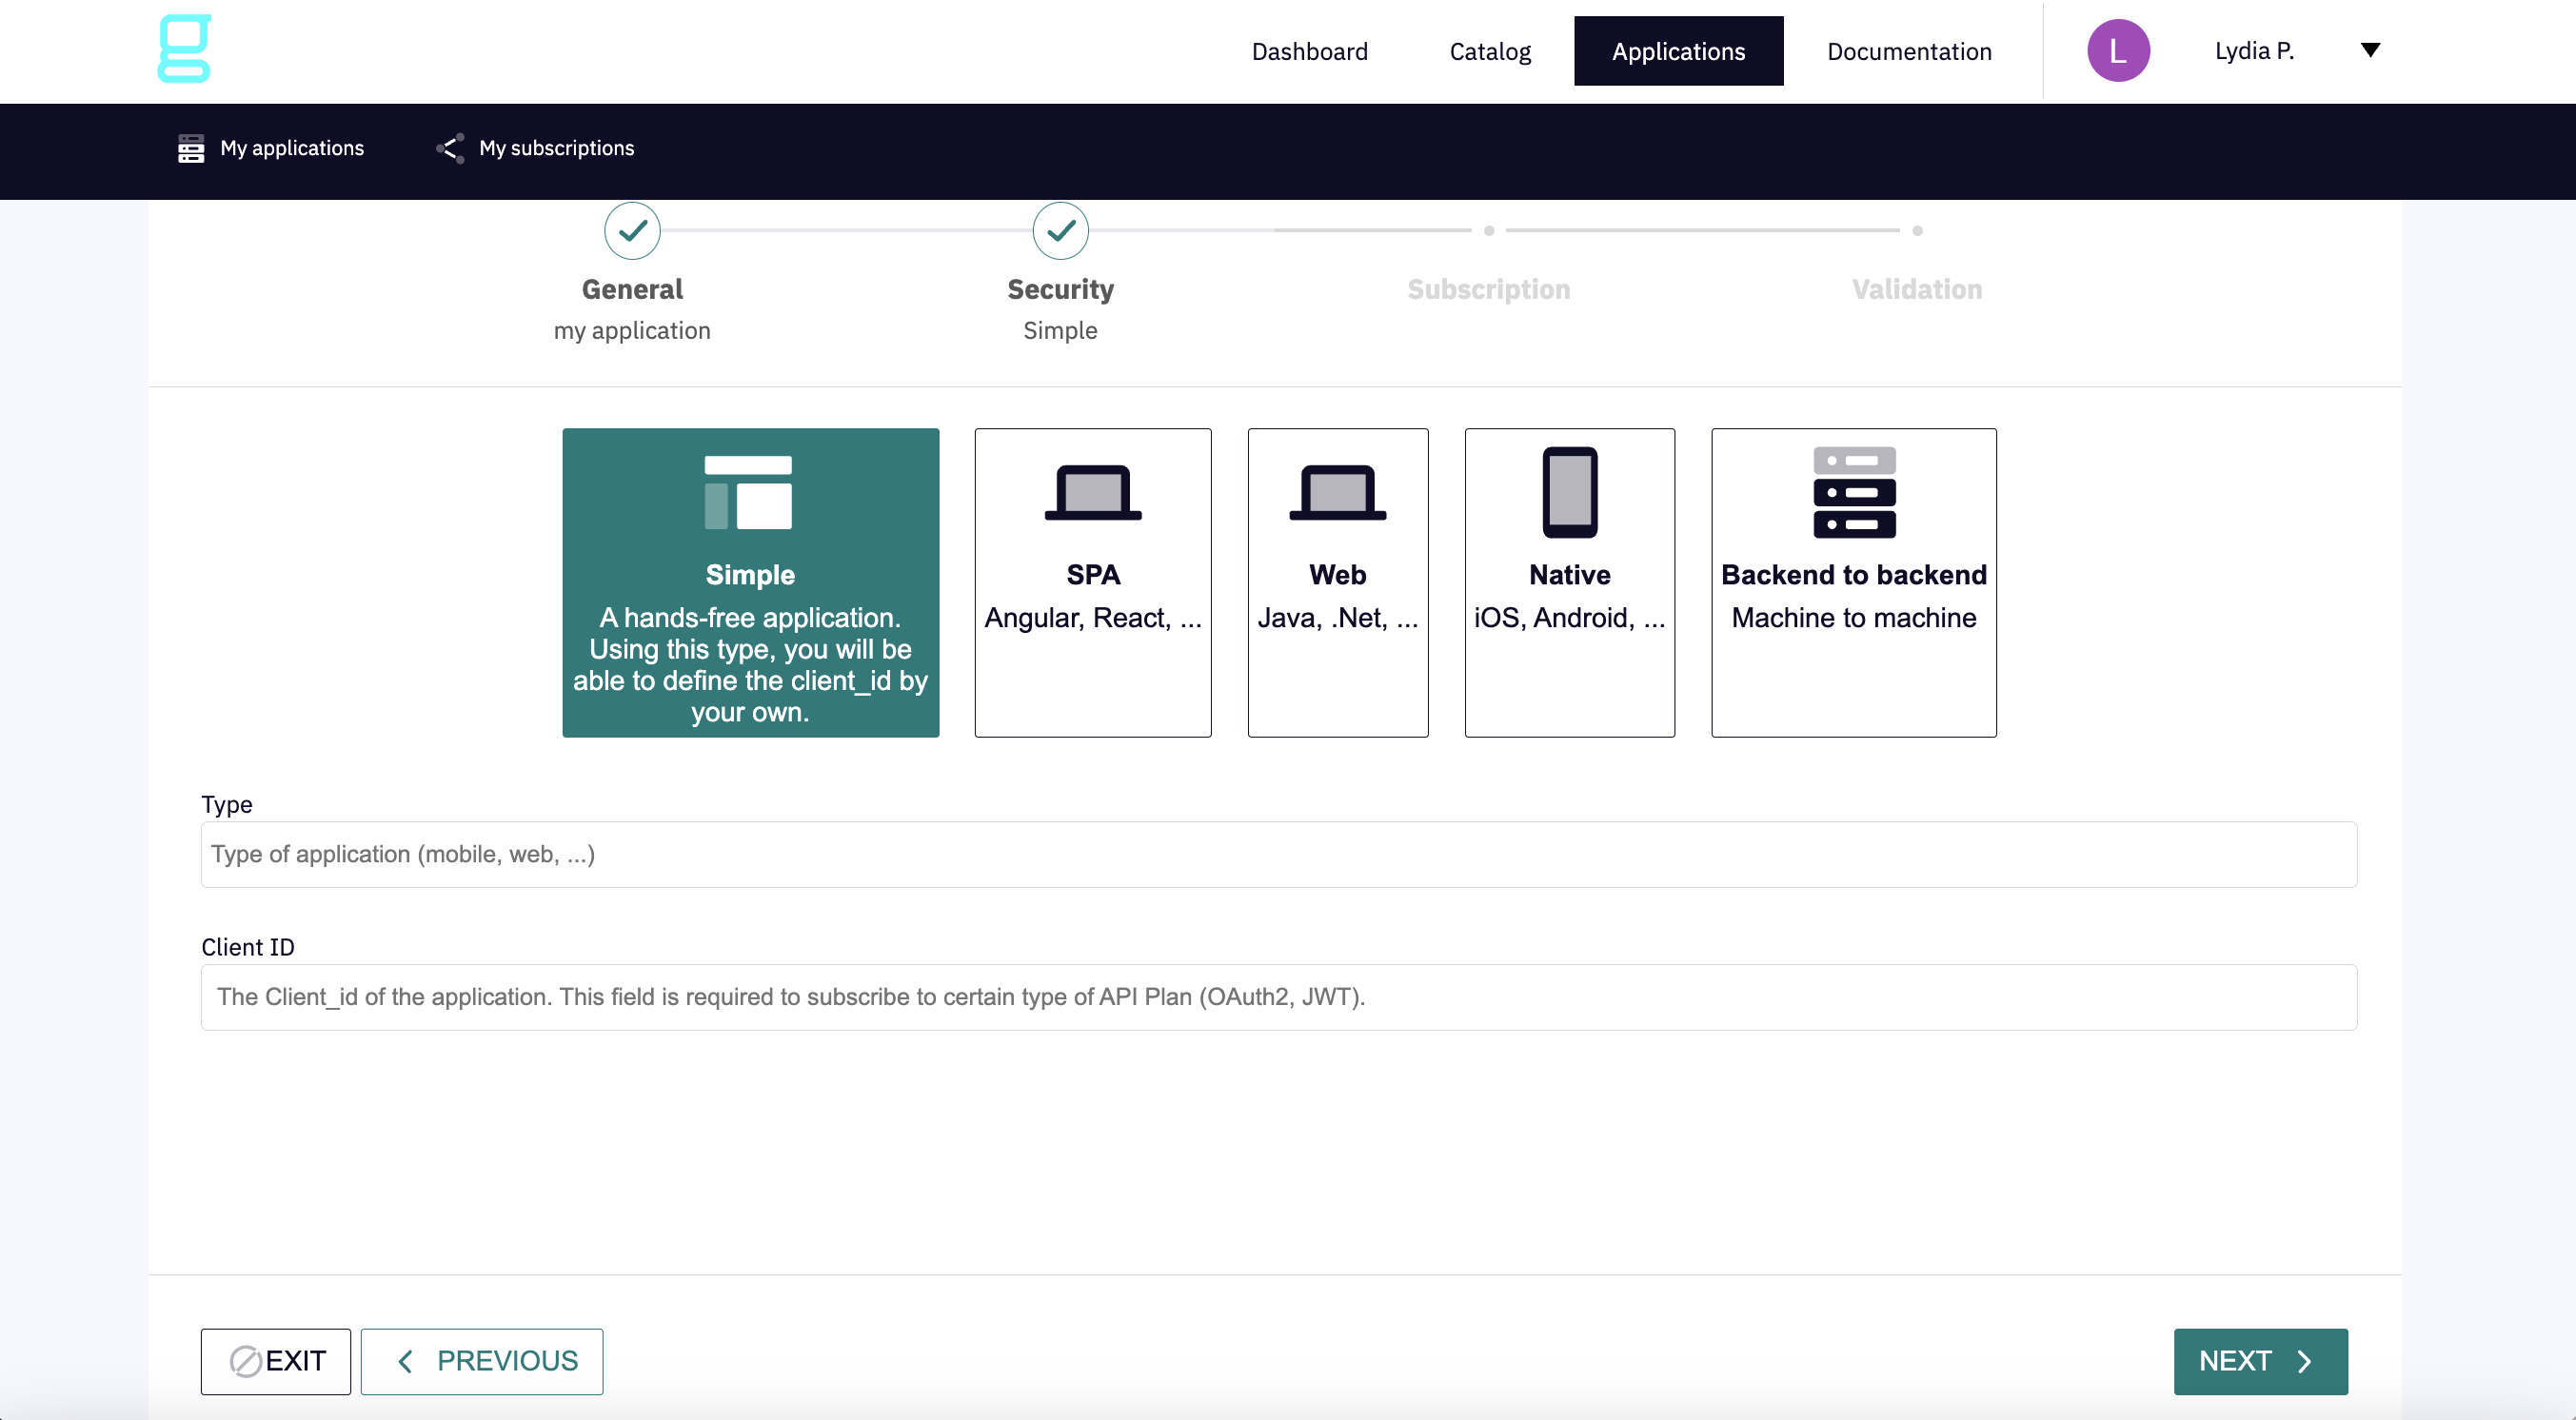
Select the appropriate tile to configure security for the type of software application you're registering your application for. Each application type requires you to set certain parameters.
A Simple application is hands-free. With this application, you have the ability to define the client ID.
Parameters:
Type: Enter the type of application (mobile, web, etc.).
Client ID: Enter the client ID of the application. This field is required to subscribe to certain API plans (OAuth2, JWT).
Configure a Simple application
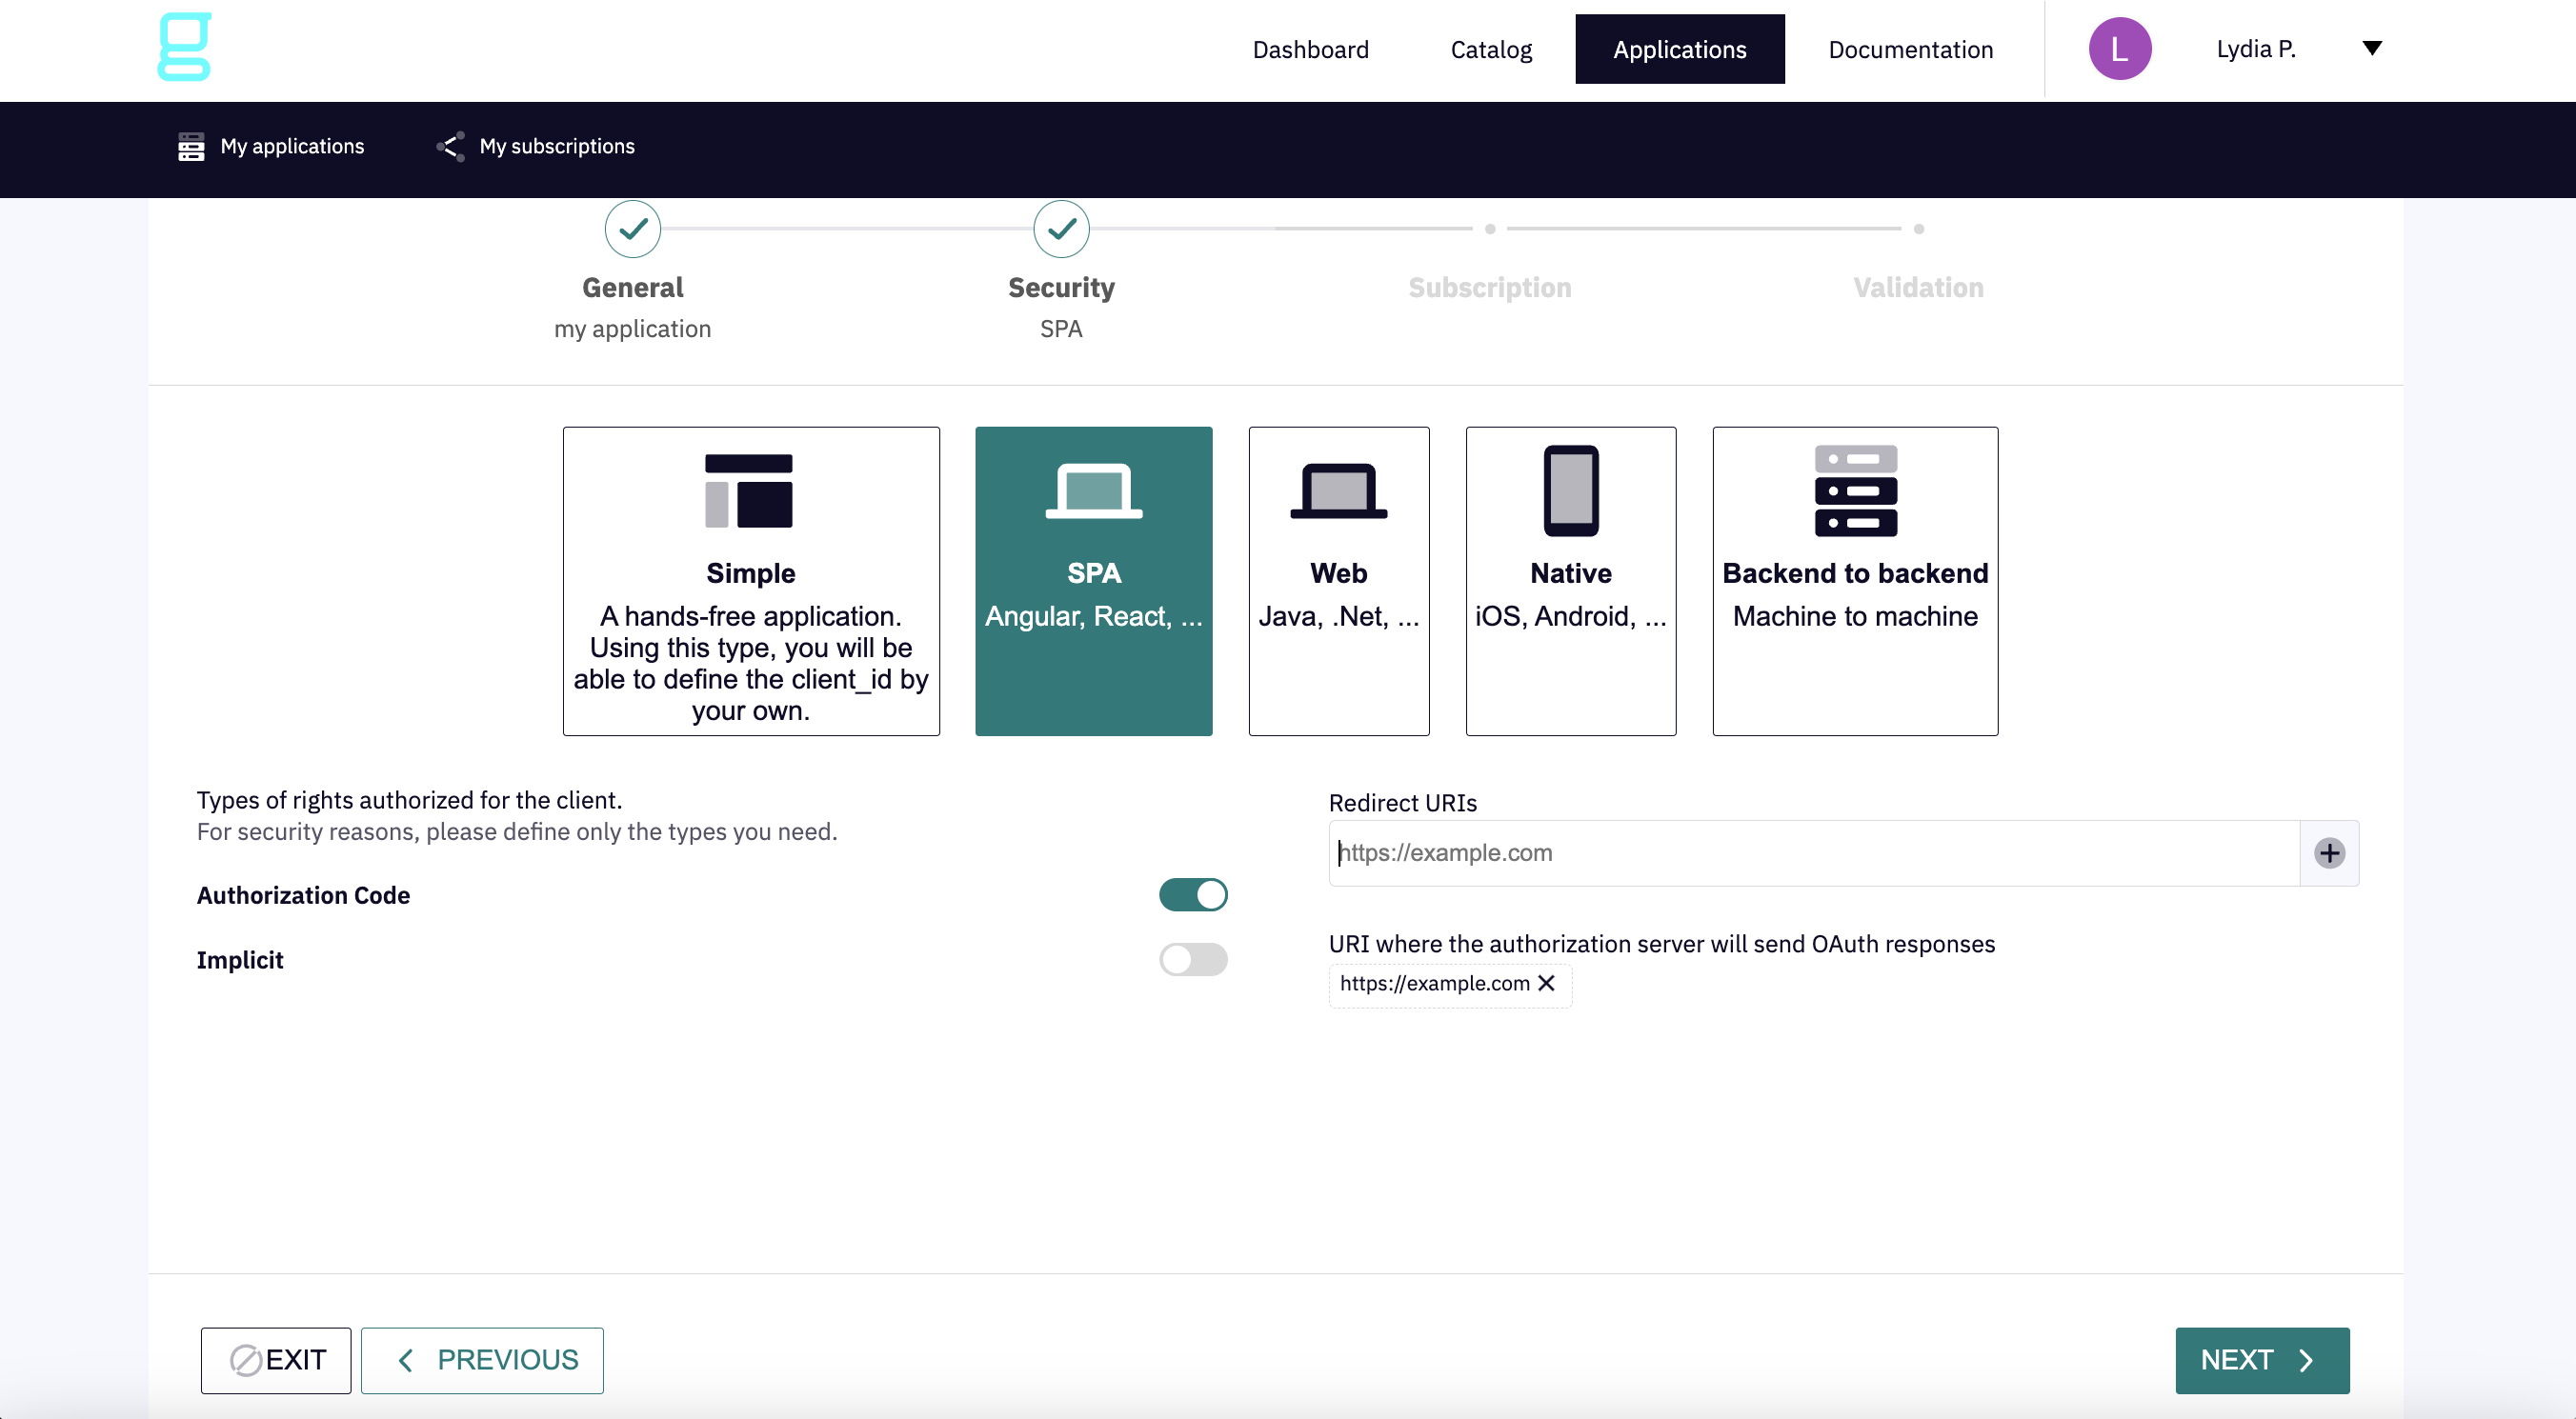
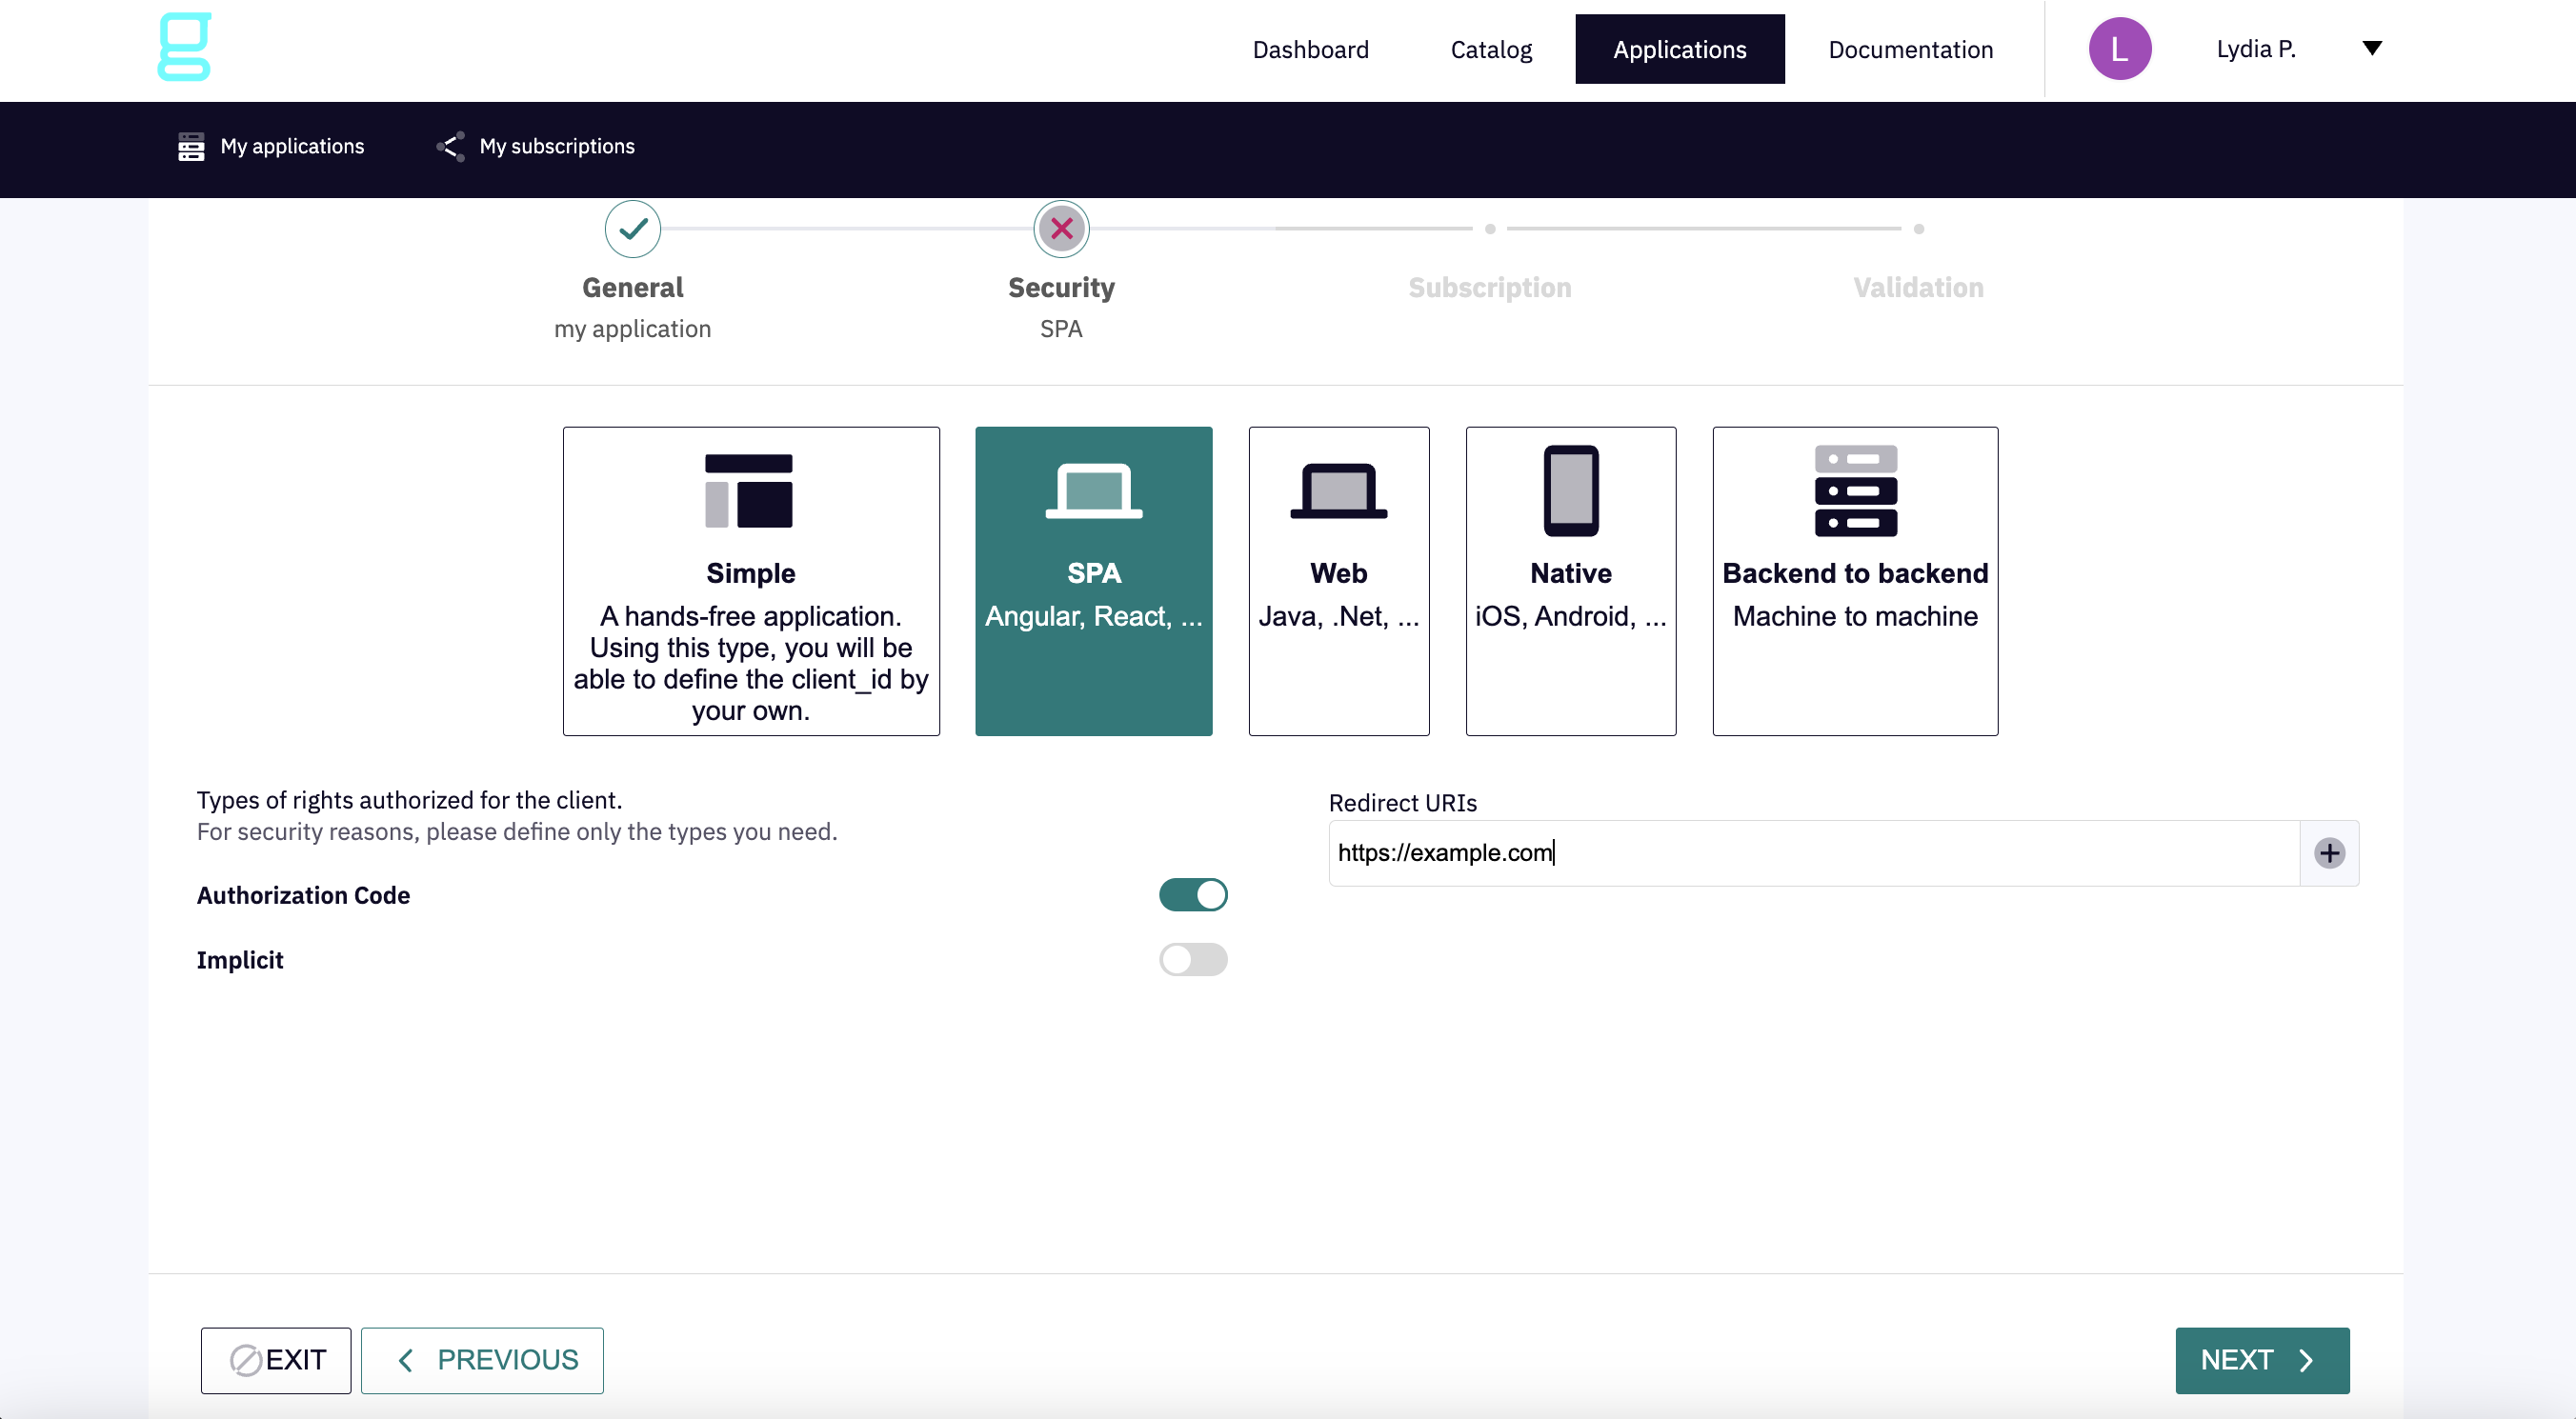
A SPA, or single-page application (Angular, React, etc.), is a web application that performs the majority of the user interface logic in a web browser and uses web APIs to communicate with the web server.
Parameters:
Toggle Authorization Code and Implicit to enable the types of rights authorized for the client. For security, define only the types you need.
Use the + icon to add Redirect URIs where the authorization server will send OAuth responses.
Configure a SPA application
Until you add a Redirect URI, a red "x" will appear in lieu of the green checkmark above Security:
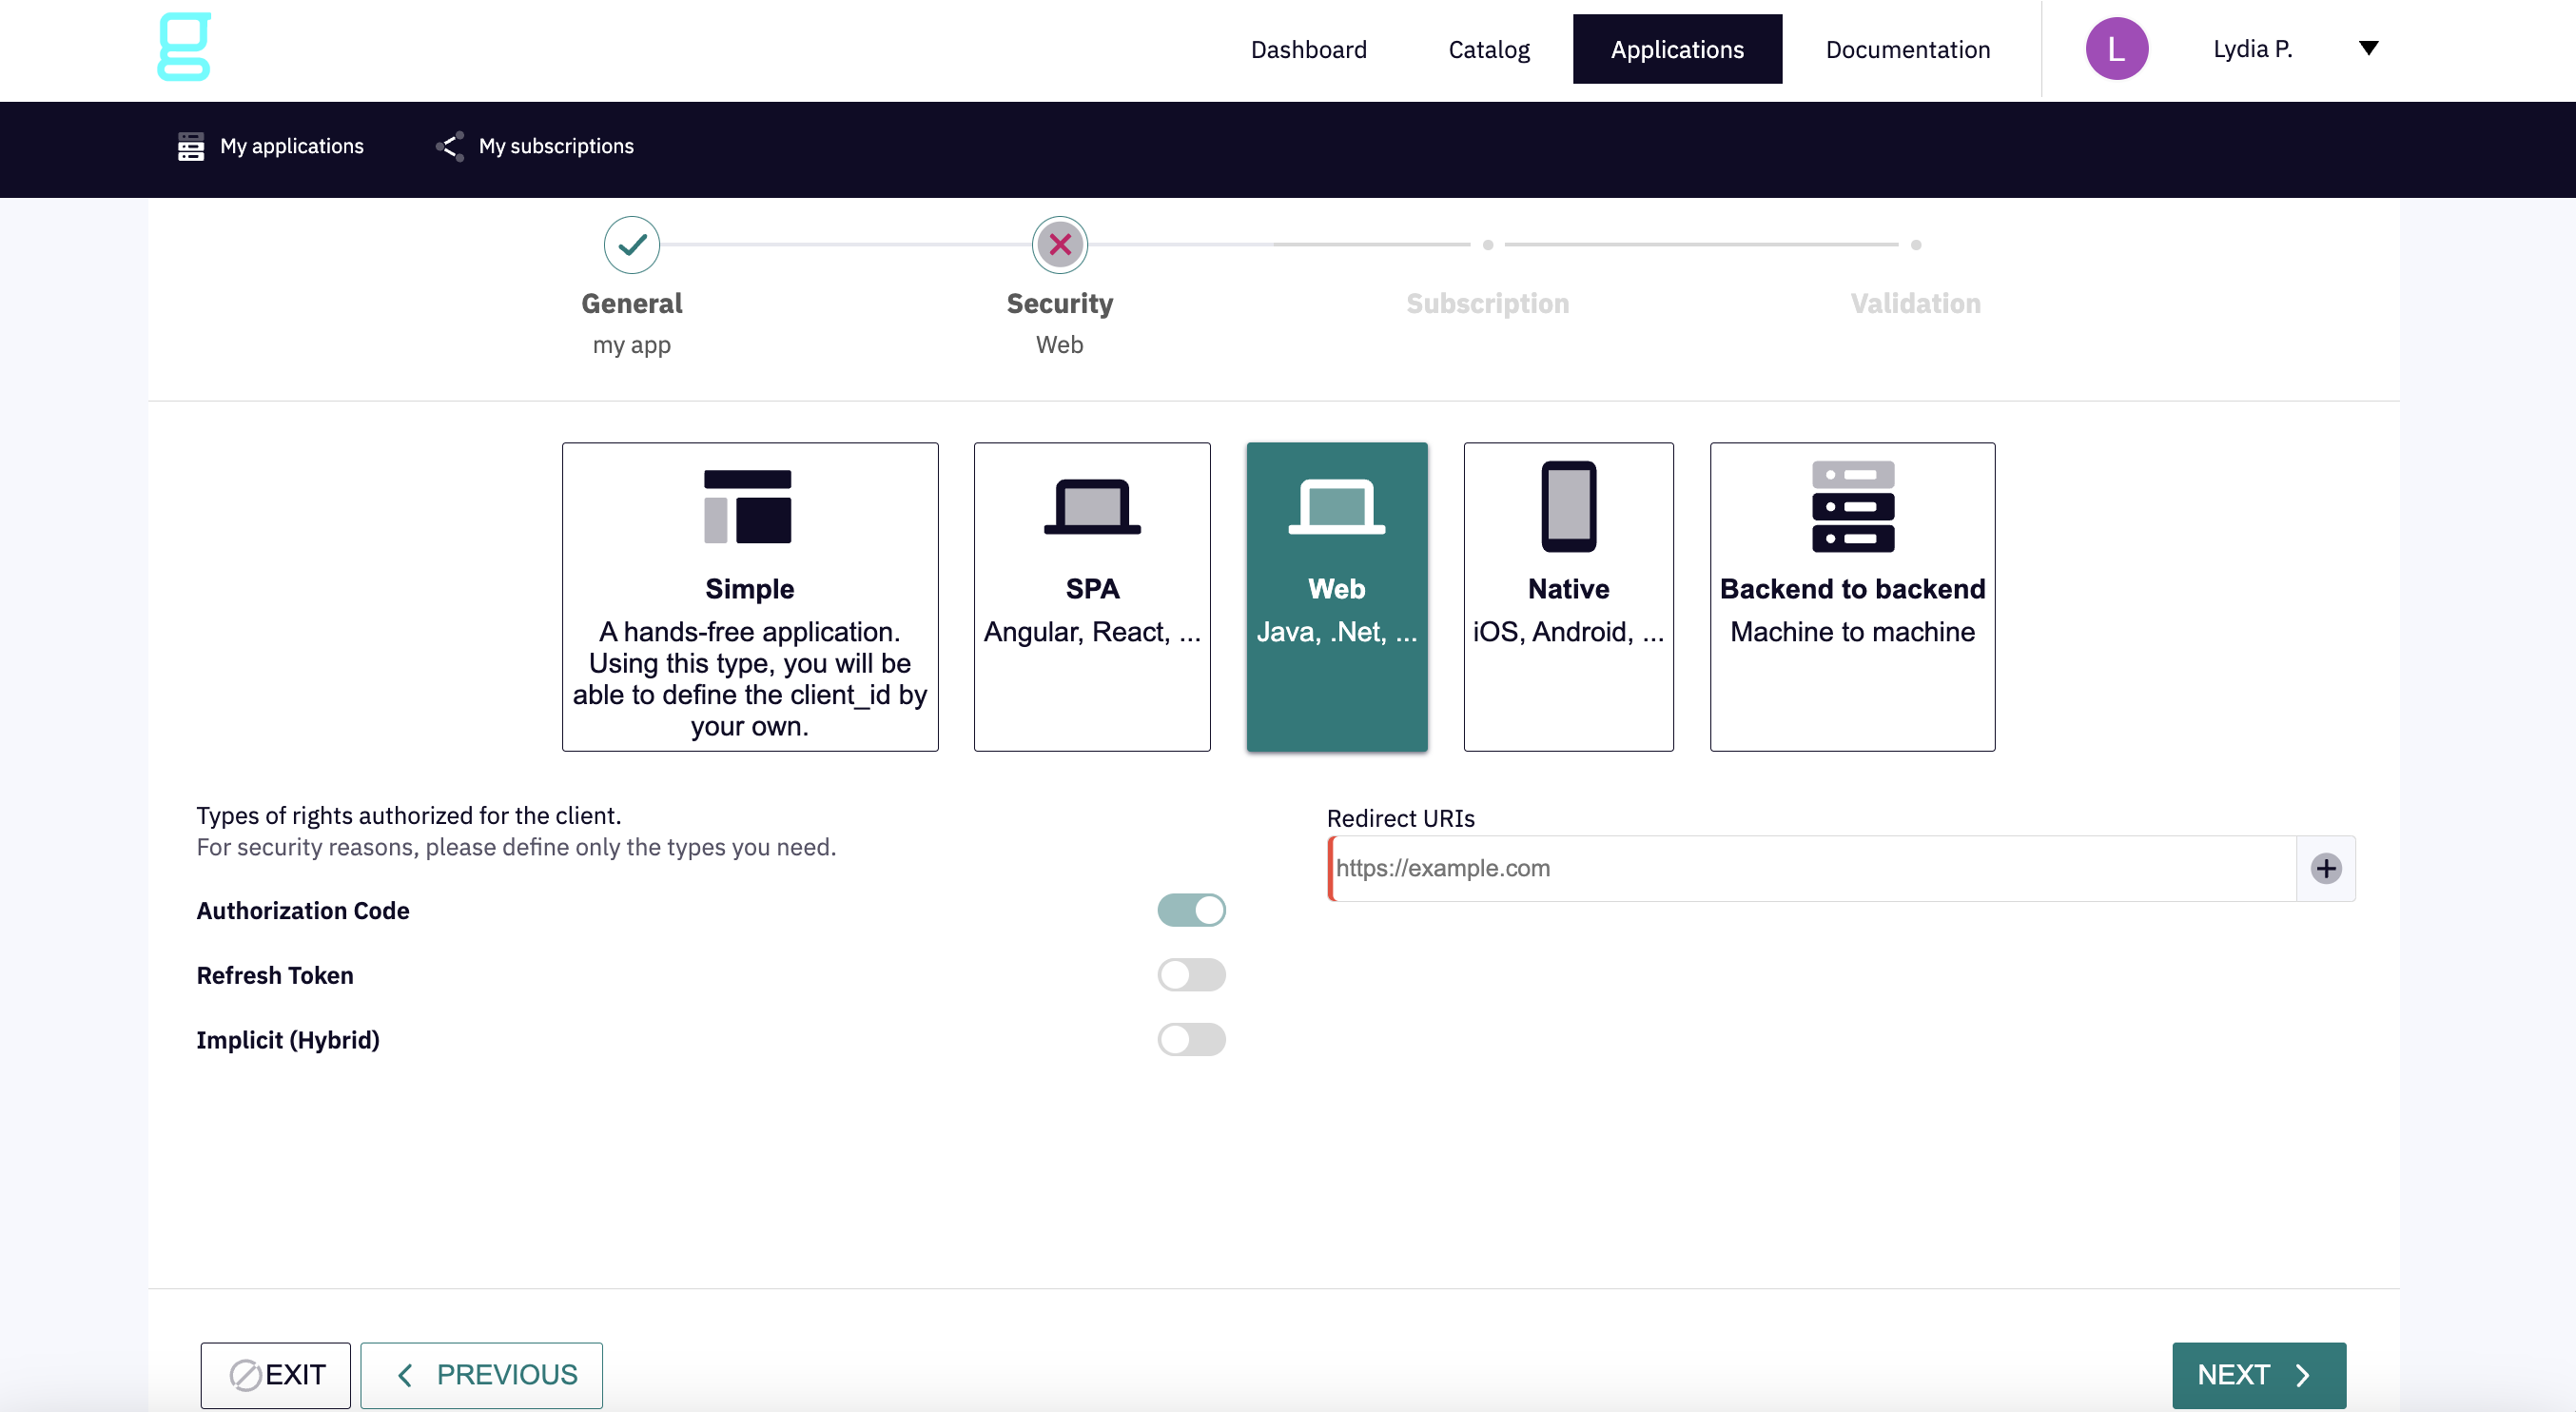
A traditional Web application (Java, .Net, etc.) performs the majority of the application logic on the server.
Parameters:
Toggle Authorization Code, Refresh Token, and Implicit (Hybrid) to enable the types of rights authorized for the client. For security, define only the types you need.
Use the + icon to add Redirect URIs where the authorization server will send OAuth responses.
Configure a Web application
Once you add a Redirect URI, a green checkmark will appear in lieu of the red "x" above Security.
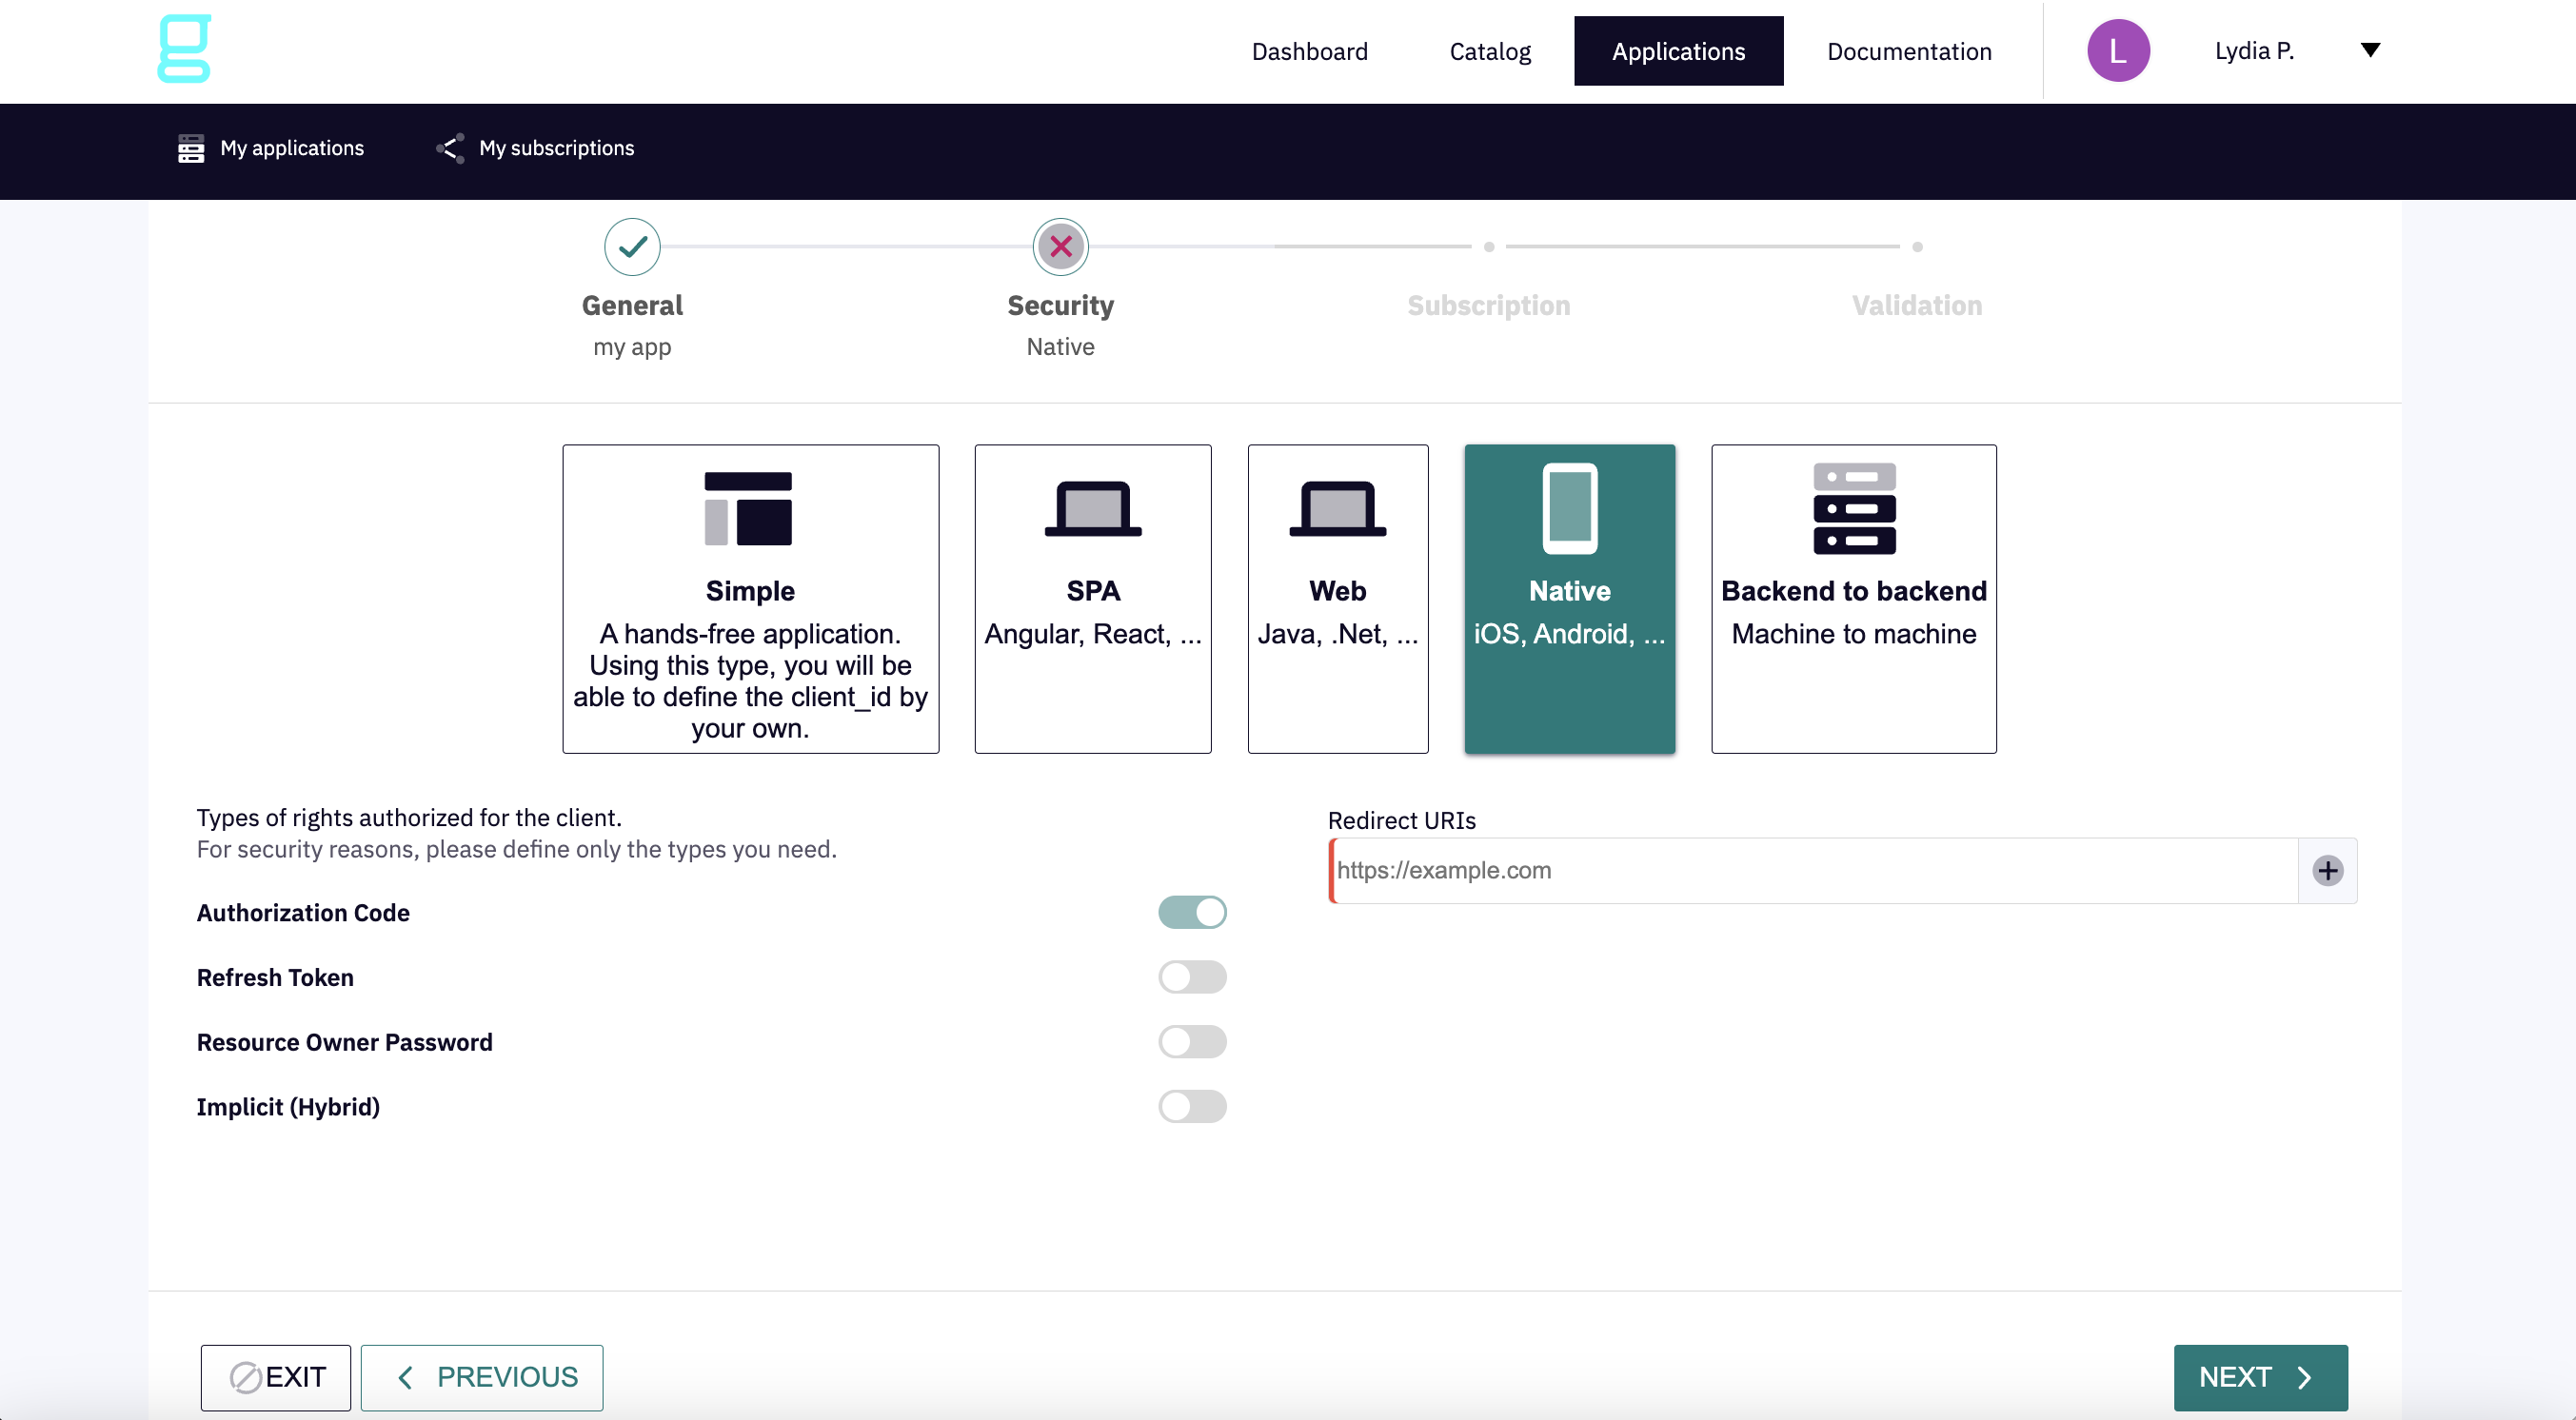
A Native application (iOS, Android, etc.) can be installed directly on a mobile device.
Parameters:
Toggle Authorization Code, Refresh Token, Resource Owner Password, and Implicit (Hybrid) to enable the types of rights authorized for the client. For security, define only the types you need.
Use the + icon to add Redirect URIs where the authorization server will send OAuth responses.
Configure a Native application
Once you add a Redirect URI, a green checkmark will appear in lieu of the red "x" above Security.
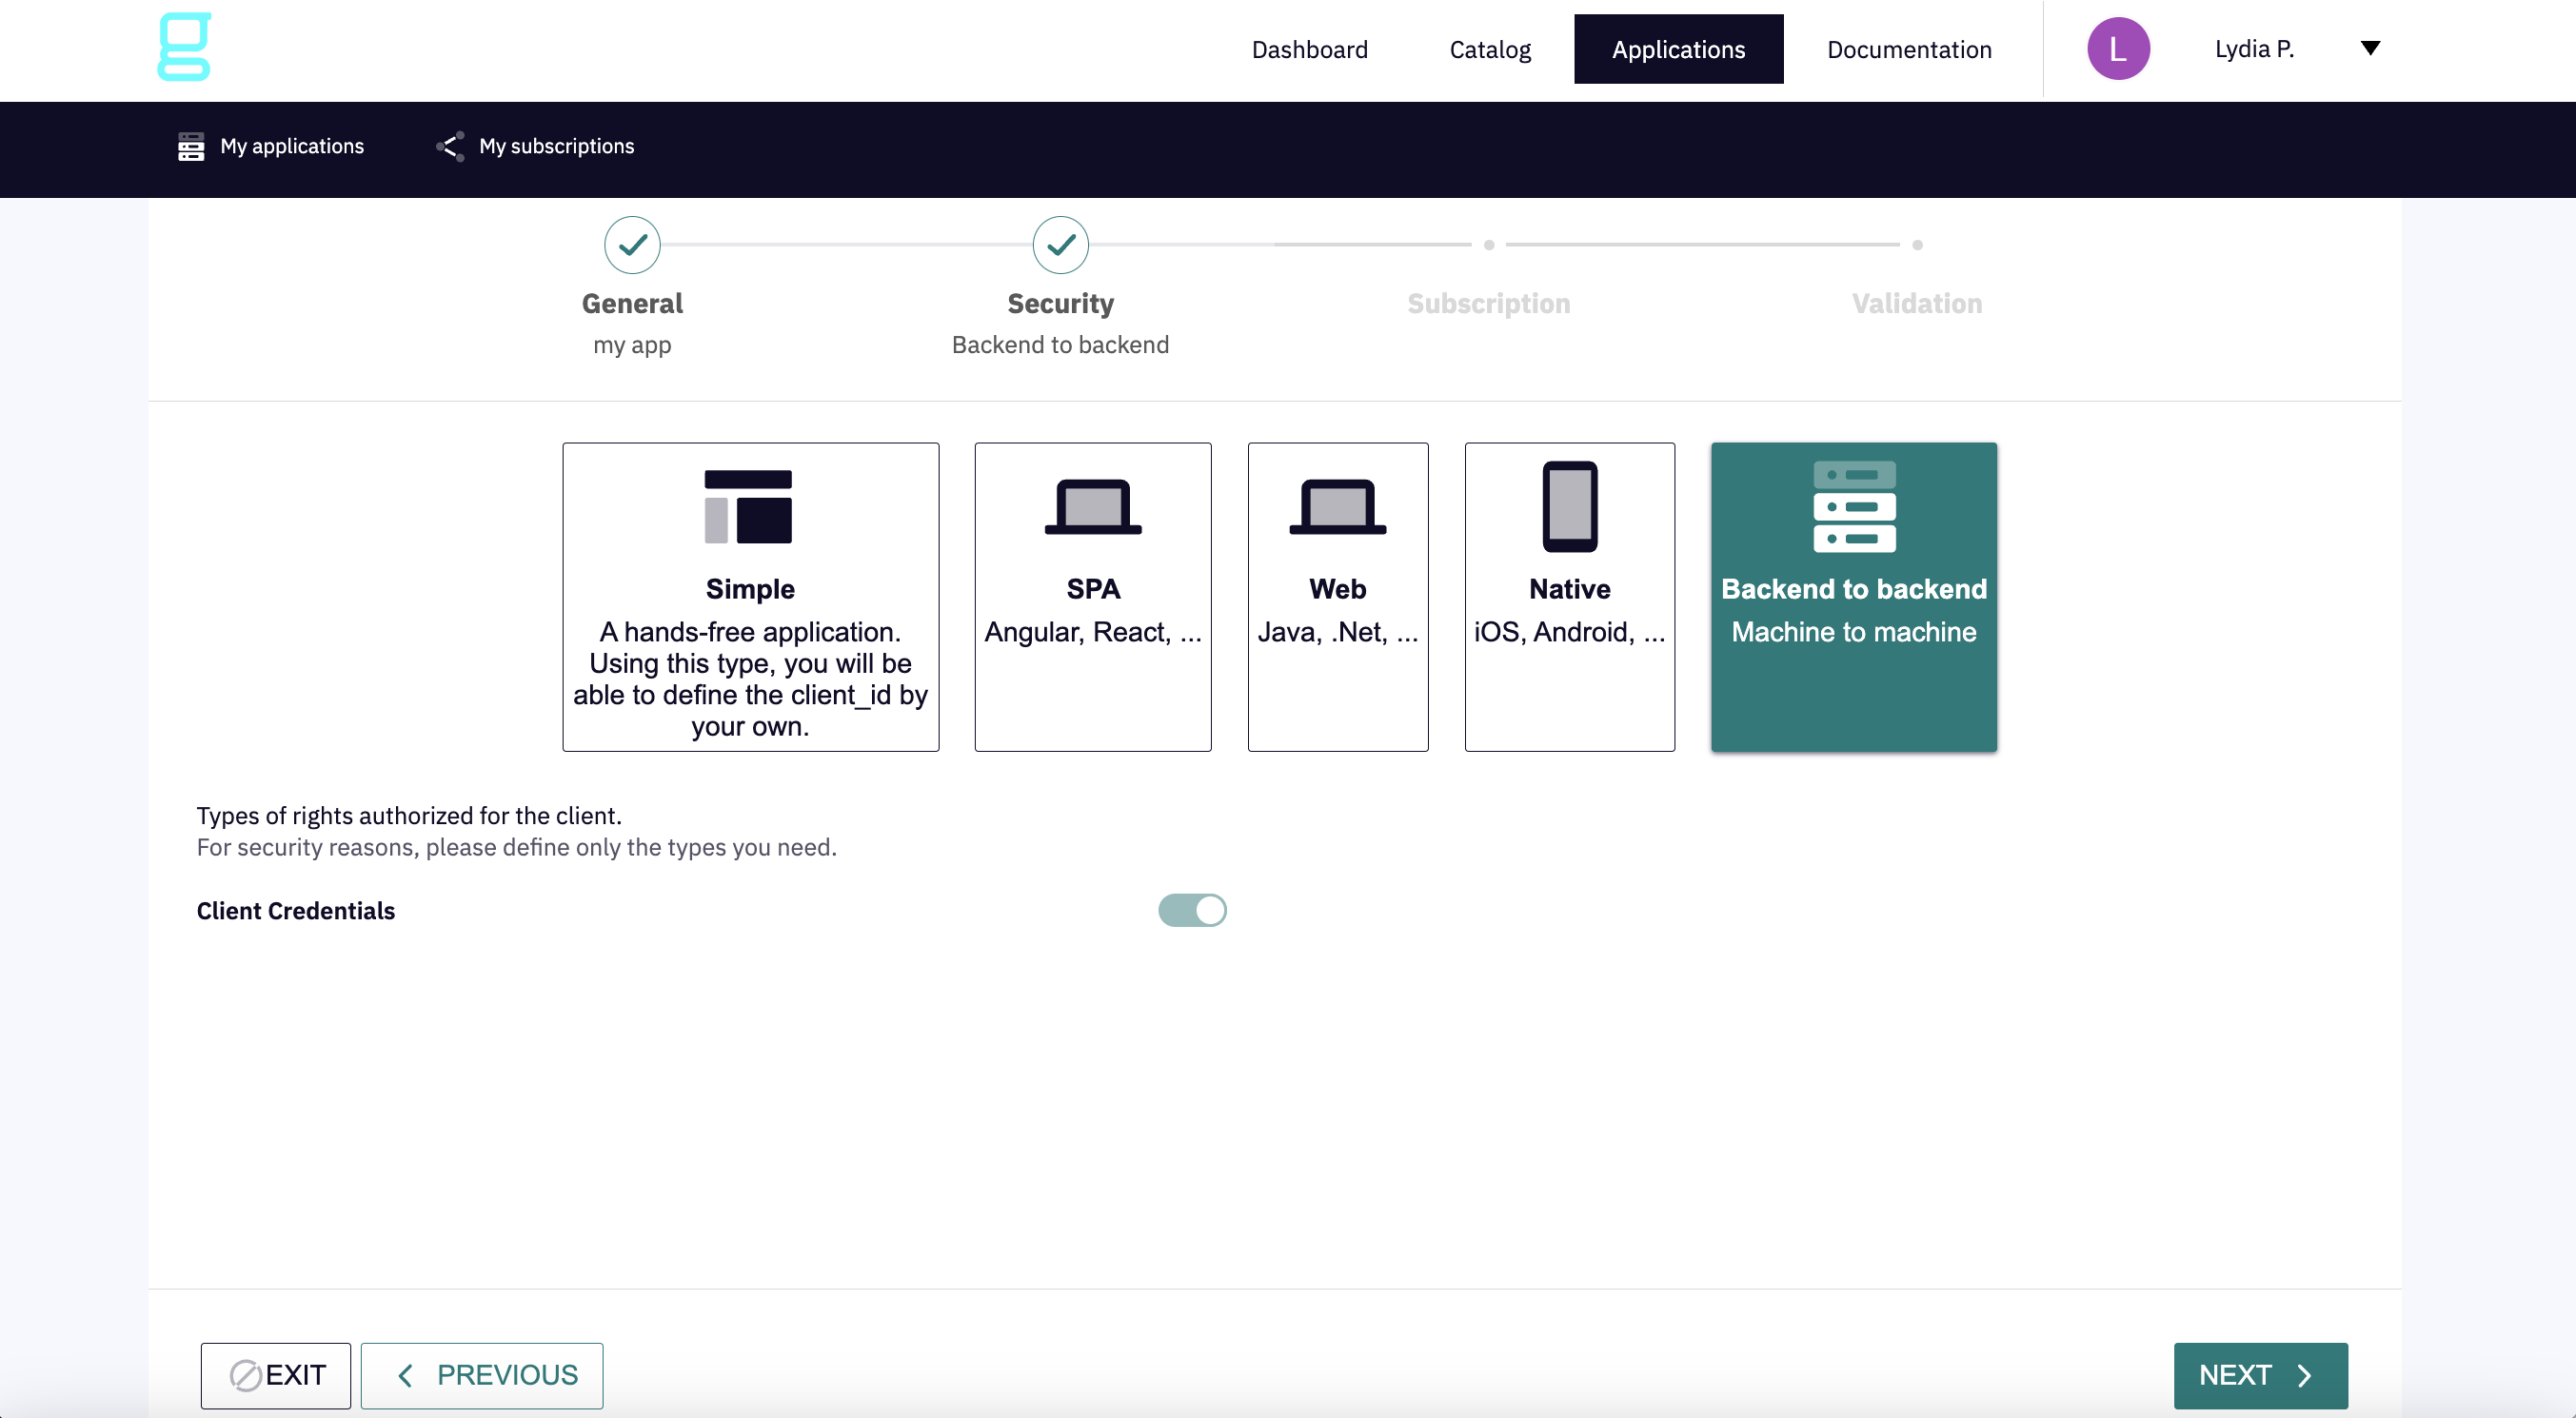
A Backend to backend application is machine to machine and does not require a user interface.
Parameters:
Toggle Client Credentials to enable the types of rights authorized for the client. For security, define only the types you need.
Configure a Backend to backend application
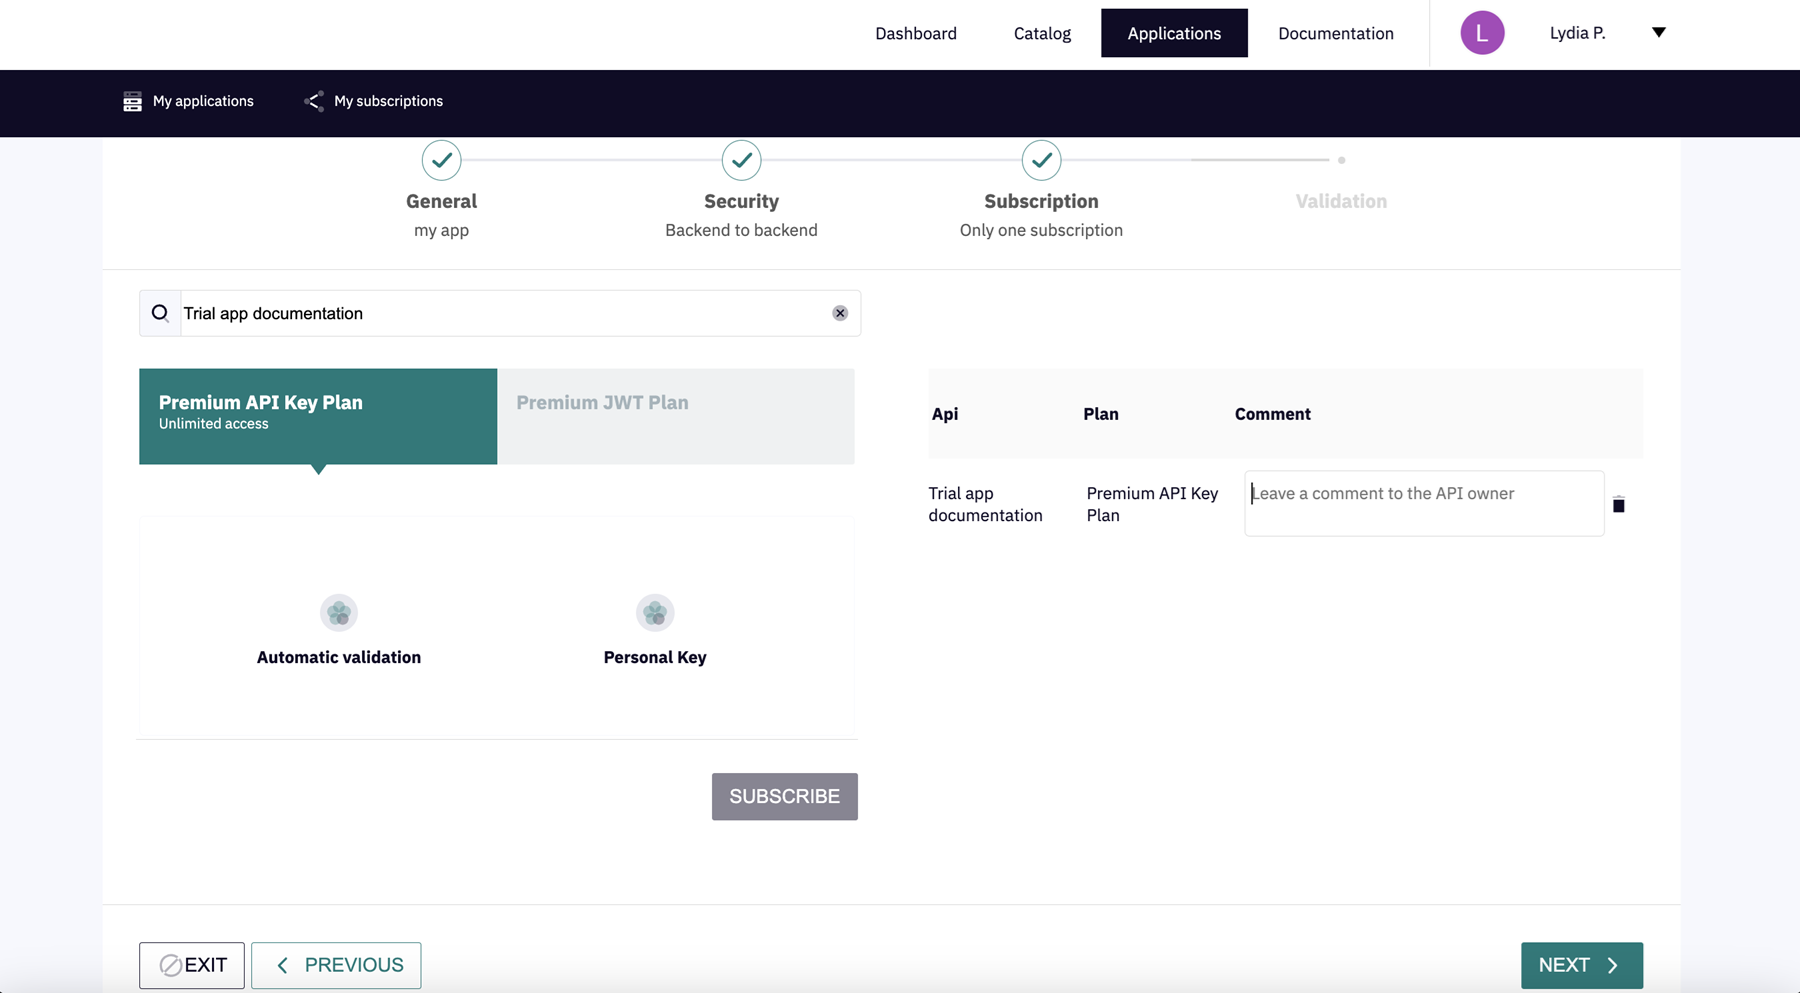
Use the search field to find an API for your application, then subscribe to it. Optionally, you can leave a comment for the API owner.
Subscribe to an API
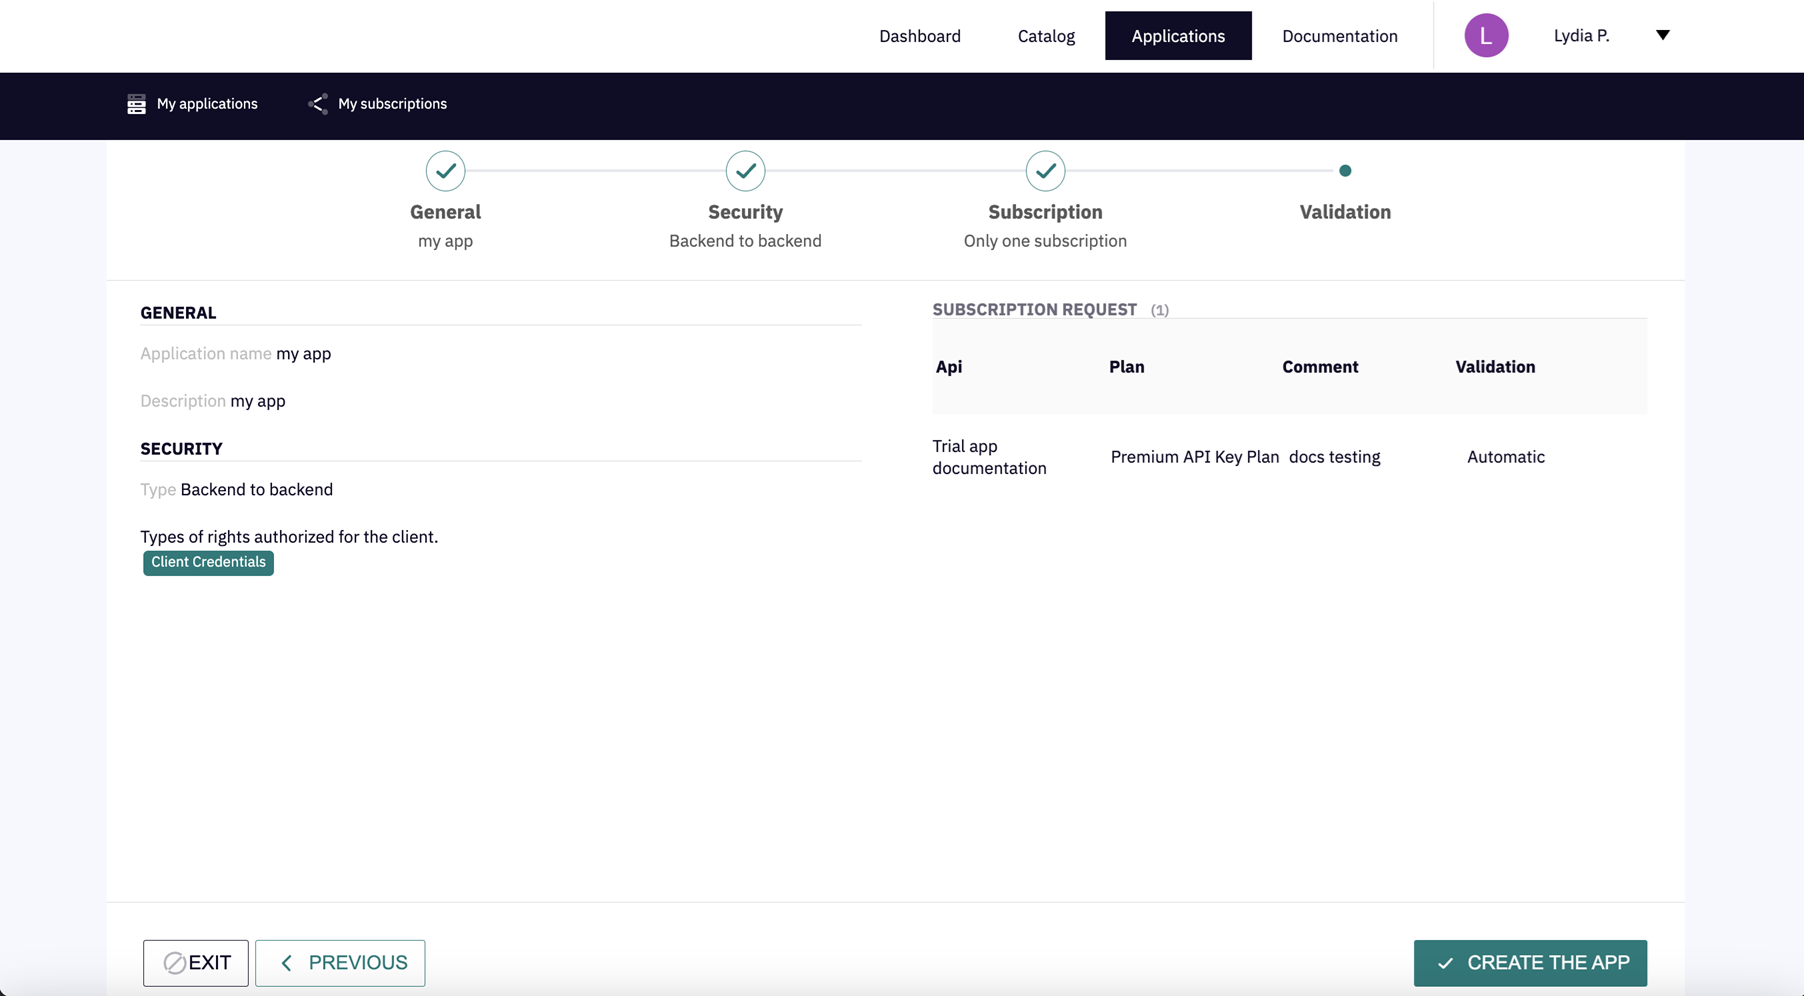
Review the information you entered, then click CREATE THE APP:
You have successfully created an application!
Application options
Once you've created an application, you can click on it and use the header options to review and edit the details of its configuration and usage:
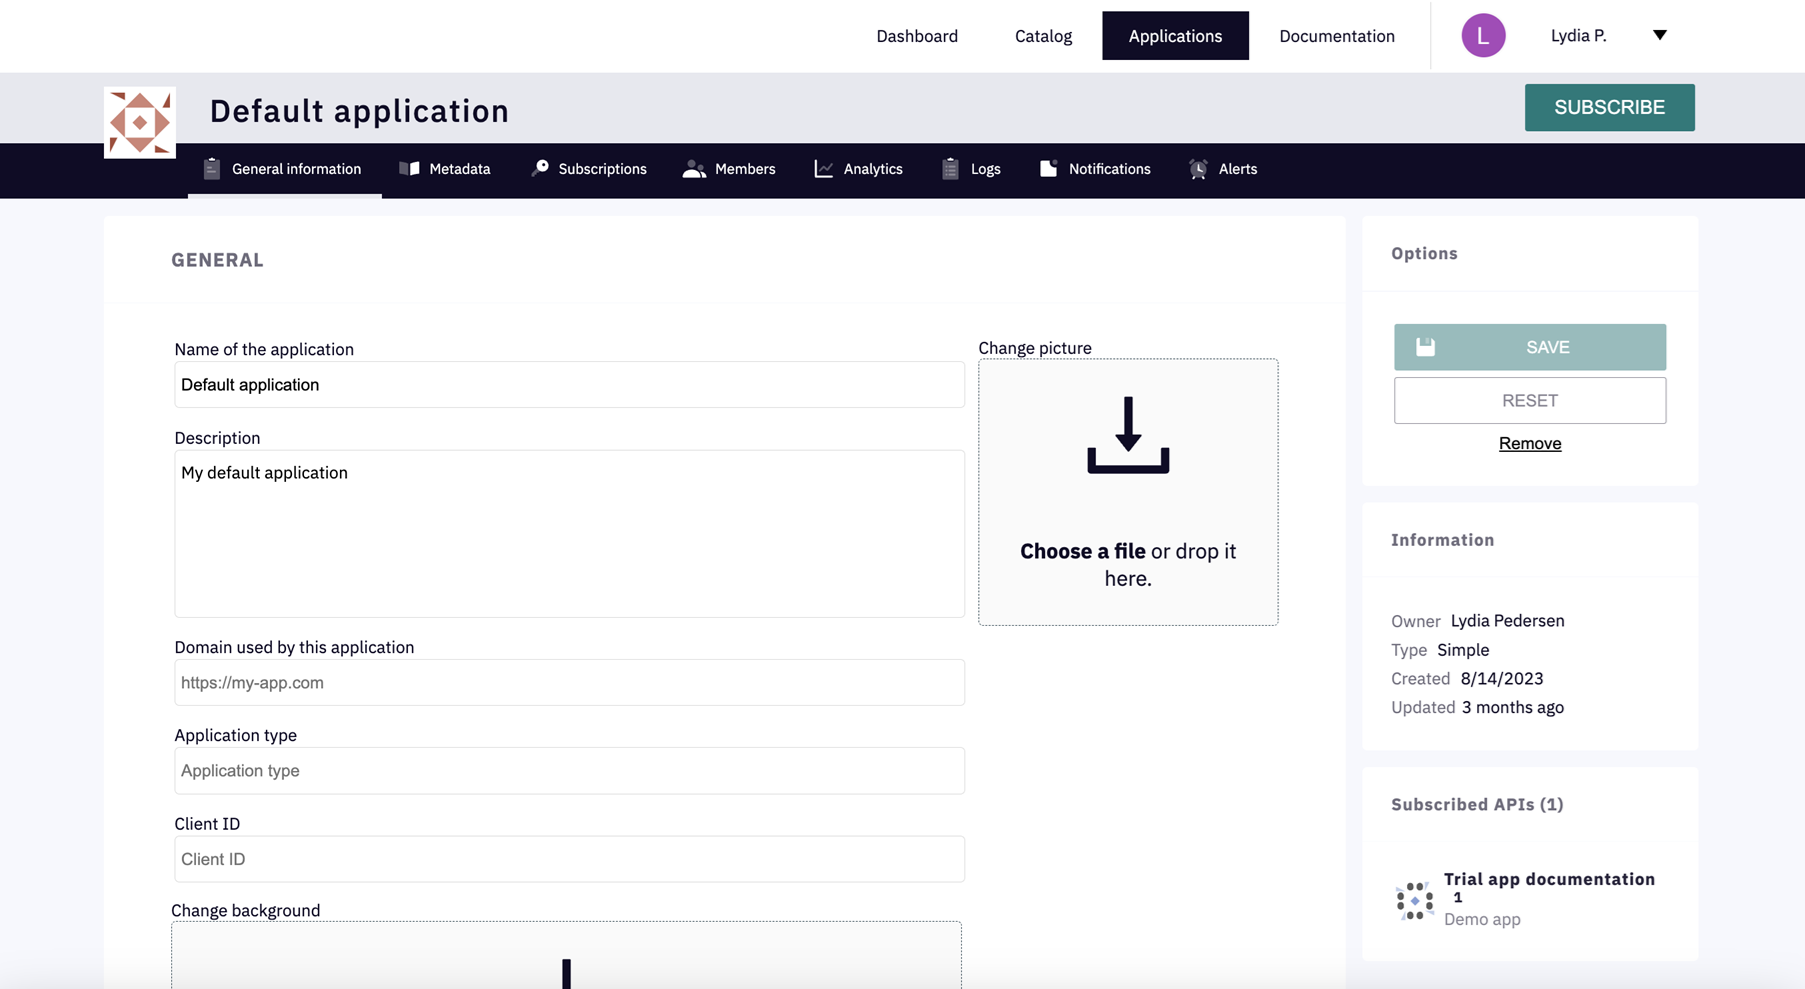
General information: View and/or modify the application's configuration.
General information
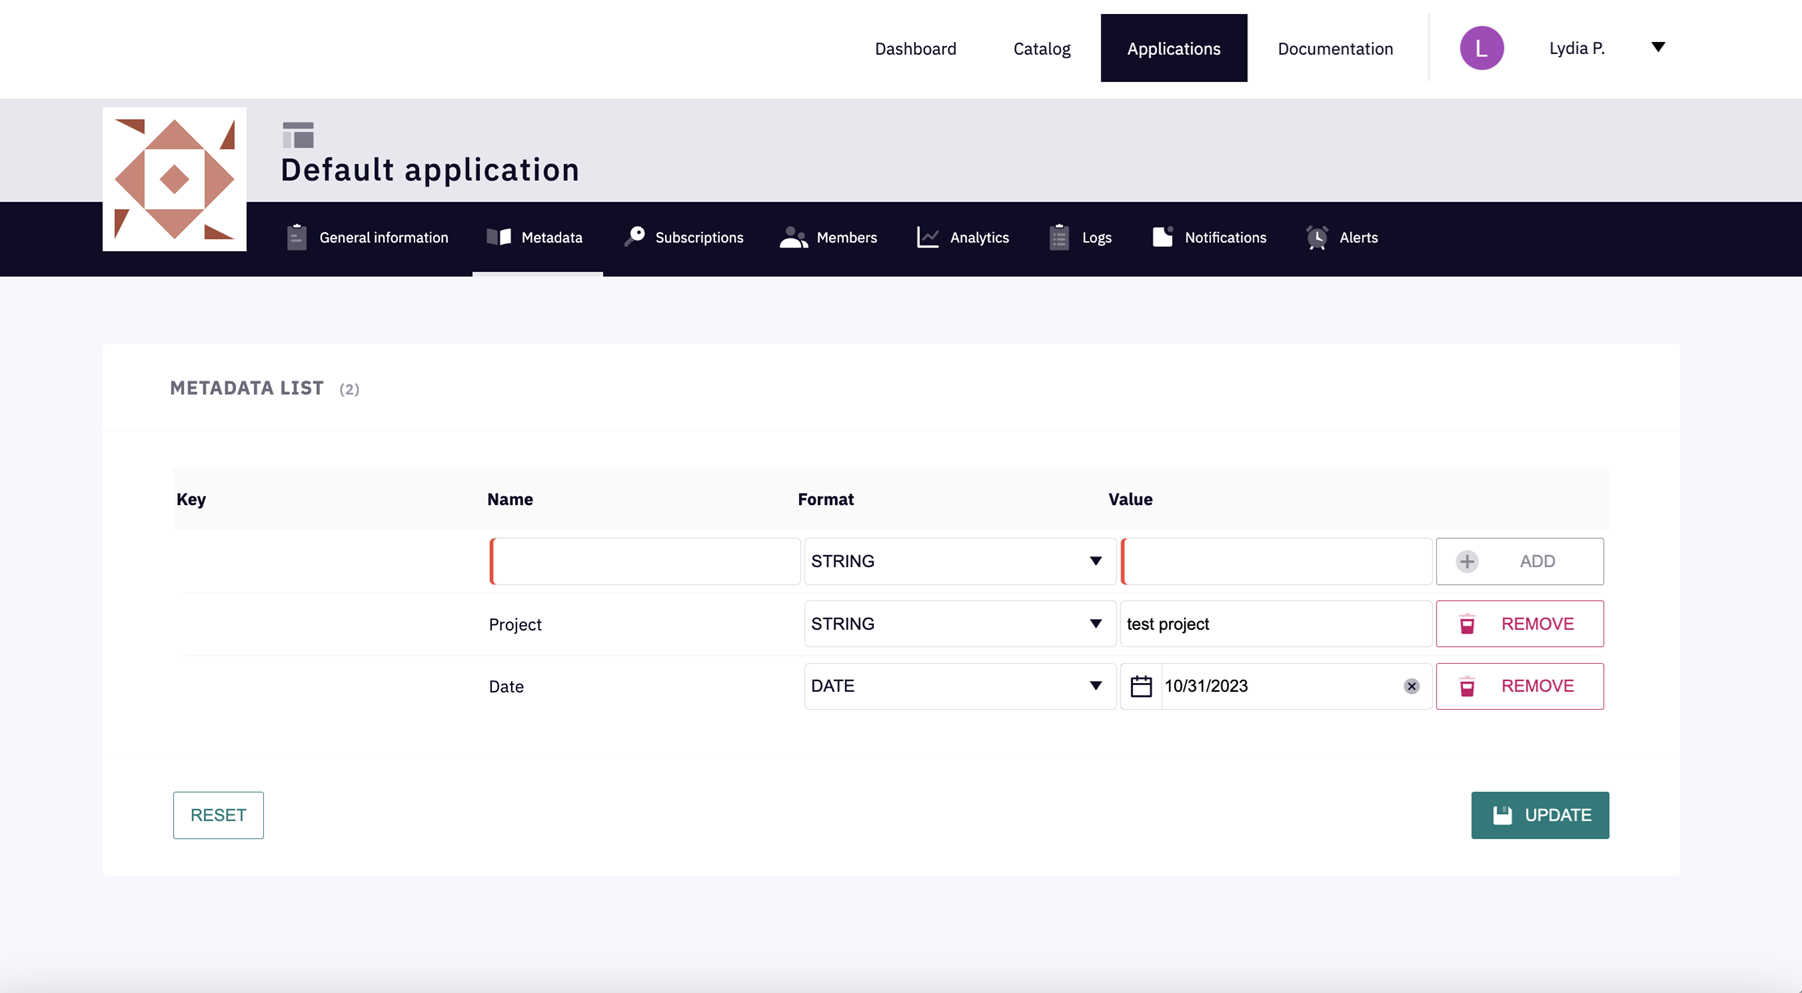
Metadata: Enter a Name and Value and use the Format selector to define metadata for your application. Use the ADD and UPDATE buttons to modify your entries.
Metadata
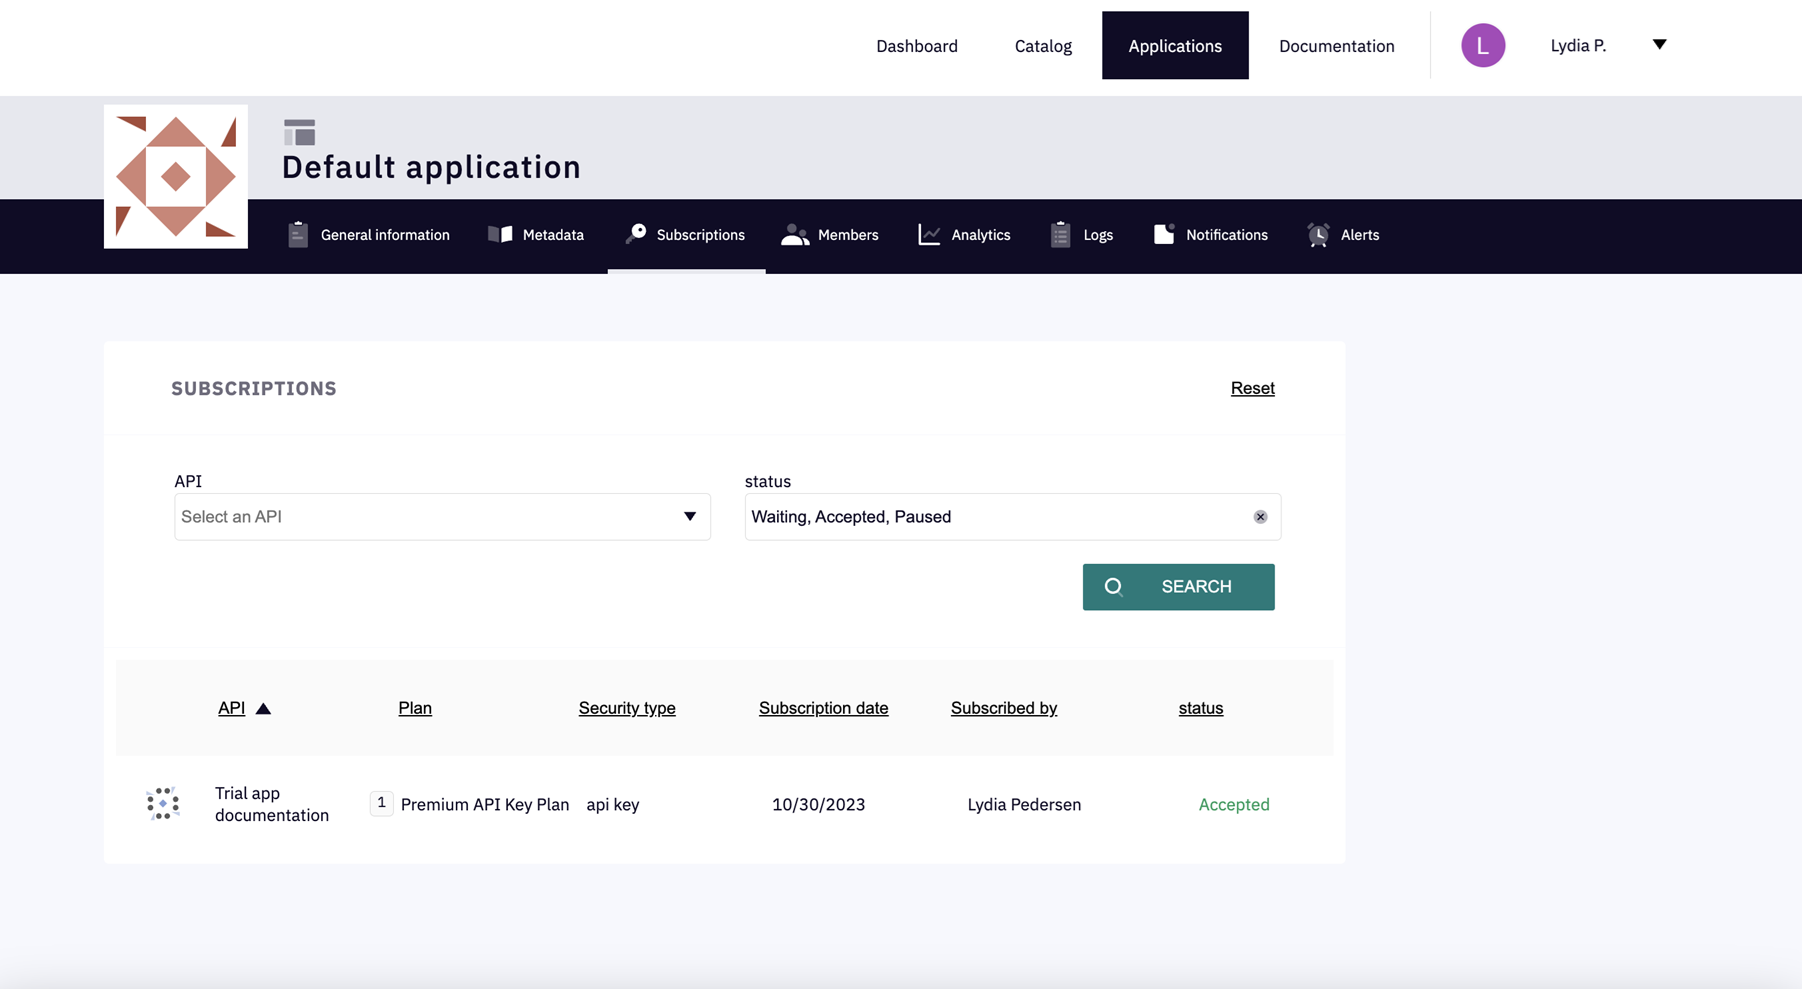
Subscriptions: View the APIs your application is subscribed to. Use the API drop-down menu to choose a particular API and the status drop-down menu to list all APIs with the selected status.
Subscriptions
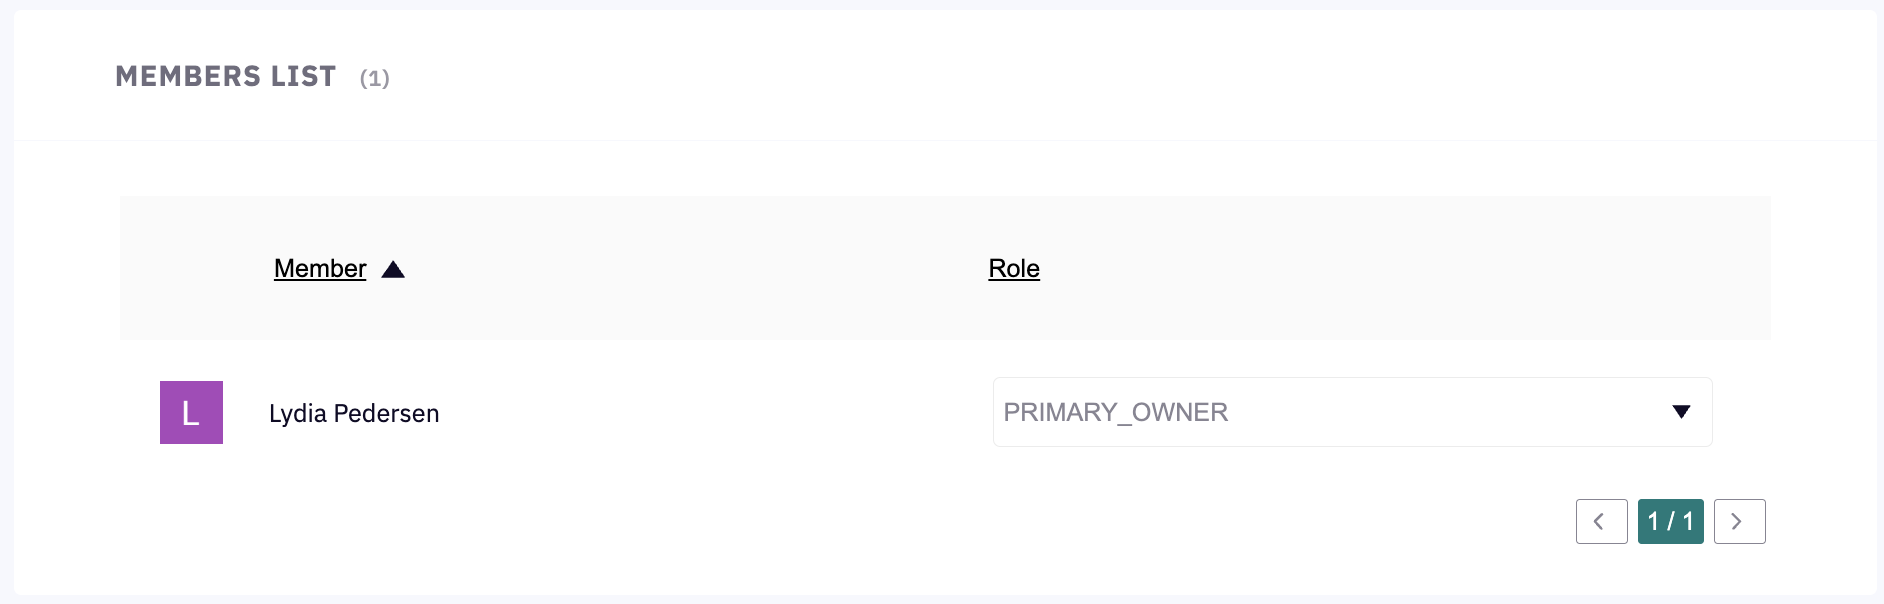
Members: View and edit member information:
MEMBERS LIST: View the names and roles of current application members.
Members list
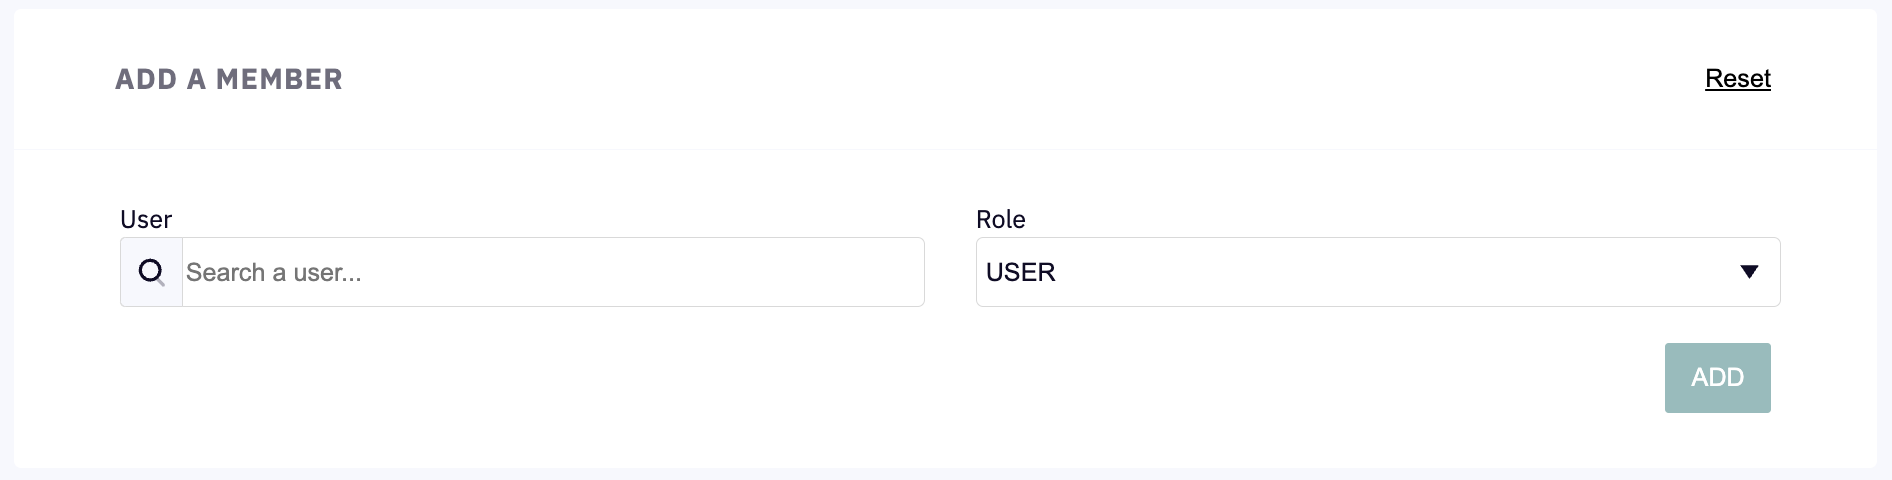
ADD A MEMBER: Use the search field to add a member to the application and assign that member a role.
Add a member
TRANSFER OWNERSHIP: Transfer ownership of the application to another user and select a different role for the current primary owner.
Transfer ownership
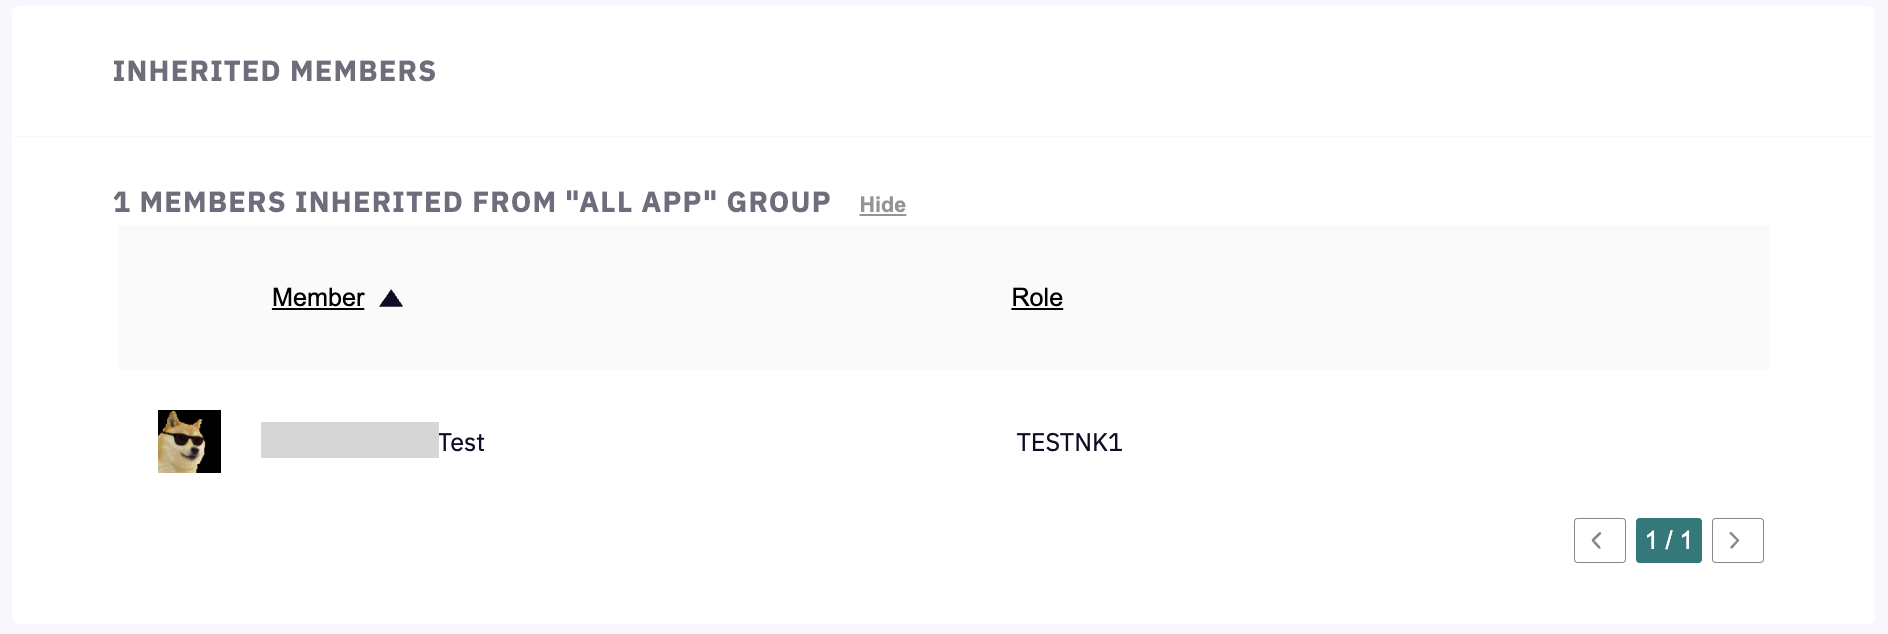
INHERITED MEMBERS: View the names and roles of members inherited from other groups.
Inherited members
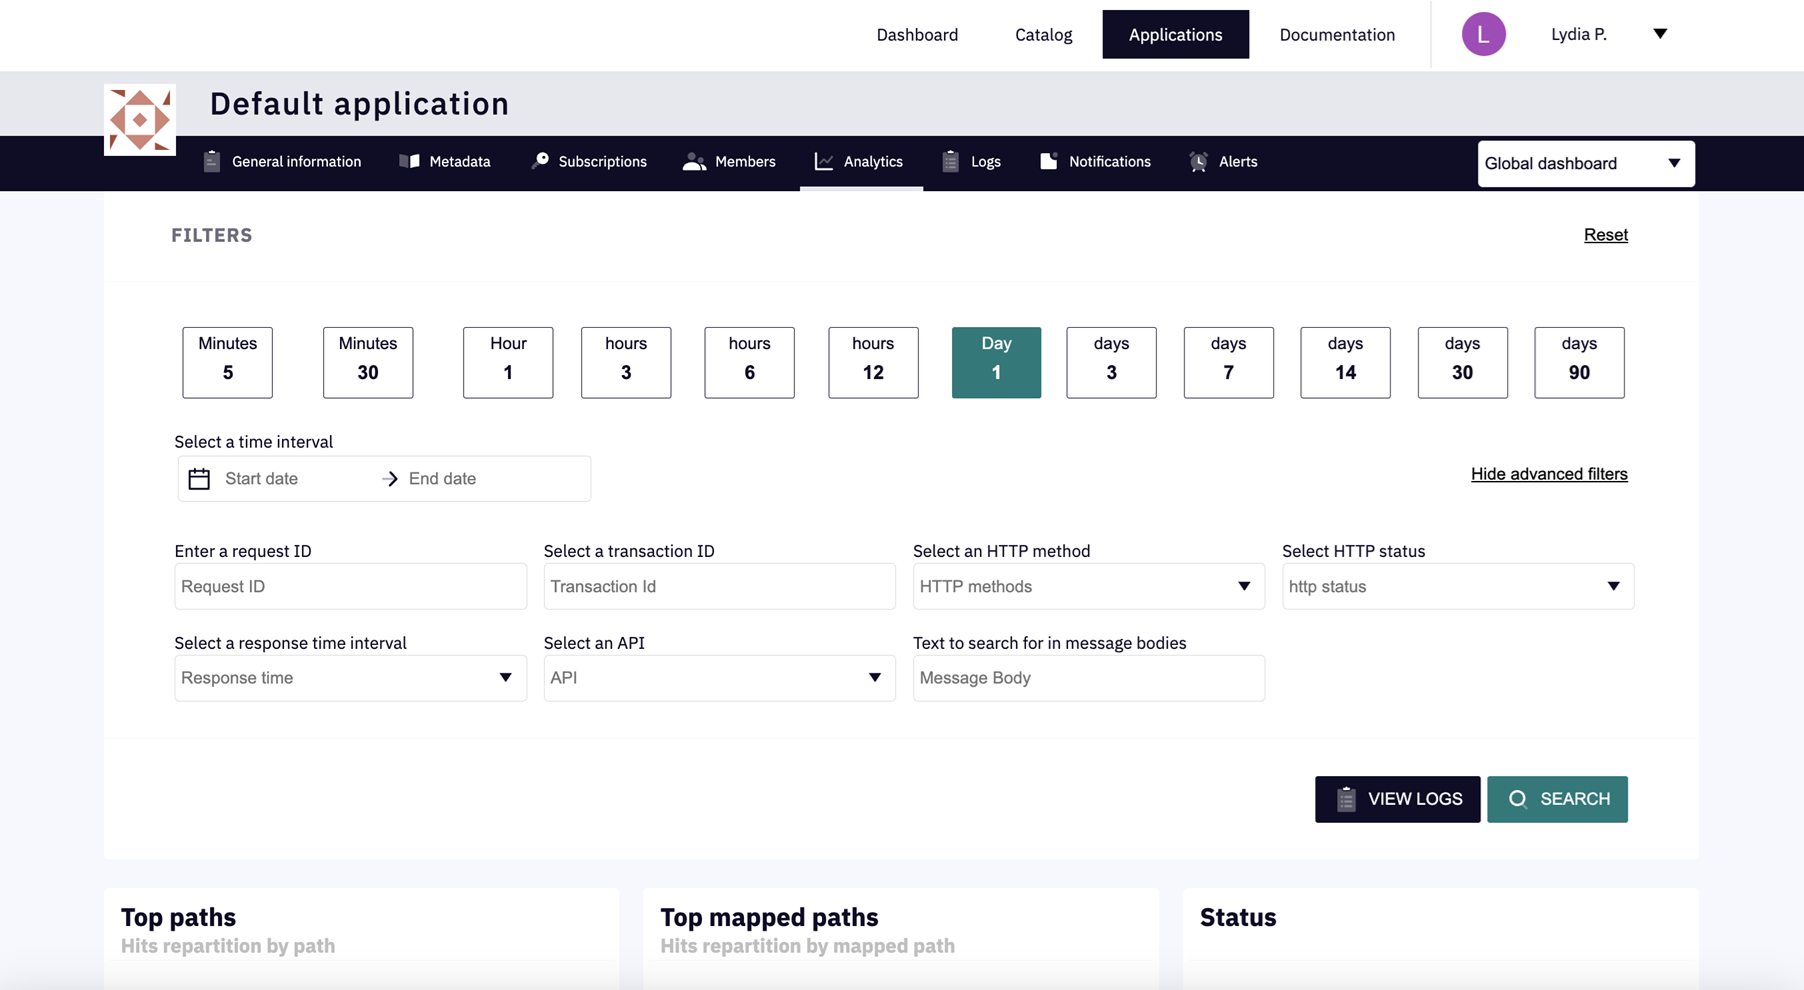
Analytics: Use the available filters to refine the application logs. Scroll down to view other metrics related to the application (top paths, top APIs, response times, etc.).
Analytics
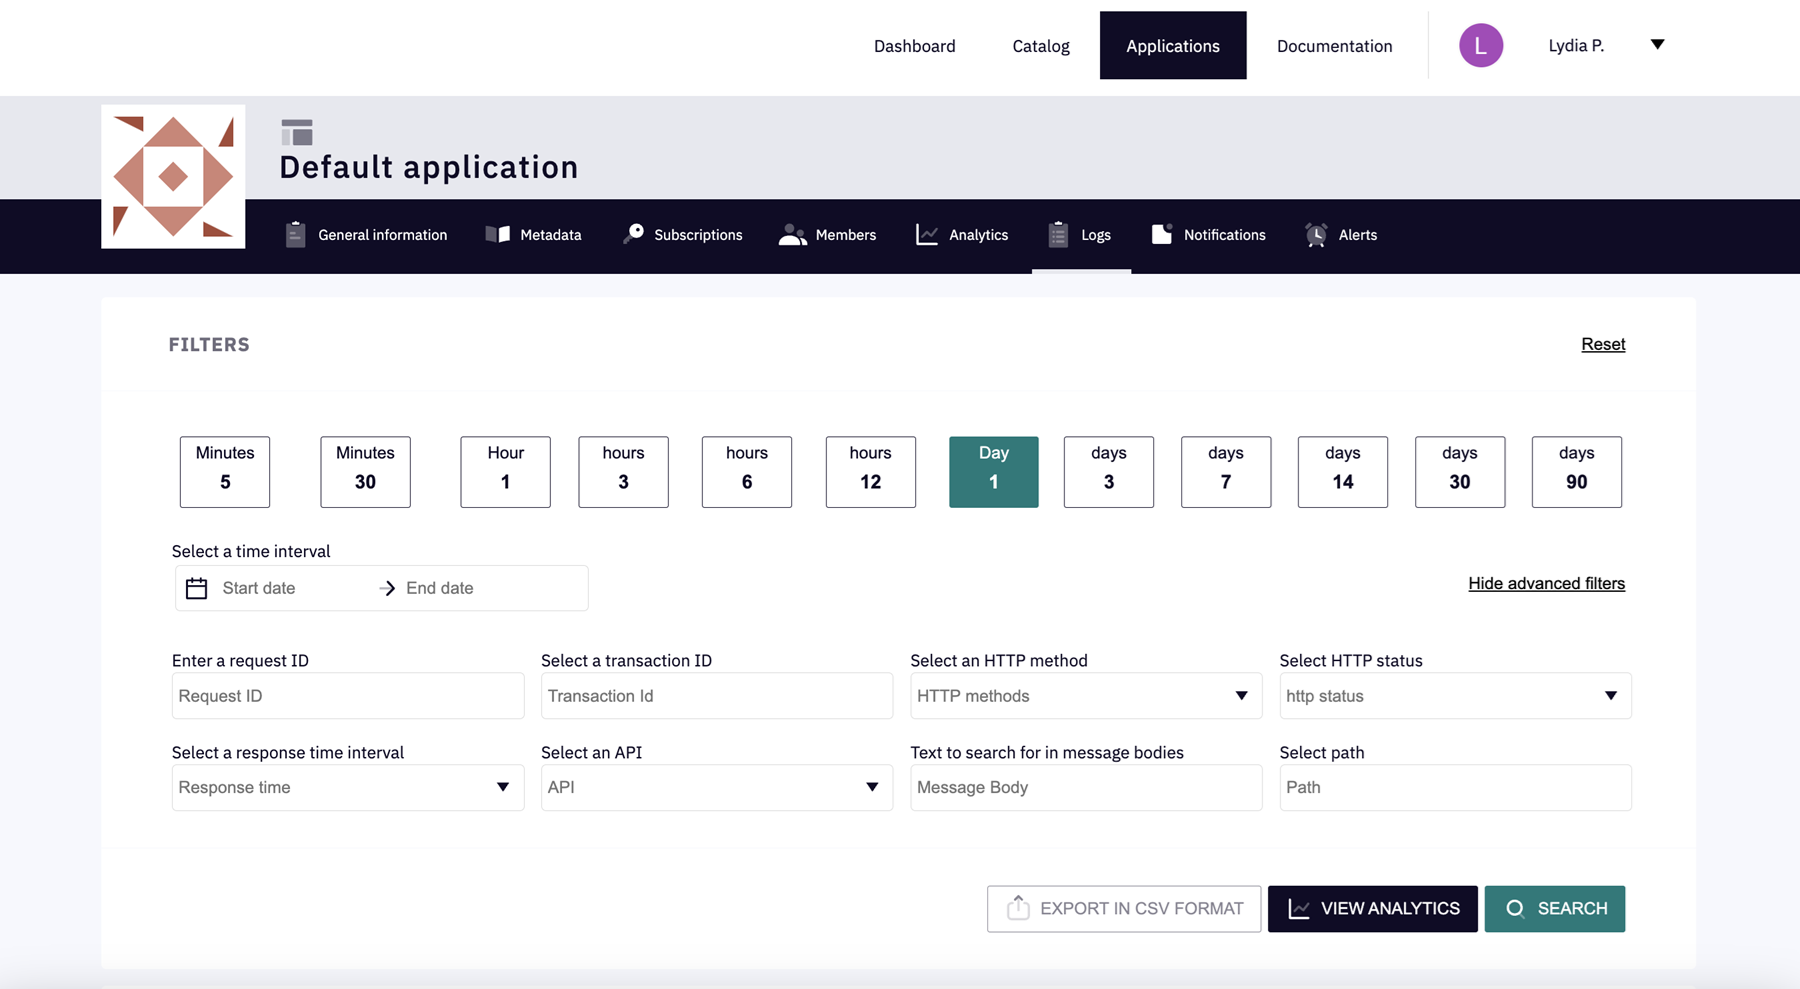
Logs: Use the available filters to view and optionally export refined application analytics. Scroll down to view the logs.
Logs
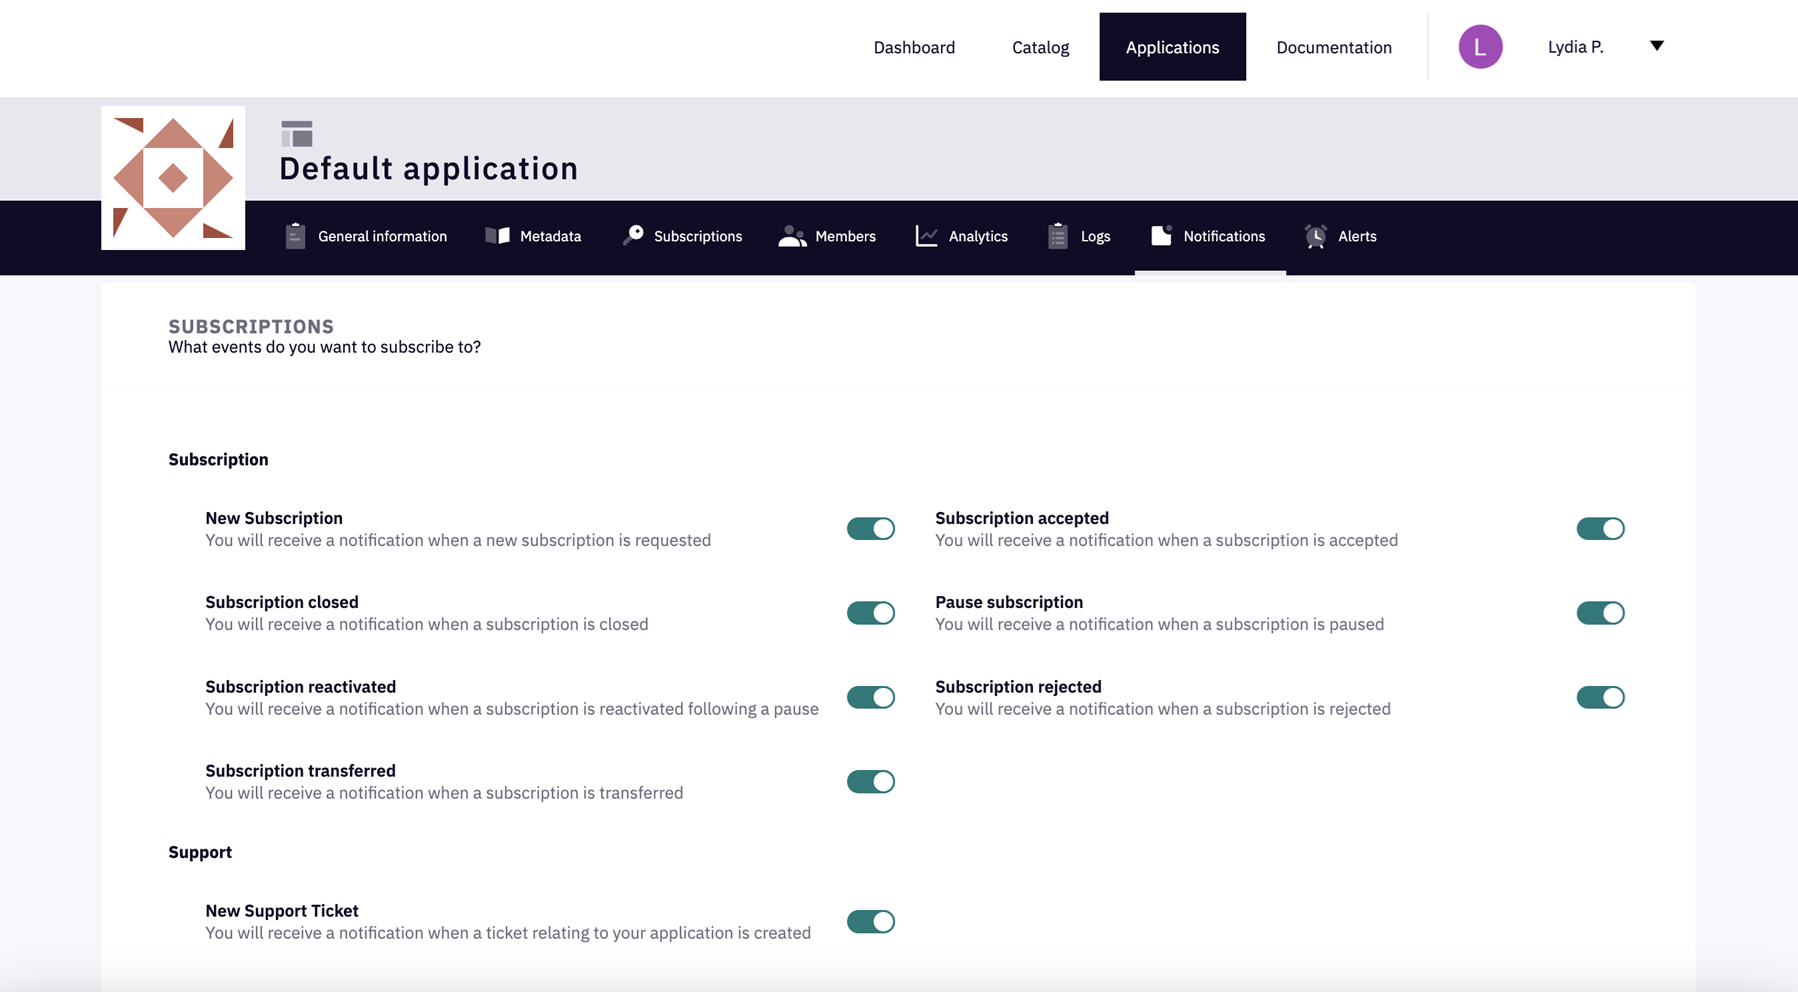
Notifications: Specify which of your application's subscription events you would like to be notified of.
Notifications
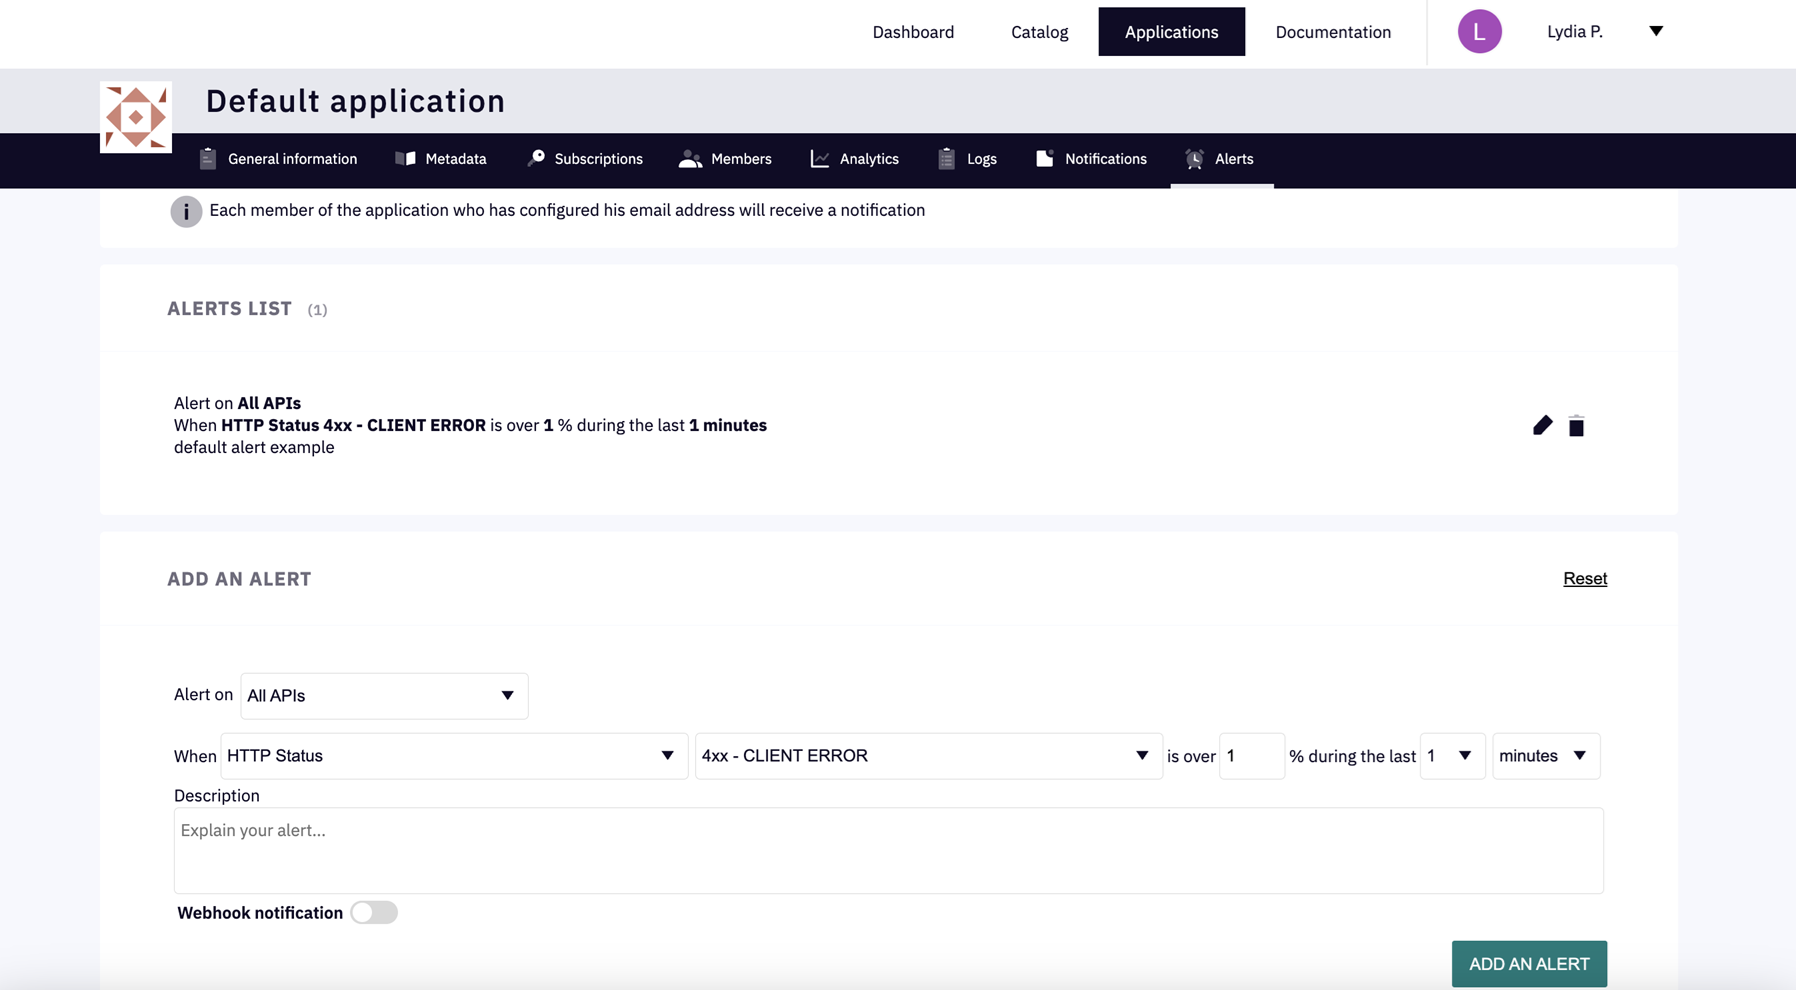
Alerts: Use the fields and drop-down menus to define an alert. After you ADD AN ALERT, it will appear in the ALERTS LIST. Application members will be notified via email.
Alerts
Publishing and managing APIs with the DSAPI Developer Portal
You can publish and maintain APIS with the DSAPI Developer Portal. For more infomation about publishing APIs, see the following articles:
Publishing your API with the DSAPI Developer Portal
Access API
First, we need to open the API in the APIM Console. You may already have it open from the previous part of the Quickstart Guide. If not, head back over to the APIs homescreen and select the API you created.
APIs homescreen
Select APIs in the sidebar
Select the API you created in Gateway APIs 101
Publish API
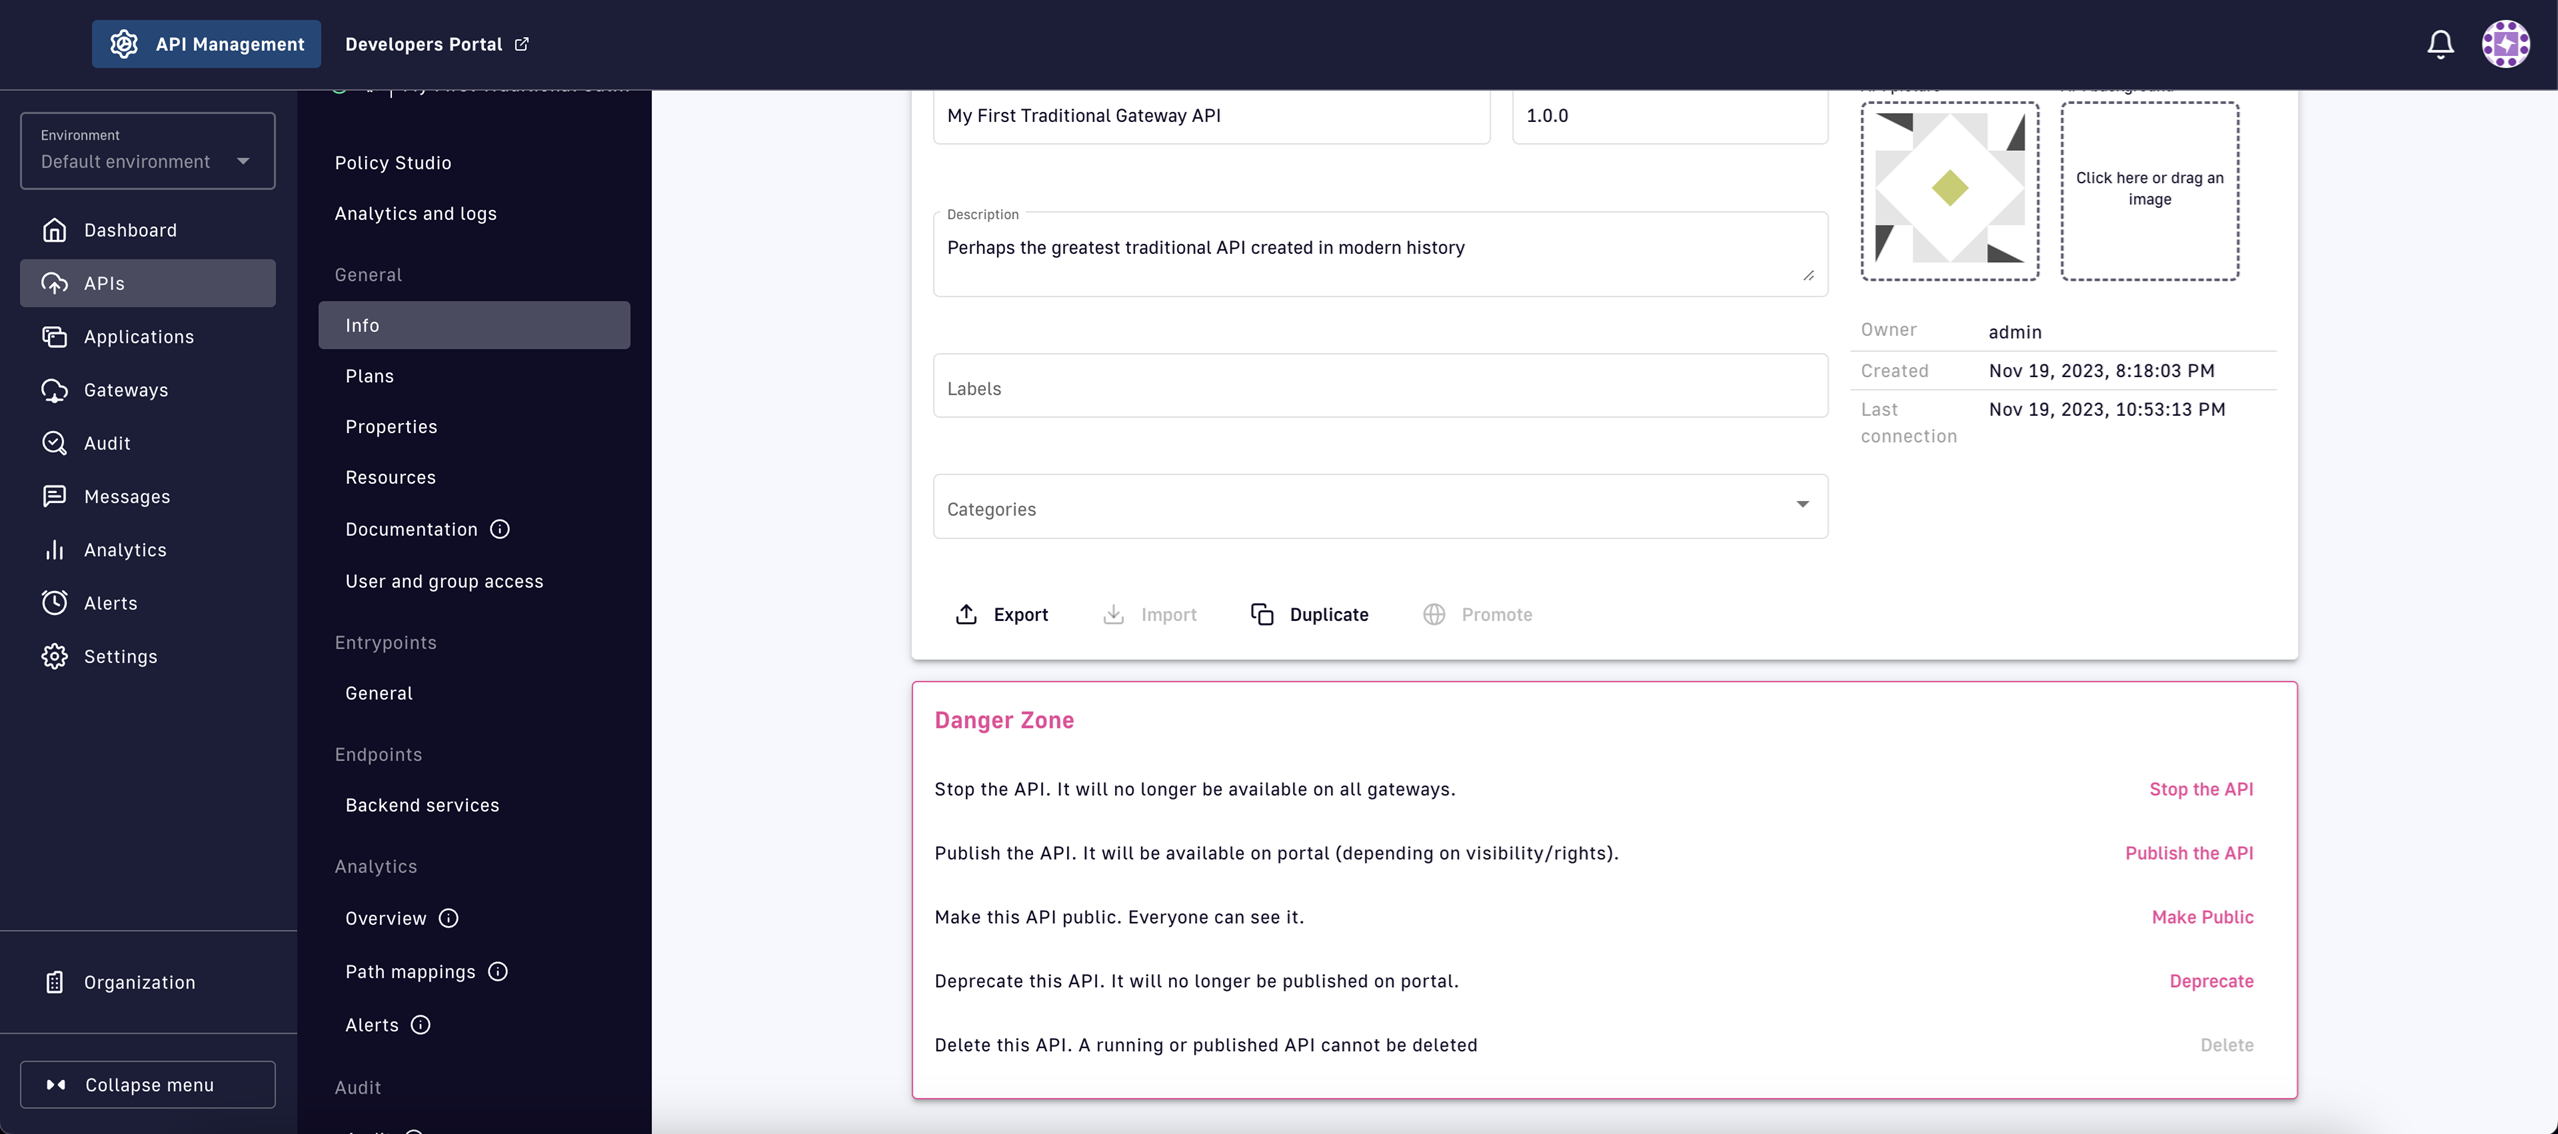
This will take you straight to your API's General Info page. In the Danger Zone, we can update the visibility of the API:
Publish/Unpublish the API: This is a toggle that controls the visibility of the API in the Developer Portal. Unless the API is also public, it is only visible to members of the API, which is controlled through User and group access in the inner sidebar.
Make Public/Private: This is a toggle that makes the API visible to anyone with access to the Developer Portal. Note, this toggle only has an impact if the API is published.
API Danger Zone
Click Publish the API, then Publish in the modal to add the API to the Developer Portal
Click Make Public, then Make Public again in the modal, to make the API visible to all API consumers
Managing API documentation with the DSAPI Developer Portal
Overview
Site-wide documentation creates a direct line of communication with your developer community. Administrators can use site-wide documentation to communicate best practices, configure pages, or as a reference via custom navigation. Published documentation is accessible from the Developer Portal's Documentation page:
Site-wide documentation is separate from API documentation, which can be added to an API by an API publisher.
Select Settings from the left sidebar of the Management Console
Select Documentation from the inner left sidebar
Documentation settings page
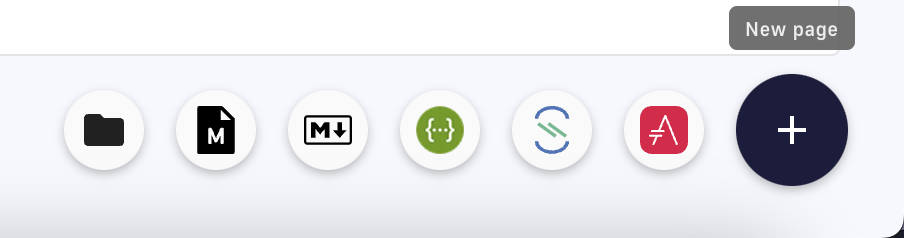
Select the + icon on the bottom right to display the options below.
Create new documentation options
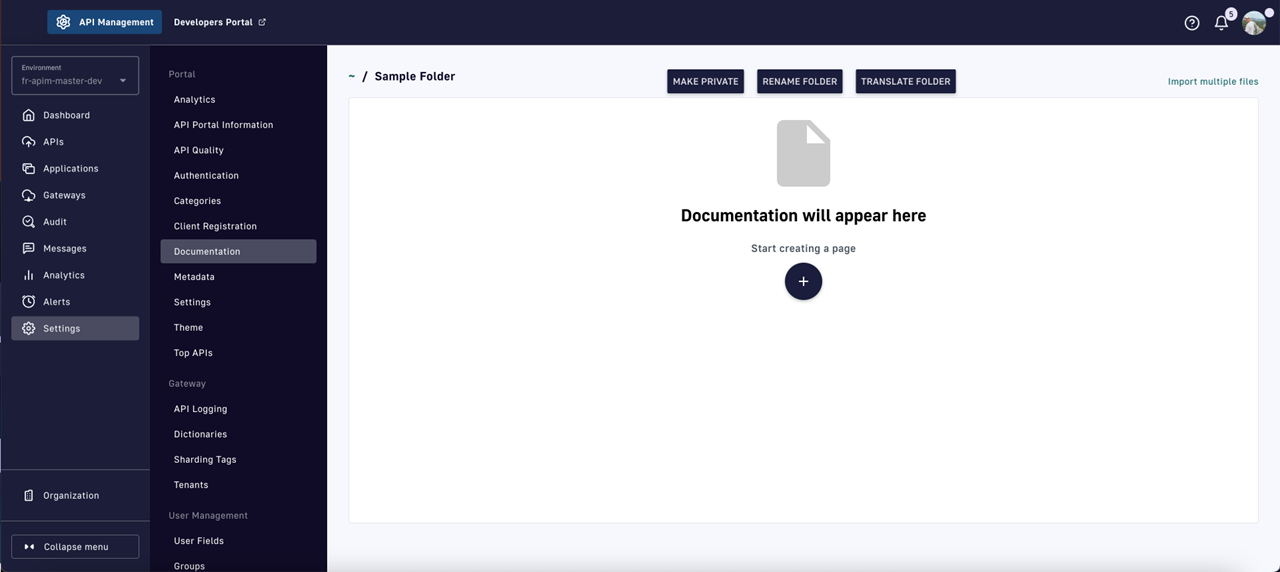
Folder: Generate a folder to organize your documentation. Optionally generate translations of the folder by selecting Translate Folder.
Sample documentation folder
Markdown Template: Create templates reusable for site-wide and API Markdown documentation.
Markdown: Use the Markdown syntax for the documentation page.
AsciiDoc: Use the Asciidoc syntax for the documentation page.
OpenAPI (Swagger): Use the OpenAPI syntax for the documentation page.
AsyncAPI: Use the AsyncAPI syntax for the documentation page.
Each documentation type provides similar configuration options and a compatible text editor.
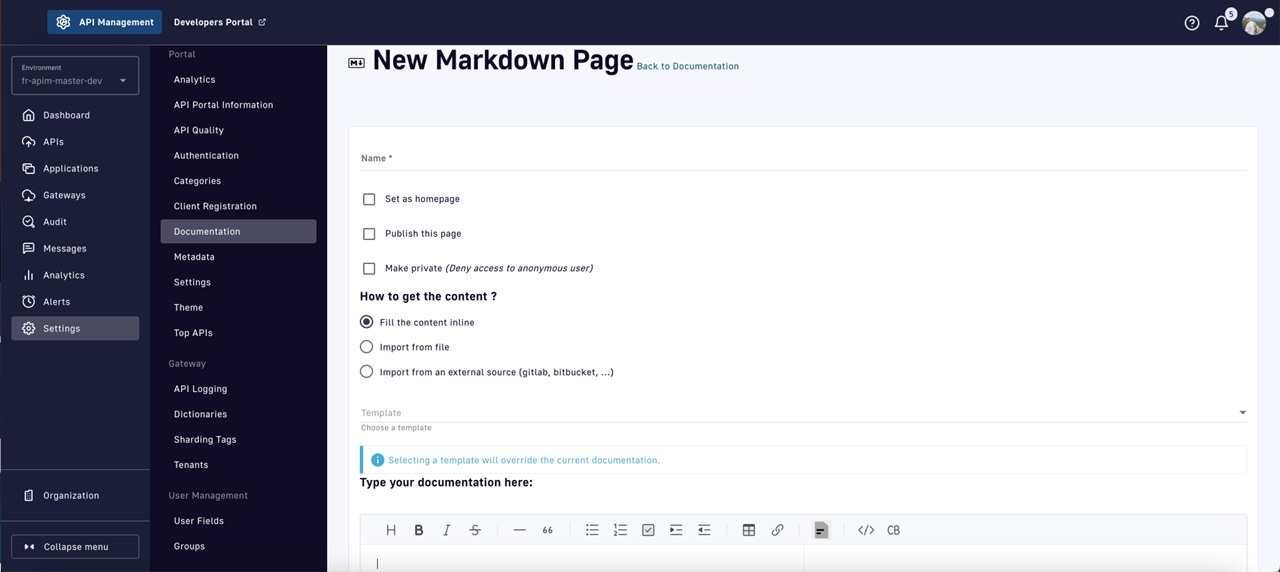
Create a documentation page
Name: Provide a title for your documentation page.
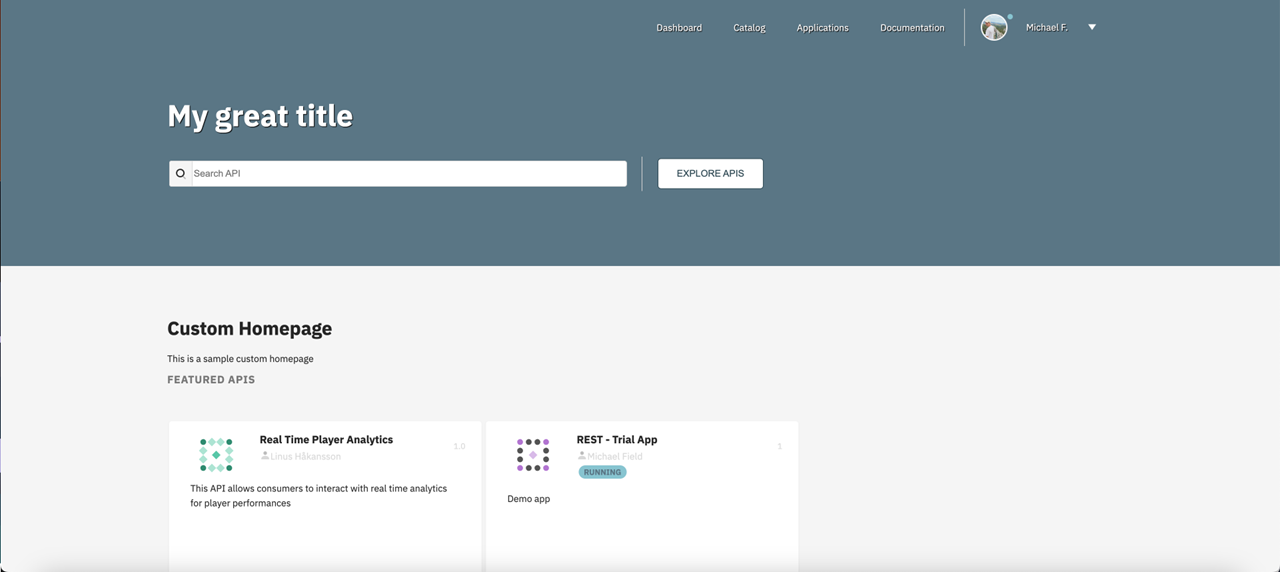
Set as homepage: Use the documentation page as the homepage of the Developer Portal. If multiple documentation pages are set as the homepage, the page most recently set will be selected.
Custom homepage example
Publish this page: Make the page available in the Developer Portal.
Make private: Make the page private to you and the users you explicitly allow using access control.
Generate content
APIM provides three methods for generating documentation content:
This method uses the text editor to generate content based on your selected documentation type. In addition, APIM supports templating with API properties.
Templating with API properties
Use the following syntax to access the API data in your API documentation: ${api.name} or ${api.metadata['foo-bar']}.
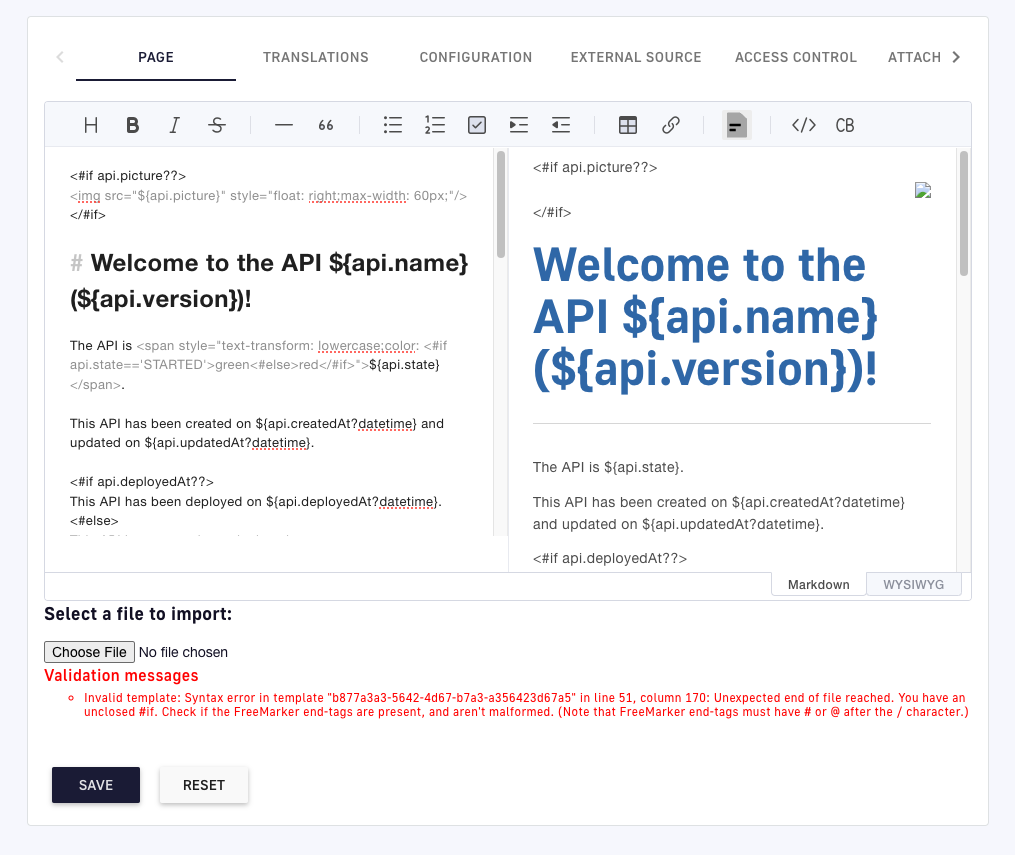
The sample script below creates a documentation template based on the Apache FreeMarker template engine:
<#if api.picture??>
<img src="${api.picture}" style="float: right;max-width: 60px;"/>
</#if>

# Welcome to the API ${api.name}(${api.version})!

The API is <span style="text-transform: lowercase;color: <#if api.state=='STARTED'>green<#else>red</#if>">${api.state}</span>.

This API has been created on ${api.createdAt?datetime} and updated on ${api.updatedAt?datetime}.

<#if api.deployedAt??>
This API has been deployed on ${api.deployedAt?datetime}.
<#else>
This API has not yet been deployed.
</#if>

<#if api.visibility=='PUBLIC'>
This API is publicly exposed.
<#else>
This API is not publicly exposed.
</#if>

<#if api.tags?has_content>
Sharding tags: ${api.tags?join(", ")}
</#if>

## Description

${api.description}

<#if api.proxy??>
## How to access

The API can be accessed through https://api.company.com${api.proxy.contextPath}:

curl https://api.company.com${api.proxy.contextPath}
</#if>

## Rating

You can rate and put a comment for this API <a href='/#!/apis/${api.id}/ratings'>here</a>.

## Contact

<#if api.metadata['email-support']??>
The support contact is <a href="mailto:${api.metadata['email-support']}">${api.metadata['email-support']}</a>.
</#if>

The API owner is <#if api.primaryOwner.email??><a href="mailto:${api.primaryOwner.email}">${api.primaryOwner.displayName}</a><#else>${api.primaryOwner.displayName}</#if>.
The above sample script creates the following in the Developer Portal:
Result of templating engine example
API properties reference
The following reference table shows all available API properties. Access these properties in the Freemarker template with ${api.<Field name>} as in the above sample script.
This method allows you to generate content by importing a file that matches the documentation type.
This method allows you to import your documentation from external sources. APIM includes five types of fetchers:
GitHub: Fetch your documentation from a GitHub repository
GitLab: Fetch your documentation from a GitLab repository
Git: Fetch your documentation from any Git repository
WWW: Fetch your documentation from the web
Bitbucket: Fetch your documentation from a Bitbucket repository
Documentation fetcher configuration
The documentation is fetched and stored locally in APIM in the following three scenarios:
Once, after you finish configuring your fetcher
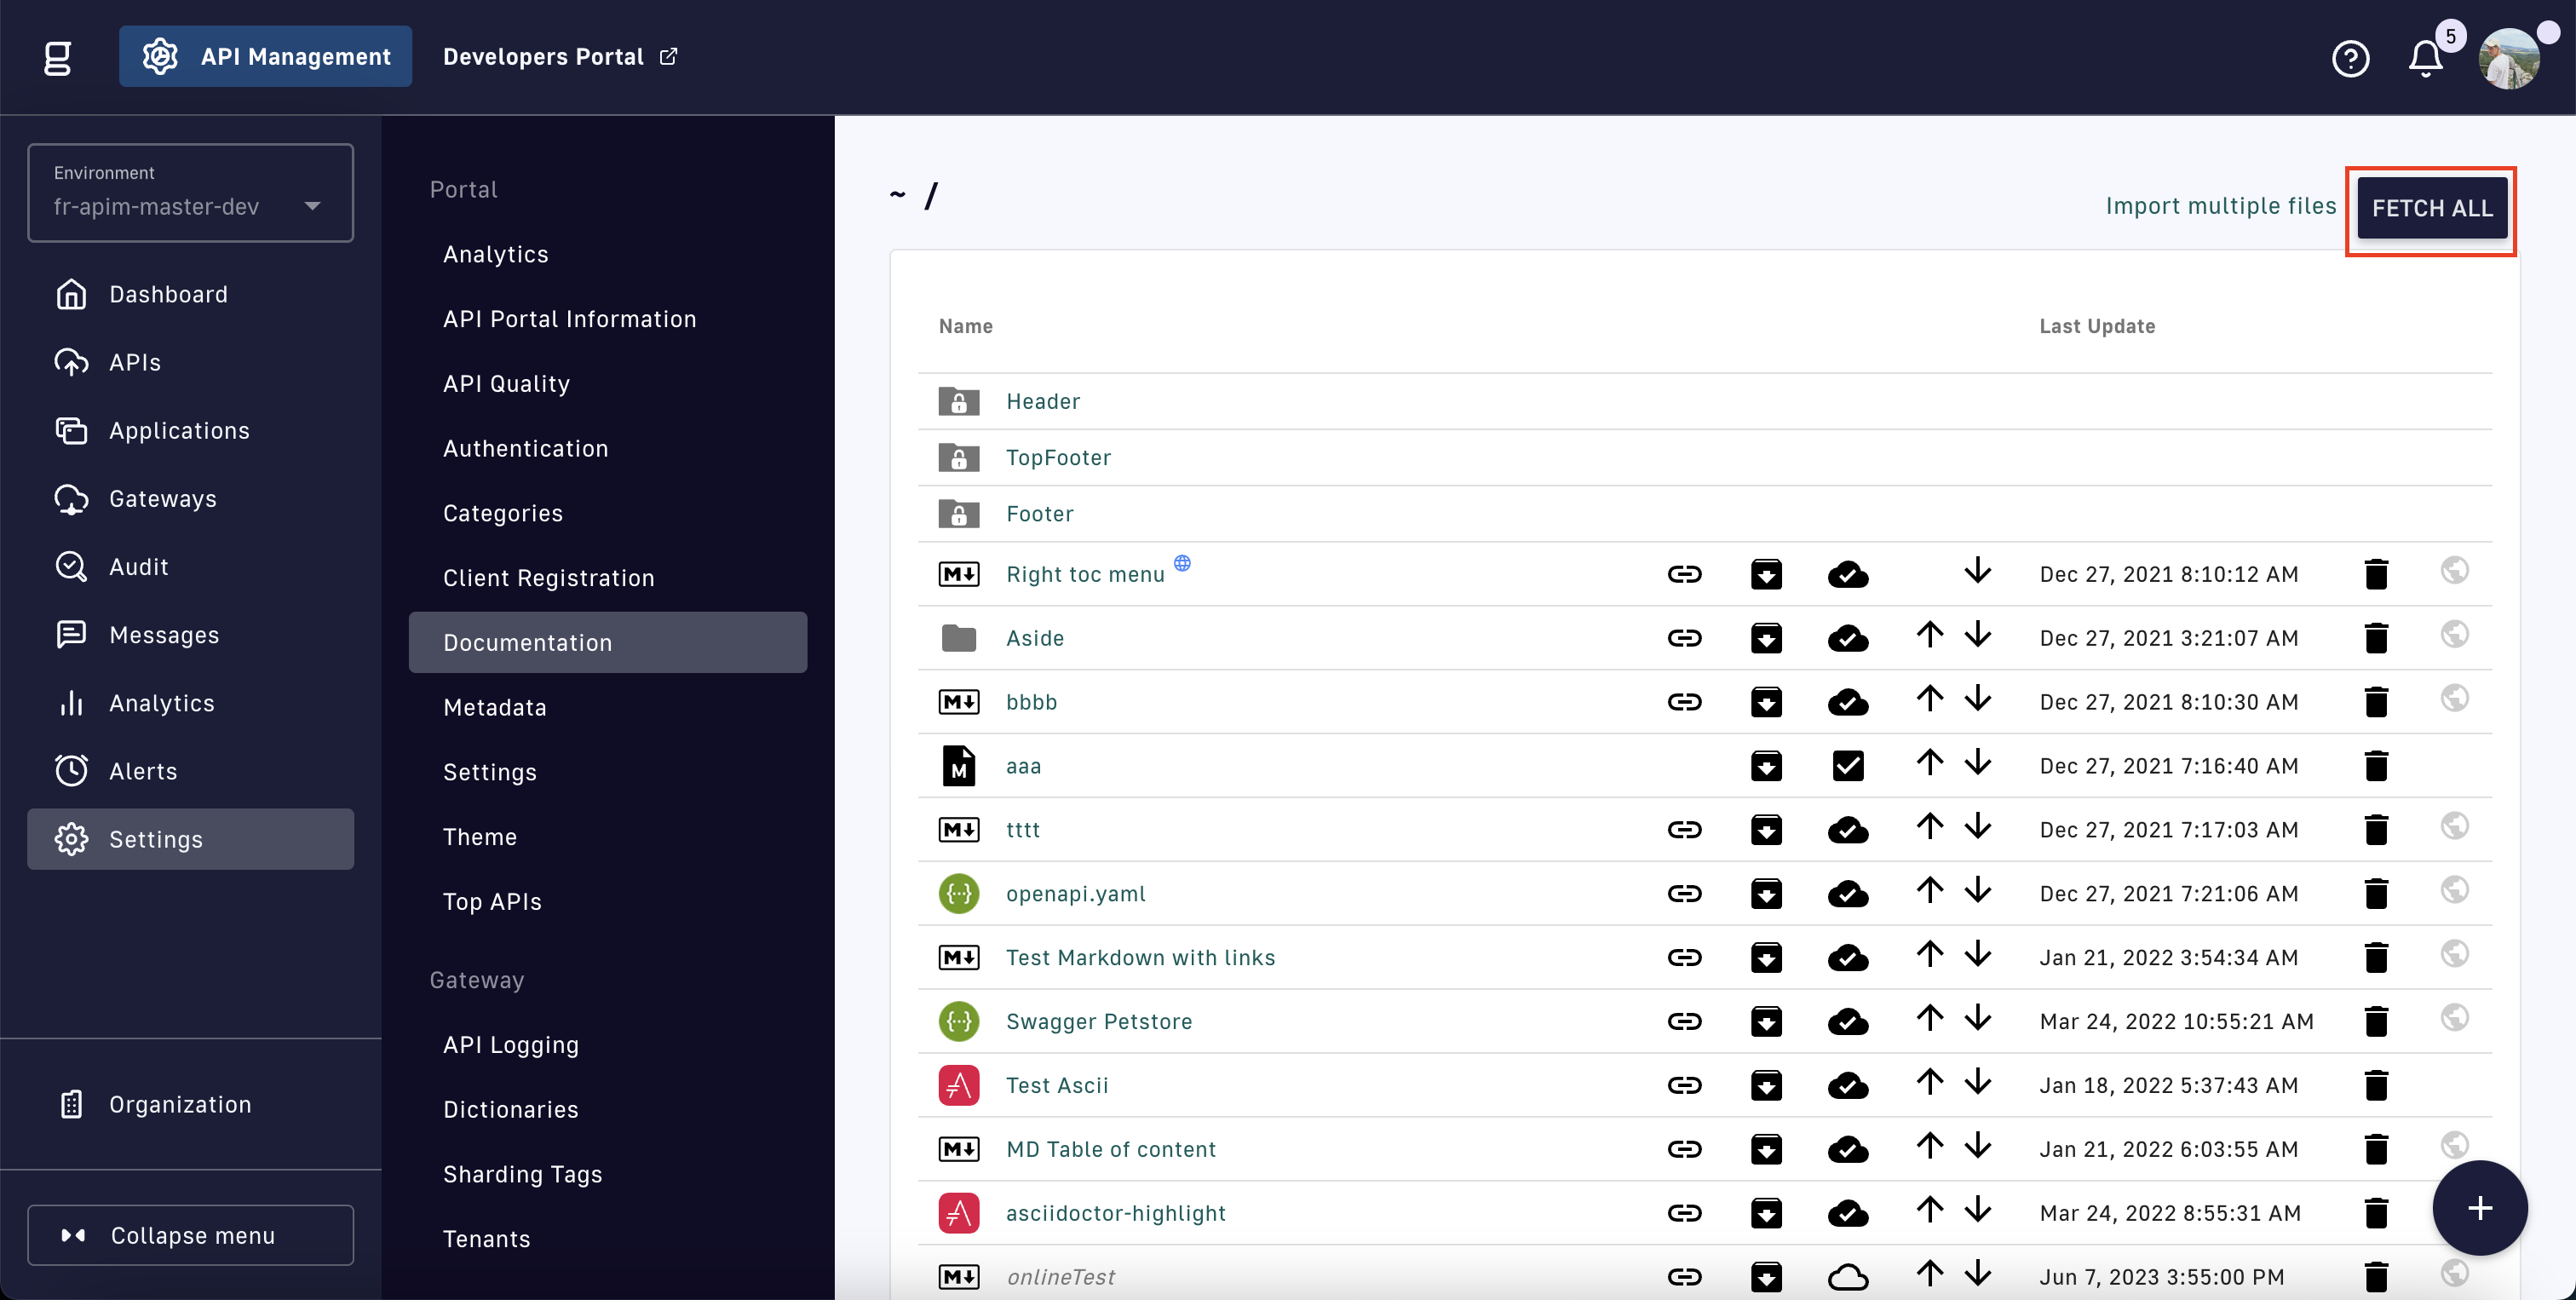
Any time you select Fetch All on the Documentation page
Update all documentation from external sources
At regular intervals when auto-fetch is configured
Import multiple pages
If you have existing documentation for your API in a GitHub or GitLab repository, you can:
Configure the GitHub or GitLab fetcher to import the complete documentation structure on a one-off or regular basis
Import the documentation into APIM in a structure different from that of the source repository by:
Creating a DSAPI descriptor file (.DSAPI.json) at the repository root that describes both the source and destination structures
Configuring a fetcher in APIM to read the JSON file and import the documentation according to the structure defined in the file
The DSAPI descriptor file must be named .DSAPI.json and must be placed at the root of the repository.
The following .DSAPI.json describes a documentation set that includes:
A homepage in Markdown format in a folder called /newdoc, to be placed at the root of the APIM documentation structure
A JSON file containing a Swagger specification at the root of the repository, to be placed in a folder called /technical in the APIM documentation structure
Follow the steps below to configure a fetcher to import multiple files:
From the Documentation page, select Import multiple files
Import multiple documentation files
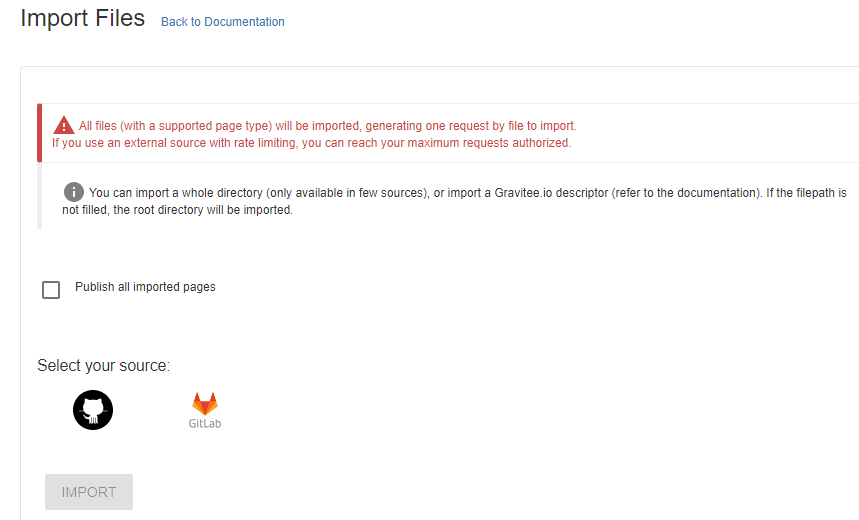
To publish the pages on import, select Publish all imported pages
Option to publish all imported files
Select the GitHub or GitLab fetcher
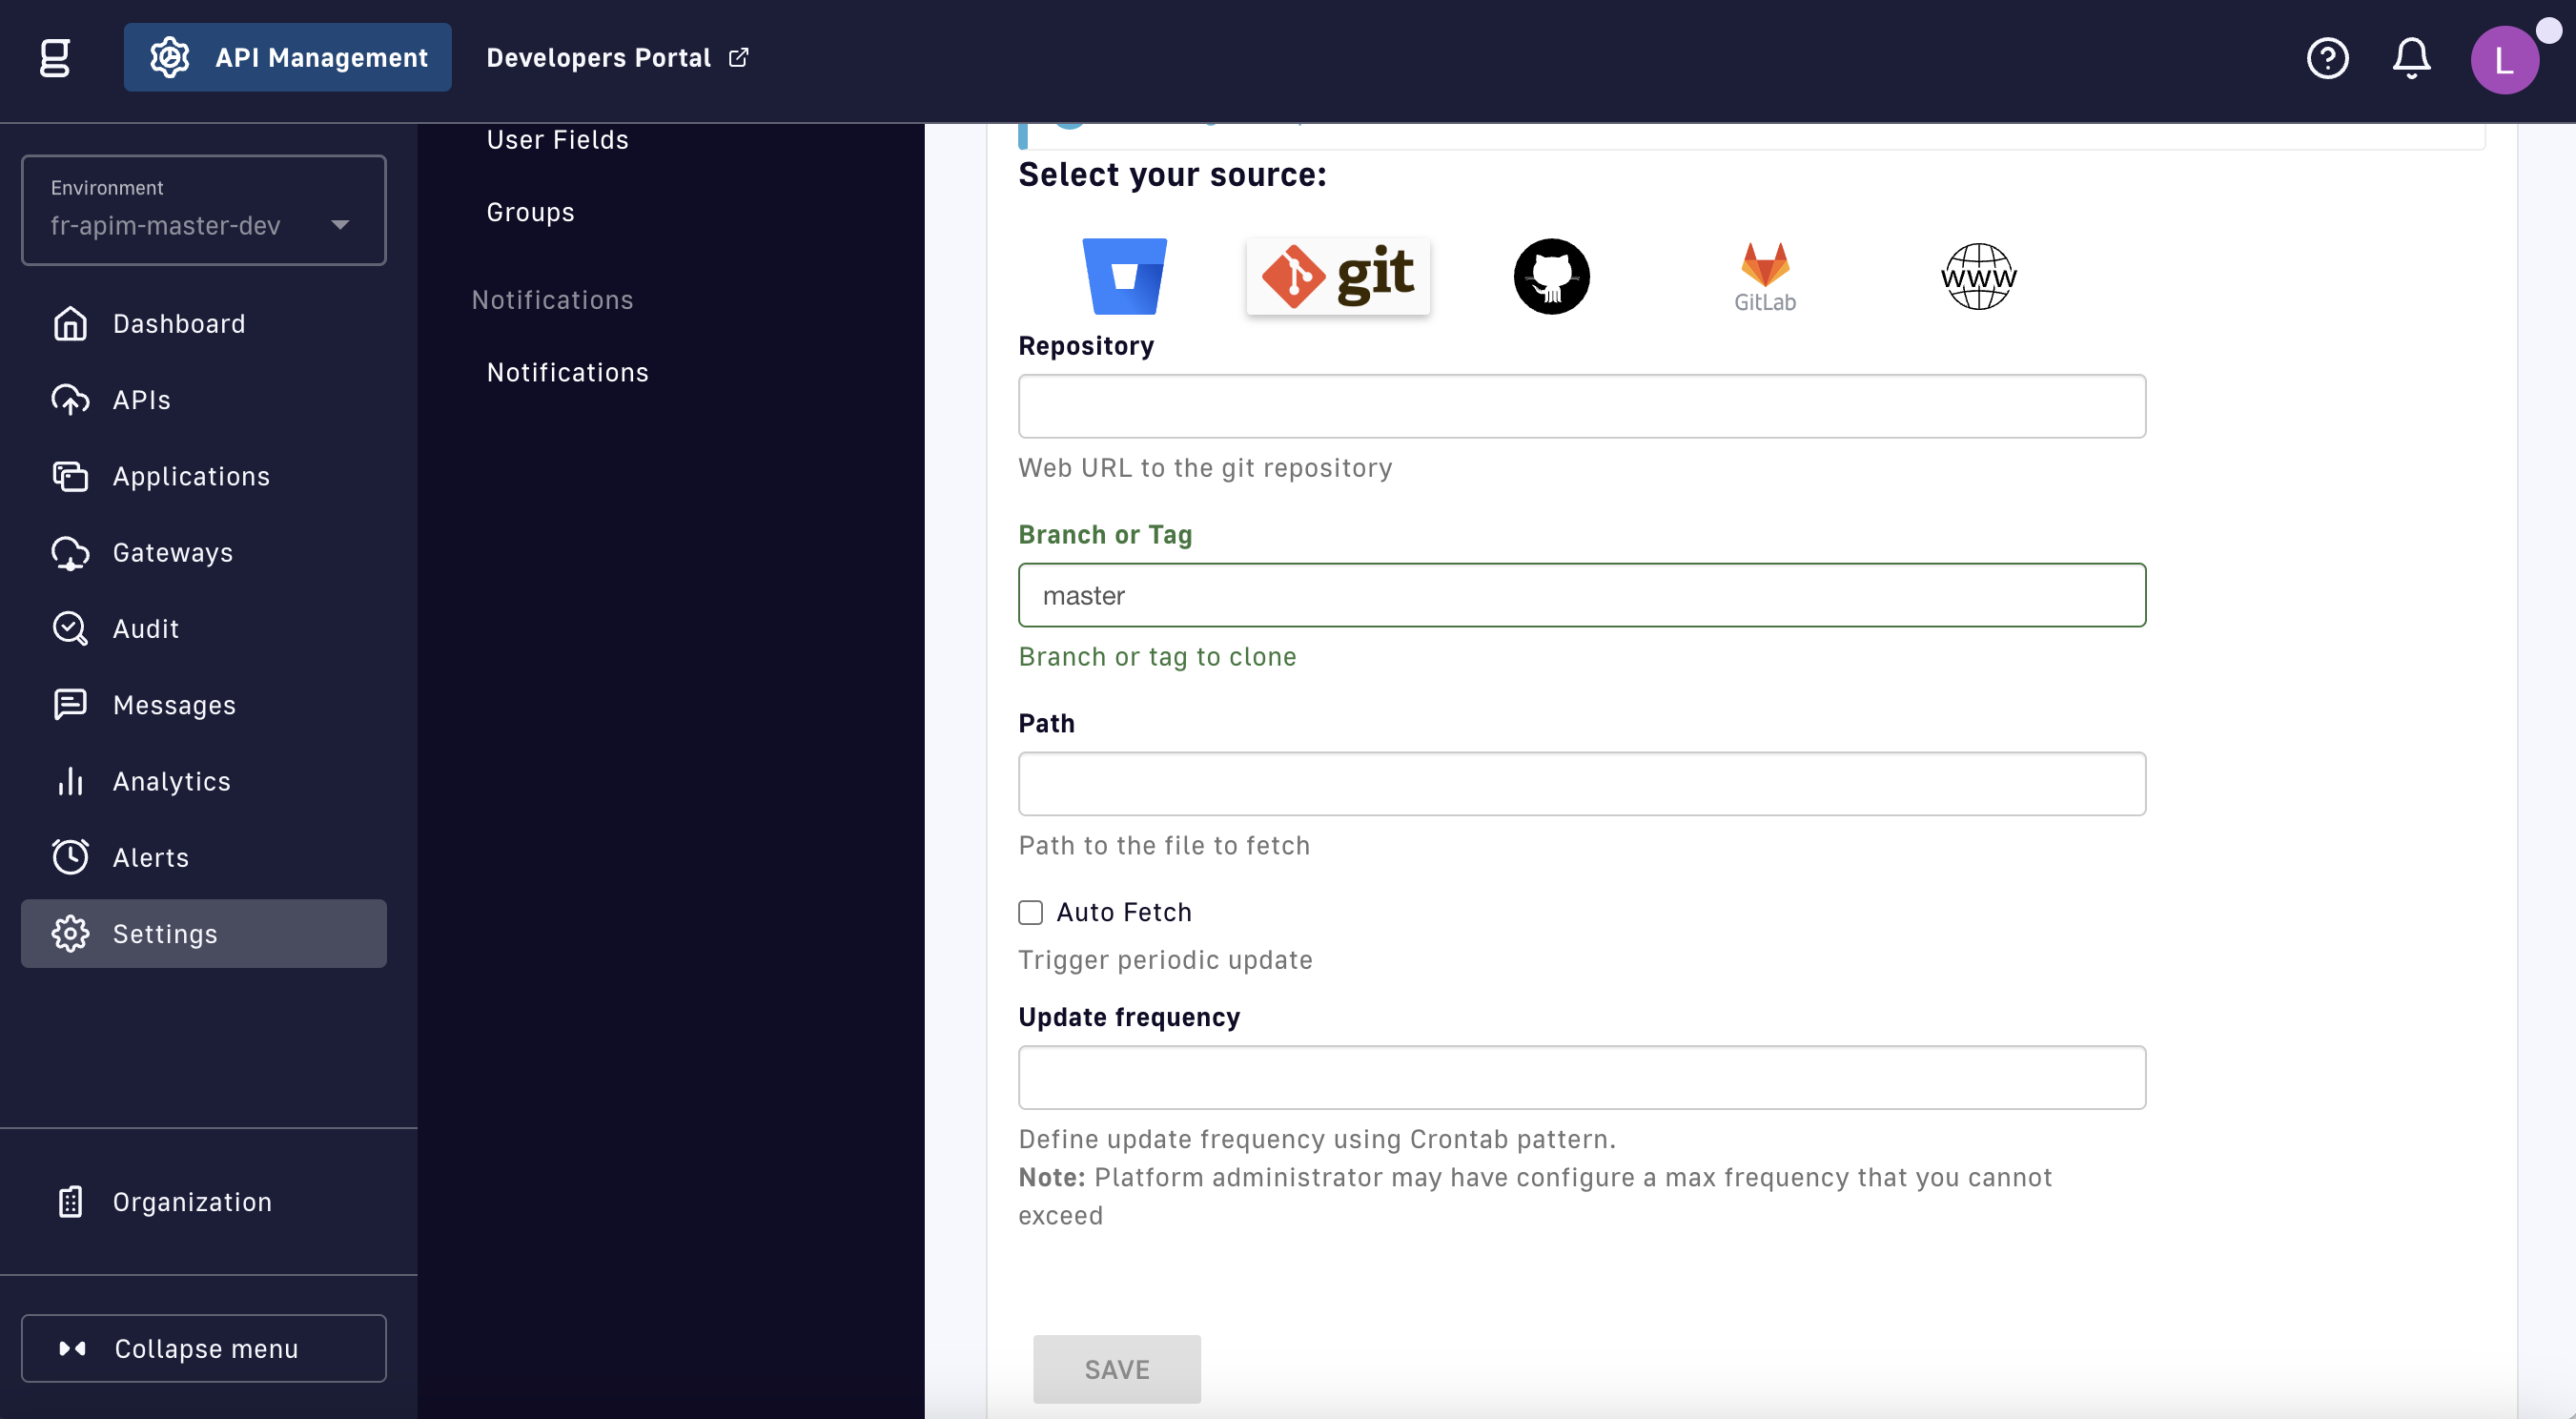
Specify the details of the external source, such as the URL of the external API, the name of the repository, and the branch. The fields vary slightly depending on the fetcher.
Configure a fetcher
In the Filepath field, enter the path to your JSON documentation specification file
Enter a Username to authenticate the request
Enter a Personal Access Token, which must be generated in your GitHub or GitLab user profile
To update the pages at regular intervals, select Auto Fetch and specify the crontab update frequency
cron expressions
A cron expression is a string consisting of six fields (representing seconds, minutes, hours, days, months, and weekdays) that describe the schedule. For example:
Fetch every second: * * */1 * * *
At 00:00 on Saturday : 0 0 0 * * SAT
If the APIM administrator configured a maximum fetch frequency, the value configured by the APIM administrator will override the frequency you specify.
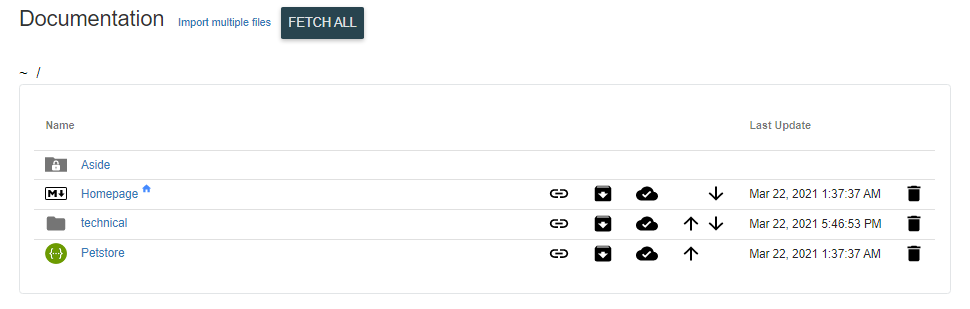
Select IMPORT for APIM to add the files to your documentation set
Import technical folder documentation with fetcher
Page management
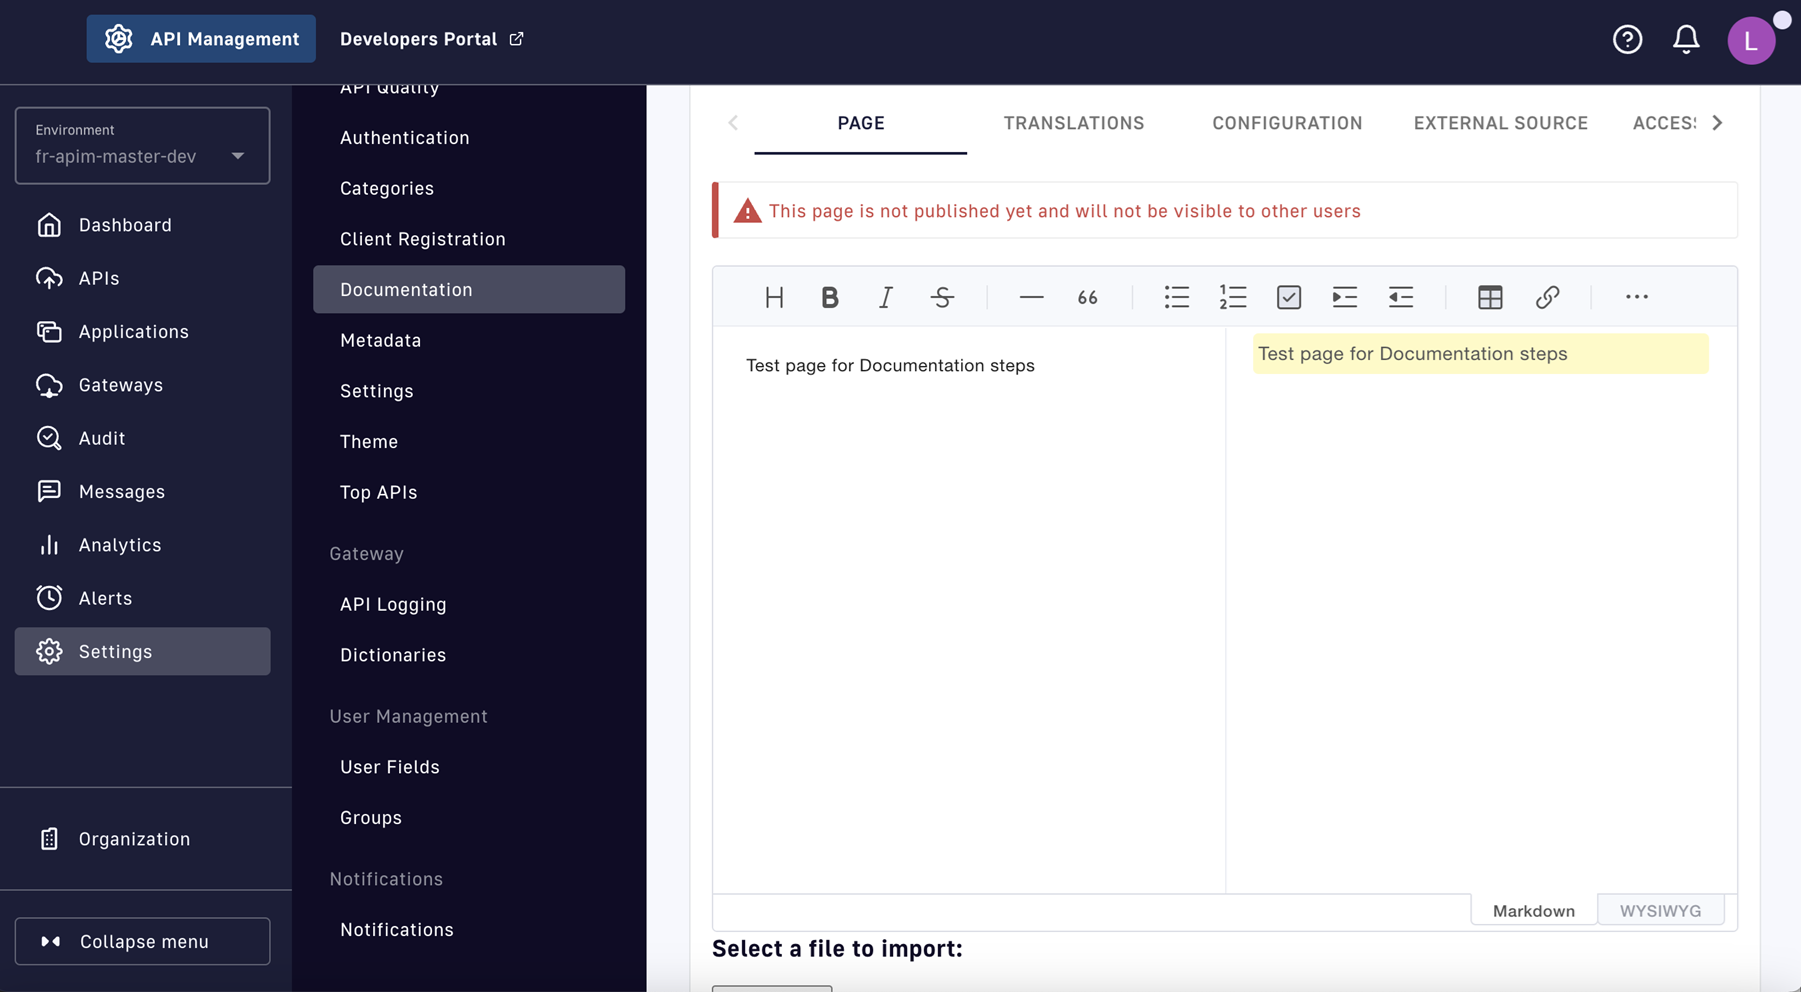
Select a page to configure the following via the header tabs:
Page: Manage the content of the documentation page by via the inline editor or by importing files
Translations: Add translations of your page
Configuration: Toggle options to publish your page and use it as the homepage
External Source: Configure a fetcher for the page
Access Control: Fine-grained access control over your page
Attached Resources: Add additional files to your documentation page.
This requires the administrator to configure Allow Upload Images and Max size upload file (bytes) in general settings.
Page management options
Page, Translations and Access Control are described in greater detail below.
If incorrect templating is applied to the Markdown page of an API, errors are generated to alert the user that the page will not be formatted as intended when published to the Developer Portal.
Example of incorrect templating
You can add translations for your pages via the Translations tab:
Select Add a translation
Enter your 2-character language code (FR for French, CZ for Czech, IT for Italian, etc.)
Enter the translated title
(Optional) You can edit the content to add translated content by toggling on the switch
Click Save Translation at the bottom of the page
Translate a page
{% tab title="Access control" %}
From the Access Control tab:
You can mark a page as Private if you want to deny access to anonymous users.
If a page is Private, you can configure access lists to either require or exclude certain roles and groups by toggling the Excluded option.
Documentation access control
Configuration
Introduction
APIM components can be configured using:
Environment variables
System properties
The DSAPI.yaml file
The order in which they are listed corresponds to their order of precedence. System properties override the DSAPI.yml configuration and environment variables override all other configuration methods.
Environment variables
You can override the default APIM configuration (DSAPI.yml) and system properties by defining environment variables. Any property in the yaml file can be translated to an environment variable by prefixing the property with "DSAPI" and using camel_case or dot notation.
Certain properties are case-sensitive and cannot use uppercase characters. We recommend using lowercase characters to define all DSAPI environment variables. To ensure compatibility and avoid or confusion, refer to your system documentation for environment variable naming best practices.
.png)
.png)

.png)